Advertisement
Advertisement
Table of Contents

Related Manuals for Russell Hobbs DualChef RHMC60


Summary of Contents for Russell Hobbs DualChef RHMC60
- Page 1 MODEL No. RHMC60 Russell Hobbs DualChef 21 function Air Fryer and Pressure Cooker...
- Page 2 FEATURES OF THE RUSSELL HOBBS DUALCHEF 21 FUNCTION AIR FRYER and PRESSURE COOKER The Russell Hobbs DualChef Air Fryer and Pressure Cooker offers an impressive 21 functions with two interchangeable lids to cook and prepare all your family favourites from chips, stews, chicken nuggets, pizza, cakes, and even home-made yoghurt.
-
Page 3: Important Safeguards
• Save on kitchen counter space by replacing up to 5 appliances! • Includes: measuring cup, spoon • Online recipe book filled with delicious recipes to get you started • For domestic use only • 1 year standard warranty. Warranty will be extended for another year if you register your product online within 12 months of purchase (visit https://russellhobbswarranty.co.za/) IMPORTANT SAFEGUARDS... - Page 4 completed - be careful not to touch the lid in order to avoid scalding and injury. If you must do so, please use an oven mitt or protective glove. 14. Do not cover the unit when in use. 15. Ensure that the unit is properly closed before operating. 16.
- Page 5 32. The surface of contact between the inner pot and the heating element inside the main cooker body should always be clean. DO NOT use the inner pot with other heating sources. DO NOT replace the inner pot with a container other than what is recommended by the manufacturer.
- Page 6 43. Extreme caution must be used when moving an appliance containing hot liquids. It is recommended that you do not move the appliance when it is full, when switched on or before it has cooled down. 44. Do not use the appliance if it has been dropped or damaged in any way. In case of damage, take the unit in for examination and/or repair by an authorised service agent.
- Page 7 60. Do not operate this appliance by means of an external timer or remote control system. 61. Do not leave the appliance unattended during use. Always unplug the unit when not in use or before cleaning. 62. Always operate the appliance on a non-flammable heat resistant surface, ensuring the surface is smooth, even and stable.
-
Page 8: Parts Diagram
PARTS DIAGRAM Air fryer air intake vents Air fryer control panel Air fryer lid handles Unit body Pressure cooker control panel Hot air outlet vents Inner pot Air fryer basket Steam rack Pressure cooker lid NOTE: When using the pressure cooker function for steaming, use the steam rack to place food ingredients on it. - Page 9 Insert the inner pot first (1.) followed by the steam rack (2.) then lastly the air fryer basket (3.) INSERTING AND REMOVAL OF AIR FRYER LID 1.To insert, securely hold the air fryer lid handles and insert into air fryer lid support completely.
- Page 10 Lid parts diagram Inner pressure cooker lid with Block Proof Coverand rubber sealing ring 1.The pressure cooker lid comes fully assembled but ensure that all parts have been included as per above parts diagram. 2. To clean pressure cooker lid, remove lid Block Proof Coverfrom lid by pulling the metal knob.
- Page 11 Open position Closed position 1.The lid will not switch on without securely closing it as per above “closed position’’ image and sliding the rapid release and lock up to the lock position. 2. When all pressure has been released from the unit, open the lid by rotating the handle counter clockwise and lift the lid using the handle.
-
Page 12: Control Panel
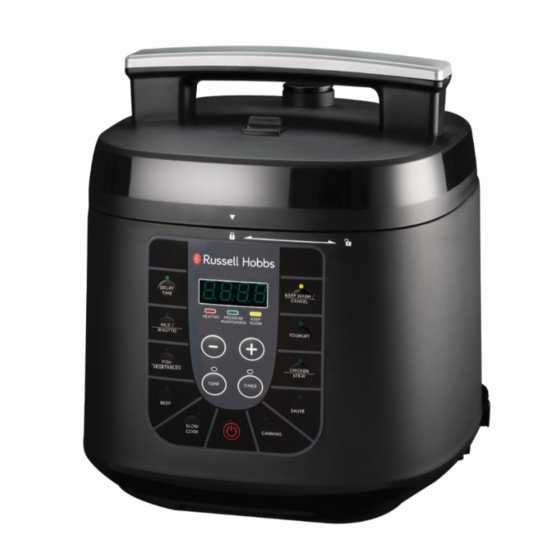
WARNING: Never use your hand to open or close Pressure Release Valve. Use tongs similar utensils to open valve. Follow these safety precautions when releasing pressure to prevent serious injury from occurring. CONTROL PANEL Pressure cooker control panel DELAY TIME: delays the cooking process for up to 24 hours. PRE-SET FUNCTIONS: to adjust the Quick/Medium/Well cooking times, press function once for ‘’QUICK’’, quick press twice for ‘’MEDIUM’’... - Page 13 KEEP WARM/ CANCEL: keeps food warm for up to 24hours and stops the cooking process at any time. After cooking cycle is complete, most cooking functions will automatically switch to keep warm function until cancel button is selected. + &- buttons: manually increase or decrease TEMP & TIMER and Delay time. PRESSURE COOKER PRE-SET FUNCTION CHART Digital Default...
- Page 14 The canning process allows for preparation and preservation of all your family’s favorites, including fresh and cooked fruits, vegetables, meats, jams, and jellies. Canning is a great way to bring “out-of- season” foods to the table economically. Buy food items in bulk at low prices and preserve for future use when they become scarce and costly.
- Page 15 • The chart below indicates style of packing and suggested processing time (with 450ml jars) for various type of foods;...
- Page 16 PRESSURE COOKER TROUBLE SHOOTING *NOTE: If necessary to re-assemble the Float Valve, insert fluted end into outer lid handle. Push all the way through until end is sticking out on underside of the lid. Hold in place by inserting pencil or like object in hole in the lid handle for leverage while placing the sealing ring on groove of fluted end sticking out on underside of the lid.
-
Page 17: Error Codes
ERROR CODES NOTE: Do not use or attempt to repair a malfunctioning appliance. Contact customer service for further information. PRESSURE COOKER FREQUENTLY ASKED QUESTIONS 1. Which coating is used for the inner pot? This appliance has a stainless-steel housing and an aluminum inner pot. 2. - Page 18 5. Can you leave the unit on while not at home? Yes, this unit can be left operating while not at home. However, it should not be left unattended, especially with children or pets around. In addition, review guidelines for food left outside a refrigerator over a certain length of time.
- Page 19 Tapping the Power Button at any time during the cooking process will shut down the unit completely causing the control panel to immediately go dark with only the word ‘’OFF’’ illuminated on the panel as well as the flashing convection fan icon. The convection fan will continue running for 20 seconds to cool down the unit.
-
Page 20: Before First Use
5. Convection icon After the desired function has been selected the convection fan will start to work. When the digital tube displays "OFF", the convection fan icon wil flash, the heating stops and the fan continues to work. After running for 20 seconds, the buzzer will beep 5 times, the fan light will stop operating and the power button will illuminate. - Page 21 IMPORTANT: Never overfill the basket with ingredients as this could affect the quality of the cooking results. FRYING: 8. After you have selected the desired pre-set function, wait a few seconds and the unit will automatically start the cooking cycle or press the power button to start the selected function.
- Page 22 • Smaller food items usually require a slightly shorter preparation time than larger food items. • Turning over smaller food items halfway through the preparation time optimises the result and can help prevent unevenly fried foods. • Add a little bit of oil to potatoes for a crispy result. Fry your ingredients in the fryer within a few minutes after you’ve added the oil.
- Page 23 Chicken Dehydrate 240 (4 hours) Reheat AIR FRYER TROUBLE SHOOTING...
- Page 24 ERROR CODES AIR FRYER FREQUENTLY ASKED QUESTIONS 1. Can I prepare foods other than fried dishes with the Air Fryer function? You can prepare a variety of dishes, including steaks, chops, burgers, and baked goods. See online recipe book - www.russellhobbs.co.za 2.
-
Page 25: Cleaning And Maintenance
8. Can the air fryer lid come off? Yes, it can. Open the lid and gently lift on the hinges, the joints will slide out. Do not immerse the lid in water. CLEANING AND MAINTENANCE • Before cleaning, switch the unit off and disconnect the plug from the power socket. •... -
Page 26: Storing The Appliance
STORING THE APPLIANCE • Unplug the unit from the power socket and clean all the parts as instructed above. • Ensure that all parts are dry before storing. • Store the appliance in its box or in a clean, dry place. •... -
Page 27: Changing The Plug
CHANGING THE PLUG Should the need arise to change the fitted plug, follow the instructions below. This unit is designed to operate on the stated current only. Connecting to other power sources may damage the appliance. - Page 28 PLEASE AFFIX YOUR PROOF OF PURCHASE/RECEIPT HERE IN THE EVENT OF A CLAIM UNDER WARRANTY THIS RECEIPT MUST BE PRODUCED. 1 YEAR STANDARD WARRANTY Warranty will be extended for another year if you register your product online within 12 months of purchase (visit https://russellhobbswarranty.co.z W A R R A N T Y AND EXTENDED WARRANTY...
Need help?
Do you have a question about the DualChef RHMC60 and is the answer not in the manual?
Questions and answers
Hi my pressire cooker lid is not opening i **** stressed, I thouvht it was because of the steam but i let it cool over night and it still does the same thing and theres food inside. What can I do?
To open the lid of a Russell Hobbs DualChef RHMC60 pressure cooker if it is stuck:
1. Ensure all pressure has been released from the unit.
2. Rotate the handle counterclockwise.
3. Lift the lid using the handle.
4. Always open the lid away from your face and body to avoid steam burns.
If the lid remains stuck, check that the rapid release valve has fully released pressure before attempting to open it.
This answer is automatically generated
@Mr. Anderson I tried all that it is still stuck and the button doesnt move all the way to the back to open it is stuck in the middle. So frustrated
Can you put the pressure cooker onto manual and set your own time and pressure
Yes, the Russell Hobbs DualChef RHMC60 pressure cooker has a manual setting that allows you to adjust the cooking time. However, the documents do not specify whether the pressure can also be manually adjusted.
This answer is automatically generated
@Mr. Anderson how do I put it onto maual?