GE PFD95 Owner's Manual & Installation Instructions
Hide thumbs
Also See for PFD95:
- Owner's manual & installation instructions (128 pages) ,
- Owner's manual & installation instructions (128 pages) ,
- Owner's manual & installation instructions (128 pages)
Table of Contents
Advertisement
Available languages
Available languages
Quick Links
GE is a trademark of the General Electric Company. Manufactured under trademark license.
USING THE DRYER
WiFi Connect . . . . . . . . . . . . . . . . . . . . . . . . 5
Getting Started . . . . . . . . . . . . . . . . . . . . . . 5
Artificial Intelligence . . . . . . . . . . . . . . . . . . .7
Cycles . . . . . . . . . . . . . . . . . . . . . . . . . . . . . . . .8
Settings . . . . . . . . . . . . . . . . . . . . . . . . . . . . . .9
Options . . . . . . . . . . . . . . . . . . . . . . . . . . . . . 10
Loading . . . . . . . . . . . . . . . . . . . . . . . . . . . . . 12
. . . . . . . . . . . . . . . . . . 14
Stacking (Optional) . . . . . . . . . . . . . . . . . . 34
Write the model and serial
numbers here:
Model # _________________
Serial # _________________
They are on the label on the front
of the dryer behind the door.
. . . . . . . . .3
OWNER'S MANUAL &
. . . . . . . . . . 13
ENGLISH/FRANÇAIS/
. . . . . .38
. . . . . . . . . . . 41
. . . . . . . . . 42
49-3000206
INSTALLATION
INSTRUCTIONS
PFD95
GFD85
GFD65
GFD55
GFV55
ESPAÑOL
Rev 5
11-21 GEA
Advertisement
Chapters
Table of Contents

Related Manuals for GE PFD95


Summary of Contents for GE PFD95
-
Page 1: Table Of Contents
Model # _________________ Serial # _________________ They are on the label on the front of the dryer behind the door. 49-3000206 Rev 5 GE is a trademark of the General Electric Company. Manufactured under trademark license. 11-21 GEA... - Page 2 THANK YOU FOR MAKING GE APPLIANCES A PART OF YOUR HOME. Whether you grew up with GE Appliances, or this is your first, we’re happy to have you in the family. We take pride in the craftsmanship, innovation and design that goes into every GE Appliances product, and we think you will too.
-
Page 3: Safety Information
IMPORTANT SAFETY INFORMATION. READ ALL INSTRUCTIONS BEFORE USING THE APPLIANCE To reduce the risk of fire, explosion, electric shock, or injury to persons when using your WARNING appliance, follow basic precautions, including the following: Read all instructions before using the appliance. DO NOT dry articles that have been previously cleaned in, washed in, soaked in, or spotted with gasoline, dry-cleaning solvents, or other flammable or explosive substances, as they give off vapors that could ignite or explode. - Page 4 IMPORTANT SAFETY INFORMATION READ ALL INSTRUCTIONS BEFORE USING THE APPLIANCE ADDITIONAL GAS DRYER WARNINGS WARNING - Fire or Explosion Hazard Failure to follow safety warnings exactly could result in serious injury, death, or property damage. - DO NOT store or use gasoline or other flammable vapors and liquids in the vicinity of this or any other appliance.
-
Page 5: Wifi Connect
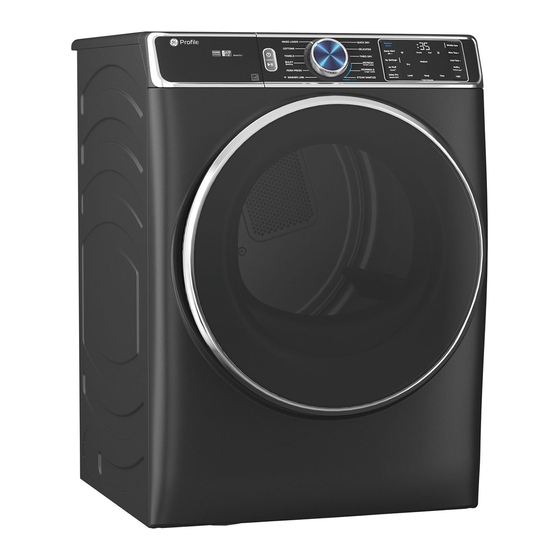
Throughout this manual, features and appearance will vary from your model. WiFi Connect (For customers in the United States only - on some models) Your dryer is GE Appliances WiFi Connect enabled. WiFi Label Location Visit geappliances.com/connect and enter your model number to show you the proper steps to connect your appliance. - Page 6 Getting started Features and appearance will vary. Model: PFD95 Model: GFD85 Model: GFD65 Models: GFD55 GFV55 49-3000206 Rev 5...
- Page 7 Getting started Power Press to “wake up” the display. If the display is active, press to put the dryer into idle mode. NOTE: Pressing Power does not disconnect the appliance from the power supply. Start and Pause Press Start to begin the cycle. NOTE: The door must be closed for the dryer to start the cycle. Pressing Start again will pause the cycle, the Start light may blink and “Pause”...
-
Page 8: Cycles
Getting started Drying Sensor cycles automatically determine fabric dryness. Cycles Timed cycles run for the selected time. MIXED LOADS For loads consisting of cottons and poly-blends. ® COTTONS For cottons and most linens. NOTE: ENERGY STAR models are tested on COTTONS cycle with default settings (Temp setting on High, Level setting on Dry, and ecoDry default on). -
Page 9: Settings
Getting started Drying Sensor cycles automatically determine fabric dryness. Cycles Timed cycles run for the selected time. TIMED DRY Use to set your own dry time. To use: 1. Turn cycle dial to TIMED DRY. 2. Increase the drying time by pressing the Time pad. NOTE: This pad only increases the time. -
Page 10: Options
Option 2 - Remote Start: Set your dryer to “AP” using the Delay Dry pad. This allows you to use the GE Appliances Laundry App via your smartphone to start your dryer remotely at the time of your choosing. If the dryer is set to AP with no activity, it will start the dryer 24 hours later. - Page 11 Getting started Options (cont.) Light (on some models) The drum light will turn on if the Light pad is pressed or the door is opened. It will turn off when the door is shut, the Light pad is pressed again or after 5 minutes if the door is left open. Small Load (on some models) Select to use for a small load with any sensor cycle (except SANITIZE).
-
Page 12: Loading
Loading Always follow fabric manufacturer’s care label when laundering. Sorting and Loading Hints WARNING - Fire Hazard Keep flammable materials and vapors, such as DO NOT dry anything that has ever had any type of oil gasoline, away from dryer. on it (including cooking oils). -
Page 13: Care And Cleaning
(on GFD85 & PFD95 models only) The stainless steel used to make the dryer drum provides the highest reliability available in a GE Appliances dryer. If the dryer drum should be scratched or dented during normal use, the drum will not rust or corrode. These surface blemishes will not affect the function or durability of the drum. -
Page 14: Installation Instructions
Installation Dryer Instructions If you have any questions, call GE Appliances at 800.GE.CARES (800.432.2737) GEAppliances.com or visit our Website at: In Canada, call 800.561.3344 www.GEAppliances.ca or visit BEFORE YOU BEGIN WARNING Read these instructions completely and carefully. IMPORTANT - Risk of Fire •... - Page 15 These hoses are manufactured and tested WE25X20060 Complete Kit (hoses, Y-adapter, washers) to meet GE Appliances specifications. GE Appliances strongly recommends the use of new water WE49X25794 Kit (Short hose, Y-adapter, washers) supply hoses. Hoses degrade over time and need to be...
- Page 16 Installation Instructions REQUIREMENTS FOR ALCOVE OR MINIMUM CLEARANCE OTHER CLOSET INSTALLATION THAN ALCOVE OR CLOSET INSTALLATION WARNING - Explosion Hazard Minimum clearance to combustible surfaces and for air opening are: 0” (0 cm) both sides , 0” (0 cm) rear Keep flammable materials and vapors, such as gasoline, and 0”...
- Page 17 Installation Instructions CONNECTING INLET HOSES (for steam dryer models only) CONNECTING INLET HOSES CONNECTING INLET HOSES (cont.) To produce steam, the dryer must connect to the cold water supply. Since the washer must also connect to the cold water, a “Y” connector is inserted to allow both inlet hoses to make that connection at the same time.
- Page 18 Installation Instructions CONNECTING A GAS DRYER (skip for electric dryers) TOOLS YOU WILL NEED • Before beginning the installation, turn off the circuit breaker(s) or remove the dryer’s circuit fuse(s) at 10” (25.40 cm) Flat-blade the electrical box. Be sure the dryer Adjustable wrenches (2) screwdriver cord is unplugged from the wall.
- Page 19 Installation Instructions CONNECTING A GAS DRYER (cont.) GAS REQUIREMENTS GAS SUPPLY • A 1/8” (3.2 mm) National Pipe Taper thread WARNING - Explosion Hazard plugged tapping, accessible for test gauge connection, must be installed immediately • Use a new CSA International approved flexible upstream of the gas supply connection to the gas supply line.
- Page 20 Installation Instructions CONNECTING A GAS DRYER (cont.) CONNECTING THE DRYER TO CONNECTING THE DRYER TO THE GAS SUPPLY (cont.) THE GAS SUPPLY Install a female 3/8” (9.6 mm) NPT elbow at Install a 1/8” (3.2 mm) NPT plugged tapping the end of the dryer gas inlet. to the dryer gas line shut-off valve for checking gas inlet pressure.
- Page 21 Installation Instructions CONNECTING A GAS DRYER (cont.) ELECTRICAL CONNECTION TEST FOR LEAKS INFORMATION FOR GAS DRYERS Never use an open flame to test for gas leaks. (cont.) Check all connections for leaks with soapy solution or equivalent. • Dryer must be electrically grounded in accordance with local codes and ordinances, or in the absence Apply a soap solution.
- Page 22 6 ft. (1.8 m) Duct tape Order on-line at GEApplianceparts.com today, 24 hours a day or by phone at 877.959.8688 during normal business hours. In Canada, visit your local GE Appliances parts distributor or call 800.661.1616 or GEAppliances.ca/en/products/parts-filters-accessories. 49-3000206 Rev 5...
- Page 23 Installation Instructions ELECTRICAL CONNECTION ELECTRICAL CONNECTION INFORMATION FOR ELECTRIC DRYERS INFORMATION FOR ELECTRIC DRYERS For electrical connections using a power cord: For direct wire connections: NOTE: If your dryer circuit is on a circuit protected by a WARNING GFCI breaker, then 3-wire installation is not permitted. - Fire Hazard House wiring and dryer must be configured for 4-wire.
- Page 24 Installation Instructions CONNECTING AN ELECTRIC DRYER (cont.) CONNECTING DRYER USING CONNECTING DRYER USING 4-WIRE CONNECTION (MUST 3-WIRE CONNECTION BE USED FOR MOBILE HOME NOTE: If your dryer circuit is on a circuit protected by a INSTALLATION) GFCI breaker, then 3-wire installation is not permitted. House wiring and dryer must be configured for 4-wire.
- Page 25 DO NOT use any plastic to vent the dryer, • If rigid metal cannot be used, then UL-listed flexible this includes the home exhaust duct, dryer metal clothes dryer transition duct (GE Appliances transition duct, or within the dryer. part – PM08X10085) can be used.
- Page 26 Installation Instructions EXHAUSTING THE DRYER (cont.) • DO cut duct as short • DO use elbows as possible and when turns are install straight into necessary. wall. Elbows • DO NOT bend • DO NOT use • DO NOT • DO NOT or collapse excessive crush duct...
- Page 27 Installation Instructions EXHAUSTING THE DRYER (cont.) EXHAUST SYSTEM CHECKLIST STANDARD REAR EXHAUST HOOD OR WALL CAP We recommend that you install your dryer before installing your washer. This will permit direct • Terminate in a manner to prevent back drafts or entry of access for easier exhaust connection.
- Page 28 Installation Instructions EXHAUSTING THE DRYER (cont.) SIDE VENTING SIDE VENTING (cont.) • Insert and connect the elbow/exhaust duct assembly WARNING - Fire Hazard to the blower housing and orient the elbow for either left or right venting. Disconnect dryer from electrical supply. Wear gloves and arm guards.
- Page 29 Installation Instructions EXHAUSTING THE DRYER (cont.) SIDE VENTING (cont.) BOTTOM VENTING For LEFT venting: Dryer Exhaust to the bottom of cabinet for Gas and Electric models WITHOUT Built-In Pedestal™. • Locate the 15-1/2” (39.4 cm) exhaust duct from the kit. •...
- Page 30 Installation Instructions EXHAUSTING THE DRYER (cont.) BOTTOM VENTING (cont.) BOTTOM VENTING (cont.) • Locate the 12-1/2” (31.5 cm) exhaust duct and • Install the new access panel from the kit. elbow duct from the kit and assemble together. • Secure access panel with 4 screws saved from Apply duct tape around the joint to eliminate leaks earlier.
- Page 31 Installation Instructions FINAL SETUP LEVEL THE DRYER DRYER START-UP Stand the dryer upright near the final location and Press the Power pad. adjust the four leveling legs at the corners to ensure that the dryer is level from side to side and front to rear.
-
Page 32: Reversing The Door Swing (Optional)
Installation Instructions REVERSING THE DOOR SWING (Optional) BEFORE YOU START Unplug the dryer from its electrical outlet. TOOLS YOU WILL NEED Phillips-head screwdriver T-25 torx driver 1/4” (6.4 mm) nut driver IMPORTANT NOTES • Handle parts carefully to avoid scratching paint. •... - Page 33 Installation Instructions REVERSING THE DOOR SWING (Optional) REMOVE, ROTATE AND REPLACE REPLACE THE INNER DOOR THE HANDLE AND HINGE INTO • Replace the inner door frame into the outer door. THE OPPOSITE SIDES • Replace the 14 screws into the inner door, using a Phillips-head screwdriver, securing it to the outer door.
- Page 34 If you are planning to stack the washer and dryer, order Stacking Kit GFA28KITN to be used for this dryer. Kit sold separately. If you have any questions, call GE Appliances at 800.432.2737 or visit our Website at: GEAppliances.com In Canada, call 800.561.3344 or visit www.GEAppliances.ca...
- Page 35 Installation Instructions STACKING THE WASHER AND DRYER (Optional Kit GFA28KITN) TOOLS YOU WILL NEED INSTALL SPACERS TO THE Phillips screwdriver Pliers DRYER BOTTOM Locate a spacer on the bottom side with its holes over Gloves the leveling leg holes. Attach spacer using 2 screws. Open-ended wrench Attach the second spacer on the other bottom side using 2 screws.
- Page 36 Installation Instructions STACKING THE WASHER AND DRYER (Optional Kit GFA28KITN) INSTALL THE APPROPRIATE PREPARE THE WASHER AND BRACKETS TO THE WASHER DRYER A. Place the washer in the approximate final Washer Depth Dryer Depth Bracket Number installation location. 32" (81.3 cm) 32"...
- Page 37 Installation Instructions STACKING THE WASHER AND DRYER (Optional Kit GFA28KITN) INSTALL THE DRYER AND THE FINALIZE THE INSTALLATION BRACKET ON THE WASHER Do not push on the dryer once CAUTION installed to top of the washer. - Excessive Weight WARNING Pushing on the dryer may result in pinched Hazard fingers.
-
Page 38: Troubleshooting Tips
Troubleshooting Tips... Before you call for service Problem Possible Cause What To Do Dryer shakes or Some shaking/noise is normal. Move dryer to an even floor space, or adjust leveling legs as makes noise Dryer may be sitting unevenly. necessary until even. Clothes take Improper or obstructed Check the Installation Instructions to make sure the dryer... - Page 39 Troubleshooting Tips... Before you call for service Problem Possible Causes What To Do Dryer doesn’t Fuse is blown/circuit breaker Check the building’s fuse/circuit breaker box and replace both heat is tripped; the dryer may fuses or reset both breakers. Your dryer may tumble if only one tumble but not heat fuse is blown or one breaker tripped.
- Page 40 Try a fabric softener. Bounce Fabric Conditioner Dryer Sheets have been approved for ® use in all GE Appliances dryers when used in accordance with the manufacturer’s instructions. Overdrying Try a fabric softener. Adjust setting to Less Dry or Damp.
-
Page 41: Limited Warranty
This limited warranty is extended to the original purchaser and any succeeding owner for products purchased for home use within the USA. If the product is located in an area where service by a GE Appliances Authorized Servicer is not available, you may be responsible for a trip charge or you may be required to bring the product to an Authorized GE Appliances Service location for service. -
Page 42: Consumer Support
Have a question or need assistance with your appliance? Try the GE Appliances Website 24 hours a day, any day of the year! You can also shop for more great GE Appliances products and take advantage of all our on-line support services designed for your convenience. - Page 43 Modelo # ________________ Serie # __________________ Se encuentran en una etiqueta en el frente de la secadora detrás de la puerta. 49-3000206 Rev 5 GE es una marca registrada de General Electric Company. Fabricado bajo licencia de marca. 11-21 GEA...
- Page 44 GRACIAS POR HACER QUE GE APPLIANCES SEA PARTE DE SU HOGAR. Ya sea que haya crecido usando GE Appliances, o que ésta es su primera vez, nos complace tenerlo en la familia. Sentimos orgullo por el nivel de arte, innovación y diseño de cada uno de los electrodomésticos de GE Appliances, y creemos que usted también.
-
Page 45: Seguridad
INFORMACIÓN IMPORTANTE DE SEGURIDAD LEA TODAS LAS INSTRUCCIONES ANTES DE USAR Para reducir el riesgo de incendio, explosión, descargas eléctricas o lesiones sobre las ADVERTENCIA personas al usar su electrodoméstico, siga las precauciones básicas, incluyendo lo siguiente: Lea todas las instrucciones antes de usar este electrodoméstico. NO seque prendas que en forma previa hayan sido secadas, lavadas, penetradas, o manchadas con gasolina, solventes de limpieza en seco, u otras sustancias inflamables o explosivas, ya que despiden vapores que se podrían encender o explotar. - Page 46 INFORMACIÓN IMPORTANTE DE SEGURIDAD LEA TODAS LAS INSTRUCCIONES ANTES DE USAR ADVERTENCIAS ADICIONALES SOBRE LA SECADORA A ADVERTENCIA - Riesgo de incendio o de explosión El incumplimiento estricto de las advertencias de seguridad podría resultar en lesiones graves, la muerte o daños a la propiedad. - NO guarde ni use gasolina u otros vapores y líquidos inflamables cerca de éste ni de otros electrodomésticos.
-
Page 47: Puesta En Marcha
Es posible que las funciones y apariencias varíen con relación a su modelo a lo largo del manual. WiFi Connect (Conexión WiFi) (Sólo para clientes en los Estados Unidos) Su secadoras está habilitada para GE Appliances WiFi Connect. Ubicación de la etiqueta de WiFi Visite www.geappliances.com/connect e ingrese su número de... - Page 48 Puesta en Marcha Las características y apariencia variarán. Modelo: PFD95 Modelo: GFD85 Modelo: GFD65 Modelos: GFD55 GFV55 49-3000206 Rev 5...
- Page 49 Puesta en Marcha Power (Encender) Presione para “activar” la pantalla. Si la pantalla está activa, presione para que la secadora quede en el modo inactivo. NOTA: Presionar Power (Encendido) no desconecta el electrodoméstico del suministro de corriente. Start and Pause (Inicio y Pausa) Presione Start (Inicio) para comenzar el ciclo.
-
Page 50: Ciclos
Puesta en Marcha Ciclos de Secado Los ciclos del sensor determinan de forma automática cuán seca está la tela. Los ciclos por tiempo funcionan durante una cantidad de tiempo seleccionada MIXED LOADS (Cargas Para cargas con algodones y telas combinadas. Combinadas) ®... -
Page 51: Configuraciones
Puesta en Marcha Ciclos de Secado Los ciclos del sensor determinan de forma automática cuán seca está la tela. Los ciclos por tiempo funcionan durante una cantidad de tiempo seleccionada STEAM SANITIZE Este ciclo desinfectará y eliminará arrugas difíciles de quitar producidas en cargas de (Refrescar al vapor) tamaño estándar que estén húmedas del lavado y/o enjuague. -
Page 52: Opciones
Opción 2: Ajuste la secadora en “AP” con el botón Delay Dry (Secado Retrasado). Esto le permite utilizar la aplicación de lavandería GE Appliances Laundry vía su teléfono inteligente para iniciar la secadora de forma remota en el momento de su elección. - Page 53 Puesta en Marcha Opciones (cont.) Light (Luz del tambor) (en algunos modelos) La luz del tambor se encenderá si se pulsa el botón Light (Luz del tambor) o se abre la puerta. Se apagará cuando la puerta está cerrada, el botón Light (Luz del tambor) está presionado o después de 5 minutos si se deja la puerta abierta. Small Load (en algunos modelos) Seleccione esta función para una carga pequeña con cualquier ciclo con sensor (Excepto SANITIZE (Desinfección)).
-
Page 54: Carga
Carga Siempre siga las instrucciones del fabricante de la ropa cuando lave. Consejos de clasificación y carga ADVERTENCIA - Riesgo de incendio Mantenga cualquier material y vapores inflamables, NO seque nada que alguna vez haya tenido algún tales como gasolina, alejados de la secadora. tipo de aceite (incluyendo aceites de cocina). -
Page 55: Cuidado Y Limpieza
El acero inoxidable utilizado para fabricar el tambor de la secadora ofrece la mayor confiabilidad de una secadora GE Appliances. Si el tambor de la secadora se raya o abolla durante un uso normal, éste no se oxidará o corroerá. -
Page 56: Instrucciones De Instalación
Instrucciones Secadora de instalación Si tiene alguna pregunta, llame GE Appliances a 800.GE.CARES (800.432.2737) o visite nuestro sitio GEAppliances.com Web en: ANTES DE COMENZAR ADVERTENCIA Lea estas instrucciones por completo y con detenimiento. - Riesgo de incendios IMPORTANTE • – Guarde estas •... - Page 57 Con pedestal opcional: 55-1/2” (141 cm) Min. - 56-5/8” (143,8 cm) Max. Apilada: 79-1/8” (201 cm). MANGUERA DE VAPOR Y AGUA (sólo para los modelos de secadoras de vapor): GE Appliances recomienda enfáticamente el uso de Número de Pieza Accesorio piezas específicas de fábrica.
- Page 58 Instrucciones de instalación ESPACIO LIBRE MÍNIMO EN REQUERIMIENTOS PARA INSTALACIÓN EN NICHOS O OTROS ESPACIOS QUE NO SEAN ARMARIOS INSTALACIONES EN NICHOS O ARMARIOS ADVERTENCIA - Riesgo de explosión Los espacios libres mínimos respecto de superficies combustibles y de aberturas de aire son: 0” (0 cm) Mantenga cualquier material y vapores inflamables, tales a ambos lados , 0”...
- Page 59 Instrucciones de instalación CÓMO CONECTAR MANGUERAS DE ENTRADA (sólo para los modelos de secadoras de vapor) CÓMO CONECTAR MANGUERAS CÓMO CONECTAR MANGUERAS DE ENTRADA DE ENTRADA (cont.) Para producir vapor, la secadora debe conectarse al suministro de agua fría. Ya que la lavadora también debe conectarse al agua fría, debe introducirse un conector en “Y”...
- Page 60 Instrucciones de instalación CÓMO CONECTAR UNA SECADORA A GAS (si se cuenta con una secadora eléctrica, saltear este paso) HERRAMIENTAS NECESARIAS • Antes de comenzar la instalación, apague el disyuntor o quite los fusibles de la secadora de la Llaves ajustables Destornillador caja eléctrica.
- Page 61 Instrucciones de instalación CÓMO CONECTAR UNA SECADORA A GAS (cont.) REQUERIMIENTOS DE GAS SUMINISTRO DE GAS • Debe instalarse una toma a rosca de 1/8” (3,2 mm) ADVERTENCIA - Riesgo de explosión NPT, accesible para una conexión del manómetro de prueba, inmediatamente en sentido ascendente •...
- Page 62 Instrucciones de instalación CÓMO CONECTAR UNA SECADORA A GAS (cont.) CÓMO CONECTAR LA SECADORA CÓMO CONECTAR LA SECADORA AL SUMINISTRO DE GAS AL SUMINISTRO DE GAS (cont.) Instale un codo hembra NPT de 3/8” (9,6 mm) Instale una toma a rosca de 1/8” (3,2 mm) NPT al final de la entrada de gas de la secadora.
- Page 63 Instrucciones de instalación CÓMO CONECTAR UNA SECADORA A GAS (cont.) CONEXIÓN ELÉCTRICA INFORMACIÓN PRUEBA DE PÉRDIDAS SOBRE LAS SECADORAS A GAS (cont.) Nunca utilice una llama abierta para detectar pérdidas de gas. • La secadora debe estar conectada a tierra según los códigos y ordenanzas locales, o, en ausencia Controle todas las conexiones con una solución de tales códigos, según la última edición del Código...
- Page 64 120/240V, 30A con CABLES DE CORRIENTE Conducto de metal de 3 o 4 patas. Identifique 4” (10,2 cm) diámetro GE Appliances recomienda enfáticamente el uso de el tipo de enchufe (recomendado) piezas específicas de fábrica. Seleccione el cable de según el tomacorriente corriente que se adecúe a sus requisitos de instalación.
- Page 65 CONEXIÓN ELÉCTRICA INFORMACIÓN CONEXIÓN ELÉCTRICA INFORMACIÓN SOBRE LAS SECADORAS ELÉCTRICAS SOBRE LAS SECADORAS ELÉCTRICAS Para realizar conexiones eléctricas Para conexiones directas de cables: con un cable de corriente: ADVERTENCIA - Riesgo de incendio NOTA: Si el circuito de su secadora está en un circuito protegido por un interruptor GFCI, no se permite la Use un cable de cobre con calibre de 10 instalación de un cable de 3 hilos.
- Page 66 Instrucciones de instalación CÓMO CONECTAR UNA SECADORA ELECTRICA CÓMO CONECTAR LA SECADORA CÓMO CONECTAR LA SECADORA USANDO UNA CONEXIÓN DE 4 CABLES USANDO UNA CONEXIÓN DE 3 CABLES (DEBE UTILIZARSE EN INSTALACIONES NOTA: Si el circuito de su secadora está en un circuito protegido por un interruptor GFCI, no se permite la DE CASAS RODANTES) instalación de un cable de 3 hilos.
- Page 67 (tipo papel de aluminio). Un conducto universal flexible aprobado NECESARIOS PARA INSTALAR UN por UL (GE Appliances partes - PM8X73 o WX8X73) CONDUCTO DE SALIDA puede ser utilizado UNICAMENTE en instalaciones 6,4 mm (1/4”) Toma y 6,4 mm (1/4”) Toma y...
- Page 68 Instrucciones de instalación SALIDA AL EXTERIOR DE LA SECADORA (cont.) • UTILICE codos • CORTE el conducto cuando hagan falta lo más corto posible curvas. e instálelo derecho en la pared. Coudes • NO doble o • NO utilice • NO •...
- Page 69 Instrucciones de instalación SALIDA AL EXTERIOR DE LA SECADORA (cont.) LISTA DE CONTROL DEL SALIDA TRASERA ESTÁNDAR SISTEMA DE SALIDA Recomendamos instalar la secadora antes que la lavadora. Esto permitirá un acceso directo para CAMPANA O CUBIERTA DE PARED poder efectuar la conexión de salida. •...
- Page 70 Instrucciones de instalación SALIDA AL EXTERIOR DE LA SECADORA (cont.) VENTILACIÓN LATERAL VENTILACIÓN LATERAL (cont.) • Inserte y conecte el ensamble del codo/ conducto de ADVERTENCIA - Riesgo de incendio salida a la caja del soplador y oriente el codo hacia la ventilación izquierda o derecha.
- Page 71 Instrucciones de instalación SALIDA AL EXTERIOR DE LA SECADORA (cont.) VENTILACIÓN POR LA PARTE VENTILACIÓN LATERAL (cont.) INFERIOR Para la ventilación IZQUIERDA: Salida de la secadora a la parte inferior del • Ubique el conducto de salida de 15-1/2” (39,4 cm) gabinete para modelos a Gas y Eléctricos SIN de este kit.
- Page 72 Instrucciones de instalación SALIDA AL EXTERIOR DE LA SECADORA (cont.) VENTILACIÓN POR LA PARTE VENTILACIÓN POR LA PARTE INFERIOR (cont.) INFERIOR (cont.) • Ubique el conducto de salida de 12-1/2” (31,5 cm) • Instale el nuevo panel de acceso de este kit. y el conducto del codo de este kit y ensamble los •...
- Page 73 Instrucciones de instalación CONFIGURACIÓN FINAL NIVELE LA SECADORA INICIO DE LA SECADORA Coloque la secadora en posición vertical cerca Presione el botón Power (Encendido). de la ubicación definitiva y ajuste las cuatro patas niveladoras para garantizar que la secadora se encuentre nivelada de lado a lado y del frente a la parte trasera.
- Page 74 Instrucciones de instalación CÓMO INVERTIR LA APERTURA DE LA PUERTA (Opcional) ANTES DE COMENZAR Desenchufe la secadora del tomacorriente. NOTAS IMPORTANTES • Manipule las piezas con cuidado para no rayar la • Una vez que haya comenzado, no mueva el pintura.
- Page 75 Instrucciones de instalación CÓMO INVERTIR LA APERTURA DE LA PUERTA (Opcional) RETIRE, GIRE Y REEMPLACE LA VUELVA A COLOCAR LA MANIJA Y LA BISAGRA EN LOS PUERTA INTERIOR LADOS OPUESTOS • Vuelva a colocar el marco de la puerta interior en la puerta exterior.
-
Page 76: Cómo Apilar La Lavadora Y La Secadora
Instrucciones de instalación CÓMO APILAR LA LAVADORA Y LA SECADORA (si así lo desea) Si planea apilar la lavadora y secadora, solicite el kit de apilado número GFA28KITN para usar con esta secadora. El kit se vende por separado. REQUERIMIENTOS INSTALACIÓN ANTES DE COMENZAR EN NICHOS O ARMARIOS Lea estas instrucciones por completo y con... - Page 77 Instrucciones de instalación CÓMO APILAR LA LAVADORA Y LA SECADORA (kit opcional GFA28KITN) HERRAMIENTAS NECESARIOS INSTALE LOS ESPACIADORES Destornillador Phillips Pinzas EN LA PARTE INFERIOR DE LA SECADORA Guantes Llave de Ubique un espaciador del lado inferior con sus agujeros extremo sobre los agujeros de las patas niveladoras.
- Page 78 Instrucciones de instalación CÓMO APILAR LA LAVADORA Y LA SECADORA (kit opcional GFA28KITN) PREPARAR LA LAVADORA Y LA INSTALE LOS SOPORTES SECADORA APROPIADOS PARA LA LAVADORA A. Coloque la lavadora en la ubicación final aproximada Profundidad de Profundidad de Número de Soporte la Lavadora la Secadora de la instalación.
- Page 79 Instrucciones de instalación CÓMO APILAR LA LAVADORA Y LA SECADORA (kit opcional GFA28KITN) INSTALE LA SECADORA Y EL FINALICE LA INSTALACIÓN SOPORTE EN LA LAVADORA No empuje la secadora una PRECAUCIÓN vez que se haya instalado - Riesgo de ADVERTENCIA sobre la lavadora.
-
Page 80: Consejos Para Solución De Problemas
Consejos para la solución de problemas Problema Causas posibles Solución La secadora se El movimiento/ruido es normal. Desplace la secadora a un lugar nivelado, o ajuste las patas niveladoras mueve o hace ruido La secadora puede estar según sea necesario. colocada en un lugar desnivelado Las prendas Conducto inadecuado u obstruido Revise las Instrucciones de instalación para verificar que la ventilación... - Page 81 Consejos para la solución de problemas Problema Causas posibles Solución La secadora no Fusible quemado/disyuntor Revise la caja de fusibles/disyuntores y reemplace ambos fusibles calienta desconectado; es posible que la y reconecte ambos disyuntores. Es posible que la secadora gire si secadora gire sin calentar únicamente un fusible se ha quemado o un solo disyuntor ha saltado.
- Page 82 Intente utilizar un suavizador de telas. suavizador de telas Bounce® Fabric Conditioner Dryer Sheets ha sido aprobado para ser usado con todas las Secadoras GE Appliances y cuando se usen de acuerdo con las instrucciones del fabricante. Sobresecado Intente utilizar un suavizador de telas.
- Page 83 Notas 49-3000206 Rev 5...
- Page 84 Notas 49-3000206 Rev 5...
-
Page 85: Garantía Limitada
GE Appliances la información sobre su electrodoméstico. Si no desea que los datos de su electrodoméstico sean enviados a GE Appliances, solicitamos que le indique a su técnico NO entregar los datos a GE Appliances en el momento del servicio. - Page 86 También puede enviar una carta en la tarjeta de inscripción preimpresa que se incluye con el material embalado. GEAppliances.com/register Servicio Programado El servicio de reparación de expertos de GE Appliances está a sólo un paso de su puerta. Conéctese a través de Internet y programe su servicio a su conveniencia cualquier día del año. GEAppliances.com/service o comuníquese al 800.432.2737 durante el horario de atención comercial.
Need help?
Do you have a question about the PFD95 and is the answer not in the manual?
Questions and answers