Table of Contents
Advertisement
Quick Links
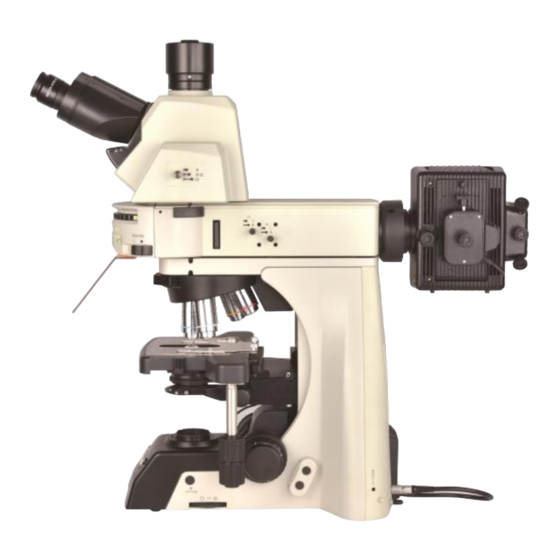
BS-2081F,2083F Scientific Fluorescent
Microscope Instruction Manual
BS-2081F
BS-2083F
This manual is for users of BS-2081F,2083F Scientific Fluorescent Microscope in laboratory. To
ensure your safety, obtain optimum performance, and to familiarize yourself fully with the use of
this microscope, we recommended that you study the instruction manual carefully.
Advertisement
Table of Contents

Related Manuals for BestScope BS-2081F


Summary of Contents for BestScope BS-2081F
- Page 1 BS-2081F BS-2083F This manual is for users of BS-2081F,2083F Scientific Fluorescent Microscope in laboratory. To ensure your safety, obtain optimum performance, and to familiarize yourself fully with the use of this microscope, we recommended that you study the instruction manual carefully.
-
Page 2: Table Of Contents
BestScope International Limited Contents Microscope Part ..........................2 Notice For Use ........................... 2 1.Components Name ........................4 2.Structure Overview ........................5 3.1 Open Power Source(fig.1) ....................7 3.2 Adjust Lighting and Switch Light Source (fig 2) ..............7 3.4 Mount Specimen And Adjust Stage( ................... 8 3.5 Adjust Interpupillary Distance( ................... -
Page 3: Microscope Part
BestScope International Limited Microscope Part Notice For Use BS-2081F,2083F I. Safety Precaution Symbol Description During use, the power box of microscope become very hot, so should not be touched with bare hands. Before using, please read the user manual carefully. If can not use... - Page 4 BestScope International Limited III. Maintenance and Storage All camera lenses are proofread and adjusted. Please tear open outfit Revolving nosepiece and coarse micro focusing mechanism, which structure are precise. Please don’t remove easily. Instruments shall be kept clean, always remove dust. Please care about that don’t contaminate optic components.
-
Page 5: Components Name
BestScope International Limited 1.Components Name BS-2081F,2083F Eyepiece Viewing head Nosepiece Objective Stage Condenser Mainframe... -
Page 6: Structure Overview
BestScope International Limited 2.Structure Overview BS-2081F,2083F 1.Filter switching knob 8.”ECO”infrared sensor 2.Coarse and fine focusing handwheel 9.Coaxial pinion for X stage movement 3.Focusing limiting and locking 10.Coaxial pinion for Y stage movement Handwheel 11.Condenser disk 4.Condenser height adjustment wheel 12.Biopsy clip 5.Lighting switching button... - Page 7 BestScope International Limited BS-2081F,2083F 8.Focusing limiting and locking 1.pushing rod for switching light path handwheel 2.Condenser fastening screw 9.Screw for fastening lamp chamber 3.Condenser height adjustment 10.Socket of lamp chamber wheel 11.Grounding bar 4.”ECO”button 12.Plug of lamp chamber 5.Aperture size adjustment knob 13.Lamp chamber...
-
Page 8: Open Power Source(Fig.1)
BestScope International Limited 3.Adjustment And Operation BS-2081F,2083F 3.1 Open Power Source(fig.1) Plug power source, toggle the main switch in ‘-’state, which on the back of microscope. 3.2 Adjust Lighting and Switch Light Source (fig 2) 1. Rotating the handwheel according to the direction... -
Page 9: Mount Specimen And Adjust Stage
BestScope International Limited BS-2081F,2083F ★ when switching light button, if found the button is not matched with the shown in the figure, please check that 3.4 Mount Specimen And Adjust Stage(fig 4, fig 5) Push the cover glass slowly into the jaw, then clamp Fig 4 glass gently. -
Page 10: Adjust Interpupillary Distance
BestScope International Limited Lable of switching light path 3.5 Adjust Interpupillary Distance(fig 6) The range of interpupillary distance is 47mm~78mm. when Pushing rod observing with binocular, holding the prism table and pivoting to adjust the interpupillary distance, until two sides of field roll into one and observe with binocular comfortably. -
Page 11: Handwheel For Adjusting The Tightness Of Focusing (Fig.9)
BestScope International Limited Handwheel for limiting and On both sides of the fine focusing handwheels are locking focusing removable. According to the direction of arrow, hold one end of handwheel and make another cock. Then stir it from the cock end. About install it, only need to align the center of handwheel and assemble it. - Page 12 BestScope International Limited Condenser centering: 1. Rotating the focusing handwheel of condenser① and rising the condenser to the top position. 2. Focusing the specimen with the objective 10x. 3. Rotating the field diaphragm ②, shrinking image of field diaphragm to view.
-
Page 13: Using Frosted Sheet(Figure 13)
BestScope International Limited 3-11 Using Frosted Sheet(figure 13) As shown in figure 13, the state of using filter is push in the rod. When push out the rod, filter is in an empty state. LBD is a filter of increasing color temperature. -
Page 14: Replace The Fuse
BestScope International Limited 3-14 Replace The Fuse (fig 16, fig17) As shown in the figure 16, first using the general wrench push aside the drawer of fuse. Then referencing figure 17, through the square hole under of the fuse drawer gently drag the fuse upward. -
Page 15: Installation
BestScope International Limited 4.Installation BS-2081F,2083F 4.1 Installation Diagram The diagram as below shows the order of each component’s installation. The figures in the diagrams show the installation steps. ★Before installing, please ensure that all components are clean. Don’t cut any component or surface of glass. -
Page 16: Install The Mechanical Slide Bracket (Fig 1, Fig 2)
BestScope International Limited 4-2Procedure BS-2081F,2083F 4-2-1 Install the Mechanical Slide Bracket (fig 1, fig 2) ★ Install the platform bracket according to the path of ① in figure 1. The dovetail slot needs to align with the slot of platform bracket, sliding it Fig 1 until the screw fix it. -
Page 17: Install Nosepiece
BestScope International Limited 4-2-3 Install Nosepiece (fig 5) Connect the plug of nosepiece with socket, then Ⅲ inset the dovetail groove of microscope according to the path ③ shown in figure 5. At last, use hex Fig 5 wrench tight up the bolt shown as Ⅲ. -
Page 18: Install Eyepiece(Fig 7)
BestScope International Limited ★ If not use the ternary camera lens and the photo accessories, please use the corresponding dust cover to cover the ternary attachment interface and eyepiece interface, to prevent into ashes. Fig 7 4-2-5 Install Eyepiece(fig 7) 1.Inset... -
Page 19: Install The Electric Condenser (Fig 9)
BestScope International Limited ★ when operating, first under of the objective 10x search the sample and focus, then switching to other ratio of objective lens. ★ When switching objectives, turn the objective nosepiece. It does not ensure the objective lens into the heart of the light path until hear the “click”... -
Page 20: Install The Led Lamp Chamber(Fig 12)
BestScope International Limited ★ In order to ensure the appropriate position of camera interface, first use eyepiece to observe and adjust the sample to a clean imaging position. Then install the camera and observe. At the same time, accordingly adjust the position of camera interface until to the clearest position, then screw the number Ⅺ... - Page 21 BestScope International Limited 5.Technical Specification BS-2081F,2083F (1) Main Technical Specification Optical System NIS60 Infinite optical system BS-2081F BS-2083F Seidentopf Trinocular Head, 30° inclined, interpupillary distance: 47mm-78mm; splitting ratio Eyepiece: Trinocular ● =100:0 or 20:80 or 0:100 Viewing Head Ergo Tilting Trinocular Head, adjustable 0-35° inclined,...
- Page 22 BestScope International Limited Objective Infinite Plan Achromatic Objective:4×, 10×, 20×, 40×, 100× ● Condenser Swing condenser NA0.9/0.25 ● Photo Attachment ○ C-Mount 1× ○ Video Adapter C-Mount 0.5× ○ Polarization Kit Simple Polarizing kit with polarizer and analyzer ○ DIC Attachment ○...
-
Page 23: Trouble Shooting Guide
BestScope International Limited 6.Trouble shooting guide 6.1 Optical Part TROUBLE CAUSE SOLUTION The edge of the field The nosepiece is not in the located position Locate the nosepiece of view is dark or (objective and light path are not coaxial) - Page 24 BestScope International Limited There was bleb in the oil Eliminate the bleb Have used the unsuitable oil Use standard immerse The size of the aperture diaphragm is too Minify it large There are stains on the incident lens of the...
-
Page 25: Mechanical System
BestScope International Limited 6.2 Mechanical System TROUBLE CAUSE SOLUTION The image can not focus The specimen is placed Turn inversely when using high inversely Use the standard coverslip magnification objective The coverslip is too thick (0.17mm) The objective touches the... -
Page 26: Electrical System
BestScope International Limited 6.3 Electrical System TROUBLE CAUSE SOLUTION Check the connection of the No power power cord The lamp can’t light when the switch is turned on The bulb is not inserted Insert it correctly The bulb burns out... -
Page 27: Fl-900 Epi- Fluorescent Attachment
BestScope International Limited FL-900 Epi- fluorescent Attachment This manual is written for FL-900 Epi-fluorescent attachment. To ensure the safety, obtain optimum performance and to familiarize yourself fully with the use of this attachment, it is strongly recommended that you read this manual carefully before using it. - Page 28 BestScope International Limited Notice for use The FL-900 epi-fluorescent attachment has been designed for BS-2081, 2083, 2085 scientific microscopes. ⅠSafety Note 1. The epi-fluorescent attachment is a precise instrument. Open the box carefully, and avoid dropping the accessories to ground and causing damage to them.
- Page 29 BestScope International Limited Symbol Explanation Indicates that the surface becomes hot, and should not be touched with bare hands。 Indicates that high voltage (upper 1KV) inside, improper handling could result in an electric shock to the user. Before use, carefully read the user manual. Improper handling could result in personal injury to the user and/or damage to the equipment.
- Page 30 BestScope International Limited 1.Components Name ●FL-900 Epi-fluorescent Attachment includes: (FL-900)=the body of fluorescent Attachment +(NFP-1) (shown in figure) ① Main body of the Epi-fluorescent Attachment ② Power supply unit NFP-1 ③ Power cord (please use the power cord provided) ④ Ultrahigh mercury burner...
- Page 31 BestScope International Limited 2. Assembly ● BS-2081F, 2083F Scientific Fluorescent Microscope: BS-2081F/2083F =BS-2081/2083+FL-900 Assembly of BS-2081F,2083F Laboratory Fluorescent Microscope: 1. Loosen the set screw① and take the trinocular Viewing Head ③ from the body of scientific microscope. 2. Insert the epi-fluorescent attachment into the scientific microscope correctly and tighten the setscrew①...
- Page 32 BestScope International Limited 2.1Preparation Open the box carefully, remove all packing material and take the attachment out. 2.2 Mounting the Mercury Burner (fig.1, fig.2) 1. Loosen the burner socket clamping screw ① (fig.1), and remove the burner socket (fig.2). 2.After removing the foam backstop②, securely insert the + pole (the wide head) of the specified mercury burner③...
- Page 33 BestScope International Limited ★To prevent any hazard, always turn the main switch on the power supply unit to “O” (OFF), unplug the power cord plug from the mains outlet, and wait for at least 10 minutes before replacing the burner.
- Page 34 BestScope International Limited 2.4 Mounting Protection Barrier (fig.5) Install the protection barrier on the attachment by tightening the screw. Screw Protection barrier Fig 5 Assembly Fluorescent Attachment (fig.6) ⑤ Mount the lamp housing① into the other end of the attachment② and fix it with two screws③.
- Page 35 BestScope International Limited Fuse Replacement ③ ② (fig.8 ,fig. 9) 1 Set the main switch ④ to “O”(OFF)and unplug the power cord before replacing fuses. ① 2 Using a flat-blade screwdriver, remove each Fig 8 of the fuses holders ⑦ by tuning it counter- clockwise and pulling out.
- Page 36 BestScope International Limited 3. Adjustment and Operation 3.1 Name of Components Diaphragm Centering Screw Mirror centering knob Lamp centering knob Filter block turret Condenser Filter block label adjustable knob Aperture diaphragm lever Light shutter lever Field Accessorial diaphragm slot lever...
- Page 37 BestScope International Limited ◎ There are 6 fluorescent mirror blocks (filter Fluorescent mirror block block) mounted in the filter block turret at (filter block ) the most. ● a mirror block includes a diachronic mirror, a barrier filter, an excitation filter. (There are kinds of excitation filters).
- Page 38 BestScope International Limited 3.2 Operation 3.2.1 Preparation 1.Verify that the voltage and the frequency of the AC mains outlet match the setting of the voltage switch and the frequency switch on the rear of the power supply units. 2.Make sure the cord is connected firmly.
- Page 39 BestScope International Limited 3.2.2 Selecting Fluorescent Filter Combination Select fluorescent filters combination according to the fluorescent dye you use. Excitation Diachronic Excitation Barrier Filter Application Mirror Filter DM400 BP330-385 BA420 · Auto-fluorescence observation · DAPI: DNA · Hoechest 332528, 33342:...
- Page 40 BestScope International Limited 3.2.3 Switching on Electrical Source Set the main switch of the power supply unit to “I” (ON). It will stabilize in 5 to 10 minutes after ignition. ◎ Some mercury burners may not ignite the first time the power is turned on due to variance in production, and the safety mechanism in the starter in such a case.
- Page 41 BestScope International Limited 3.2.4 Centering the Field Iris Diaphragm (fig.1) ③ 1. Switch the light shutter ① to “●”position. 2. Revolve filter block turret to engage the B-excitation mirror in the light path. 3. Switch the light shutter ① to “O” position.
- Page 42 BestScope International Limited observation target region. According to the objective in use, adjust the diaphragm image using the field diaphragm lever so that the field of view is circumscribed by the field diaphragm to exclude stray light. 3.2.5 Centering the Aperture Iris...
- Page 43 BestScope International Limited 9 . Adjust the aperture iris diaphragm centering screws④ with attached wrench to superpose the image of aperture iris diaphragm on the cross of centering plate. Adjusting the aperture iris diaphragm (fig.3) The aperture iris diaphragm adjusts image resolution and contrast.
- Page 44 BestScope International Limited 3.2.6 Centering the Mercury Burner (fig.4, fig.6) ◎Before proceeding to center the burner, wait for the arc image to stabilize to protect against glare during arc image centering, it should be viewed across the excitation light protective shield.
- Page 45 BestScope International Limited are image and the mirror reflected arc image in the symmetrical position.(B) ⑦ 9. Adjust the mirror focusing knob⑥ (Fig.6) to ⑥ sharpen the mirror reflected arc image. (C) 10. Turn the burner adjustin,,g knob ⑤ to overlap the are image with the mirror reflected are image.
- Page 46 BestScope International Limited 3.2.7 Mounting ND filter (fig.7) 1.The ND filter can reduce the excitation light intensity to delay color fading of the specimen. Use the ND filter as far as this does not hinder observation. 2. There are two kinds of ND filters for option:ND6 and ND25 for position①...
- Page 47 BestScope International Limited 4. Troubleshooting Guide Under certain conditions, performance of the attachment may be adversely affected by factors other than defects. if problems occur, please review the following list and take remedial action as needed. PROBLEMS CAUSE SOLUTION I. Optical Part The light shutter closes the light Switch the light shutter to “○”position...
- Page 48 BestScope International Limited The field of view doesn’t open fully Open it fully ND filter is stopped in halfway in the Pull in the filter slider until it clicks into light path place The mercury burner is not centered. Center it...
- Page 49 BestScope International Limited 5. Characteristics of Mirror Block’s Wave Length Blue excitation Green excitation Ultraviolet excitation Violet excitation...
- Page 50 BestScope International Limited Epi-Fluorescent Fluorescent Filter Excitation Dichroic mirror Barrier Filter Illumination block B Excitation BP460~490 DM500 BA520 ● G Excitation BP510~550 DM570 BA590 ● U Excitation BP330~385 DM400 BA420 ○ V Excitation BP400~410 DM455 BA455 ○ Lamp 100W GCQ Ultra Hi-voltage Spherical Mercury Lamp ●...
Need help?
Do you have a question about the BS-2081F and is the answer not in the manual?
Questions and answers