Table of Contents
Advertisement
Available languages
Available languages
Quick Links
Quick guide
THANK YOU FOR BUYING A WHIRLPOOL PRODUCT
In order to receive a more complete assistance, please
register your product on www . whirlpool . eu/ register
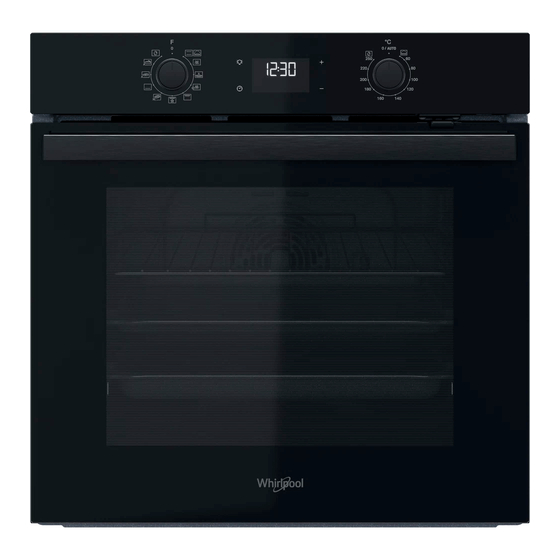
CONTROL PANEL DESCRIPTION
1
1. SELECTION KNOB
For switching the oven on by selecting a
function. Turn to
position to switch the
oven off.
2. LIGHT
With the oven switched on, press
the oven compartment lamp on or off.
SLIDING RUNNERS AND SHELF GUIDES
Before using the oven remove the protective tape [a] and then remove
the protective foil [b] from the sliding runners.
REMOVING THE SLIDING RUNNERS [c]
Pull the lower part of the sliding runner to uncouple the lower hooks
(1) and pull the the sliding runners upwards, removing them from the
upper hooks (2).
REFITTING THE SLIDING RUNNERS [d]
Hook the upper hooks on the shelf guides (1) then press the lower part
of the sliding runners against the shelf guides, until the lower hooks
are clicking (2).
FIRST TIME USE
1. SETTING THE TIME
You will need to set the time when you switch on the appliance for the
first time: Press
until the
start flashing on the display.
Use
or
to set the hour and press
digits for the minutes will start flashing. Use
minutes and press
to confirm.
2
3
3. SETTING THE TIME
For accessing the cooking time settings,
delayed start and timer.
For displaying the time when the oven
is off.
to turn
4. DISPLAY
5. ADJUSTMENT BUTTONS
For changing the cooking time settings.
icon and the two digits for the hour
to confirm. The two
or
to set the
Before using the appliance carefully read the Safety
Instruction.
4
5
6. THERMOSTAT KNOB
Turn to select the temperature you require
when activating manual functions.
Please note: Type of knobs may vary from model
type. If the knobs are push-activated, push
down on the center of the knob to release it
from seating.
2
1
REMOVING AND REFITTING THE SHELF GUIDES
1.
To remove the shelf guides, firmly grip the external part of the
guide, and pull it towards you to extract the support and the two
internal pins from the lodging.
2.
To reposition the shelf guides, position them near the cavity and
initially insert the two pins into their lodgings. Next, position
the external part near its lodging, insert the support, and firmly
press towards the wall of the cavity to make sure the shelf guide is
properly secured.
Please note: When the
power outages, you will need to reset the time.
2. HEAT THE OVEN
A new oven may release odours that have been left behind during
manufacturing: this is completely normal.
Before starting to cook food, we therefore recommend heating the
oven with it empty in order to remove any possible odours. Remove
any protective cardboard or transparent film from the oven and
remove any accessories from inside it. Heat the oven to 250 °C for
about one hour. The oven must be empty during this time.
Please note: It is recommended to ventilate the room after using the
appliance for the first time.
1
[c]
icon is flashing, for example following lengthy
EN
6
2
[d]
Advertisement
Table of Contents

Related Manuals for Whirlpool OMR58HU1B


Summary of Contents for Whirlpool OMR58HU1B
- Page 1 THANK YOU FOR BUYING A WHIRLPOOL PRODUCT Before using the appliance carefully read the Safety In order to receive a more complete assistance, please Instruction. register your product on www . whirlpool . eu/ register CONTROL PANEL DESCRIPTION 1. SELECTION KNOB 3. SETTING THE TIME 6.
-
Page 2: Functions & Daily Use
FUNCTIONS & DAILY USE CONVENTIONAL MAXI COOKING For cooking any kind of dish on one shelf only. For cooking large joints of meat (above 2.5kg). We recommend turning the meat over during cooking to ensure that both sides brown RISING evenly. -
Page 3: End Of Cooking
PROGRAMMING THE END COOKING TIME/ END OF COOKING DELAYED START An audible signal will sound and the display will indicate that the function has finished. Turn the selection knob to select a different After a cooking duration has been set, starting the function can be function or to switch the oven off. -
Page 4: Troubleshooting
The door safety device can be removed by following the sequence of images (see Fig. 2). * Available only on certain models Download the complete Daily Reference Guide from docs.whirlpool.eu for more informations about your product Policies, standard documentation and additional product information can be found by: •... - Page 5 БЛАГОДАРИМ ВИ, ЧЕ ЗАКУПИХТЕ ПРОДУКТ НА WHIRLPOOL Преди да използвате уреда, прочетете внимателно За да получавате по-пълно съдействие, регистрирайте инструкциите за безопасност. вашия уред на www.whirlpool.eu/register ОПИСАНИЕ НА КОНТРОЛНИЯ ПАНЕЛ 1. БУТОН ЗА ИЗБИРАНЕ 3. НАСТРОЙКА НА ЧАСОВНИКА 6. ВЪРТЯЩ СЕ БУТОН НА ТЕРМО- СТАТА...
- Page 6 ФУНКЦИИ И ВСЕКИДНЕВНА УПОТРЕБА КОНВЕНЦИОНАЛНО MAXI COOKING (МАКСИ ПЕЧЕНЕ) За готвене на всякакви ястия само на едно ниво. За готвене на едри парчета месо (над 2,5 kg). Препоръчваме да обръщате месото по време на готвенето, за да се опече еднакво ВТАСВАНЕ...
-
Page 7: Настройка На Таймера
ПРОГРАМИРАНЕ НА КРАЙНИЯ ЧАС НА ГОТВЕНЕ/ КРАЙ НА ГОТВЕНЕТО ОТЛОЖЕН СТАРТ Чува се звуков сигнал и на дисплея се извежда информация, че функцията е завършена. Завъртете бутона за избор, за да изберете След като зададете време за готвене можете да отложите старта на друга... -
Page 8: Откриване И Отстраняване На Неизправности
последователността, показана на илюстрациите (вижте фиг. 2). * Налично само при определени модели Изтеглете целия наръчник за ежедневна употреба от docs.whirlpool.eu за повече информация за вашия продукт Фирмените политики, стандартната документация и допълнителна информация за уреда можете да намерите, като: •... -
Page 9: Popis Ovládacího Panelu
DĚKUJEME VÁM, ŽE JSTE SI ZAKOUPILI VÝROBEK ZNAČKY WHIRLPOOL Před použitím spotřebiče si pečlivě přečtěte Bezpečnostní Přejete-li si získat plnou podporu, zaregistrujte svůj pokyny. výrobek na www . whirlpool . eu/ register POPIS OVLÁDACÍHO PANELU 1. VOLICÍ KNOFLÍK 3. NASTAVENÍ DENNÍHO ČASU 6. OVLADAČ TERMOSTATU Pro zapínání... - Page 10 FUNKCE A KAŽDODENNÍ POUŽITÍ TRADIČNÍ MAXI COOKING Slouží k pečení jakéhokoli jídla pouze na jednom roštu. Slouží k pečení velkých kusů masa (nad 2,5 kg). Během přípravy doporučujeme masem otáčet, aby bylo zajištěno důkladné KYNUTÍ a rovnoměrné zhnědnutí na obou stranách. Rovněž doporučujeme Napomáhá sladkému nebo slanému těstu účinně vykynout. maso často podlévat, aby nedošlo k jeho přílišnému vysušení.
-
Page 11: Nastavení Časovače
NAPROGRAMOVÁNÍ ČASU UKONČENÍ / KONEC PEČENÍ ODLOŽENÉHO STARTU Zazní zvukový signál a na displeji se zobrazí, že funkce je ukončena. Otočením volicího knoflíku zvolíte jinou funkci, popřípadě Po nastavení doby přípravy je možné odložit spuštění funkce troubu vypnete. naprogramováním času ukončení: Stiskněte , dokud na displeji nezačne blikat ikona a aktuální... -
Page 12: Odstraňování Závad
Bezpečnostní zařízení dveří lze odinstalovat – postupujte podle obrázků (viz obr. 2). * Dostupné pouze u určitých modelů Pro více informací o výrobku si z webových stránek docs.whirlpool.eu stáhněte příručku pro každodenní použití. Zásady, standardní dokumentaci a další informace o výrobku naleznete: • na naší webové stránce docs,whirlpool .eu, •... - Page 13 Kiirjuhend TÄNAME, ET OSTSITE WHIRLPOOL TOOTE Enne seadme kasutamist lugege hoolikalt läbi Parema tugiteenuse saamiseks registreerige oma ohutusjuhend. seade aadressil www . whirlpool . eu/ register JUHTPANEELI KIRJELDUS 1. VALIKUNUPP 3. KELLAAJA SEADISTAMINE 6. TERMOSTAADINUPP Ahju sisselülitamiseks ja funktsiooni See on küpsetusaja, viitkäivituse ja taimeri Seda pöörates saate käsifunktsioone...
- Page 14 FUNKTSIOONID JA IGAPÄEVANE KASUTAMINE TAVAPÄRANE KÜPSETAMINE MAXI COOKING (SUUR KÜPSETAMINE) Mis tahes tüüpi roogade küpsetamine ainult ühel ahjutasandil. Suurte lihatükkide (üle 2,5 kg) küpsetamine. Soovitame liha küpsetamise ajal ümber pöörata, et mõlemad pooled ühtlaselt KERGITAMINE pruunistuksid. Samuti soovitame liha mõne aja tagant leemega üle Magusa või soolase taigna tõhus kergitamine.
- Page 15 KÜPSETAMISE LÕPUAJA/ KÜPSETAMISE LÕPP VIITKÄIVITUSE PROGRAMMEERIMINE Kõlab helisignaal ja ekraan annab teada, et funktsiooni töö on lõppenud. Pöörake valikunuppu, et valida teine funktsioon, või valige Kui küpsetusaeg on määratud, saab funktsiooni käivitamise aega edasi ahju väljalülitamiseks asend lükata, programmeerides selle lõpuaja: vajutage nuppu , kuni ekraanil hakkab vilkuma ikoon ja praegune kellaaeg.
- Page 16 Ukse ohutusseadme eemaldamiseks järgige kujutistel toodud järjekorda (vt joonis 2). * Saadaval ainult teatud mudelitel Toote kohta lisateabe saamiseks laadige aadressilt docs.whirlpool.eu alla täielik igapäevase võrdluse blankett Poliitikate, standardite dokumentatsiooni ja toote lisateabe lugemiseks tehke järgmist: • Külastage meie veebilehte docs.whirlpool.eu •...
-
Page 17: Első Használat
KÖSZÖNJÜK, HOGY A WHIRLPOOL TERMÉKÉT VÁLASZTOTTA A készülék használata előtt olvassa el figyelmesen a Teljes körű szolgáltatásaink eléréséhez, kérjük, regisztrálja Biztonsági útmutatót. termékét honlapunkon: www . whirlpool . eu/ register A KEZELŐPANEL BEMUTATÁSA 1. VÁLASZTÓGOMB 3. AZ IDŐ BEÁLLÍTÁSA 6. HŐMÉRSÉKLET-SZABÁLYOZÓ... - Page 18 MINDENNAPI HASZNÁLT / FUNKCIÓK HAGYOMÁNYOS (ALSÓ ÉS FELSŐ SÜTÉS) MAXI COOKING Tetszőleges étel egyetlen szinten történő sütése. Nagyobb darab hús (2,5 kg felett) sütése egyben. Javasoljuk a hús forgatását a sütés ideje alatt, hogy mindkét fele egyenletesen KELESZTÉS megbarnuljon. A hús többszöri meglocsolását is ajánljuk a túlzott Sós vagy édes tészták hatékony kelesztésének elősegítése.
-
Page 19: Az Időzítő Beállítása
A SÜTÉSI IDŐ VÉGE / A KÉSLELTETÉS BEÁLLÍTÁSA A SÜTÉS VÉGE Hangjelzés hallatszik, és a kijelző jelzi, hogy a funkció befejeződött. A sütési időtartam beállítását követően késleltethető a funkció bekapcsolása úgy, hogy megadjuk a befejezési időt: nyomja meg és Forgassa el a választógombot egy másik funkció kiválasztásához, vagy tartsa lenyomva az gombot, amíg a ikon és az aktuális idő... - Page 20 Az ajtózáró eszközt a képek sorrendjének követésével lehet eltávolítani (lásd 2. ábra). * Kizárólag bizonyos típusok esetén A termékkel kapcsolatos további információkért töltse le a teljes Mindennapi használati útmutatót a docs.whirlpool.eu weboldalról A szabályzatok, a szabványos dokumentáció és a termékkel kapcsolatos további információk az alábbi elérhetőségeken találhatók:...
-
Page 21: Laika Iestatīšana
PALDIES, KA IEGĀDĀJĀTIES WHIRLPOOL IZSTRĀDĀJUMU Pirms ierīces lietošanas rūpīgi izlasiet drošības Lai saņemtu pilnvērtīgu palīdzību, lūdzu, reģistrējiet norādījumus. savu ierīci vietnē www . whirlpool . eu/ register VADĪBAS PANEĻA APRAKSTS 1. ATLASES SLĒDZIS 3. LAIKA IESTATĪŠANA 6. TERMOSTATA SLĒDZIS Lai ieslēgtu cepeškrāsni, izvēloties funkciju. - Page 22 FUNKCIJAS UN IKDIENAS LIETOŠANA STANDARTA REŽĪMS MAXI COOKING (MAKSIMĀLĀ GATAVOŠANA) Lai pagatavotu jebkuru veidu ēdienus, novietojot tos tikai uz Lai pagatavotu lielus gaļas gabalus (virs 2,5 kg). Lai nodrošinātu, viena plaukta. ka gaļa ir vienmērīgi brūna no abām pusēm, gatavošanas laikā to ieteicams apgriezt.
- Page 23 GATAVOŠANAS BEIGU LAIKA IESTATĪŠANA/ GATAVOŠANAS BEIGAS AIZKAVĒTĀ PALAIŠANA Tiklīdz funkcijas darbība būs beigusies, tiks atskaņots skaņas signāls un displejā būs redzams paziņojums. Pagrieziet atlases slēdzi, lai izvēlētos Pēc gatavošanas ilguma iestatīšanas jūs varat aizkavēt programmas citu funkciju vai lai izslēgtu cepeškrāsni. palaišanu, iestatot gatavošanas beigu laiku: nospiediet , līdz displejā...
-
Page 24: Problēmu Novēršana
Durvju drošības slēdzenes ierīci var noņemt, rīkojoties kā norādīts secīgajos attēlos (skat. 2.att.). * Pieejams tikai atsevišķiem modeļiem Lejupielādējiet Ikdienas lietošanas pamācību no vietnes docs.whirlpool.eu, lai uzzinātu vairāk par savu izstrādājumu Noteikumi, standarta dokumentācija un papildu informācija par produktu ir pieejama: •... -
Page 25: Naudojimas Pirmą Kartą
DĖKOJAME, KAD ĮSIGIJOTE „WHIRLPOOL“ GAMINĮ Kad galėtumėte tinkamai pasinaudoti Prieš naudodamiesi prietaisu atidžiai perskaitykite saugos pagalba, užregistruokite gaminį svetainėje instrukcijas. www . whirlpool . eu/ register VALDYMO PULTO APRAŠYMAS 1. PASIRINKIMO RANKENĖLĖ 3. LAIKO NUSTATYMAS 6. TERMOSTATO RANKENĖLĖ Naudojama krosnelei įjungti ir funkcijai Įjungiami gaminimo laiko nustatymai, atidėtas... - Page 26 FUNKCIJOS IR KASDIENIS NAUDOJIMAS TRADIC. GAMIN. MAXI COOKING (DIDELIŲ GABALŲ KEPIMAS) Bet kokio patiekalo gaminimas tik ant vienos lentynos. Didelių mėsos gabalų (sveriančių daugiau nei 2,5 kg) kepimas. Kad abi gabalo pusės tolygiai apskrustų, įpusėjus gaminimui, mėsą RISING (TEŠLOS KILDINIMAS) rekomenduojama apversti.
-
Page 27: Laikmačio Nustatymas
GAMINIMO PABAIGOS LAIKO / GAMINIMO PABAIGA ATIDĖTO PALEIDIMO NUSTATYMAS Garsinis signalas ir informacija ekrane praneš apie gaminimo pabaigą. Sukite pasirinkimo rankenėlę, kad pasirinktumėte kitą funkciją, arba Nustačius gaminimo trukmę galima atidėti funkcijos paleidimą nustatykite ją į padėtį ir išjunkite orkaitę. užprogramavus gaminimo pabaigos laiką. -
Page 28: Trikčių Šalinimas
Durelių saugos įtaisą galima išimti vadovaujantis paveikslėlių seka (žr. 2 pav.). * Tik tam tikruose modeliuose Jei reikia daugiau informacijos apie gaminį, naudojimo ir priežiūros vadovą atsisiųskite iš docs.whirlpool.eu Politiką, standartinę dokumentaciją ir papildomą informaciją galite rasti: • Apsilankę svetainėje adresu docs . whirlpool . eu •... -
Page 29: Opis Panelu Sterowania
DZIĘKUJEMY ZA ZAKUP PRODUKTU WHIRLPOOL W celu uzyskania kompleksowej pomocy Przed użyciem urządzenia należy uważnie przeczytać prosimy zarejestrować urządzenie na stronie instrukcje bezpieczeństwa. www . whirlpool . eu/ register OPIS PANELU STEROWANIA 1. POKRĘTŁO WYBORU 3. USTAWIANIE ZEGARA 6. POKRĘTŁO TERMOSTATU Służy do włączania urządzenia poprzez... - Page 30 FUNKCJE URZĄDZENIA I CODZIENNA EKSPLOATACJA KONWENCJONALNE MAXI COOKING Do pieczenia dowolnego rodzaju potraw na jednym poziomie. Do pieczenia dużych kawałków mięsa (powyżej 2,5 kg). Zaleca się obracanie mięsa podczas pieczenia tak, aby pieczeń z każdej strony WYRASTANIE przyrumieniła się równomiernie. Zalecamy również polewanie pieczeni Ułatwia wyrastanie ciast słodkich i słonych.
-
Page 31: Koniec Pieczenia
PROGRAMOWANIE CZASU ZAKOŃCZENIA PIECZENIA/ KONIEC PIECZENIA OPÓŹNIONY START Kiedy funkcja zakończy się, będzie słychać sygnał dźwiękowy, a wyświetlacz pokaże odpowiedni komunikat. Obrócić pokrętło wyboru, Po ustawieniu czasu pieczenia można opóźnić włączenie funkcji, aby wybrać inną funkcję, lub do pozycji , aby wyłączyć programując czas jej zakończenia: naciskać... -
Page 32: Usuwanie Usterek
(patrz Rys. 2). * Dostępne tylko w wybranych modelach Więcej informacji znajduje się w Instrukcjach codziennego użytku, które można pobrać ze strony docs.whirlpool.eu Zasady, standardową dokumentację oraz dodatkowe informacje o produkcie można znaleźć: •... -
Page 33: Prima Utilizare
Înainte de a utiliza aparatul, citiţi cu atenţie instrucţiunile Pentru a beneficia de servicii complete de privind siguranţa. asistenţă, vă rugăm să vă înregistraţi produsul pe www . whirlpool . eu/ register DESCRIEREA PANOULUI DE COMANDĂ 1. BUTONUL DE SELECTARE 3. SETAREA OREI 6. - Page 34 FUNCŢII ŞI UTILIZAREA ZILNICĂ CONVENTIONAL (CONVENŢIONAL) GĂTIT MAXI Pentru a prepara orice fel de alimente, pe un singur nivel. Pentru prepararea bucăţilor mari de carne (peste 2,5 kg). Vă recomandăm să întoarceţi carnea în timpul preparării pentru a vă DOSPIRE asigura că...
-
Page 35: Setarea Temporizatorului
FINALIZAREA PREPARĂRII Vă rugăm să reţineţi: Pentru a anula durata de preparare setată, apăsaţi în mod repetat pe până când pictograma începe să clipească pe Se va emite un semnal sonor, iar pe afişaj va fi indicată finalizarea afişaj, apoi utilizaţi pentru a reseta durata de preparare la „00:00”. -
Page 36: Remedierea Defecţiunilor
(consultaţi fig. 2). * Disponibile numai la anumite modele Descărcaţi ghidul complet de referinţă pentru utilizare zilnică de la adresa docs.whirlpool.eu pentru informaţii suplimentare despre produs Politicile, documentaţia standard şi informaţii suplimentare despre produs pot fi găsite: Vizitând site-ul nostru web docs . -
Page 37: Prvé Použitie
Rýchly sprievodca ĎAKUJEME, ŽE STE SI KÚPILI VÝROBOK WHIRLPOOL Aby sme vám mohli lepšie poskytovať pomoc, Prv než spotrebič začnete používať, pozorne si prečítajte zaregistrujte, prosím, svoj spotrebič na Bezpečnostné pokyny. www.whirlpool.eu/register OPIS OVLÁDACIEHO PANELA 1. VOLIACI GOMBÍK 3. NASTAVENIE ČASU 6. - Page 38 FUNKCIE A KAŽDODENNÉ POUŽÍVANIE STATICKÝ OHREV MAXI COOKING Na prípravu ľubovoľného jedla iba na úrovni jedného roštu. Na pečenie veľkých kusov mäsa (kusy väčšie ako 2,5 kg). Odporúčame počas pečenia mäso otáčať, aby obe strany zhnedli KYSNUTIE rovnomerne. Odporúčame mäso pri pečení občas oblievať, aby sa Na účinné...
-
Page 39: Nastavenie Časovača
PROGRAMOVANIE ČASU UKONČENIA PEČENIA/ UKONČENIE PRÍPRAVY JEDLA POSUNUTÉHO ŠTARTU Ozve sa zvukový signál a na displeji sa zobrazí, že funkcia je ukončená. Otočte voliacim gombíkom na inú funkciu alebo do polohy Po nastavení času pečenia možno funkciu odložiť naprogramovaním čím rúru vypnete. času jej ukončenia. -
Page 40: Riešenie Problémov
Ak potrebujete ďalšie informácie o výrobku, stiahnite si kompletnú Príručku na každodenné používanie na stránke docs.whirlpool.eu. Zásady, štandardnú dokumentáciu a ďalšie informácie o výrobku nájdete: • Na našej webovej stránke docs . whirlpool . eu • Pomocou QR kódu Prípadne sa obráťte na náš popredajný servis (telefónne číslo nájdete v záručnej knižke). -
Page 41: Опис Панелі Керування
Стислий посібник ДЯКУЄМО ЗА ПРИДБАННЯ ВИРОБУ WHIRLPOOL Перед використанням пристрою уважно прочитайте Для отримання більш повної допомоги зареєструйте інструкції з техніки безпеки. свій прилад на сайті www.whirlpool.eu/register ОПИС ПАНЕЛІ КЕРУВАННЯ 1. РУЧКА ВИБОРУ 3. НАЛАШТУВАННЯ ЧАСУ 6. РУЧКА ТЕРМОСТАТА Щоб увімкнути духову шафу, оберіть будь- Для... - Page 42 ФУНКЦІЇ І ЩОДЕННЕ ВИКОРИСТАННЯ СТАНДАРТНИЙ MAXI COOKING (ВЕЛИКІ ШМАТКИ М’ЯСА) Для приготування будь-якої страви лише на одній полиці. Для готування великих шматків м’яса (понад 2,5 кг). Рекомендуємо повертати м’ясо під час готування, щоб усі боки ПІДНІМАННЯ ТІСТА підсмажувалися рівномірно. Також рекомендуємо час від часу Для...
-
Page 43: Таблиця Приготування
ЗАКІНЧЕННЯ ГОТУВАННЯ Пролунає звуковий сигнал і на дисплеї з'явиться повідомлення про те, що приготування їжі завершено. Пролунає звуковий сигнал і на дисплеї з'явиться повідомлення Зверніть увагу: Щоб скасувати встановлений час готування, натискайте про те, що виконання функції завершено. Поверніть ручку вибору, кнопку... -
Page 44: Пошук Та Усунення Несправностей
Запобіжний пристрій дверцят можна зняти, виконавши послідовність дій, показану на малюнках (див. мал. 2). * Доступно лише на деяких моделях Завантажте повний «Довідник із використання» з веб-сайту docs.whirlpool.eu для отримання додаткової інформації про ваш виріб З правилами, стандартною документацією та додатковою інформацією про виріб можна...
Need help?
Do you have a question about the OMR58HU1B and is the answer not in the manual?
Questions and answers