Table of Contents
Advertisement
Available languages
Available languages
Quick Links
Advertisement
Table of Contents

Related Manuals for Gyration Cyberview2000


Summary of Contents for Gyration Cyberview2000
- Page 1 Cyberview2000 Smart PTZ Camera User manual...
-
Page 2: Packing List
Packing list 1. Camera*1 2. Support bracket kit*1 3. Power adapter*1 4. Mounting screw kit*1 5. USB charging cable*1 6. Operation instruction*1... -
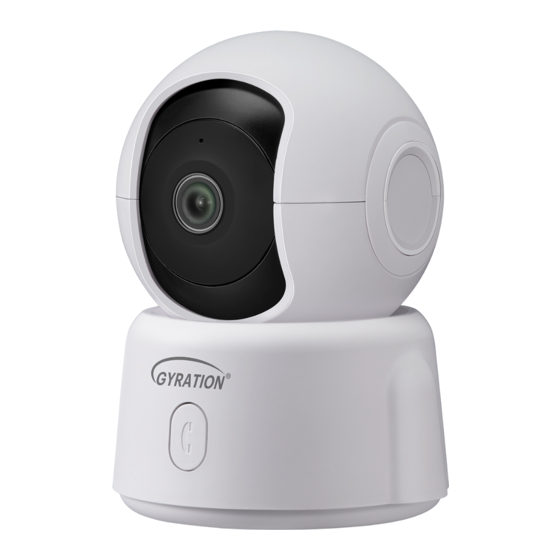
Page 3: Product Appearance
Product appearance Indicator light Lens Microphone USB Type-C Port Micro-SD card slot Reset button... -
Page 4: Quick Start
Quick start The wireless smart camera supports DC power supply. 1. Download and install the App The wireless smart battery camera supports Android and iOS App. For your best experience, please scan the QR code below with your mobile phone, install the app, and follow the instruction to complete the user registration. - Page 5 Bind the camera 1) Click the "Add Now" button in the app, press and hold the camera switch button for 3 seconds to turn on the camera, and the app will automatically search for devices that are on and not bound. Select the device you want to bind in the search results for the next step.
- Page 6 Please make sure that the Wi-Fi meets the requirements, click Next after completion, and the app can try to connect the camera to the Wi-Fi. 3) After a while, the camera will play a sound indicating that the connection is successful. At this point, please set a name for the camera on the app and select the location where you want to place the camera.
-
Page 7: Install The Camera
Install the camera (1) Select a good spot for your camera Select a good spot for your camera, please install the camera in a position where its view is not blocked and ensure that it is within the coverage of the WiFi network. (2) Install the bracket Fix the camera to the desired location. - Page 9 Unbinding Device If this device has been connected to other Wi-Fi or has been bound by other users, you need to unbind the device before rebinding. Device unbinding method: After the device is powered on and selfchecked, press and hold the reset button of the device for 5 seconds, the device will be reset and unbound.
- Page 10 Share the camera 1) Find the camera you want to share on the App homepage or camera setting page. Click the share button and enter the sharing page. 2) Click "Invite",and a QR code will be generated for sharing. 3) For the members you need to share, find "Add a Friend's Camera" on the "User"...
- Page 11 4) Scan the QR code on your mobile phone, and you will receive the confirmation notification after success. The sharing will be completed after you agree.
-
Page 12: Product Specification
Product specification Item Specification Horizontal angle 0° ~ 355° Vertical angle -20° ~ 60° Field of view 63° horizontal, 50° vertical Image resolution 1920 X 1080 Video bit rate Adaptive Image coding standard H.264 Audio Duplex two-way audio intercom Storage media Micro SD card (Up to 128GB) Night vision light source Infrared light... -
Page 13: Regulatory Compliance
Regulatory Compliance FCC Statements This device complies with Part 15 of the FCC Rules. Operation is subject to the following two conditions: (1) this device may not cause harmful interference, and (2) this device must accept any interference received, including interference that may cause undesired operation. -
Page 14: Rf Radiation Exposure Statement
RF Radiation Exposure Statement: This equipment complies with FCC radiation exposure limits set forth for an uncontrolled environment. This equipment should be installed and operated with a minimum distance of 20cm between the radiator and any part of your body. LVD/EMC Directive This product complies with the European Low Voltage Directive 2014/35/EU and EMC Directive 2014/30/EU. - Page 15 Disclaimer and Safety Warnings Copyright Statement No part of this manual may be copied, reproduced, translated or distributed in any form by any means without prior content in writing from our company (referred to as us hereafter). The product described in this manual may contain proprietary software owned by our company and its possible licensors.
- Page 16 Power Requirements Installation and use of the device must be in strict accordance with your local electrical safety regulations. Use a UL certified power supply that meets LPS requirements if an adapter is used. Use the recommended cordset (power cord) in accordance with the specified ratings.
- Page 17 Cyberview2000 Caméra PTZ intelligente Manuel de l'Utilisateur...
-
Page 18: Liste De Colisage
Liste de colisage 1. Caméra*1 2. Kit de support*1 3. Adaptateur secteur*1 4. Kit de vis de montage*1 5. Câble de chargement USB*1 6. Instructions d’utilisation*1... -
Page 19: Apparence Du Produit
Apparence du produit Voyant Lentille Microphone USB Type-C Port Fente pour carte Micro-SD Bouton de réinitialisation... -
Page 20: Démarrage Rapide
Démarrage rapide La caméra à intelligente sans fil prend en charge l’alimentation CC. 1. Téléchargez et installez l’application La caméra de batterie intelligente sans fil prend en charge les applications Android et iOS. Pour votre meilleure expérience, veuillez scanner le code QR ci-dessous et suivre les instructions pour terminer l’inscription de l’utilisateur. - Page 21 Configurer la caméra 1) Cliquez sur le bouton « Ajouter maintenant » dans l’application, appuyez et maintenez l’appareil photo enfoncé basculez pendant 3 secondes pour allumer l’appareil photo, et l’application recherchez automatiquement les appareils qui sont allumés et non liés. Sélectionnez l’icône appareil que vous souhaitez lier dans les résultats de la recherche pour l’étape suivante.
- Page 22 de l’entreprise. Veuillez vous assurer que le Wi-Fi répond aux normes , cliquez sur Suivant après l’achèvement et l’application peut essayer de connectez l’appareil photo au Wi-Fi. 3) Après un certain temps, la caméra émettra un son indiquant que le La connexion est réussie. À ce stade, veuillez définir un nom pour la caméra sur l’application et sélectionnez l’emplacement où...
-
Page 23: Installer La Caméra
Installer la caméra (1) Sélectionnez un bon endroit pour votre appareil photo Sélectionnez un bon endroit pour votre caméra, veuillez installer la caméra dans une position où sa vue n’est pas bloquée et assurez-vous qu’elle est dans la couverture du réseau WiFi. (2) Installez le support Fixez la caméra à... - Page 25 Dispositif de déliaison Si cet appareil a été connecté à un autre Wi-Fi ou a été lié par d’autres utilisateurs, vous devez dissocier l’appareil avant de le relier. Méthode de dissociation de l’appareil: Une fois l’appareil allumé et autovérifié, appuyez sur le bouton de réinitialisation de l’appareil et maintenez-le enfoncé...
- Page 26 Partager la caméra 1) Trouvez l’appareil photo que vous souhaitez partager sur la page d’accueil de l’application ou la page des paramètres de l’appareil photo. Cliquez sur le bouton de partage et accédez à la page de partage. 2) Cliquez sur « Inviter », et un code QR sera généré pour le partage. 3) Pour les membres que vous devez partager, trouvez « Ajouter la caméra d’un ami »...
- Page 27 4) Scannez le code QR sur votre téléphone portable et vous recevrez la notification de confirmation après le succès. Le partage sera terminé après votre accord.
-
Page 28: Spécifications Du Produit
Spécifications du produit Article Spécification Angle horizontal 0° ~ 355° Angle vertical -20° ~ 60° Champ de vision 63° horizontal, 50° vertical Résolution de l’image 1920 X 1080 Débit binaire vidéo Adaptatif Norme de codage d’image H.264 Audio Interphone audio bidirectionnel duplex Supports de stockage Carte Micro SD (jusqu’à... -
Page 29: Conformité Réglementaire
Conformité réglementaire Déclarations de la FCC Cet appareil est conforme à la partie 15 des règles de la FCC. Le fonctionnement est soumis aux deux conditions suivantes : (1) cet appareil ne doit pas causer d’interférences nuisibles, et (2) cet appareil doit accepter toute interférence reçue, y compris les interférences pouvant provoquer un fonctionnement indésirable. - Page 30 Énoncé sur l’exposition aux rayonnements RF : Cet équipement est conforme aux limites d’exposition aux rayonne- ments de la FCC établies pour un environnement non contrôlé. Cet équipement doit être installé et utilisé avec une distance minimale de 20 cm entre le radiateur et toute partie de votre corps. LVD/EMC Directive Ce produit est conforme à...
- Page 31 Avis de non-responsabilité et avertissements de sécurité Déclaration de droit d’auteur Aucune partie de ce manuel ne peut être copiée, reproduite, traduite ou distribuée sous quelque forme que ce soit par quelque moyen que ce soit sans contenu écrit préalable de notre société (ci-après dénommée nous). Le produit décrit dans ce manuel peut contenir un logiciel propriétaire appartenant à...
- Page 32 Exigences en matière d’alimentation Utilisation de la batterie L’installation et l’utilisation de l’appareil doivent être strictement conformes aux réglementations locales en matière de sécurité électrique. Utilisez un bloc d’alimentation certifié UL qui répond aux exigences LPS si un adaptateur est utilisé. Utilisez le cordon recommandé...
Need help?
Do you have a question about the Cyberview2000 and is the answer not in the manual?
Questions and answers