
Subscribe to Our Youtube Channel
Related Manuals for Everbilt 1007122486


Summary of Contents for Everbilt 1007122486
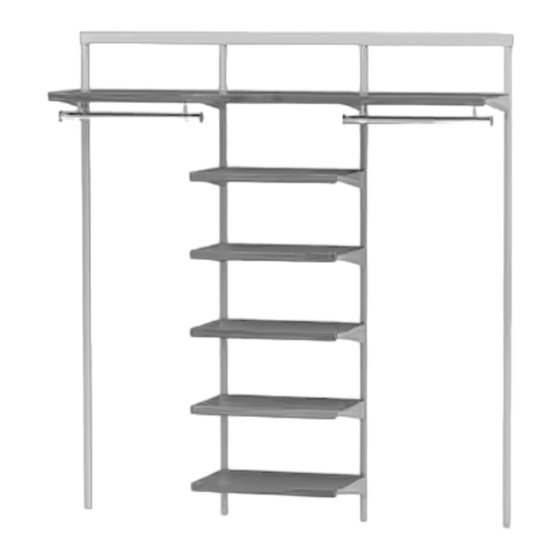
- Page 1 73.5 in. Double Long Hang with Six Shelf Stack SKU#: 1007122486 / 1007122493 / 1007122499...
- Page 2 INSTRUCTION TABLE OF CONTENTS: • Quick Start Guide • 73.5 in Long Hang with Shelf Stack – Base Kit • 24 in. White / Gray / Birch Décor Shelf Cover...
- Page 3 Quick Start Guide Look for packet in this ‘BASE KIT’ box labeled “Modular Configuration Guide”, find your layout in the packet, and make sure you received the correct number of boxes and contents to build your specific layout. 1. First, find the “Assembly and Installation” instructions for building your ‘BASE KIT’...
- Page 4 THANK YOU We appreciate the trust and con dence you have placed in Everbilt through the purchase of this closet organizer. We strive to continually create quality products designed to enhance your home. Visit us online to see our full line of products available for your home improvement needs. Thank you for...
-
Page 5: Table Of Contents
Table of Contents Table of Contents............2 Installation ..............6 Install Hang Tracks..............6 Safety Information............2 Install Upper Vertical Rails............6 Product Speci cations..........2 Install Vertical Rail Joiners and Lower Vertical Rails....7 Warranty.................2 Install Brackets................8 Pre-installation...............3 Install Shelves................9 Planning Installation...............3 Install closet rod brackets and closet rods.......9 Tools Required................3 Install Closet Rod End Caps............10 Hardware Package Contents...........3... -
Page 6: Pre-Installation
Pre-installation PLANNING INSTALLATION 1. Measure the closet width and plan the layout. See the “Plan Your Closet Layout” section for illustration examples. 2. Select the correct hardware for assembly. See "choose your hardware" section below. 3. Use stud nder to locate the studs and mark. It is recommended to mount hang tracks onto studs. 4. -
Page 7: Component Package Contents
Pre-installation (continued) CHOOSE YOUR HARDWARE DRYWALL Drill a 1/2 in. hole in the drywall. If Insert bolt through hang track (or Allow the toggle (DD) to spring Screw the bolt (CC) until tight to you hit a stud during drilling, use vertical rail/vertical rail joiner) then apart behind the drywall. -
Page 8: Plan Your Closet Layout
Plan Your Closet Layout When planning your installation, measure the dimensions of your installation location. For speci c designs refer to separate Modular Closet System Con guration Guide. TIP: Shelf height can be adjusted per your personal needs. HOMEDEPOT.COM Please contact 1-800-305-1726 for further assistance. -
Page 9: Installation
Installation Install Hang Track □ Use a stud finder to locate and mark your studs if installing on drywall. □ Place the longest hang track (C) flush against the wall, the bottom of the track should be 84 in. off the ground. The thicker side should be on top, closest to the ceiling. -
Page 10: Install Vertical Rail Joiners And Lower Vertical Rails
Installation (continued) Install Vertical Rail Joiners and Lower Vertical Rails SCENARIO 1: STUD □ Push vertical rail joiner (I) up into upper Hole B vertical rail (A) as shown, secure the vertical rail joiner (I) on hole B with panhead screw (#12 x 2 in.) (see Fig. -
Page 11: Install Brackets
Installation (continued) SCENARIO 3: DRYWALL □ Tear the drilling template box (P) according to the dashed line (see Fig. 14). □ Align the drilling template box (P) as a Hole B locator as shown and mark the holes on the wall (see Fig. 15). Hole C Hole B □... -
Page 12: Install Shelves
Installation (continued) Install Shelves □ Make sure your shelves (G) t your closet layout design. □ Hold the shelf’s (G) front rod, let it t into the bracket’s (H) front notches as the diagram shows, then push down the shelf’s rear part allowing the shelf’s rear horizontal rod to lock into the back clip of bracket. -
Page 13: Install Closet Rod End Caps
Installation (continued) Install Closet Rod End Caps □ Measure length of closet rod assembly needed based on your closet layout. □ Push end caps (N) into both ends of closet rod (L) (see Fig. 9). Fig. 9 Fig. 8 □ Position closet rod assembly at desired location and snap into closet rod brackets (M) (see Fig. - Page 14 Questions, problems, missing parts? Before returning to the store, call Everbilt Customer Service 8 a.m. – 7 p.m., EST, Monday-Friday, 9 a.m. – 6 p.m., EST, Saturday 1-800-305-1726 HOMEDEPOT.COM Retain this manual for future use.
- Page 15 Item #1006-841-112 / 1006-841-104 / 1006-841-024 Assembly and Installation Guide Model #90442 / 90444 / 90446 24 in. White / Gray / Birch Décor Shelf Cover (2-Pack) PARTS LIST Part Description Quantity B (Right) 24 in. Décor Shelf Cover Décor Shelf Cover Endcap Set (both ends) B (Left) Installation REMOVE PROTECTIVE FILM (TWO SIDES) BEFORE INSTALLATION.
Need help?
Do you have a question about the 1007122486 and is the answer not in the manual?
Questions and answers