
Subscribe to Our Youtube Channel
Related Manuals for ROBINHOOD WMFLA75W


Summary of Contents for ROBINHOOD WMFLA75W
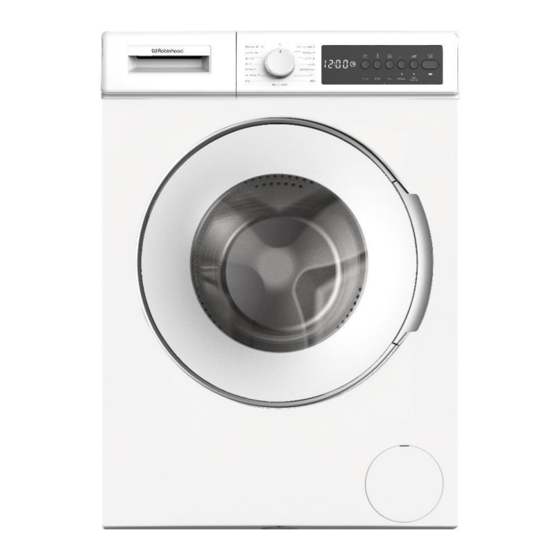
- Page 1 Installation and Operating Instructions Issue 1 DESCRIPTION ROBINHOOD FRONT LOAD WASHING MACHINE 7.5KG WHITE MODEL NUMBER : WMFLA75W *Actual unit may vary from above model picture...
-
Page 2: Table Of Contents
Contents Congratulations! Thank you for choosing one of our appliances. Before you use the appliance, we strongly recommend that you read through the whole user manual which provides important safety instructions and description of the product and the proper use of its functions. To avoid the ever‐present risks involved with using an electrical appliance it is vital that the oven is installed correctly and that you read the safety instructions carefully to avoid misuse and hazards. -
Page 3: Important Safety Instructions
Important Safety Instructions IMPORTANT: Read the assembly instruction section and safety precautions of this booklet carefully before removing the contents of this carton. Operating voltage / frequency 220-240V,50Hz Total current (A) Water pressure (Mpa) Maximum 1 Mpa / Minimum 0.1Mpa Total power (W) 2200 Maximum washing capacity (dry laundry) (kg) - Page 4 Important Safety Instructions • Unplug your Washing Machine and switch off the water supply if the Washing Machine is left unused for a long time. We also recommend that you leave the door open to prevent buildup of humidity inside the Washing Machine. •...
- Page 5 Important Safety Instructions • To avoid risk of injury, please take care when moving your Washing Machine. It is heavy and we recommend that a minimum of two people move your Washing Machine. CHILD SAFETY • Do not allow children to play with the machine. •...
-
Page 6: Technical Specifications
Technical Specifications Maximum washing capacity (dry laundry) (kg) Spin speed (rpm) 1400 Number of programmes Operation voltage / Frequency (v/hz) 220-240 / 50 Water pressure (mpa) Maximum: 1 Minimum: 0.1 Dimensions (HxWxD) (mm) 845x596x557 Total Current (A) Total Power (W) 2200 1) Electronic Display 6) Pump Filter Cover... -
Page 7: Installation Instructions
Installation Instructions Your machine must only be installed by an authorized service company. REMOVE THE TRANSIT SCREWS 1. Before operating your machine, you must remove the transit screws from the rear of the machine. 2. Loosen the transit screws by rotating anti-clockwise with an appropriate spanner. 3. - Page 8 Installation Instructions PLACING THE MACHINE AND ADJUSTING THE FEET 1. Do not install your machine on a carpet or surface that will block ventilation at the base. • To ensure silent and vibration-free operation of your machine, install it on a firm surface. •...
- Page 9 Installation Instructions Water Inlet Connection 1- Your machine may have either a single water inlet connection (cold) or double water inlet connection (hot and cold) depending on the machine specifications. The white capped hose should be connected to cold water inlet and red capped hose to the hot water inlet (if applicable).
- Page 10 Installation Instructions Water Draining Connection • Connect the water drain hose to a standpipe or to the outlet elbow of a household sink, using additional equipment. • • Never attempt to extend the water drain hose. • Do not put the water drain hose from your machine into a container, bucket or bathtub. •...
-
Page 11: Operating Instructions
Operating Instructions Control Panel Overview 1. Detergent Drawer. 2. Program Dial. 3. Electronic Display. Detergent Drawer General View 1. Liquid Detergent Attachments (*) 2. Main Wash Detergent Compartment 3. Softener Compartment 4. Pre-Wash Detergent Compartment 5. Powder Detergent Levels 6. Powder Detergent Scoop (*) (*) Specifications may vary depending on the machine purchased. - Page 12 Operating Instructions Sections MAIN WASH DETERGENT COMPARTMENT: This compartment is for liquid or powder detergents or limescale remover. The fluid detergent level plate is supplied inside your machine. (*) (*) Specifications may vary depending on the machine purchased. FABRIC CONDITIONER, STARCH, DETERGENT COMPARTMENT: This compartment is for softeners, conditioners or starch.
- Page 13 Operating Instructions Program Dial To select the desired program, turn the program dial either clockwise or anti-clockwise until the marker on the program dial points to the chosen program. Make sure that the program dial is set exactly to the program you want. Electronic Display Electronic Display Digital Display...
- Page 14 Operating Instructions Using Your Washing Machine PREPARING YOUR LAUNDRY 1- Follow the instructions given in the care labels on the clothing. • Separate your laundry according to type (cotton, synthetic, sensitive, wool etc.), washing temperature (cold, 30°, 40°, 60°, 90°) and the degree of dirtiness (slightly stained, stained, highly stained). 2- Never wash colored and white laundry together.
- Page 15 Operating Instructions Washing Symbols Placing Laundry into the Machine • Open the loading door of your machine. • Check inside the drum. There may be laundry left inside from previous washes. If there is, empty your machine before selecting a program. •...
- Page 16 Operating Instructions The following table shows approximate weights of typical laundry items: LAUNDRY TYPE WEIGHT (gr) Towel Linen Bathrobe 1200 Quilt cover Pillow slip Underwear Tablecloth • Load each item of laundry separately. • Check that no items of laundry are trapped between the rubber seal and the door. •...
- Page 17 Operating Instructions Operating Your Machine 1- Plug your machine in to the mains supply. 2- Turn on the water supply. • Open the machine door. • Evenly spread your laundry in the machine. • Gently push the door until it clicks shut. Selecting a Programme Use the program tables to select the most appropriate program for your laundry.
- Page 18 Operating Instructions 2. Spin Speed Selection When you select a program, the maximum spin speed is automatically selected. To adjust the spin speed between the maximum spin speed and the cancel spinning option (- - -), press the Spin speed button until the desired speed is displayed.
- Page 19 Operating Instructions 4. Anti- Allergic(*) You can add an additional rinse operation to your laundry using this additional function. Your machine will carry out all rinsing steps with hot water. We recommend this setting for laundry worn on delicate skin, baby clothes and underwear.
- Page 20 Operating Instructions 8. Rapid Wash(*) You can wash your laundry in a shorter time, using less energy and water by selecting this additional function. We recommend that you only use this option if you are washing less than half the maximum dry load for the selected program.
- Page 21 Operating Instructions Start/Pause button By pressing on the Start/Pause button, you may start the program you have selected or suspend a running program. If you switch your machine to the standby mode, the Start/Pause LED on the electronic display will blink. Child Lock The Child Lock function allows you to lock the buttons so that the wash cycle you have chosen cannot be changed unintentionally.
- Page 22 Operating Instructions Program End Your machine will stop by itself as soon as the program you have selected finishes. • END will flash on the electronic display. • You can open the machine’s door and remove the laundry. • Leave the door of your machine open to allow the inner part of your machine to dry. •...
- Page 23 Operating Instructions Programme Table Programme Laundry type / Descriptions Very dirty, cotton and flax textiles. (Underwear, COTTON *60-90-80-70-40 linen, tablecloth, towel (maximum 4,0 kg), bedclothes, etc.) Dirty cotton and flax textiles. (Underwear, linen, COTTON 40°C tablecloth, towel (maximum 4,0 kg), bedclothes, etc.) Dirty cotton and flax textiles.
- Page 24 Operating Instructions (*) Washing water temperature of the program is the factory default. (**) If your machine has the rapid wash auxiliary function, you can enable the quick wash option on the display panel and load the machine with 2 kg or less laundry to wash it in 30 minutes. (***) Due to the short washing time of this program, we recommend that less detergent is used.
-
Page 25: Cleaning And Maintenance
Cleaning and Maintenance WARNING: Turn your mains power supply off and remove the plug from the socket before carrying out maintenance and cleaning your machine. Turn off the water supply before starting maintenance and cleaning your machine. CAUTION: Do not use solvents, abrasive cleaners, glass cleaners or all-purpose cleaning agents to clean your Washing Machine. - Page 26 Cleaning and Maintenance The pump filter system in your Washing Machine prolongs the life of the pump by preventing lint from entering your machine. We recommend that you clean the pump filter every 2 months. The pump filter is located behind the cover on the front-lower right corner. To clean the pump filter: 1- You may use the washing powder spade (*) supplied with your machine or liquid detergent level plate to open the pump cover.
- Page 27 Cleaning and Maintenance • Remove the detergent drawer and disassemble the flush stopper. Clean thoroughly to completely remove any softener residue. Refit the flush stopper after cleaning and check that it is seated properly. • Rinse with a brush and lots of water. •...
-
Page 28: Troubleshooting
Troubleshooting Repair of your machine should be carried out by an authorized service company. If your machine requires repair or if you cannot solve an issue with the information provided below, then you should: • Unplug your machine from the mains power supply. •... - Page 29 Troubleshooting FAULT POSSIBLE CAUSE TROUBLESHOOTING Increase the amount of detergent following the Hard water. manufacturer’s instructions. Unsatisfactory washing Your laundry is too tightly packed result. together in the drum. Check that your laundry is spread out. As soon as the machine is Check that the drain hose is at a suitable height.
-
Page 30: Warranty Certificate (New Zealand)
The following conditions apply in respect of the warranty given in this certificate: 1. Monaco Corporation Limited (“Monaco”) warrants the following Robinhood products against manufacturing defects and faulty materials, under normal use and subject to the exclusions in this certificate, for a period of: Rangehood, Ovens, Cooktops, Dishwashers - 24 months from date of original purchase for domestic use. -
Page 31: Warranty Certificate (Australia)
• The product was used outdoors. All Robinhood Rangehoods are suitable for indoor use only and not suitable over BBQs or charcoal cookers designed for outdoor use. In addition, this warranty does not extend to damage or defects which in our opinion, directly or indirectly arise from or are due to: exposing the product to acidic or corrosive materials or chemicals such as dyes, solvents, denture cleaner or acetone;...
Need help?
Do you have a question about the WMFLA75W and is the answer not in the manual?
Questions and answers