Table of Contents
Advertisement
Quick Links
Advertisement
Table of Contents

Related Manuals for Reyco Granning IFS 1660S3


Summary of Contents for Reyco Granning IFS 1660S3
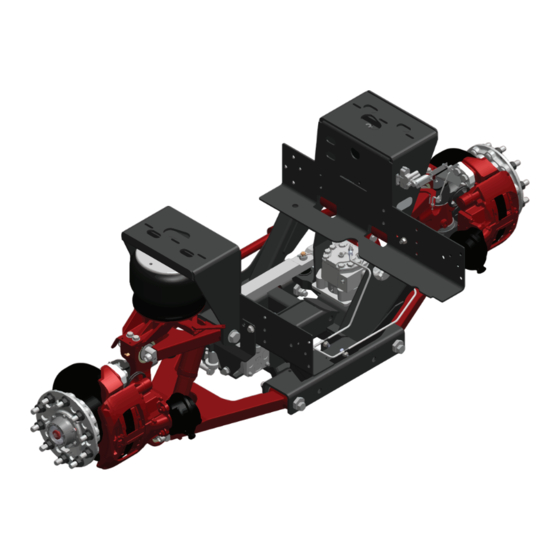
- Page 1 Motorhome Suspensions Owner’s Manual IFS 1660S3|1700S3|1800S3|2000S3 Independent Front Suspension Document #: D710551 Revision: J Revision Date: 05/2022 Reyco Granning Suspensions 1205 Industrial Park Drive Mount Vernon, MO 65712 Phone: 417.466.2178 Fax: 833.896.6997 www.reycogranning.com...
- Page 2 Page Left Blank Intentionally...
-
Page 3: Table Of Contents
TABLE OF CONTENTS Introduction ..........................Service Notes ..........................Identi cation ..........................Model Options .......................... Vehicle Towing Information ....................9 Maintenance Schedule ......................10 Maintenance Record ........ - Page 4 TABLE OF CONTENTS Inspecting Control Arm Bushings ..................Inspecting Tie Rod Ends ....................... 39 Inspecting the ABS Sensor and Tone Ring ................39 Inspecting the Shock Absorber .................... Inspecting the Air Spring and Height Control Valve ........
- Page 5 TABLE OF CONTENTS Removal ..........................59 Installation ..........................Replacing the Idler Arm Bearings (1660S3&1700S3) ............Removal ..........................60 Installation ..........................Replacing the Upper and Lower Control Arm Bushings ........
- Page 6 TABLE OF CONTENTS Installation ..........................Replacing the Sway Bar and Components ................. 74 Vertical Linkage Removal ..................... 74 Vertical Linkage Installation ....................74 Sway Bar Removal .........................
-
Page 7: Introduction
INTRODUCTION Introduction Service Notes ® Reyco Granning This Service Manual describes the correct service and repair procedures for the IFS1660S3 Independent Front Suspension model with 16,600 lbs, the IFS1700S3 Independent Front Suspension Model with 17,000 lbs, the IFS1800S3 Independent Front Suspension Model with 18,000 lbs and the IFS2000S3 Independent Front Suspension Model with 20,000 lbs Gross Axle Weight Rating (GAWR). -
Page 8: Identi Cation
-frame assembly (Figure 1). The serial number is used by ® Reyco Granning for control purposes and should be referred to when servicing suspension or requesting technical support (Figure 2). Figure 1 - Suspension Identification Location... -
Page 9: Model Options
MODEL OPTIONS Model Options Orig inal Model Number Format R ev. 1 GAWR(lb) Model Model ID# IFS1660S3 IFS1660S3 -[Options] 16,600 IFS1800S3 IFS1800S3 -[Options] 18,000 IFS2000S3 IFS2000S3 -[Options] 20,000 Original Model Options Key R ev. 1 Disc Height Control Sensor Height Sway Bilstein Koni... - Page 10 MODEL OPTIONS Current Model Number Format R ev. 3 GAWR(lb) Model Model ID# IFS1701 S3 IFS17 01S3 -##### 17,000 IFS20 S3 IFS20S3 -##### 20,000 Current Model Number Format R ev. 3 Model ID# Su x Position 3rd and 4 th - 5th –...
-
Page 11: Vehicle Towing Information
VEHICLE TOWING INFORMATION Vehicle Towing Information If a vehicle is disabled and needs to be towed by the front end to service center, check the OEM/Coach Builder towing procedures for the recommended method. Check with local authorities and Department of Transportation (DOT) for permissible towing methods before towing. -
Page 12: Maintenance Schedule
MAINTENANCE SCHEDULE Maintenance Schedule GENERAL MAINTENANCE SERVICE TO BE PERFORMED MILEAGE IN THOUSANDS Check axial endplay Stee ring Arm Ball Joints Inspect for ruptured seals Check that cotter pin is installed Check bolt torque Control Arm Bushings Inspect for contact between control arm and mount Inspect for bushing wear Inspect ball socket endplay... -
Page 13: Maintenance Record
MAINTENANCE REORD Maintenance Record Name of Owner Address of Owner Date of Purchase Name and Address of Dealer Model of Vehicle Vehicle Identification Number Suspension Model Number: Suspension Serial Number: (See Serial Tag) Inspection and Maintenance Item Date Mileage Service Performed - 11 -... -
Page 14: Part List
Tie Rod Assembly (RH) * Sway Bar Units (S) have a single (L) HCV/HCS, Non Sway Bar Units (N) have Dual (R&L) HCV/HCS ® Reyco Granning assumes no responsibility for ride control on units built without shocks, C ontact the Chassis Builder for shock specification and support. -
Page 15: Unit Assembly - Ifs1800S3 & Ifs2000S3
* Sway Bar Units (S) have a single (L) HCV/HCS, Non Sway Bar Units (N) have Dual (R&L) HCV/HCS ® Reyco Granning assumes no responsibility for ride control on units built without shocks, Contact the Chassis Builder for shock specification and support. -
Page 16: Unit Assembly - Ifs1701S3
*Sway Bar Units (S) have a sing le (L) HCV/HCS, Non Sway Bar Units (N) have Dual (R&L) HCV/HCS ® Reyco Granning assumes no responsibility for ride control on units built without shocks, Contact the Chassis Builder for shock specification and support. -
Page 17: Unit Assembly - Ifs20S3
*Sway Bar Units (S) have a single (L) HCV/HCS, Non Sway Bar Units (N) have Dual (R&L) HCV/HCS ® Reyco Granning assumes no responsibility for ride control on units built without shocks, Contact the Chassis Builder for shock specification and support. -
Page 18: Control Arm Components
PARTS LIST Control Arm Components Control Arm Components Item Part No. Description Item Part No. Description 703182 -01 Upper Control Arm Assembly* Socket Set Screw 10 -24 x .38” 705849 -01 Upper Control Arm Assembly** 701683 -04 Hardened Flat Washer, 7/8” 700944 -01 Lower Control Arm Assembly* 100039 -P1... -
Page 19: Control Arm Components Subassemblies
PARTS LIST Control Arm Components Subassemblies Control Arm Assemblies – All Revs IFS1660S3/IFS1700S3/IFS1701 IFS1800S3/IFS2000S3/IFS20S3 Item Part No. Description Description Item Part No. 703181 -01 Upper Control Arm (LH)/ (RH ) 705850 -01 Upper Control Arm (LH)/ (RH ) 700939 -01 Lower Control Arm (LH)/ (RH ) 705848 -01... -
Page 20: Steering Components (Ifs1660S3/Ifs1700S3)
PARTS LIST Steering Components (IFS1660S3/IFS1700S3) Unit Assembly REV 1 and 2 Refer to model option identi cation section for correct REV Steering Components (IFS1660S3/IFS1700S3) Item Part No. Description Item Part No. Description 714691 -01 * TRW TAS85 Steering Gearbox 705620 -01 Idler Arm Assembly (Includes Items Below) 714693 -01** TRW TAS85 Steering Gearbox... -
Page 21: Steering Components (Ifs1800S3/Ifs2000S3)
PARTS LIST Steering Components (IFS1800S3/IFS2000S3) Unit Assembly REV 1 and 2 Refer to model option identi cation section for correct REV Steering Components (IFS1800S3/IFS2000S3) Item Part No. Description Item Part No. Description 714692 -01* TRW TAS85 Steering Gearbox (Master) 709388 -01 Hex Head Bolt 3/4 -16 x 1.50 GR 8 ZN 714694 -01** TRW TAS85 Steering Gearbox (Master) 8223752... -
Page 22: Steering Components Ifs1701S3
PARTS LIST Steering Components (IFS1701S3) Unit Assembly REV Refer to model option identi cation section for correct REV Steering Components IFS1701S3 Item Part Number Description Item Part Number Description TRW TAS85 Steering Gearbox 705382 -01 40mm Ball Joint 710135 -01 25.2 Bleed Line Assembly 7348... -
Page 23: Steering Components (Ifs20S3)
PARTS LIST Steering Components (IFS20S3) Unit Assembly REV Refer to model option identi cation section for correct Steering Components IFS 20 S3 Item Description Part Number Description Item Part Number TRW TAS85 Steering Gearbox (Master) Hex Head Bolt 3/4 -16 x 2.00 GR 8 710135 -01 8223752 TRW RCS85 Steering Gearbox (Slave) -
Page 24: Air Spring And Shock Components (Ifs1800S3/Ifs2000S3)
Hex Head Bolt 3/4 -10 x 4.00 GR 8 ZN 8131017 Flat Washer 3/4" .812 x 1.469 x .134 ZN ® * Reyco Granning assumes no responsibility for ride control on units built without shocks, Contact Chassis Builder shock speci cation and support IFS1800S3 &... -
Page 25: Air Spring And Shock Components (Ifs1701S3/Ifs20S3)
Flanged Lock Nut 3/4 -10 GR G ZN Hex Head Bolt 3/4 -10 x 4.00 GR 8 ZN 100727 -P1 ® * Reyco Granning assumes no responsibility for ride control on units built without shocks, Contact Chassis Builder for shock speci cation and support IFS20S3 Item Part No. -
Page 26: Hcv Assembly Components (All)
PARTS LIST HCV Assembly Components (All) HCV Assembly Components (All) Refer to your unit/ model for identi cation of correct HCV Item Part Number Description Item Part Numbers Description HCV Assembly (Std Single or Dual)* Lock Ø 1/4 705275 -01/02 100703 -P1 Electronic Sensor (Hadley Single or Dual)* Straight HCV Pin Ø... -
Page 27: Sway Bar Assembly Components (All)
PARTS LIST Sway Bar Assembly Components (All) Sway Bar Assembly Components (All) Item Part No. Description Item Part No. Description 703124 -01 Sway Bar Flanged Hex Bolt 1/2 -13 x 1. 75 GR 8 ZN 703165 -01 Sway Bar to UCA Mount Assembly 702898 -01 Washer, Cut, Sway Bar 89422299 Lock Nut 7/16 -14 UNC GR 8... -
Page 28: Disc Brake Components (Protorq Spindle Nut)
PARTS LIST Disc Brake Components (ProTorq Spindle Nut) Disc Brake Components ( ProTorq Spindle Nut ) © Started in production approx. (08/2009). Refer to your unit/ model for identi cation of correct wheel end Item Part No. Description Item Part No. Description Flange Head Bolt 5/16 -18x.75, Gr. -
Page 29: Disc Brake Components (Integral Spindle Nut)
PARTS LIST Disc Brake Components (Integral Spindle Nut) Disc Brake Components ( Integral Spindle Nut ) Started in production approx. (02/2020). Refer to your unit/ model for identi cation /veri cation of correct wheel end Item Part No. Description Item Part No. -
Page 30: King Pin Components (All)
PARTS LIST King Pin Components (All) King Pin Components (All) Item Part No. Description Item Part No. Description Shim, .005” thick Cap, King Pin 705011 -07 705011 -17 Shim, .010” thick O-Ring 705011 -08 705011 -18 Shim, .020” thick King Pin 705011 -09 705011 -19 Assembly, Bearing, Thrust... -
Page 31: Steering Knuckle Carrier Components (All)
PARTS LIST Steering Knuckle Carrier Components (All) Steering Knuckle Carrier Components (All) Part No. Description Item Part No. Description 705632 -01 Machining, Carrier (LH)* 702620 -01 Retaining clip Machining, Carrier (RH)* Spacer 705632 -02 702622 -01 Machining, Carrier (LH)** Shim, .004 705852 -01 702623 -01 Machining, Carrier (RH)**... -
Page 32: Lubrication
LUBRICATION Lubrica tion Lubricant Speci cations and Intervals Lubricant Speci cations and Intervals COMPONENT SERVICE INTERVAL CHANGE INTERVAL LUBRICANT SPECIFICATION Multi -Purpose Chassis Grease Ball Studs on Ends of Tie Whichever comes rst: Every oil Premium Multi -Purpose Chassis Rods change or every 6 months Grease NLGI Grade 2 Multi -Purpose Chassis Grease... -
Page 33: Carrier Bearing And King Pin
LUBRICATION NOTE: Hand Grease Carriers . Grease Carrier Bearing and King Pin may not discharge due to hydraulic Apply lubricant to both upper and lower shuto carrier bearings and kingpin bushings until new lubricant d ischarges from the carrier bearing seals and in between the steering knuckle kingpin housing and carrier . -
Page 34: Steering Gear Hydraulic Oil
LUBRICATION Steering Gear Hydraulic Oil Steering Gear Input Shaft Refer to Chassis Builder’s Reference TRW Service Bulletin documentation for complete #TAS -103 information on the hydraulic Review lubricant speci cation and system and requirements. interval requirements before NOTE: When changing to di erent servicing. -
Page 35: Wheel Bearings
LUBRICATION achieved. (Figure 5) . Add oil Wheel Bearings slowly since the heavy weight oil Review lubricant speci cation and will settle slowly in the hub. (Note: interval requirements before The hub cap window can only be servicing. cleaned with mild soap and water. Park Vehicle on a level surface (side Aromatic solvents should not be to side) when checking the hub oil... -
Page 36: Troubleshooting
TROUBLESHOOTING Troubleshooting SYMPTOMS POSSIBLE CAUSES REMEDIES Tires have incorrect pressure Put speci ed air pressure in tires Tires wear out quickly or Tires out of balance Balance or replace tires have uneven tire tread wear Incorrect toe -in setting Adjust toe -in to speci ed setting Note: Wear pattern will indicate possible cause(s). - Page 37 TROUBLESHOOTING SYMPTOMS POSSIBLE CAUSES REMEDIES Vehicle overloaded or unevenly Check wheel loads and correct as loaded driver side to passenger side needed Improper (mismatched) tires and Install correct tire and wheel wheels combination Tires have incorrect pressure Put correct air pressure in tires based on wheel load Incorrect toe -in setting Adjust toe -in to speci ed setting...
- Page 38 TROUBLESHOOTING SYMPTOMS POSSIBLE CAUSES REMEDIES Grease, oil or dirt on brake linings Replace brake linings as required Deglaze brake linings by burnishing Brake linings are glazed or replace as required Brake linings are not a balanced set, Replace brake linings as required di erent friction codes or lining brand Loose or broken brake linings...
- Page 39 TROUBLESHOOTING SYMPTOMS POSSIBLE CAUSES REMEDIES Front shock absorbers worn Replace shock absorbers as needed Incorrect ride height Adjust ride height to speci ed setting Vehicle overloaded Check wheel loads and correct as needed Vehicle ride is too harsh Air spring supply lines leaking Check air line connections and and/or suspension contacts...
-
Page 40: Inspection
Inspecting Control Arm CAUTION Bushings Reyco Granning recommends ® NOTE It is recommended that the replacing any damaged or out -of - bushings in all of the control arms be speci cation components. -
Page 41: Inspecting Tie Rod Ends
INSPECTION Check for bushing bulging between steered straight ahead grab the tie the control arm and sub -frame rod near its end and try to move the mount or presence of small rubber socket in a direction parallel to the particles near subframe bushing ball stud axis (Figure 6) . -
Page 42: Inspecting The Shock Absorber
INSPECTION Disconnect the ABS sensor lead from output o f new sensor). the chassis connector. The ABS sensor test will require a voltmeter that can measure AC voltage on a millivolt scale. Connect the voltmeter to the connector pins of the ABS sensor lead. -
Page 43: Inspecting The Steering Arm And Relay Rod Ball Joints
INSPECTION Check to s ee that there is a minimum of 1 -inch clearance around circumference of the air spring while it is energized with air. Check the air spring piston for buildup of foreign material. Remove any foreign material that is present. Height Control Valve Inspection Check the height control valve and Figure 8 –... -
Page 44: Inspecting Wheel Bearing Endplay
INSPECTION Endplay Inspection Place the tip of the dial indicator on Install a dial indicator with a the center of the steering knuckle magnetic base so that the base is spindle. Set the dial indicator on xed to the steering arm. -
Page 45: Inspecting The Knuckle Carrier Bearing And Seal
INSPECTION If the steering knuckles binds or Inspecting the Knuckle less than .001 inch endplay is Carrier Bearing and Seal measured, remove shims from the Inspect the seals for damage. shim pack. See repair section for kingpin. Place the magnetic base of a dial indicator on the knuckle carrier and If the vertical endplay position the tip of the dial on the... -
Page 46: Adjustment
ADJUSTMENT Adjustment from the hubcap and place it in a container for re -installation. Adjusting Wheel End Play Rotate the hub such that the drain ® (PRO -TORQ style only ) hole faces downward and drain the oil from hub cavi ty. Wait a few WARNING minutes for most of the oil to drain before continuing to the next step. - Page 47 ADJUSTMENT steering knuckle the center of the spindle. Set the dial indicator on zero. 22. Measure the endplay by simultaneousl y pushing/pulling on each side of the tire, drum, or hub while observing the dial indicator. The endplay is the total travel observed.
-
Page 48: Adjusting Suspension Ride Height
ADJUSTMENT Properly adjusted ride height results in Adjusting Suspension Ride correct suspension travel and alignment. Height The ride height should not be adjusted to adjust chassis rake angle. The height control va lve (HCV) or height sensor and linkage should be checked CAUTION regularly for proper clearance, operation and adjustment . -
Page 49: Adjusting The Maximum Wheel Turn Angle
ADJUSTMENT lower studs be positioned parallel to CAUTION eac h other. Torque to 8 -12 lb -ft . In power steering systems, the After adjusting the length, it hydraulic pressure should relieve recommended to dump and re - in ate or “drop o ”... -
Page 50: Inspection Before Alignment
ADJUSTMENT Drive the front tires on a suitable Turn the stop bolt until the speci e device that allows the front wheels to wheel turn angle is achieved and the turn and measures the wheel turn bolt head contacts the knuckle carrier. angle Tighten the jam nut to 50 -75 ft -lb (See... -
Page 51: Front Suspension
Equipment rod end jam nuts, steering arm mounts, and chassis stee ring Reyco Granning LLC recommends that system components. Inspect suitable alignment equipment be used to connections for wear and replace measure the wheel alignment as needed. -
Page 52: Preparation
ADJUSTMENT adjustment of camber and caster to minimize vehicle drifts or pulls to one side WARNING of the road. Never work under a vehicle The lower bar pin of the knuckle carrier supported by only a jack(s). Jacks bearing mar ked with a “B” may also be can slip or fall over and cause used to provide additional camber serious personal injury. -
Page 53: Adjusting The Camber Angle
ADJUSTMENT The wheel camber angle is a ected by the Adjusting the Camber Angle ride height of the suspension. If the ride height is set too high, then the camber measur ement will be more positive. See the inspecting and adjusting suspension ride height sections before measuring camber. -
Page 54: Bar Pin Camber Adjustment
ADJUSTMENT When the setscrews in both lower control “B” is located farthest from the lower arm mounts are oriente d closer to the control arm (see Figure 14 ). suspension centerline, the tir e camber Place a portable jack under the tire to becom es more negative. -
Page 55: Adjusting The Caster Angle
ADJUSTMENTS ahead (Figure 15) . Lower the jack t o align the bar pin with The caster angle is indirectly measured the co ntrol arm. Apply Loctite #242 to from th e change in wheel camber as the mounting bolt threads and tighten to wheel is turned through a prescribed turn 350 -410 lb -ft for IFS1660S3 &... - Page 56 ADJUSTMENTS When the setscrews in the forward lower The eccentric adapters at both lower control arm mount are oriented closer to control arm mounts must be oriented the frame rail and the setscrews in the opposite each other to a ect caster. rearward lower control arm mount are Mid -year 2015, caster was changed from 3.0°...
- Page 57 ADJUSTMENTS NOTE: Improperly adjusted ride height will result in incorrect wheel Rotate the eccentric adapters at the alignment measurements and may forward and rearward control arm result in abnormal tire wear. Check mounts opposite one another as the ride height prior to front needed based on measured wheel suspension alignment.
-
Page 58: Adjusting The Toe -In
ADJUSTMENTS Adjusting the Toe If the lengths of the tie rod assemblies are not within 1/8 inch of each other, CAUTION then adjust their lengths such that they Do not alter components to are within 1/8 inch of each other. adjust the toe -in. -
Page 59: Repairs
REPAIRS Millin g or machining of any component Repairs except that control arm bushing bores General Procedures may be honed to remove any burrs. Repair or reconditioning of front WARNING suspension components is not allowe Components that are damaged or worn Never work under a vehicle must be replaced. -
Page 60: Ground Or Polished Parts
REPAIRS Ground or Polished Parts CAUTION Use a cleaning solvent to clean ground or Do not strike the component polished parts and surfaces. DO NOT clean mating taper directly with a steel ground or polished parts with hot solution hammer. Parts can break and tank or with water, steam or alkaline cause serious personal injury. -
Page 61: Replacing Pitman Arm Or Idler Arm Ball Joint
REPAIRS Steering arm ma y be removed to Replacing Pitman Arm or facilitate ball joint removal. See the Idler Arm Ball Joint steering arm replacement section as needed. The thread -in mount type ball joints Inspect the ball joint stud and relay rod installed with a thread adhesive and may tapered hole(s). -
Page 62: Replacing The Idler Arm Bearings (1660S3&1700S3)
REPAIRS retaining ring is seated against Replacing the Idler Arm bottom inner race. Do not use a steel Bearings (1660S3&1700S3) hammer to install the sleeve be cause bearing raceways can be damaged. Replace the idler arm bearings in sets. The replacement bearings should be installed Install upper retaining ring. -
Page 63: Upper Control Arm Removal
REPAIRS be inspected for damage. directly to the bar pin or mounting bolts. Both control arm bushings and mounting hardware ex cept eccentric adapt ers must Disconnect sway bar connector at sway be replaced in a control arm when bushings bar if so equipped with a sway bar. -
Page 64: Lower Control Arm Removal
REPAIRS Apply Loctite #242 to carrier mounting for installation. bolt threads and tighten to 370 -410 lb - Loosen and remove control ft for IFS1660S3 & IFS1 700S3 Hex Head mounting locknuts. Bolt, 450 -500 lb -ft for IFS1800S3 & Support control arm and remove IFS2000S3 Socket Head Cap Screw (See... -
Page 65: Replacing Wheel Bearings, Oil Seals & Hub Caps (Pro - Torq Style Nut)
REPAIRS Torque Table). Rotate the hub such that the drain hole faces downward and drain t he oil from Compress shock absorber and connect hub cavity. Wait a few minutes for most the lower shock mount to the lower of the oil to drain before continuing to shock bracket using the mounting the next step. -
Page 66: Installation
REPAIRS facing downwards. Protect the wheel Pre -lube the inner bearing and studs from damage. Wipe the excess place it onto spindle with small end oil o spindle with a clean shop towel of taper facing outward. Seat the to prevent oil dr ipping onto the brake inner race against the shoulder of assembly. - Page 67 REPAIRS 12. Back the nut o until it is loose. 20. Refer to the Wheel Bearin g Endplay Adjustment section to measure 13. Adjust the bearing by tightening the and adjust the endplay to .001 -.004 nut to 100 lb -ft . Spin the wheel at inch.
-
Page 68: Pre Adjusted With Integral Spindle Nut Wheel Hubs
REPAIRS 24. Check the hub cap for external oil WARNING leakage at the drain plug or gasket. Vehicles on jacks can fall, causing For leaks at the drain plug check for serious personal injury or property application of thread sealant to damage. - Page 69 REPAIRS parts will occur, causing possible of the seal that remains on the loss of axle wheel -end spindle. components and serious NOTE : If the bearing does hit the personal injury. oor, w hile removing the hub, clean Use a breaker bar to loosen the and inspect bearing as stated in the spindle nut.
-
Page 70: Hub And Component Cleaning
REPAIRS cleaners. Read the manufacturer’s Clean and inspect the wheel instructions before using a solvent bearing cups and cones, race, cleaner, then carefully follow the spindle bearing and seal journals instructions. Also follow the procedures on the spindle and hub. Bearings below. -
Page 71: Removing Cups In Iron Hubs
REPAIRS control wheel end play. Reyco evidenced by a raised edge on the Granning recommends installing a machined end. new Pre Adjusted with Integral If removal or replacement is Spindle Nut service kit whe required, follow the steps outlined inspection indicates that component below. -
Page 72: Spindle Nut And Spiral Snap Ring Reassembly
REPAIRS Lubricate the inner bearing cone Install a bearing spacer. If the with the same lubricant as will be spacer has a tapered end, it should used in the hub and install it into face towards the outboard end of the inner bearing cup. -
Page 73: Replacing Brake Components
REPAIRS Lubricate the bearing journals on Replacing Brake the spindle, or the inside diameter Components of the bearing cones with Grade 2 grease or the lubricant that will be Brake Rotors used in the wheel end. Do not coat The brake rotors should be replaced if the seal journal on the spindle. -
Page 74: Sensor Removal
REPAIRS repaired and must be replaced if run out of .008”. Replace as needed damaged or malfunctioning. and repeat step 4. If the minimum reading is still not Sensor Removal obtained, then replace the sensor Press sensor out of steering and repeat the installation knuckle. -
Page 75: Installation
REPAIRS Installation Installation Position shock in suspensio n such that 1. Attach air spring to upper air the thru bolt is connected to the lower spring mount. Tighten mounting shock mounting bracket tabs. hardware snugly. Attach upper shock bushing to 2. -
Page 76: Installation
REPAIRS assembly. Disconnect the airlines from Disconnect sway vertical linkage at the HCV. If any other plumbing xtures upper control arm bracket on both are connected to the HCV, mark them sides. Retain hardware for installation. for re -assembly. Secu re the sway bar to prevent Remove the HCV mounting hardware rotation and disconnect the lower from the sub -frame. -
Page 77: Replacing The Steering Knuckle Carrier Bearings
REPAIRS Apply approximately 400 lbs press load Replacing the Steering to the spacer and remove the split Knuckle Carrier Bearings collar. It is recommended to replace all Remove spacer and shims. steering knuckle carrier bearings at the Press bar pin out of bearing cones. same time. -
Page 78: Replacing The Steering Gearbox/Slave Unit Assembly
REPAIRS Pack a bearing cone with gr ease and mounting bolts in control arms. Note plac e it onto the bar pin end opposite orientation of bar pin. Apply Loctite the shoulder and seat it in the raceway. #242 to mounting bolt threads tighten to 370 -410 lb -ft for IFS1660S3 Place the spacer onto the bar pin , then... -
Page 79: Installation
REPAIRS Installation Steering Gear Poppet Clean all bolts of Loctite before reinstalling into the gearbox Readjustment Install the gearbox mounting plate Steering poppet valves automatically adjust onto the gearbox with the single when the unit is turned all the way to the mounting bolt. - Page 80 This page intentionally left blank. Grade Markings on Bolts - 78 -...
-
Page 81: Torque Tables
TORQUE TABLES Torque Tables Most threaded fasteners are covered by speci cations that de ne required mechanical properties, such as tensile strength, yield Grade Markings on Bolts strength, proof load, and hardness. These speci cations are carefully considered in initial Grade Markings on Lock Nuts selection of fasteners for a given application. - Page 82 TORQUE TABLES Torque Table 2 TORQUE SPEC. APPLICATIONS FASTENER SIZE TORQUE SEQUENCE (lb -ft) (CLEAN AND DRY) Drivers Side Torque Plate 3/4 -16 Grade 8 290 -320 Mount Cap Screws Hub Cap Bolt 5/16 -18 Grade 5 12 -16 450 -500 M22x1.5 Wheel Nut (Hub Piloted)
- Page 83 Page Left Blank Intentionally...
- Page 84 Reyco Granning Suspensions 1205 Industrial Park Drive Mount Vernon, MO 65712 Phone: 417.466.2178 Fax: 833.896.6997 www.reycogranning.com...
Need help?
Do you have a question about the IFS 1660S3 and is the answer not in the manual?
Questions and answers