Table of Contents
Advertisement
Advertisement
Table of Contents

Related Manuals for Motorola HMWL1010


Summary of Contents for Motorola HMWL1010
-
Page 1: Quick Start Guide
Quick Start Guide HMWL1010 Wireless Camera... -
Page 2: Wireless Camera
Product that is manufactured by Motorola and identified by Motorola owned trademark, trade name or product identification logos affixed to the Product. Motorola does not warrant to you, the end user, or to anyone else that the Software will perform error free or without bugs. MOTOROLA IS NOT RESPONSIBLE FOR, AND PROVIDES “AS IS”... -
Page 3: Battery Life
Motorola, Inc. Motorola reserves the right to revise this publication and to make changes in content from time to time without obligation on the part of Motorola to provide notification of such revision or change. Motorola provides this guide without warranty of any kind, either implied or expressed, including, but not limited to, the implied warranties of merchantability and fitness for a particular purpose. - Page 4 Wireless Camera. Controlling Your Camera Using your computer and the Gateway, you locally manage your home environment with the Motorola Home Monitoring & Control System. When configured, the system can notify you of any new events by sending an e-mail when your Wireless Camera detects an event.
-
Page 5: Installation Hints
Quick Start Guide Installation Hints The Motorola Wireless Camera is constructed of UV resistant ABS plastic. Please consider the following points when mounting the camera: • The camera must be aimed so that it does not directly face the sun or any bright light; otherwise, this may cause damage to the camera. - Page 6 Wireless Camera Using the screws provided, secure the camera to the wall. When mounting the screws to the wall, leave 1/16" (1.6 mm) space between the screw head and the wall. Using the mounting holes, slide the camera down on to the screws until it is firmly seated. Discovery Button Position the camera to view the desired area and plug in the power supply.
-
Page 7: Troubleshooting
Quick Start Guide Troubleshooting Problem Camera will not register with the Gateway No camera picture Poor picture quality Motion events are not triggered Audio problems The Gateway does not recognize the camera during discovery mode? Make sure your Gateway indicates discovery mode and that the camera is using the proper power supply (9 volt). -
Page 8: Features And Specifications
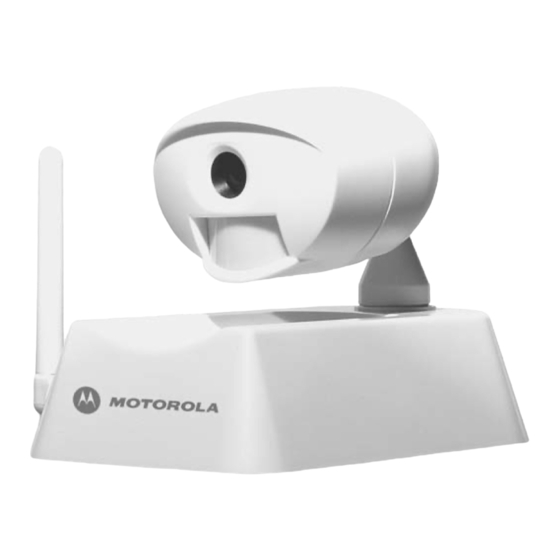
Wireless Camera Features and Specifications • PIR motion detection • LED in camera illuminates when activity occurs • Microphone captures audio • 80 degree field of view for motion and camera lens • Weather resistant • Auto Brightness, Auto Contrast, Auto White-Balance •... - Page 9 Quick Start Guide Wireless Camera Wall Mounting Drilling Template Mounting tools: Screwdriver, electric drill or awl. On hard surfaces, pre-drill ½ inch deep pilot holes with a drill bit slightly smaller than the camera mounting screws before securing the camera to the sur- face.
- Page 10 Visit our website at: http://www.motorola.com/homemonitoring 516955-001 7/04 MGBI...
Need help?
Do you have a question about the HMWL1010 and is the answer not in the manual?
Questions and answers