Advertisement
This tool emits a laser beam that projects a visible spot on the target surface when the tool is used indoors.
Read all instructions before operating the unit.
Getting Started
Recommended Tools:
Hex wrenches: 2.5, 5 and 6 mm
Small flat blade screwdriver
Blank sheet of paper, pencil and easel
1. Review alignment tool components.
2. Mount your chucks as required for
your application.
Remove the Inserts from the Chucks
1. Use 6 mm hex wrench to remove all bolts.
2. Use jacking screws to remove the inserts from the guide pins:
For top insert, use the removed bolts as jacking screws.
•
For bottom insert, use a M10 bolt and 8 mm hex wrench.
•
3. Remove the guide pins.
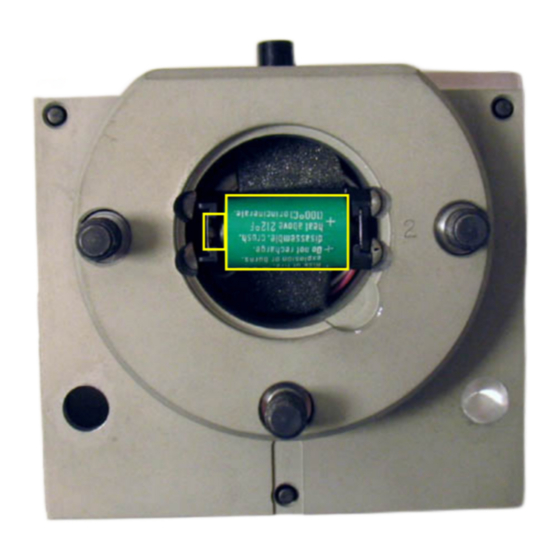
Install the Battery in the Alignment Tool
Each alignment unit requires a CR ½ AA, 3V lithium battery (included).
1. Pry the cover off of the battery compartment.
2. Install the battery in the compartment as illustrated.
If laser beam does not come on when switch is on,
check battery polarity.
3. Reinstall the cover. (Align the number stamped on the cover
with the number stamped on the tool.)
www.maxcessintl.com
Laser Alignment Tool
Boschert VT Chuck 30-40/40-50
To avoid bodily injury:
DO NOT stare directly at the laser beam. Serious eye injury could result.
•
DO NOT use optical tools such as a transit to view laser beam.
•
DO NOT project the laser beam directly into the eyes of others.
•
DO NOT project laser beam onto a reflective surface.
•
DO NOT operate around children or allow children to operate.
•
DO NOT disassemble the laser.
•
DO NOT remove warning labels.
•
Always turn off the laser when the tool is not in use.
•
ALIGNMENT
SET SCREWS
SPRING-LOADED
MOUNTING BOLTS
COMPARTMENT
(BACK SIDE)
TRAM BOSS
ALIGNMENT
TARGET FACE
JACKING SCREW
1.360.834.2345
Installation and Operation
ON/OFF SWITCH
(3 PLCS)
(3 PLCS)
BATTERY
M8
(2 PLCS)
M10
JACKING
SCREW
Page 1 of 2
Advertisement
Table of Contents

Related Manuals for Maxcess Boschert VT Chuck 30-40


Summary of Contents for Maxcess Boschert VT Chuck 30-40
- Page 1 Laser Alignment Tool Boschert VT Chuck 30-40/40-50 Installation and Operation To avoid bodily injury: DO NOT stare directly at the laser beam. Serious eye injury could result. • DO NOT use optical tools such as a transit to view laser beam.
- Page 2 Tidland Laser Alignment Tool (continued from other side) Install the Alignment Tools in the Chucks 1. Remove the inserts from the chucks and position the alignment tools in each chuck. 2. Use 5 mm hex wrench to tighten the mounting bolts. Align Laser Beam with Chuck Centerline 1.
Need help?
Do you have a question about the Boschert VT Chuck 30-40 and is the answer not in the manual?
Questions and answers