
Subscribe to Our Youtube Channel
Related Manuals for Maxcess Tidland D3


Summary of Contents for Maxcess Tidland D3
- Page 1 TIDLAND WINDING SOLUTIONS Tidland D3 Differential Air Shaft Installation, Operation and Maintenance Manual For use with Tidland Serial Numbers 651931 and after Includes Appendices for earlier shaft models MI 638671 1 Q...
-
Page 2: Safety Instructions
15. All replacement parts used on this product should be made to original Tidland specifications. 16. All maintenance and repair procedures performed on this product should be done to Tidland specifications by qualified personnel. www.maxcessintl.com Tidland D3 Differential Air Shaft MI 638671 1 Q Page 2... -
Page 3: Table Of Contents
Install Tension Segment Strip ..................18 Install Tray in the Shaft Slot ..................... 19 Replace Wear Bars ......................19 Troubleshooting ........................20 Appendix A .......................... 22 Appendix B .......................... 23 www.maxcessintl.com Tidland D3 Differential Air Shaft MI 638671 1 Q Page 3... -
Page 4: Tidland Customer Service
LOCTITE 242 (blue) Parker Super O-Lube O-ring Lubricant (make no substitutions) Small pliers For more accessories to help with your winding processes, visit www.maxcessintl.com www.maxcessintl.com Tidland D3 Differential Air Shaft MI 638671 1 Q Page 4... -
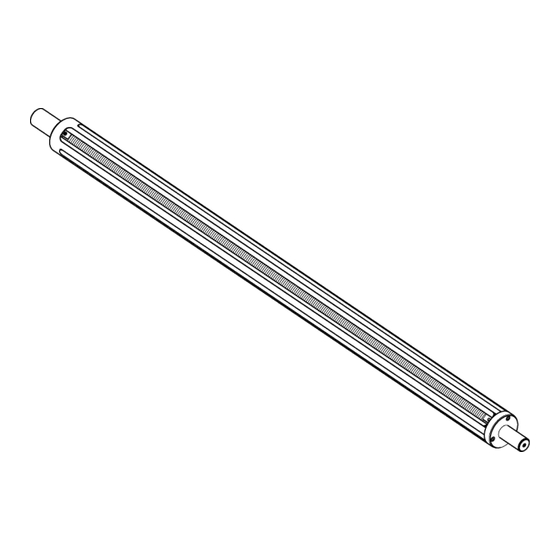
Page 5: Nomenclature And Part Numbers
TO RAISE TENSION SEGMENTS 652361 639967 FOR SERIAL NUMBERS MUFFLER 660659 AND AFTER 665891 For shaft serial numbers before 660659, see page 11 for information about wear bars. www.maxcessintl.com Tidland D3 Differential Air Shaft MI 638671 1 Q Page 5... -
Page 6: Tray Assembly
See Appendix B for shaft serial numbers up to and including 651018. Spacer (UHMW) part profile changed with serial number XXXXXX, but it does not affect assembly. Rotary Air End Non-Rotary Air End www.maxcessintl.com Tidland D3 Differential Air Shaft MI 638671 1 Q Page 6... -
Page 7: Pressure Control Valve System
NOT DEFINED.) For the D3 Differential Shaft, this Pressure Control Valve System affects only the upper bladder that controls the tension segment height. Note: The Pressure Control Valve System is installed in Tidland D3 shafts starting with serial number 644698. www.maxcessintl.com... -
Page 8: Operation
To increase the pressure, turn the valve clockwise. To decrease the pressure, turn the valve CLOSE counterclockwise. DO NOT adjust while shaft is spinning. To clean or replace the valve, see page 12. www.maxcessintl.com Tidland D3 Differential Air Shaft MI 638671 1 Q Page 8... -
Page 9: Inflation Sequence
The tension segments beneath the cores must be fully retracted, and cores should turn by hand easily on the shaft. If they do not, refer to Troubleshooting on page 21. www.maxcessintl.com Tidland D3 Differential Air Shaft MI 638671 1 Q Page 9... -
Page 10: To Begin Winding
2. Reduce tension segment pressure (rotary union valve) to zero psi. 3. Rolls are now ready to be repositioned or removed from shaft. www.maxcessintl.com Tidland D3 Differential Air Shaft MI 638671 1 Q Page 10... -
Page 11: Maintenance
For shaft serial numbers up to 653669, contact Tidland Customer Service for replacement information. 1-800-426-1000 Shaft serial numbers 660659 and after, see page 19 for replacement instructions. www.maxcessintl.com Tidland D3 Differential Air Shaft MI 638671 1 Q Page 11... -
Page 12: Exhaust Bleeder Valve
Close the valve down until it just bottoms out in the housing, and then adjust as required for your application. Resume winding operation. Adjust the bleeder valve incrementally to achieve required internal pressure. www.maxcessintl.com Tidland D3 Differential Air Shaft MI 638671 1 Q Page 12... -
Page 13: Tension Segment Tray
4. Lift the tray out of the shaft and set it on a workbench. 5. Ensure that three o-rings remain in the shaft body slot after the tray is removed. Earlier shaft models have two o-rings: see page 23. O-RING O-RINGS www.maxcessintl.com Tidland D3 Differential Air Shaft MI 638671 1 Q Page 13... -
Page 14: Disassemble Tension Segment Tray
4. On the bottom side of the tray, remove two screws that secure the lower bladder end clamp. (2.5mm hex drive) 5. Slide the core-locking bar out of the tray. www.maxcessintl.com Tidland D3 Differential Air Shaft MI 638671 1 Q Page 14... -
Page 15: Shaft And Tray Maintenance
4. Clean the tension segment tray with a mild solvent, such as rubbing alcohol. Dry thoroughly before beginning reassembly. NOTICE Petroleum-based lubricants will damage the bladders and o-rings. Do not use! www.maxcessintl.com Tidland D3 Differential Air Shaft MI 638671 1 Q Page 15... -
Page 16: Install Bladders
9. Install the element end clamp with two flathead cap screws, securing the bladder underneath. (2.5mm hex drive) [21 in·lbs/2.37 Nm] FLAT HD CPSCR (2 PLCS) 6mm LG LOWER END CLAMP www.maxcessintl.com Tidland D3 Differential Air Shaft MI 638671 1 Q Page 16... -
Page 17: Tension Segment Element (Upper Bladder)
12. Install the retainer ring to secure the air fitting to the tray. UPPER BLADDER AIR FITTING RETAINER RING www.maxcessintl.com Tidland D3 Differential Air Shaft MI 638671 1 Q Page 17... -
Page 18: Install Tension Segment Strip
Before continuing reassembly, test the bladder for air leaks at 80 psi (5.5 bar) using soapy water at end clamps and air fitting. When inflated, the bladder should cause the tension segments to lift. www.maxcessintl.com Tidland D3 Differential Air Shaft MI 638671 1 Q Page 18... -
Page 19: Install Tray In The Shaft Slot
Aluminum Wear Bars are installed with button head screws. Use a hex drive wrench (2.5mm) to remove. When reinstalling screws, apply WEAR BAR LOCTITE 242 to threads and tighten to 15 in·lbs (1.7 Nm). www.maxcessintl.com Tidland D3 Differential Air Shaft MI 638671 1 Q Page 19... -
Page 20: Troubleshooting
10% max overspeed; recommend 5% Replace cores. * Oversized cores will not allow core locking bar to engage; tension segments will not retract properly – rubbing on cores. www.maxcessintl.com Tidland D3 Differential Air Shaft MI 638671 1 Q Page 20... - Page 21 Replace bladder(s) or air lines as needed. Exhaust Bleeder Valve not Match tensions by adjusting Pressure Control adjusted correctly. System in each shaft (p. 7). * +0.20/+0.10 nominal clearance, unless otherwise specified. www.maxcessintl.com Tidland D3 Differential Air Shaft MI 638671 1 Q Page 21...
- Page 22 APPENDIX A Tidland D3 Serial Numbers up to and including 651018. Remove Tension Segment Trays Important: Earlier shaft models use air hoses. Use care when removing the tray from the shaft Carefully remove the hose end from the air fittings in the tray.
- Page 23 APPENDIX B For use with Tidland D3 Serial Numbers up to and including 651018. www.maxcessintl.com Tidland D3 Differential Air Shaft MI 638671 1 Q Page 23...
- Page 24 Fax +86.756.881.9393 Tel +65.9620.3883 Fax +1.405.755.8425 sales@maxcess.eu sales@maxcessintl.com.cn Fax +65.6235.4818 sales@maxcessintl.com www.maxcess.eu www.maxcessintl.com.cn asia@maxcessintl.com www.maxcessintl.com SOUTH AMERICA INDIA JAPAN Tel +55.11.3959.0990 Tel +91.22.27602633 Tel +81.43.421.1622 Fax +55.11.3856.0990 Fax +91.22.27602634 Fax +81.43.421.2895 southamerica@maxcessintl.com india@maxcessintl.com japan@maxcessintl.com www.maxcessintl.com.br www.maxcess.in www.maxcess.jp © 2011 Maxcess...
Need help?
Do you have a question about the Tidland D3 and is the answer not in the manual?
Questions and answers
What is the weight limit on 3" 100" shafts