Table of Contents
Advertisement
Quick Links
HIDEAVECTOR3
ATTENTION: READ THESE INSTRUCTIONS CAREFULLY BEFORE ATTEMPTING TO INSTALL, OPERATE, OR SERVICE
THE EMBASSY HIDEAVECTOR3 HEATERS! RETAIN THESE INSTRUCTIONS FOR FUTURE REFERENCE.
INSPECT THE SHIPMENT IMMEDIATELY WHEN RECEIVED TO DETERMINE IF ANY DAMAGE HAS
OCCURRED DURING SHIPMENT.
PRIOR TO INSTALLATION, CHECK FOR ANY VISIBLE DAMAGE. MAKE CERTAIN THAT ANY
LOOSE PARTICLES ARE REMOVED (ESPECIALLY IN THE BLOWER ASSEMBLY AREA).
GENERAL DESCRIPTION
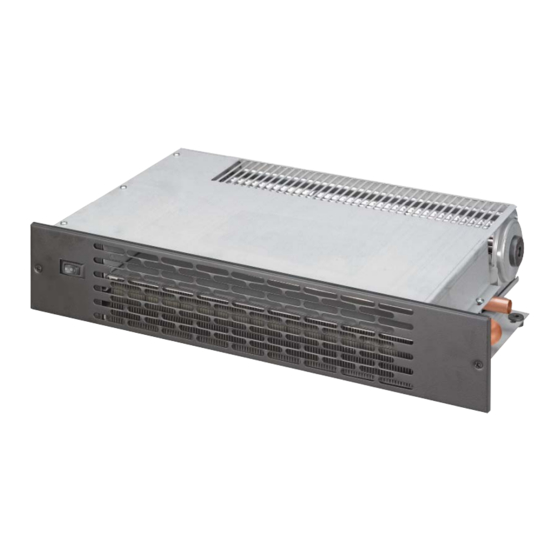
HIDEAVECTOR3 heaters are for use with forced hot water residential heating systems and consist of a serpentine
copper tube, aluminum fi nned heating element, with an electric motor and blower of unique cross fl ow design. Their
purpose is to deliver a comfortable stream of warmed air, at or near fl oor level, and their construction is extremely
compact so minimum space is required for installation. This unit is primarily used in horizonal fl oor installation, for
example: under a kitchen counter cabinet, or bathroom sink enclosure. Although it is also available for verticle mounting,
fully recessed in the wall studs, with the air discharged upward through a fl ush mounted, louvered front panel. All
types have heating elements with 1/2" nominal (5/8 O.D.) copper tube connections, and 115V. electric blower motor,
interwired with a 120° F (49° C) reverse acting aquastat that prevents operation until hot water is circulating. These units
are NOT intended to be used on one or two pipe steam systems. See bottom of page 7. For gravity fed systems, it is
recommended that a separate circulator pump be installed for the kick space heater.
INSTALLING HIDEAVECTOR (FLOOR MOUNT)
1. Select a location under the bottom shelf of a cabinet that meets the minimum dimensions shown in Fig. 1.
2. CUT AN ACCESS PANEL THROUGH THE BOTTOM OF THE CABINET AT THIS LOCATION, LARGE ENOUGH
FOR INSTALLATION AND SERVICE. IT IS RECOMMENDED THAT THIS ACCESS PANEL BE CONSTRUCTED SO
ANNUAL CLEANING OF THE BLOWER FAN AND COIL FINS CAN BE EASILY ACCESSIBLE.
3. At this location, center and cut an opening in the toe-space riser 4'' high x 11'' long (HAV-48-3) (See fi gure 1)
or 4'' high x 18'' long (HAV-88-3) (See fi gure 2).
4. Set the HIDEAVECTOR3 in the space at fi nished fl oor level and check piping and wiring locations. The air outlet
should be facing but not extending beyond the toe-space riser at the opening. The air outlet should also be located at
the bottom portion of the 4'' toe-space riser (See fi gure 1) at fi nished fl oor level. Make sure the switch is accessible
through the grille opening. The front of the unit should fi t fl ush to the inside of the toe space riser.
6. If using the "Easy Connect" Flexible Hose Connection Kit, see those installation instructions.
7. Next, prepare the heating element for pipe connections (this procedure will also pertain to fl oor and wall models).
Remove the screws from the electric conn. box. Unsnap (pull) the thermostat clamp from the return copper U-bend.
Holding down the top cover, remove the 4 element cover screws. Carefully remove this top cover noting the position of
the element and the neoprene side pad. Lift out the element for soldering and fi ttings. Both ends are sized to accept
1/2'' solder fi ttings. (Note required fi ttings for one pipe and two pipe systems on page 6).
8. Replace the heating element in the bottom cover in the proper position. Place the neoprene side pad in position and
replace the top cover using the 4 screws. Tighten enough to keep the element in place between the covers. DO NOT
OVER-TIGHTEN!
9. Place the HIDEAVECTOR3 under the cabinet and connect the piping and wiring. Make sure unit & outlet are free
of any dirt or debris prior to start up. Turn on the system, purge of air, check blower operation and check for any
possible leaks in the piping (run for 2 hrs. minimum). It should then be screwed to the fl oor through the four resilient
mounting feet (2-inside electrical box and 2 external). Do not over-tighten screws. Secure top of electrical box.
INSTALLATION INSTRUCTIONS
315 OSER AVENUE, HAUPPAUGE, NEW YORK 11788
1.
HVIOM-3
Advertisement
Table of Contents

Related Manuals for Mestek EMBASSY INDUSTRIES HIDEAVECTOR3


Summary of Contents for Mestek EMBASSY INDUSTRIES HIDEAVECTOR3
- Page 1 HVIOM-3 HIDEAVECTOR3 INSTALLATION INSTRUCTIONS ATTENTION: READ THESE INSTRUCTIONS CAREFULLY BEFORE ATTEMPTING TO INSTALL, OPERATE, OR SERVICE THE EMBASSY HIDEAVECTOR3 HEATERS! RETAIN THESE INSTRUCTIONS FOR FUTURE REFERENCE. INSPECT THE SHIPMENT IMMEDIATELY WHEN RECEIVED TO DETERMINE IF ANY DAMAGE HAS OCCURRED DURING SHIPMENT. PRIOR TO INSTALLATION, CHECK FOR ANY VISIBLE DAMAGE.
- Page 2 HIDEAVECTOR3 ELECTRIC HAV-48-3 CONNECTION FIGURE 1 12 1/4 (311) 12 3/4 (324) AQUASTAT 4" FRONT GRILLE 6 1/4 MIN. RETURN (102) (159) SUPPLY 6" PIPE CENTERS (152) SWITCH RETURN HEATED DISCHARGE 2" AIR DISCHARGE (51) 8" CAT-68303-A (204) HIDEAVECTOR3 ELECTRIC HAV-88-3 CONNECTION FIGURE 2...
- Page 3 INSTALLATION OF HIDEAVECTOR3 WALL MODELS Figures 3 and 5 show exploded views of the wall models. Figure 4 shows the “IW” type mounted in a wall with an air outlet at the top of the unit. Figure 6 shows the wall mounted “EW”. The louvers of the front panel will direct the air fl...
- Page 4 Vertical External Wall Installation 18" (457) HAV-48 4 3/8 17 27/32 (453) HAV-48 (111) 22" (559) HAV-88 21 27/32 (555) HAV-88 ACCESS DOOR SWITCH ELECTRICAL CONNECTION 23 29/32 (607) 24" RETURN (610) 24" (610) 3 3/4 (97) FINISHED FLOOR SUPPLY 18"...
-
Page 5: Electrical Connections
Electrical Connections CAUTION! For Supply Connections, use wires suitable for at least 194° F (90° C). All electrical connections must conform to local and national codes. A shaded pole motor is used to drive the Hideavector3 blower on 115 -120 V. 60 hz. Since current drain is very small, wiring codes for short circuit protection only will apply. -
Page 6: System Considerations
System Considerations Embassy Hideavector3 Heaters should be connected only to circulating hot water systems where at least 1 gpm water fl ow is expected. They are essentially small unit heaters, and will work on one or two pipe systems, or in a series loop where pressure and temperature drop can be tolerated (see capacity charts and piping diagrams). -
Page 7: Replacement Parts List
REPLACEMENT PARTS LIST QTY./UNIT DESCRIPTION MODEL TYPE "HAV": HAV-48 HAV-88 CROSS-FLOW BLOWER & MOTOR ASS’Y HAV-3020-1 HAV-3020-2 HEATING ELEMENT HAV-3017-1 HAV-3017-2 AQUASTAT ASS’Y HAV-3024 HAV-3024 BOTTOM PAN ASS’Y HAV-3013-1 HAV-3013-2 TOP PAN HAV-3266-1 HAV-3266-2 ELECTRICAL CONTROL BOX COVER HAV-67548-1 HAV-67548-2 ELECTRICAL CONTROL BOX BASE HAV-3031 HAV-3031... -
Page 8: Year Limited Warranty
5 YEAR LIMITED WARRANTY Hideavector3 The “Manufacturer” warrants to the original owner at the original installation site that the Hideavector Heaters (the “Product”) will be free from defects in material or workmanship for fi ve (5) years from the date of shipment from the factory.
Need help?
Do you have a question about the EMBASSY INDUSTRIES HIDEAVECTOR3 and is the answer not in the manual?
Questions and answers
I AM REPLACING A OLD MODEL HAV88 THAT IS APPROXIMATELY 28 YEAR OLD AND ORDERED A NEW HAV88 -4. THE NEW MODEL DOES NOT HAVE AS MANY TUBES AS OLD UNIT . HAS THIS DESIGN GHANGE PUT OUT AS MUCH HEAT AS OLDER MODEL OR SHOULD I ORDER A LARGER MODEL
The Mestek HIDEAVECTOR3 includes HAV-48-3 and HAV-88-3 models. Based on the BTUH ratings for 65°F entering air:
- HAV-48-3 (low fan speed, 180°F water temp): 2,956 BTUH
- HAV-88-3 (low fan speed, 180°F water temp): 5,390 BTUH
- HAV-48-3 (high fan speed, 180°F water temp): 4,825 BTUH
- HAV-88-3 (high fan speed, 180°F water temp): 8,850 BTUH
Therefore, the HAV-88-3 produces significantly more heat than the HAV-48-3. If the older model used was HAV-88-3, a HAV-48-3 would not produce as much heat, and a larger model should be considered to match the output.
This answer is automatically generated