
Summary of Contents for Primetime Petz Safety Mate
- Page 1 Safety Mate Expandable Pet Gate ASSEMBLY INSTRUCTIONS & USER GUIDE Manufactured by: Primetime Petz LLC 519 Interstate 30 #119, Rockwall, TX 75087 info@primetimepetz.com • 214-257-8068 www.primetimepetz.com...
- Page 2 Safety Mate Videos Features Assembly Installation...
-
Page 3: Assembly & Installation Instructions
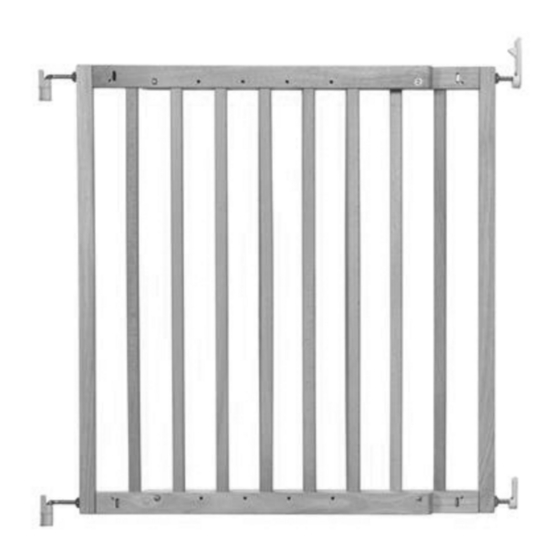
Safety Mate Expandable Pet Gate ASSEMBLY & INSTALLATION INSTRUCTIONS Important: Keep instructions for future reference. Read instructions thoroughly before assembling and installing gate. WARNING • Not for use as a child‘s gate. • Fits openings from 24.5“ to 41“. •... - Page 4 PARTS 2x FRAME SIDE 2x FRAME BOTTOM 2x FRAME TOP 2x DRILLED VERTICAL SPINDLE 8x VERTICAL SPINDLE 1x LOCKING LATCH 4x METAL PIN 4x BINDING BARREL 1x SADDLE 4x BINDING BARREL SCREW 2x HINGE 4x HEX NUT 2x HINGE COVER LOCK 4x CYLINDER NUT 1x HEX WRENCH 2x STRAIGHT BOLT...
-
Page 5: Gate Assembly
GATE ASSEMBLY STEP 1 STEP 2 Insert 4 VERTICAL SPINDLES (E) and 1 DRILLED Attach FRAME TOP (C) to top of vertical VERTICAL SPINDLE (D) into FRAME BOTTOM (B) spindles Insert METAL PIN (F) into hole in frame bottom Insert METAL PIN (F) into hole in frame top and through drilled vertical spindle and through drilled vertical spindle STEP 3... - Page 6 GATE ASSEMBLY STEP 4 Insert CYLINDER NUT (J) into hole in frame bottom Insert CYLINDER NUT (J) into hole in frame bot- on one gate panel tom on remaining gate panel With HEX NUT (I) threaded on STRAIGHT BOLT With HEX NUT (I) threaded on ANGLE BOLT (L), (K), insert straight bolt into hole in frame side and insert angle bolt into hole in frame side and turn turn clockwise until threaded through hex nut,...
-
Page 7: Tools Required
GATE INSTALLATION TOOLS REQUIRED 30.5” Drill 28.4” Hammer Philips screwdriver 4.65” 3.6” STEP 6 Measure vertically from floor and mark points as shown above Pre-drill holes and insert WALL ANCHORS (S) NOTE: Wall anchors are not needed if installing in solid wood frame or studs On side where gate will open, attach LOCKING LATCH (M) at top and SADDLE (N) at bottom using MOUNTING SCREWS (R) - Page 8 GATE INSTALLATION STEP 8 Use HEX WRENCH (Q) to tighten hex nuts until flat side is secure against frame NOTE: This step is important for gate stability. If gate become loose over time, check hex nuts and re-tighten as needed. Unlocking Gate STEP 9 Unlock gate by pressing...