Table of Contents
Advertisement
Available languages
Available languages
9A07928600
DV - H500
DVD Player
OWNER'S MANUAL
MANUEL DU PROPRIETAIRE
Thanks for buying a TEAC. Read this manual carefully to get the best performance from this unit.
Nous vous remercions pour l'achat d'un appareil TEAC.
Lire ce manuel avec attention pour obtenir les meilleures performances possibles de cet appareil.
Advertisement
Chapters
Table of Contents

Subscribe to Our Youtube Channel
Related Manuals for Teac DV-H500


Summary of Contents for Teac DV-H500
- Page 1 OWNER’S MANUAL MANUEL DU PROPRIETAIRE Thanks for buying a TEAC. Read this manual carefully to get the best performance from this unit. Nous vous remercions pour l’achat d’un appareil TEAC. Lire ce manuel avec attention pour obtenir les meilleures performances possibles de cet appareil.
-
Page 2: Introduction
PAGE 2 INTRODUCTION IMPORTANT SAFETY INSTRUCTIONS CAUTION : PLEASE READ AND OBSERVE ALL WARNINGS AND INSTRUCTIONS IN THIS OWNER’S MANUAL AND THOSE MARKED ON THE UNIT. RETAIN THIS BOOKLET FOR FUTURE REFERENCE. This set has been designed and manufactured to assure personal safety. Improper use can result in electric shock or fire hazard. - Page 3 INTRODUCTION PAGE 3 IMPORTANT SAFETY INSTRUCTIONS 15. Burden 22. Damage Requiring Service Do not place a heavy object on or step on the Unplug this product from the wall outlet and refer product. the object may fall, causing serious personal servicing to qualified service personnel under the injury and serious damage to the product.
-
Page 4: Safety Precautions
BROWN - LIVE Changes or modifications to this equipment not As these colours may not correspond with the coloured expressly approved by TEAC CORPORATION for markings identifying the terminals in your plug proceed as compliance could void the user’s authority to operate follows: this equipment. - Page 5 INTRODUCTION PAGE 5 Safety Precautions This product has been designed and manufactured according to FDA regulations “title 21, CFR, chapter 1, subchapter J, based on the Radiation Control for Health and Safety Act of 1968”, and is classified as a class 1 laser product. There is no hazardous invisible laser radiation during operation because invisible laser radiation emitted inside of this product is completely confined in the protective housings.
-
Page 6: Table Of Contents
PAGE 6 INTRODUCTION Table of Contents Introduction Advanced Operation < IMPORTANT SAFETY INSTRUCTIONS ....2 < Viewing Information about GUI ......24 < Safety Precautions ..........4 < Using a title menu/ DVD menu ......25 < Table of Contents ..........6 < Changing subtitle language ......26 <... -
Page 7: Precautions
INTRODUCTION PAGE 7 Precautions Notes on handling Notes on Moisture Condensation Moisture condensation damages the DVD player. < When shipping the DVD player, always use the Please read the following carefully. original shipping carton and packing materials. For maximum protection, repack the unit as it was originally packed at the factory. -
Page 8: For Proper And Long Use
PAGE 8 INTRODUCTION For Proper and Long Use DO NOT MOVE THE UNIT DURING CAUTION : WHEN PLACING THE UNIT PLAYBACK IN A STEREO RACK WITH GLASS DOORS During playback, the disc rotates at high speed. Do NOT lift or move the unit during playback. Doing so Be sure there is ample space between the unit and may damage the disc. -
Page 9: Features
INTRODUCTION PAGE 9 For Proper and Long Use Features On Handling Discs DVD : a completely new dimension in video entertainment < Do not touch the playback side of the disc. < Subtitles may be displayed in one of maximum of 32 languages. -
Page 10: Identification Of Controls
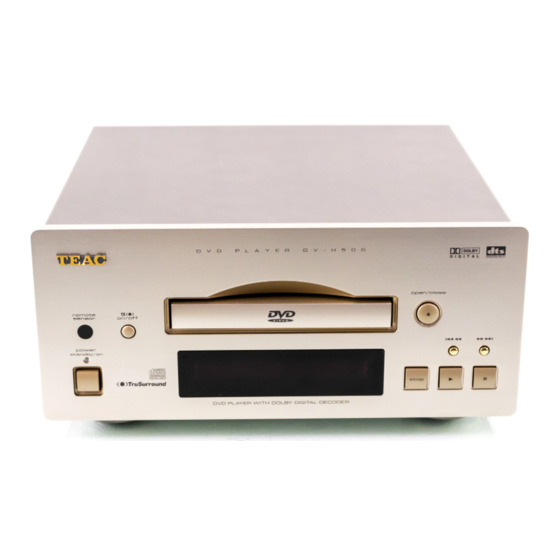
PAGE 10 INTRODUCTION Identification of Controls Front Panel Display Window... -
Page 11: Rear Panel
Remove the dust protection cap from the connector and connect Single : To use remote control unit of the optical digital cable (not supplied) firmly so that the DV-H500, select Signal. configurations of both the cable and the connector match. Keep System : When connected to the... -
Page 12: Remote Control
PAGE 12 INTRODUCTION Identification of Controls REMOTE CONTROL You will find instructions for each of the remote control functions in the appropriate sections of this instruction manual. -
Page 13: Preparing The Remote Control
INTRODUCTION PAGE 13 Identification of Controls Preparing the Remote Control Operating with the Remote Control Insert the batteries into the remote control so you can This section shows you how to use the remote use it to operate the DVD player. control. -
Page 14: Connections
PAGE 14 CONNECTIONS Connecting to a TV Connect the DVD player to your TV If the player is connected to the TV through a video cassette recorder, the picture may not be played back normally with some DVDs. So we strongly recommended you not to connect the DVD player to your video cassette recorder when setting up your home entertainment system. -
Page 15: Connecting To An Audio System
CONNECTIONS PAGE 15 Connecting to an Audio System You can listen to the sound of audio CDs and DVD video discs in stereo. If the TV has an S-Video Input, connect the DVD player with a S-Video cable to get more clear picture. -
Page 16: Connecting To Optional Equipment
PAGE 16 CONNECTIONS Connecting to Optional Equipment Enjoying Dolby Digital Sound You can enjoy the high quality dynamic sound of Dolby Digital Dolby Pro Logic, and 2 Channel Digital Stereo. Dolby Digital Dolby Digital is the surround sound technology used in the theaters showing the latest movies, and is now available to reproduce this realistic effect in the home. -
Page 17: Enjoying Dolby Digital (5.1 Ch) Sound
CONNECTIONS PAGE 17 Connecting to Optional Equipment Enjoying Dolby Digital (5.1 CH) Sound Dolby Digital Surround (5.1 CH) Dolby Digital (AC-3) is a six-channel digital surround sound technology developed by Dolby Laboratories for theater-like surround sound reproduction. DVDs supporting Dolby Digital (AC-3) technology feature the logo. -
Page 18: Enjoying Dolby Pro Logic Surround Sound
PAGE 18 CONNECTIONS Connecting to Optional Equipment Enjoying Dolby Pro Logic Surround Sound Dolby Pro Logic Surround You can still enjoy the excitement of Surround Sound even if your A/V receiver does not offer Dolby Digital (AC-3) decoding. If you A/V receiver has a Dolby Pro Logic decoder. Refer to the following connecting diagram. Connect one or two rear speakers. -
Page 19: Enjoying 2 Channel Digital Stereo Sound
CONNECTIONS PAGE 19 Connecting to Optional Equipment Enjoying 2 Channel Digital Stereo Sound 2 Channel Digital Stereo You can enjoy the dynamic sound of 2 Channel Digital Stereo by connecting this DVD player to a receiver equipped with a digital audio input and speaker system (right and left front speakers). Enjoying DTS Sound Introducing DTS Digital Surround the finest technology ever invented to transform existing “home... -
Page 20: Basic Operation
PAGE 20 BASIC OPERATION Basic Playback Press the POWER switch. Playing DVDs, CDs and Video CDs When the STANDBY is on, you can power on with the remote control. < Turn the TV’s power on and set its input to a position for DVD viewing (VIDEO etc.). -
Page 21: Stopping Playing & Switching Power Off
BASIC OPERATION PAGE 21 Basic Playback Stopping Playback & Switching Power Off Press the STOP (H ) button. Playback stops. Press the OPEN/CLOSE (L)button. < The disc table comes out. Remove the disc. Press the STANDBY ON button. < The disc table goes back in, the unit enters standby mode, and the STANDBY indicator lights. -
Page 22: Viewing A Still Frame
PAGE 22 BASIC OPERATION Basic Playback Viewing a still frame Press PAUSE(J ) button. To return to normal playback, press PLAY(G) or PAUSE(J ) button. Slow playback-Viewing a slow picture Press or hold SLOW - or SLOW + during playback. <... -
Page 23: Resuming Playback From The Same Location
BASIC OPERATION PAGE 23 Basic Playback Resuming Playback from the same location You can stop playback and resume playback later from the same location on the disc. Press STOP at the location where you want to interrupt playback. < The DVD player memorizes the location where you stopped playback. -
Page 24: Advanced Operation
PAGE 24 ADVANCED OPERATION Viewing Information about GUI Press GUI during playback. < Title, Chapter, Track : Total numbers of Title, Chapter and Track that are recorded in the disc. < Time, Audio, Subtitle, Sound, Angle : the information of the current playback location and mode. -
Page 25: Using A Title Menu/Dvd Menu
ADVANCED OPERATION PAGE 25 Using a title menu/DVD menu Using a title Menu Press TITLE. A list of the current titles is displayed. Some movie discs may contain two or more titles. If the disc has a title menu recorded on it, the TITLE button can be used to select the movie title. -
Page 26: Changing Subtitle Language
PAGE 26 ADVANCED OPERATION PAGE 26 Changing subtitle language It is possible to change the subtitle language to a Press SUBTITLE during playback. different language from the one selected at the initial When no subtitles are recorded, “OFF” will be settings. -
Page 27: Viewing From Another Angle
ADVANCED OPERATION PAGE 27 PAGE 27 Viewing from another angle Some DVDs may contain scenes which have been Press ANGLE during playback. shot simultaneously from a number of different angles. For these discs, the same scene can be viewed from each of these different angles using the ANGLE button. -
Page 28: Repeat Play
PAGE 28 PAGE 28 ADVANCED OPERATION Repeat Play Repeating sections between two Press REPEAT during playback. Press to select repeat mode. specific points (A-B repeat) Press A-B during play at the point where Repeat of REPEAT repeat play is to start (A). chapter being CHAPTER played... -
Page 29: Storing Markers In Memory To Be Viewed (Listened To) Again
ADVANCED OPERATION PAGE 29 PAGE 29 Storing markers in memory to be viewed (listened to) again Storing a MARKER in the DVD memory is similar to Storing a marker in the memory marking your page in a book. It allows you to quickly return to any point on the disc. -
Page 30: Zooming Feature/Random Play
PAGE 30 PAGE 30 ADVANCED OPERATION Zooming Feature/Random play Zooming Feature (DVD only) Random play (CD) The Zoom feature allows you to “ZOOM-IN” and The player plays the tracks in the disc in random enlarge the picture on the screen to either 4 times order. -
Page 31: Program Play
ADVANCED OPERATION PAGE 31 PAGE 31 Program play Note : Program play function is possible only with audio CDs. It does not work with DVD movie discs. The player plays the tracks in the disc in an order you specify. Press PROGRAM during stop mode. -
Page 32: Initial Setup Operation
PAGE 32 PAGE 32 INITIAL SETUP OPERATION Common procedures of initial settings SET UP Menu CLEAR Once the initial settings have been completed, the Please do as follows, to return to the initial player can always be operated under the same configuration before set up menu. -
Page 33: Selecting Display Mode
INITIAL SETUP OPERATION PAGE 33 PAGE 33 Selecting Display Mode Selecting Display mode At the SET UP screen Select the appropriate screen type according to your Press the SET UP button, in stop mode. TV set; conventional size screen (4:3) or wide-screen (16:9), and PAL/NTSC or Multi TV. -
Page 34: Selecting Audio Output
PAGE 34 PAGE 34 INITIAL SETUP OPERATION Selecting Digital Audio Output Selecting Audio Output At the SET UP screen If you have a audio system that has 2 speakers L/R Press the SET UP button, in stop mode. input. You must change the setting of speaker output, from Multichannel to Two channel. -
Page 35: Selecting Rating Level And Password-Parental Control
INITIAL SETUP OPERATION PAGE 35 PAGE 35 Selecting rating level and Password-Parental Control (DVD only) This is to prohibit the playing of specified DVDs Selecting rating level (DVD only) which are unsuitable for children. At the SET UP screen < Some DVD discs contain a restriction level which enables parents to remove scenes or prevent Press the SET UP button, in stop mode. -
Page 36: Selecting Disc Language
PAGE 36 PAGE 36 INITIAL SETUP OPERATION Selecting disc language (DVD only) This is to select the audio soundtrack language, At the SET UP screen subtitle language and the language used in title menus or DVD menus which will always be used for Press the SET UP button, in the stop mode. -
Page 37: Reference
REFERENCE PAGE 37 PAGE 37 Disc Requirements/Copyright Information Playable Discs This DVD player can play back the following discs. Disc mark Contents Disc size Maximum playback time Approx. 4 hours (single sided disc) 12 cm Approx. 8 hours (double sided disc) Audio + Video DVD video discs Approx. -
Page 38: Troubleshooting
PAGE 38 REFERENCE Troubleshooting Check the following guide for the possible cause of a problem before contacting service. Symptom Possible cause Operations Playback is not possible. < The disc is dirty or warped. < The disc is not placed properly on the disc table. <... -
Page 39: Specifications
REFERENCE PAGE 39 Specifications Power supply AC 120V, 60Hz (US/CANADA) / AC 230V, 50Hz (EUROPE) Power consumption 22 W Weight 3.9 kg (8.5lbs) External dimensions (W x H x D) 285 x 132 x 294 mm (11-1/4" x 5-3/16" x 11-1/2") Signal system NTSC (US/CANADA) / PAL (EUROPE) Laser... - Page 40 PAGE 40 INTRODUCTION Table des matières Introduction Fonctionnement sophistiqué < Consignes de sécurité ........4 < Consultation des informations sur l'interface GUI......58 < Table des matières ..........40 < Utilisation d'un menu Titre/menu DVD....59 < Précautions............41 < Pour un emploi correct et de longue durée ..42 <...
-
Page 41: Précautions
INTRODUCTION PAGE 41 Précautions Remarques concernant les Remarques concernant la manipulations condensation de l'humidité La condensation de l'humidité abîme ce lecteur < Lors du transport du lecteur DVD, utilisez toujours le carton de transport d'origine et les matériaux DVD. d'emballage d'origine. Veuillez lire soigneusement les remarques Pour maximiser la protection, remballez cet suivantes. -
Page 42: Pour Un Emploi Correct Et De Longue Durée
PAGE 42 INTRODUCTION Pour un emploi correct et de longue durée NE DEPLACEZ PAS CET APPAREIL ATTENTION : PROCEDEZ AVEC PENDANT L'ECOUTE D'UN DISQUE PRECAUTION LORSQUE VOUS PLACEZ CET APPAREIL DANS UN RACK STEREO Pendant une écoute, le disque tourne à grande A VITRES EN VERRE vitesse. -
Page 43: Fonctions
INTRODUCTION PAGE 43 Pour un emploi correct et de longue durée Fonctions Consignes de manipulation des disques DVD est une dimension entièrement nouvelle du monde des loisirs vidéo < Ne touchez pas la face de lecture d'un disque. < Les sous-titres s'affichent dans une des 32 langues. -
Page 44: Identification Des Commandes
PAGE 44 INTRODUCTION Identification des commandes Panneau avant Capteur de Bouton Dolby Plateau à Bouton Boutons télécommande Surround virtuel disque OPEN/CLOSE SKIP/SCAN Bouton POWER/Standby et Bouton Bouton Bouton témoin lumineux Regard d'affichage STOP PLAY PAUSE (Mode Veille : couleur rouge) Regard d'affichage... -
Page 45: Panneau Arrière
Sélecteur de la télécommande Retirez le chapeau pare-poussière du connecteur puis branchez Simple : pour utiliser la télécommande fermement le câble numérique optique (qui n'est pas fourni) afin du DV-H500, choisissez Signal. que les configurations du câble et du connecteur correspondent. Système pour utiliser Conservez ce chapeau pare-poussière et remettez-le toujours en... -
Page 46: Télécommande
PAGE 46 INTRODUCTION Identification des commandes TELECOMMANDE Vous trouverez les consignes portant sur chaque fonction de télécommande dans les sections appropriées de ce mode d'emploi. Bouton ALIMENTATION Bouton OPEN/CLOSE Bouton A-B Bouton POWER Bouton SHUFFLE Bouton REPEAT (RANDOM) Bouton TruSurround Bouton AUDIO Bouton SUBTITLE Bouton ANGLE... -
Page 47: Préparation De La Télécommande
INTRODUCTION PAGE 47 Identification des commandes Préparation de la télécommande Fonctionnement avec la télécommande Introduisez les piles dans la télécommande afin de Cette section vous décrit comment vous servir de la vous en servir pour faire fonctionner votre lecteur télécommande. DVD. -
Page 48: Branchements
PAGE 48 BRANCHEMENTS Branchement sur un téléviseur Branchement du lecteur DVD sur votre téléviseur Si vous raccordez le lecteur DVD à votre téléviseur par le biais d'un magnétoscope, l'image qui est diffusée risque de ne pas être tout à fait normale avec certains disques DVD. Par conséquent, nous vous recommandons fortement de ne pas brancher votre lecteur DVD sur votre magnétoscope lors de la programmation de votre système hi-fi. -
Page 49: Branchement Sur Un Système Audio
BRANCHEMENTS PAGE 49 Branchement sur un système audio Vous pouvez écouter le son de disques CD audio et de disques DVD vidéo en stéréo. Si votre téléviseur a une entrée S-Vidéo, raccordez votre lecteur DVD à l'aide d'un câble S-Vidéo afin d'obtenir une image plus Téléviseur ou moniteur avec Système audio... -
Page 50: Raccordement À Des
PAGE 50 BRANCHEMENTS Raccordement à des équipements proposés en option Pour apprécier le son Dolby Digital Vous pouvez apprécier le son dynamique de qualité de Dolby Digital ou Dolby Pro Logic et de la stéréo numérique à deux canaux. Dolby Digital Dolby Digital est la technologie sonore Surround qu'utilisent les cinémas qui projettent les films les plus récents et qui est maintenant employée pour reproduire cet effet très réaliste chez vous. -
Page 51: Pour Apprécier Le Son Dolby Digital (5.1 Ch)
BRANCHEMENTS PAGE 51 Branchement sur des appareils proposés en option Pour apprécier le son Dolby Digital (5.1 CH) Dolby Digital Surround (5.1 CH) Le Dolby Digital (AC-3)est une technologie qui offre un son surround numérique à six canaux et qui a été mise au point par Dolby Laboratories pour reproduire les sons surround des cinémas. -
Page 52: Pour Apprécier Le Son Dolby Pro Logic Surround
PAGE 52 BRANCHEMENTS Branchement sur des appareils proposés en option Pour apprécier le son Dolby Pro Logic Surround Dolby Pro Logic Surround Vous pouvez continuer d'apprécier le son Surround très excitant, même si votre récepteur A/V n'offre pas de décodage Dolby Digital (AC-3). Si votre récepteur A/V a un décodeur Dolby Pro Logic, consultez le schéma de branchement suivant. -
Page 53: Pour Apprécier Le Son Stéréo Numérique À Deux Canaux
BRANCHEMENTS PAGE 53 Branchement sur des appareils proposés en option Pour apprécier le son stéréo numérique à deux canaux Stéréo numérique à 2 canaux Vous pouvez apprécier le son dynamique d'un système stéréo numérique à 2 canaux en raccordant votre lecteur DVD à... -
Page 54: Fonctionnement De Base
PAGE 54 FONCTIONNEMENT DE BASE Lecture de base Lecture de disques DVD, CD et vidéo CD Appuyez sur le contacteur POWER. Lorsque le mode STANDBY est activé, vous < Mettez votre téléviseur sous tension et pouvez mettre l'ensemble sous tension à l'aide de programmez son entrée sur une position la télécommande. -
Page 55: Arrêt De L'écoute Et Mise Hors Tension
FONCTIONNEMENT DE BASE PAGE 55 Ecoute de base Arrêt de l'écoute et mise hors tension Appuyez sur le bouton STOP (H ). L'écoute du disque s'arrête. Appuyez sur le bouton OPEN/CLOSE (L). < TLe plateau à disque sort. Retirez le disque. Appuyez sur le bouton STANDBY ON . -
Page 56: Visionnement Avec Arrêt Sur L'image
PAGE 56 FONCTIONNEMENT DE BASE Ecoute de base Visionnement avec arrêt sur l'image Appuyez sur la touche PAUSE(J ). Pour revenir dans le mode d'écoute normale, appuyez sur la touche PLAY(G) ou PAUSE(J ). Visionnement lent Appuyez sur la touche SLOW - ou SLOW + ou maintenez la pression sur l'une de ces touches pendant l'écoute d'un disque. -
Page 57: Reprise De L'écoute Depuis Le Même Point
FONCTIONNEMENT DE BASE PAGE 57 Ecoute de base Reprise de l'écoute depuis le même point Vous pouvez arrêter l'écoute et la reprendre depuis le même point du disque. Appuyez sur la touche STOP à l'endroit où vous souhaitez interrompre l'écoute. <... -
Page 58: Fonctionnement Sophistiqué
PAGE 58 FONCTIONNEMENT SOPHISTIQUE Consultation des informations sur l'interface GUI Appuyez sur la touche GUI pendant l'écoute d'un disque. < TITLE, CHAPTER, TRACK: nombre total de titres et de chapitres enregistrés sur un disque. < TIME, AUDIO, SUBTITLE, SOUND, ANGLE : les informations concernant le lieu et le mode d'écoute actuel. -
Page 59: Utilisation D'un Menu Titre/Menu Dvd
FONCTIONNEMENT SOPHISTIQUE PAGE 59 Utilisation d'un menu Titre/menu DVD Utilisation d'un menu Titre Appuyez sur la touche TITLE. Une liste des titres actuels apparaît à l'écran. Certains disques de films contiennent deux titres, voire plus. Si un menu Titre est enregistré sur un disque, vous pouvez utiliser la touche TITLE pour sélectionner un titre de film. -
Page 60: Changement De La Langue Des Sous-Titres
PAGE 60 FONCTIONNEMENT SOPHISTIQUE Changement de la langue des sous-titres Vous pouvez changer la langue des sous-titres en Appuyez sur la touche SUBTITLE pendant utilisant une des langues sélectionnées lors des l'écoute. réglages initiaux. Lorsqu'aucun sous-titre n'est enregistré, le Cette opération ne fonctionne que sur les disques sur message "OFF"... -
Page 61: Visionnement Sous Un Autre Angle
FONCTIONNEMENT SOPHISTIQUE PAGE 61 Visionnement sous un autre angle Certains disques DVD contiennent des scènes qui ont Appuyez sur la touche ANGLE pendant une été filmées simultanément sous un certain nombre écoute. d'angles. Sur ces disques, vous pouvez visionner une même scène sous chacun de ces angles en utilisant la touche ANGLE. -
Page 62: Répétition
PAGE 62 FONCTIONNEMENT SOPHISTIQUE Répétition Appuyez sur la touche REPEAT pendant Répétition de sections entre deux l'écoute. points spécifiques (répétition A-B) Appuyez sur pour sélectionner le mode Répétition. Appuyez sur la touche A-B pendant une écoute au point où vous souhaitez que la répétition commence (A). -
Page 63: Mémorisation De Marqueurs En Vue D'un Revisionnement (D'une Nouvelle Écoute)
FONCTIONNEMENT SOPHISTIQUE PAGE 63 Mémorisation de marqueurs en mémoire en vue d'un revisionnement (d'une nouvelle écoute) La mémorisation d'un MARKER dans la mémoire Conservation d'un marqueur en mémoire DVD suit le même principe que lorsque vous placez un signet dans un livre. Cela vous permet de revenir Appuyez sur la touche MARKER pendant l'écoute rapidement en n'importe quel point du disque. -
Page 64: Fonction De Zoom/Lecture Au Hasard
PAGE 64 FONCTIONNEMENT SOPHISTIQUE Fonction de zoom/lecture au hasard Fonction de zoom (DVD uniquement) Ecoute au hasard (CD) La fonction de Zoom vous permet d'effectuer un Le lecteur fait passer les morceaux du disque dans "rapprochement" pour élargir l'image à l'écran et un ordre pris au hasard. -
Page 65: Ecoute Programmée
FONCTIONNEMENT SOPHISTIQUE PAGE 65 Ecoute programmée Remarque : cette fonction d'écoute programmée n'est possible que sur les disques CD audio. Elle ne marche pas sur les disques à films DVD. Le lecteur joue les morceaux d'un disque dans l'ordre que vous spécifiez. Appuyez sur la touche PROGRAM dans le mode d'arrêt. -
Page 66: Opérations De Programmation Initiale
PAGE 66 OPERATIONS DE PROGRAMMATION INITIALE Procédures communes pour les réglages initiaux Menu PROGRAMMATION EFFACER Dès que les réglages initiaux sont terminés, vous Procédez comme suit pour revenir à la configuration pouvez toujours faire fonctionner ce lecteur dans les initiale avant le menu Set up de programmation. mêmes conditions (en particulier les disques DVD). -
Page 67: Sélection Du Mode D'affichage
OPERATIONS DE PROGRAMMATION INITIALE PAGE 67 Sélection du mode d'affichage Sélection de l'aspect Téléviseur Sur l'écran SET UP Sélectionnez le format écran approprié en fonction Appuyez sur la touche SET UP dans le mode de votre téléviseur ; il s'agit d'un écran traditionnel d'arrêt. -
Page 68: Sélection De La Sortie Audio
PAGE 68 OPERATIONS DE PROGRAMMATION INITIALE Sélection de la sortie audio numérique Sélection de la sortie audio Sur l'écran de SET UP Si vous avez un système audio comportant 2 Appuyez sur la touche SET UP dans le mode enceintes (entrée G et entrée D) : vous devez d'arrêt changer le réglage de sortie de haut-parleurs et passez de Multichannel à... -
Page 69: Sélection Du Niveau De Classification Et Du Contrôle Parental Par Mot De Passe
OPERATIONS DE PROGRAMMATION INITIALE PAGE 69 Sélection du niveau de classification et du contrôle parental par mot de passe (DVD uniquement) Cela permet d'interdire le passage de DVD Sélection du niveau de classification (DVD spécifiques qui ne conviennent pas aux enfants. uniquement) <... -
Page 70: Sélection De La Langue Du Disque
PAGE 70 OPERATIONS DE PROGRAMMATION INITIALE Sélection de la langue du disque (DVD uniquement) Cette option permet de choisir la langue de la piste Sur l'écran SET UP son, la langue des sous-titres et la langue des menus de titres ou des menus DVD et cette langue sera Appuyez sur le bouton SET UP, dans le toujours utilisée pour chaque disque que vous mode Arrêt. -
Page 71: Référence
REFERENCE PAGE 71 Paramètres des disques/renseignements sur les droits d'auteur (copyright) Disques jouables Ce lecteur DVD peut passer les disques suivants : Repère de disque Contenu Taille du disque Durée maximale d'écoute Environ 4 heures (disque à une face) 12 cm Environ 8 heures (disque à... -
Page 72: Recherche Des Causes De Pannes
PAGE 72 REFERENCE Recherche des causes de pannes Vérifiez le guide suivant pour identifier la cause possible d'un problème avant de contacter un service de réparation. Symptôme Cause possible Opérations L'écoute est impossible. < Le disque est encrassé ou déformé. <... -
Page 73: Caractéristiques Techniques
REFERENCE PAGE 73 Caractéristiques techniques Alimentation électrique 120 V c.a., 60 Hz (ETATS-UNIS/CANADA) / 230 V c.a., 50 Hz (EUROPE) Consommation d'électricité 22 W Poids 3,9 kg (8.5lbs) Cotes externes (l x h x p) 285 x 132 x 292 mm (11-1/4" x5-3/16" x 11-1/2") Système de signaux NTSC (ETATS-UNIS/CANADA) / PAL (EUROPE) Rayon laser... - Page 74 PAGE 74...
- Page 75 PAGE 75...
- Page 76 7733 Telegraph Road, Montebello, California 90640 Phone: (323) 726-0303 TEAC CANADA LTD. 5939 Wallace Street, Mississauga, Ontario L4Z 1Z8, Canada Phone: (905) 890-8008 TEAC MEXICO, S.A. De C.V Privada De Corina, No. 18, Colonia Del Carmen Coyoacon, Mexico DF 04100 Phone: (5) 658-1943 TEAC UK LIMITED 5 Marlin House, Marlins Meadow, The Croxley Centre, Watford, Herts.
Need help?
Do you have a question about the DV-H500 and is the answer not in the manual?
Questions and answers