Table of Contents
Advertisement
Quick Links
Advertisement
Table of Contents

Subscribe to Our Youtube Channel
Related Manuals for Hover-1 HELIOS


Summary of Contents for Hover-1 HELIOS
- Page 1 ELECTRIC FOLDING SCOOTER O P E RATI ON M A NUAL H 1 H LOS...
- Page 2 HELMETS SAVE LIVES! Always wear a properly itted helmet that complies with CPSC or CE safety standards when you ride your E Scooter. Correct Fit: Make sure your helmet covers your forehead. Incorrect Fit: Forehead is exposed and vulnerable to serious injury.
- Page 3 WARNING Great care should be taken with the Hover-1 Helios when folding and unfolding it. Moving and folding parts can cut skin or pinch if mishandled. DO NOT RIDE YOUR HOVER 1 HELIOS WITHOUT THE STEERING COLUMN, FOLDING HINGE, AND HANDLEBARS SECURELY LOCKED IN PLACE.
- Page 4 • To avoid collisions, falls, and loss of control, please learn how to ride the Helios safely. • You can learn how to ride the Helios by reading the operation manual and watching videos. • All users are responsible for any consequences caused by violating warning contents or proper operations.
- Page 5 Helios, increasing internal resistance. Additonally, the discharge capacity and capacity of the battery will be signi icantly decreased. Use caution when riding the Helios in cold temperatures (below 40°F/4°C). Doing so may increase the risk of mechanical failures of the E Scooter, which may lead to damage to your device, property damage, serious bodily injury, and even death.
- Page 6 • Do not operate or allow others to operate the Helios until the user understands all instructions, warnings, and safety features described in this manual. • Check with your doctor if you have a medical condition that could a ect your ability to use the Helios.
-
Page 7: Safety Precautions
You should check with local o icials to ensure you are complying with local tra ic law requirements. • Hover-1 is not liable for tickets or violations given to riders who do not follow local laws and regulations. - Page 8 • Do not ride too fast – with increased speed comes increased risk. If you are moving at a higher speed, small bumps can create strong impacts, leading to a higher risk of injury. • Do not ride with pets. • Before stepping on your Helios, make sure it is placed lat on level ground.
- Page 9 • If you are riding near other riders, be sure to maintain a safe distance between each other to prevent collisions. • Be sure to keep your feet on the Helios at all times. Moving your feet o your Helios while driving is dangerous and may cause the Helios to stop suddenly or veer sideways.
- Page 10 • Do not ride your Helios near motor vehicles or on public roads. • Do not travel up or down steep hills. • The Helios is intended for use by a single individual, DO NOT attempt to operate the Helios with two or more people.
- Page 11 • Do not turn sharply, especially at high speeds. • Do not exceed the maximum weight limit of 240 lbs (120 kg). • Avoid driving the Helios in unsafe places, including areas with lammable gas, steam, liquid, dust, or iber that could cause ire and explosion accidents.
-
Page 12: Care And Maintenance
• Do not let the Helios come into contact with sharp objects, as this will cause scratches and damage. • Do not let the Helios fall from high places, as doing so may damage the internal circuitry. • Do not attempt to disassemble the Helios. -
Page 13: Battery Care / Maintenance
• When charging the E Scooter, only use the enclosed 1-pin charging cable provided by Hover-1. Use of any other charger or cable may lead to damage to the E Scooter, overheating, and risk of ire. Use of any other charger or cable voids the manufacturer warranty. - Page 14 • Do not attempt to modify, change, or replace your battery. • Do not use your E Scooter if the battery begins to emit odor, overheats, or begins to leak. • Do not touch any leaking materials or breathe fumes emitted. •...
-
Page 15: Specifications
Front drum and rear disc brakes BT ID: D058376 FCC ID: 2AANZHLOS UL Certi ication: UL2272 certi ied PARTS LIST A. Helios E Scooter D. 2 Battery Keys E. Phone Mount & Screw B. Hex Keys C. Charger & Charging Cable 14 14... - Page 16 INSTALL MOBILE PHONE HOLDER Phone mount installation guide: 1. Insert the phone holder on the mounting base as shown below. 2. Use the provided 3mm hex key to screw the phone holder onto the mount. Tighten completely.
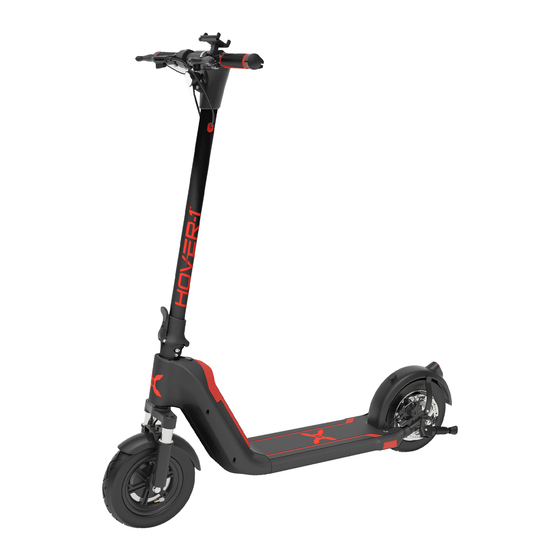
- Page 17 HOVER 1 HELIOS DIAGRAM FEATURES/PARTS 1. Front Brake Lever 9. Foot Deck 2. Rear Brake Lever 10. Drum Brake 3. Throttle 11. Rear Fender 4. Display 12. Brake Light 5. Handlebar 13. Disc Brake 6. Headlight 14. Kickstand 7. Folding Hinge 15.
-
Page 18: Led Display
HOVER 1 HELIOS DIAGRAM REAR BRAKE HANDLE (L) FRONT BRAKE HANDLE (R) MOBILE PHONE HOLDER POWER ON OFF BELL BUTTON FOLDING CLIP THROTTLE LED DISPLAY LED LIGHTS ON/OFF BUTTON LED DISPLAY 1. Braking Light 2. Current Speed 3. Speed Mode 4. -
Page 19: Speed Modes
SPEED MODES To activate di erent speed modes, ensure the Helios is powered on and not in motion. Press the power button 2 times. The speed mode number will appear on your display to indicate which speed mode is activated. -
Page 20: App Instruction
• Open the app and select “Sign Up” or “Log In”. • Complete any app updates that are needed. • Click the button on the top right hand corner (+) to add the Helios. • Select “Auto Scan” at the top of the screen and turn on your Helios. - Page 21 E Scooter is now being charged. • When the red indicator light on your charger changes to green, then your E Scooter is fully charged. • After fully charging your Helios, unplug the charger from it and from the power outlet. WARNING...
-
Page 22: Pinch Points
Your Helios should be locked in a folded position. To unfold your Helios Pro, pull on the bottom edge of the magnetic clip to unlock the steering column. Raise the steering column until it is pointing straight up and clicks into place. -
Page 23: Pre-Ride Checklist
Ensure that your E Scooter is in proper working order each time ride. part E Scooter does function correctly, please contact our customer support team. It is important that you fully understand all the functions of your Helios. If these functions used correctly, will have full control of your Helios. - Page 24 When you are comfortable riding the Helios, power it on. For the motor to activate, you must irst push o the ground with your foot to get the Helios moving, then press the throttle down with your thumb.
- Page 25 OPERATING RANGE The Helios can travel up to 24 miles on a fully charged battery under ideal riding conditions. The following are some of the major factors that will a ect the operating range of your device: •...
-
Page 26: Safety Alerts
SAFETY ALERTS If a system error occurs or an improper operation is performed while riding your Helios, the device will alert the user in a variety of ways. WARNING The following are common occurrences that will produce safety alerts. These notices should not be ignored and appropriate action should be taken to correct any improper operation, failure, or errors. -
Page 27: Fcc Statement
FCC STATEMENT NOTE: This equipment has been tested and found to comply with the limits for a Class B digital device, pursuant to Part 15 of the FCC Rules. These limits are designed to provide reasonable protection against harmful interference in a residential installation. This equipment generates, uses, and can radiate radio frequency energy and, if not installed and used in accordance with the instructions, may cause harmful interference to radio communications. -
Page 28: Warranty
WARRANTY For warranty information, please visit us at www.hover-1.com Error code E1- motor hall failure, the motor needs to be replaced Error code E2 - accelerator failure, the accelerator needs to be replaced Error code E3 - motor blocking fault, release the... - Page 29 @Hover1Rideables @RideHover1 @RideHover1 www.Hover-1.com...
Need help?
Do you have a question about the HELIOS and is the answer not in the manual?
Questions and answers
I can't get it to turn on. It's says 100% charged
If your Hover-1 HELIOS shows 100% charged but will not turn on, consider these possible reasons:
1. Kick-To-Start Feature: The scooter will not accelerate unless it is moving at least 1.8 mph (3 km/h). Try pushing off the ground before pressing the throttle.
2. Power Button Issue: Ensure you are pressing the power button correctly and holding it long enough.
3. Battery Connection: The lithium-ion battery is built-in and should not be removed. If there is a connection issue, it may need professional servicing.
4. Overheating or Temperature Issues: The scooter operates between 32°F - 104°F (0°C - 40°C). If the temperature is outside this range, the battery may not function properly.
5. Component Wear or Damage: If there are cracks, scratches, or discoloration in stressed areas, a component may have failed and needs replacement.
If none of these resolve the issue, the scooter may require professional inspection.
This answer is automatically generated
What is the battery keys for