
Related Manuals for Auxx Lift One


Summary of Contents for Auxx Lift One
- Page 1 AUXXLIFT One All rights reserved Design and Quality US Patent AUXXLIFT of the USA Release 9/2021/SW...
-
Page 2: Before You Start
Before YOU start advanced advanced tough tough 1. Have you read through the instructions? easy easy difficult difficult 2. Do you have all the recommended tools? 3. Do you have somebody assisting you? 4. Have you allocated enough time? For a professional it takes about 3 hours to install. What is most important is to follow the instructions and read everything carefully before you start. -
Page 3: Recommended Tools
RECOMMENDED TOOLS 7/16"-11mm 9/32" / 7mm 13/32"-10mm 3/16" / 5mm 23/32"-18mm 1/8" / 3mm 0.04"X0.1" 1X3mm 3/16" / 5mm 3/32" / 2.5mm... - Page 4 Version 1 0503A 0301A Version 2 Only Version 2 0509A 0803A Down Down STOP STOP 1 ⅛” x ⅛” 1102A 1 channel 1105A 2 channel 1106A 6 channel 1107A M5x3 0002A 0400A 0302A 1206A 0504A 0400A M5x12 1207A 0802A 0507A 0505A 0602A 2001A...
-
Page 5: Troubleshooting
Motors should be mounted such that the wires spooling off the motors are plumb and perpendicular to the floor. Information Troubleshooting... - Page 6 Strut Channels Joist 90º Joist Extra material for this configuration is not included. You will find the below materials at any big-box hardware store or order it from us (contact us). 2x Strut Channel 57.5" or 146cm 8x Strut Spring Nuts ½” or M12 8x Strut Screws Hex-Head ½”...
- Page 7 Warning! DO NOT use an Impact Driver Strut to tighten the Lag screws! Channels 7/16" 11mm 1/8" 3mm for pre-drill Tighten screw until the washer no longer rotates. Then tighten screw another 10ᵒ in same direction. 10ᵒ= (200 pound/ inch=20Nm) 59"/150cm 90ᵒ...
- Page 8 CONTROLLER MOUNTING OPTIONS Controller If Drywall/Concrete Ceiling: 1 ⅛” x ⅛” 3/16" E.g. drywall Strut Strut Controller Controller Strut Outlet PG Grommet STOP DOWN End cap End cap 3/16"...
- Page 9 BLACK bl ˂ Down ˃ WHITE wt Neutral Wiring GREEN gn Earth ˂ Down BLACK bl ˃ WHITE wt Neutral GREEN gn Earth GREEN gn Earth WHITE wt Neutral BLACK bl Before connecting to the outlet, make sure that all wires are tightly connected Wires are connected by tightening binding...
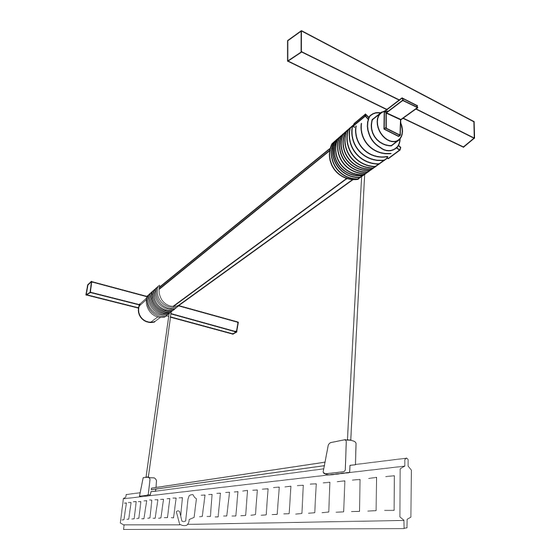
- Page 10 green Rope unwind Motor The black cables that come out of the motors needs to come straight down towards floor. Cable in direction ceiling After cutting the middle cable tie, the wire rope must be unrolled from the tube until it stops due to the other remaining cable ties.
- Page 11 Beam adjustment Wire rope groove Tighten the screws Remove all 2 cable ties evenly by hand. carefully. Do not use an Impact driver. Set screws Do not tighten yet! 3/16" / 5mm Steel rope Vinyl 3/32" / 2.5mm 2-3 revolution M5x16...
- Page 12 Overview Controller COLOR KEY ADJ DM Learn Max Time Delay Time LC LF RF RC S2 S3 BLACK LED intern Motor switch Left Ceiling WHITE Left Floor GREEN Right Floor Right Ceiling Controller Power Power on (Power) Controller Functions Green light on, SW1.1 Ind.
- Page 13 Motor Adjustment (leveling), Preparation LED3 LED2 LED1 Remote learn button Stop red green green red Lift activity Indicator LED Watch the Video on Indicator LED ADJ DM www.auxx-lift.com/ installation-help Lift mode, DEADMAN active Delay time Default 5 Motor adjustment mode, Deadman off DeadMan off- press key Wire and Motor switch test...
- Page 14 Motor Adjustment (leveling), Preparation Technical information for 400 lbs lift Technical information for 600 lbs lift Max travel is 21.8 feet/ 6.40m & storage Max travel is 15.4 feet/ 4.70m & storage 1 tube rotation 12 turns on the stop switches 1 tube rotation 12 turns on the stop switches 1 tube rotation...
- Page 15 Prepare Adjustment Adjustment hints One Motor lift Left Motor Controller Inside Switches Floor adjustment Outside Switches Ceiling adjustment (- ) (+) Rigthy tighty Lefty loosey...
-
Page 16: Level Adjustment
Level Adjustment White LED White LED LED3 LED2 LED1 Lift activity Indicator LED Lift activity Lift activity ADJ DM Max running Time 1.5min Overheated? Not running just clicking? Motors were running more than 4min? Allow motors to cool for 20min STOP DOWN Motor... - Page 17 Level Adjustment White LED White LED Motor Lift off Lift off Ceiling Stop point Max running Time 1.5min Press Down 3, lift stops here by itself or press Stop 2 before touch Floor Stop point the floor Overheated? No running only clicking? Proper coiled wire rope Motors were running more than 4min?
- Page 18 Strut cover Rail Cover with caps (Cable side) 5'/150cm Click Click Load evently! If you are done with the adjustment, please switch the DeadMan function back on Important! The Lift has to run to the ceiling end points (stopped automatically) in order to be leveled properly.
- Page 19 Inspection Inspect and tighten all screws, wire clips, grommets and cotter pins. Make an alignment mark on each part that might be able to shift over time (like the motor mounts) using a Sharpie pen. Inspect all items, especially movement on the alignment marks, once a year.
- Page 20 Check Check list (after installing, and than ones the year! 1. Lag screws tighten 4X ░ 2. Cotter Pins installed and curved up 2X ░ 3. 12mm Bracket screws tighten 2X ░ 4. All set screws tighten 12X ░ 5. All 6mm screws tighten 8X ░ 6.
- Page 21 Running Time Preadjusted for 1.5 min LED3 LED2 LED1 Remote learn button red green green red Lift activity Indicator LED Indicator LED ADJ DM Delay time Default 5 Controller running time learn button (Power) 10sec-1.5min Switch on Controller Indicator Switch on the Controller, press power switch to the left LED DL1 is lit Programming the running time Indicator...
- Page 22 Controller running time learn button (Power) 10sec-1.5min Stop Down Learn Remotes are Pre-configured Max 5 sec Erase memory One remote Push S2 and more, start with hold until DL2 Click S2 switch off Click S2 (not hold) Learn Controller switch...
Need help?
Do you have a question about the One and is the answer not in the manual?
Questions and answers