Advertisement
Assembly Instructions
1) Carefully cut out the parts.
2) Make mountain folds and valley folds along the dotted lines,
as indicated by the directions.
3) Assemble the parts in the order shown by the numbers on the glue tabs.
(Read the assembly instruction for more information.)
4) Attach the parts in order.
(Read the assembly instruction for more information.)
5) Your Paper craft model is finished.
Tools
Scissors, glue (We recommend a strong adhesive such as woodwork glue.)
Caution
Keep glue away from small children.
Be careful not to cut your fingers when using scissors.
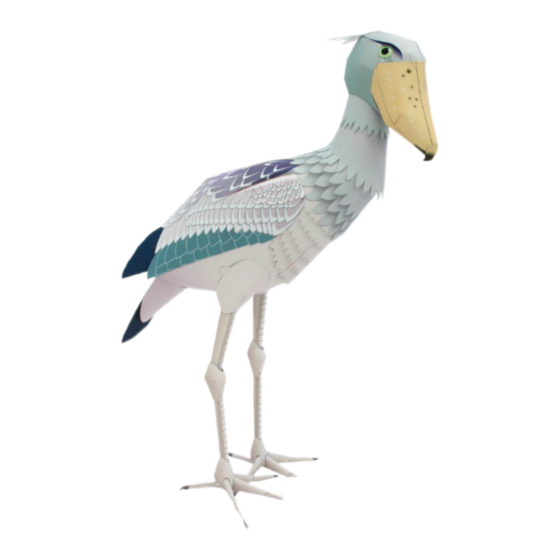
Shoebill : Assembly Instructions
Shoebill
With an approximately 1.2-meter body
and weighing approximately five
kilograms, shoebills are birds that are
large indeed. They have huge beaks
and are known to be able to remain
almost completely still for hours when
taking aim at their prey. They live in
marshy areas of eastern and central
Africa or in neighboring prairies. They
eat fish, frogs, and snakes, and although
rare, they also eat small animals such as
young water birds as well. They are
excellent at flying and possess a
wingspan measuring approximately two
meters.
The scale of this papercraft is
approximately 1/4 of the original size
of a shoebill.
Notation Key
Scissors line
Cut in line
Glue up to this line
Mountain fold
Valley fold
Glue spot
Advertisement
Table of Contents

Subscribe to Our Youtube Channel
Related Manuals for Canon CREATIVE PARK Shoebill


Summary of Contents for Canon CREATIVE PARK Shoebill
- Page 1 Shoebill : Assembly Instructions Shoebill With an approximately 1.2-meter body and weighing approximately five kilograms, shoebills are birds that are large indeed. They have huge beaks and are known to be able to remain almost completely still for hours when taking aim at their prey.
- Page 2 Shoebill : Assembly Instructions Assemble Assemble to make the beak. Assemble and the beak. Insert inside.
- Page 3 Shoebill : Assembly Instructions 8 9 10 Assemble and glue Attach them to the back side of Assemble to the body.
- Page 4 Shoebill : Assembly Instructions Assemble and attach them to the body. 13 15 16 19 14 17 18 Assemble ) to make the legs.
- Page 5 Shoebill : Assembly Instructions 26 27 Assemble to make the feet. Glue the legs to the body, and finish by inserting the head into the neck. Do not attach The head is designed the head with glue. to move. Complete! Assemble the nameplate.
Need help?
Do you have a question about the CREATIVE PARK Shoebill and is the answer not in the manual?
Questions and answers