Advertisement
Quick Links
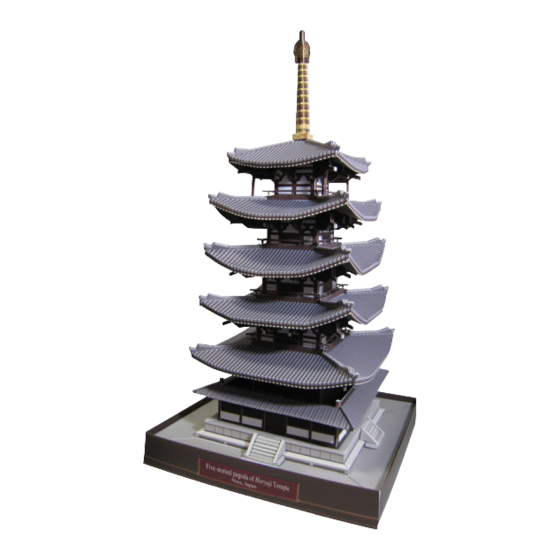
Five-storied pagoda of Horyuji Temple, Japan : Assembly Instructions
h t t p: // w ww. c a n o n. c o m /c - p a rk /
View of completed model
* This model was designed for Papercraft and may differ from the original in some respects.
Assembly Instructions : Ten A4 sheets (No. 1 to No. 10)
* Build the model by carefully reading the Assembly Instructions , in the parts sheet page order.
*Hint: Trace along the folds with a ruler
and an exhausted pen (no ink) to get a sharper, easier fold.
Assembly Instructions
Mountain fold(dotted line)
Make a mountain fold.
Valley fold(dashed and dotted line)
Make a valley fold.
Scissors line(solid line)
Cut along the line.
Cut in line(solid line)
Cut along the line.
Scissors, set square, glue(We recommend stick glue), pencil, used
Tools and materials
ballpoint pen, toothpicks, tweezers, (useful for handling small parts)
Before gluing, crease the paper along mountain fold and valley
Assembly tip
fold lines and make sure rounded sections are nice and stiff.
Glue, scissors and other tools may be dangerous to young children
Caution
so be sure to keep them out of the reach of young children.
Glue
The glue spot(colored dot)
shows where to apply the glue.
Glue spot(Red dot)
Glue parts with the same number together.
Glue spot(Green dot)
Glue within the same part.
Glue spot(Blue dot)
Glue to the rear of the other part.
Before starting assembly :
Writing the number of each section on its back side before
cutting out the sections is highly recommended.
(* This way, you can be sure which section is which even
after cutting out the sections.)
[ 1 ] Assemble the foundation and base pillars.
Indicates where sections should be glued
together.
Indicates where to insert sections.
Do not glue the sections together.
Indicates sections that should be glued first,
then cut out.
The staircases are minute and
difficult to fold. Use a ruler to
define the folding lines as shown
in the illustration.
Advertisement

Subscribe to Our Youtube Channel
Related Manuals for Canon CREATIVE PARK Five-storied pagoda of Horvuji Temple, Japan


Summary of Contents for Canon CREATIVE PARK Five-storied pagoda of Horvuji Temple, Japan
- Page 1 Five-storied pagoda of Horyuji Temple, Japan : Assembly Instructions Indicates where sections should be glued Before starting assembly : together. Writing the number of each section on its back side before Indicates where to insert sections. cutting out the sections is highly recommended. Do not glue the sections together.
- Page 2 Five-storied pagoda of Horyuji Temple, Japan : Assembly Instructions Rear west Front east...
- Page 3 Five-storied pagoda of Horyuji Temple, Japan : Assembly Instructions After gluing the parts, cut the extra paper off. The east side is the front. Assemble 6 parts Glue the Part in the same way. facing backward. Assemble the 4 sides in the same way.
- Page 4 Five-storied pagoda of Horyuji Temple, Japan : Assembly Instructions [ 2 ] Assemble the building. Insert the pillar part to see if insertion and removal are smooth.
- Page 5 Five-storied pagoda of Horyuji Temple, Japan : Assembly Instructions Rear (west) Left (south) Right (north) Front (east) Cross-section...
- Page 6 Five-storied pagoda of Horyuji Temple, Japan : Assembly Instructions Glue to the rear side Aline the upper parts and glue them in the same way as the front part. together. Glue to the rear side in the same way as the front part.
- Page 7 Five-storied pagoda of Horyuji Temple, Japan : Assembly Instructions Glue to the rear side in the same way as the front part. Parts Glue to the rear side must face the front. in the same way as the front part. Assemble Parts in the same way.
- Page 8 Five-storied pagoda of Horyuji Temple, Japan : Assembly Instructions Glue to the rear side in the same way as the front part. Glue to the rear side in the same way as the front part. Bend in the direction of the arrow as you glue.
- Page 9 Five-storied pagoda of Horyuji Temple, Japan : Assembly Instructions Glue to the rear side in the same way as East the front part. Glue to the rear side in the same way as the front part. West South North Bend in the direction of the arrow as you glue. Pay attention to the compass directions.
- Page 10 Five-storied pagoda of Horyuji Temple, Japan : Assembly Instructions [ 3 ] Insert the main building to the foundation. Finished!
Need help?
Do you have a question about the CREATIVE PARK Five-storied pagoda of Horvuji Temple, Japan and is the answer not in the manual?
Questions and answers