Advertisement
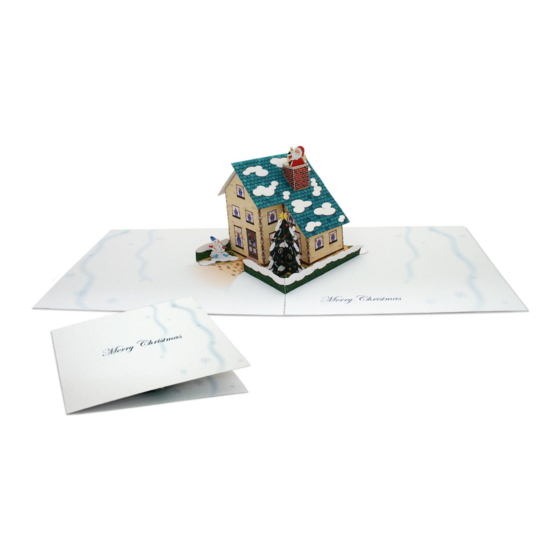
Pop-up Card(Christmas house): Assembly Instructions
PAGE01
Cut out the parts and fold them along the fold lines on each.
Part C
Part A
Part E
Part B
Part F
Fold back the longest glue tab on the bottom edge of part A, and glue it to the reverse side.
For part B also, fold back the longest glue tab on the bottom edge and glue it to the reverse side.
Part D
Part I
Part J
Part K
Part L
Part G
Part M
Part N
Part O
Part H
Part P
Advertisement
Table of Contents

Related Manuals for Canon Creative Park Pop-up Card Christmas House


Summary of Contents for Canon Creative Park Pop-up Card Christmas House
- Page 1 Pop-up Card(Christmas house): Assembly Instructions Cut out the parts and fold them along the fold lines on each. Part C Part D Part I Part J Part A Part E Part K Part L Part G Part M Part B Part N Part O Part H...
- Page 2 Pop-up Card(Christmas house): Assembly Instructions As shown in the picture, attach the left glue tab on part B to the wall glue tab on part A. Fold back the top part of part D along the fold line, and glue it to the reverse side. Fold up the parts you glued together in 4 as shown in the picture, while attach- Fold back the vertical piece along the fold line, and glue it to the reverse side.
- Page 3 Pop-up Card(Christmas house): Assembly Instructions Attach part E. Fold part C down the middle and glue together at the back. Insert the piece you made in 9 into the piece you made in 6, in line with the po- Fold back the horizontal glue tab at the bottom of part F (marked ) and glue sition of the chimney on 6.
- Page 4 Pop-up Card(Christmas house): Assembly Instructions Glue the glue tab on the piece you made in 15 to the reverse side of part F. Fold back the top glue tab (marked ) on part F at the fold line, and glue it to the reverse side.
- Page 5 Pop-up Card(Christmas house): Assembly Instructions Attach part G to the roof. Fold part I down the middle and glue together at the back. Fold back the bottom glue tab on part H (marked ) and glue it to the reverse side. Pass the piece you made in 25 through the vertical strip on the top back edge of part F as shown in the photo, and secure its glue tabs to the reverse side of the roof.
- Page 6 Pop-up Card(Christmas house): Assembly Instructions Attach the right glue tab on part J to the glue tab at the back left corner of the house. After gluing, carefully fold it up and open and close the card a few times to ch- eck the mechanism.
- Page 7 Pop-up Card(Christmas house): Assembly Instructions Fold back the second glue tab from the left and right on the bottom of part M, Insert the bottom glue tabs of the part you made in 36 through the slits on the and glue them to the reverse side (the parts in the photo only). base, and attach them to the reverse side.
Need help?
Do you have a question about the Creative Park Pop-up Card Christmas House and is the answer not in the manual?
Questions and answers