Advertisement
Quick Links
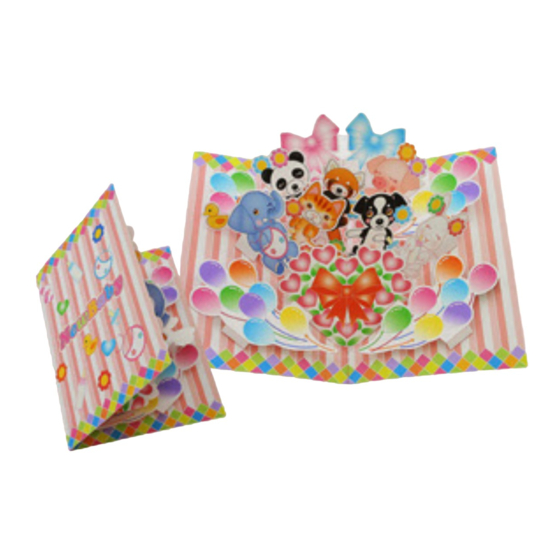
Pop-up Card (New Baby) : Assembly Instructions
Tools
Scissors
Paste, or woodwork glue
Stencil pen, or bodkin
Ruler
The Assembly instructions are divided into three blocks:
A (Card), B (Animals, Decorations).
Follow the instructions for each block to assemble your card.
<Caution>
Keep scissors and glue away from small children.
Be careful not to cut your fingers when using scissors.
Notation Key
Scissors line
Mountain fold
Valley fold
Glue spot
Parts No.
Numbers of parts
to be attached
Assemble the card
Use pattern: Page2, Page3.
Cut out A1 by cutting along the lines.
Cut along the line marked
Make a mountain fold on A1.
Trace along the mountain fold line with a stencil pen, scoring it
to make it easier to fold.
Attach A1 and A2, and the card is complete.
Using the photo as a guide, attach in the direction of the arrow.
Check that A1 and A2 are the right way up,
place some paste on the blue area of the
back side, and attach them together.
Page
Katsuyuki Shiga ( PinoArt )
Canon Inc.
.
Mountain fold
Scissors line
Parts No. / Parts name
Advertisement

Related Manuals for Canon CREATIVE PARK Pop-up Card


Summary of Contents for Canon CREATIVE PARK Pop-up Card
- Page 1 Pop-up Card (New Baby) : Assembly Instructions Page Katsuyuki Shiga ( PinoArt ) Canon Inc. Assemble the card Use pattern: Page2, Page3. Cut out A1 by cutting along the lines. Cut along the line marked Mountain fold Scissors line Parts No. / Parts name Make a mountain fold on A1.
- Page 2 Pop-up Card (New Baby) : Assembly Instructions Page Katsuyuki Shiga ( PinoArt ) Canon Inc. Make the animals and decorations Glue B7,B8,B9 and B10 to the card. Use pattern: Page4, Page5. Glue B1 to the card. After attaching the parts, open and close to check if the card opens smoothly.
Need help?
Do you have a question about the CREATIVE PARK Pop-up Card and is the answer not in the manual?
Questions and answers