
Related Manuals for Teba therm TP-05


Summary of Contents for Teba therm TP-05
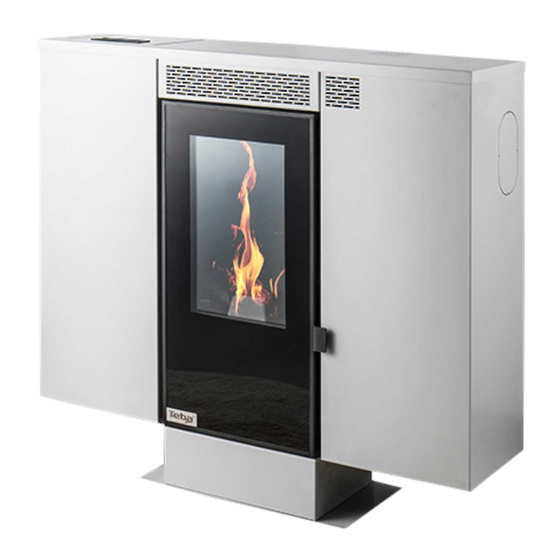
- Page 1 Installation and User Manual Model TP-05 / TP-06 / TP-07 / TP-08/ TP-09 TP-10 / TP-11 Pellet Stove Tested according to DIN EN 14785...
-
Page 2: Table Of Contents
TABLE OF CONTENTS 1. INTRODUCTION ................................3 2. FEATURES ..................................3 3. WARNING ..................................3 4. INSTALLATION AND CONNECTION ..........................4 4.1 GENERAL .................................. 4 4.2 SAFETY ..................................4 4.3 ELECTRICITY ................................5 4.4 FLUE PIPE CONNECTION ............................5 4.5 MINIMUM SAFETY DISTANCES .......................... 10 5. -
Page 3: Introduction
We recommend you to keep this guide in order to reach the information about the correct use of the stove at the beginning of every winter. 2. FEATURES TECHNICAL TP-05 TP-06 TP-07 TP-08 TP-09 TP-10 TP-11... -
Page 4: Installation And Connection
● CLEAN THE FIRE POT EVERYDAY. ● AT THE END OF THE WINTER, GENERAL MAINTENANCE AND CLEANING MUST BE CARIED OUT AND THE FUEL STORAGE MUST BE EMPTIED. ● DAMAGES CAUSED BY USING INAPPROPRIATE PELLET AND NON-REGULAR CLEANING ARE NOT COVERED BY WARRANTY. ●... -
Page 5: Electricity
* In order to get better heat efficiency and extend the life of the product, qualitative pellet and wood fuel should be preferred. Do not use moist or wetted pellet, sawdust, coal etc. * Since the pellet stoves are designed according to the interior spaces and give heat to the environment, they should not be installed in places such as bathrooms, shelter, cellar. - Page 6 We recommend the use of twin(double) wall or twin(double) wall insulated system for chimney connection. • In the interior spaces, by using twin wall chimney system, exhaust gas can be throughed out to the outside, at the same time fresh air provided to inside. Twin insulated chimney should be used on the outside.
- Page 7 ROOM THERMOSTAT CONNECTION POINT TP-05 / TP-06 / TP-07...
- Page 8 TP-08 TP-09...
- Page 9 TP-10 TP-11...
-
Page 10: Minimum Safety Distances
4.5 MINIMUM SAFETY DISTANCES A 50 cm from rear wall B 40 cm from lateral wall C 100cm from front side Flammable materials and furniture should not be placed at a distance of 100 cm in the radiation area (C) of the flame monitoring cover. -
Page 11: Control Panel
5. CONTROL PANEL FUNCTIONS BUTTONS DESCRIPTION to exit from menu or submenu and to EXIT return previous menu Wait for 3 seconds by touching the P2 to ON- OFF switch on and off (Er05) Wait for 3-4 seconds by touching the P2 RESET to reset the error code MENU... -
Page 12: Error Code And Explanation
5.1. ERROR CODE AND EXPLANATION NOTE: When you encounter the error codes, firstly be sure stove and parts don’t work. You will see “BLOCK” on the screen. After checking and correcting the following connection, parts and values according to the error code, the error code must be cleared by -pressing the P2 for 3 seconds. -
Page 13: Menu Functions
5.2. MENU FUNCTIONS Touch the P3 button to enter the user menu. The following menus will appear on the screen. Combustion Management Heating Management Remote control Chrono Loading Press P3 for 3 seconds to enter the input menu, the following menu will appear on the screen. -
Page 14: Chrono Menu
5.2.3 REMOTE CONTROL MENU Remote control is not available 5.2.4. CHRONO MENU Press the P3 button to enter the menu. The display shows the chrono management menu. Enter the modality menu by touching the P3 button. The screen on the right-up will appear. In the chrono menu, the daily / Daily weekly / weekend time settings are usually switched on / off. -
Page 15: Loading Menu
5.2.5. LOADING MENU Press the P3 button to enter the submenu. It will manually load the pellet when it is turned ON with the P4 button. Pellet loading will stop by selecting OFF mode. Use P1 ESC to exit. (This is only a process to fill the pot and accelerate the ignition during the first burning phase when the product is in the OFF mode. -
Page 16: Cleaning And Maintenance
6. CLEANING AND MAINTENANCE TP-05 / TP-06 / TP-07 TP-08... - Page 17 TP-09 TP-10...
-
Page 18: Flame Pipes Cleaning
TP-11 Sections to clean Cleaning Frequency Flame Transmission Channels Cleaning Average 15 days Firepot Cleaning Daily Ash tray 1 Cleaning Daily Ash tray 2 Cleaning Average 20-30 dyas 6.1 FLAME PIPES CLEANING For the cleaning of the flame transmission channels, the combustion wall behind the firepot should be removed by taking screws out. -
Page 19: Ash Tray 1 And Ash Tray 2 Cleaning
6.3 ASH TRAY 1 AND ASH TRAY 2 CLEANING The ashtray 1 and ashtary 2 which is placed under or behind(according to the model) the firepot is easy-to-replace. When you pull them, they will be moved out easily. You should clean ash tray 1 daily, ash tray 2 once in 20 days. - Page 20 PRODUCER AUTHORIZED Company Name : Aral Makina Company Name Madeni Eşya San. Ve Tic.Ltd. Şti Address : Organize Sanayi Bölgesi Address : 8.Cad. No: 16 Melikgazi / KAYSERİ Tel : +90 0 352 321 28 11 Tel : Fax : +90 0 352 321 28 14 Fax : E- posta : E- posta :...
Need help?
Do you have a question about the TP-05 and is the answer not in the manual?
Questions and answers