Table of Contents
Advertisement
Quick Links
Advertisement
Table of Contents

Related Manuals for Bowers & Wilkins CDA-4D


Summary of Contents for Bowers & Wilkins CDA-4D
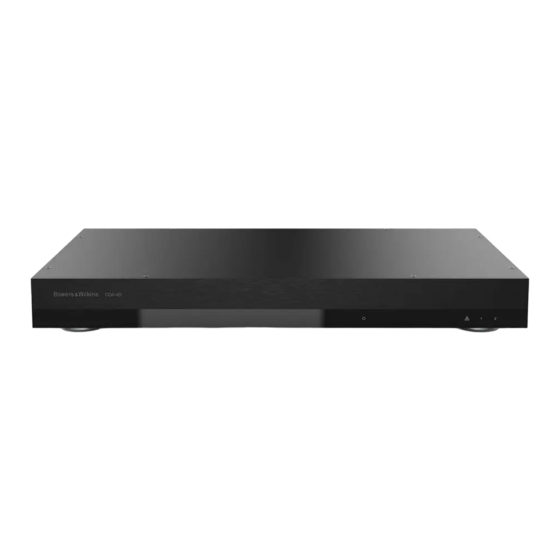
- Page 1 CDA-4D Distribution Amplifier...
- Page 2 Note: Always check for the latest software on the Bower & Wilkins website. *AVB is available when two or more Bowers & Wilkins CDA amplifiers (CDA-2HD or CDA-4D) are connected to the same wired network using AVB enabled network hardware (AVB enabled switch).
- Page 3 CLASS 2 WIRING 1. CDA-4D Carton Contents CÂBLAGE DE CLASSE 2 a. 1 x CDA-4D b. 2 x Rack-mount ears Connecting speaker wires or input cables c. 4 x Feet d. 1 x Power cable while the amplifier is powered may cause electrical shock and could damage the e.
-
Page 4: Installation
2. Installation Diagram 2. Rack mounting 2.1 Rack mounting CDA-4D is intended to be installed in a standard 19-inch equipment rack. It is supplied with rack mount ears, but not rack mount bolts and nuts. Ensure that, once mounted in the rack, the amplifier is well ventilated and that the ventilation apertures are not obstructed. -
Page 5: Controls And Connections
2.2 Foot mounting Diagram 3. Foot mounting CDA-4D can also be table mounted and is supplied with feet and feet screws, see Diagram 3. Ensure that, once positioned, the amplifier is well ventilated and that the ventilation apertures are not obstructed. - Page 6 Unplug the power cord before making connections. DIGITAL IN 1 4.1 Connecting from source There are three options when connecting audio inputs to the CDA-4D distribution amplifier. Ethernet (network connection) Network connection is mandatory for setup and configuration. See section 6 Network Connection Instruction.
- Page 7 Diagram 9. Connecting to speakers 4.2 Connecting to speakers CDA-4D can power two stereo output of audio and has phoenix-style terminal blocks for speaker Standard Wiring connections. Speakers can also be wired to bridge channels to increase the power available to the speakers.
-
Page 8: Setting Power Mode
3. (Optional) Connect the 12V TRIGGER OUT socket to a 12V TRIGGER IN on another amplifier to link the power control together In this mode, CDA-4D will turn on when a 12V signal is present on the 12V Trigger Input. This 12V trigger 180º... - Page 9 7.1.1 Information In this section, the user can add a name for the CDA-4D amplifier and enter the installation details. The amplifier model, Firmware version, serial number, temperature and time/date are displayed here, they...
-
Page 10: Auto Detect
7.1.3 Network DHCP ON / OFF CDA-4D’s factory default setting has DHCP (Dynamic Host Connection Protocol) set to ON. DHCP shows the current IP address used when DHCP is ON. When DHCP is set to OFF this allows you to enter a desired static IP address. -
Page 11: Lock Settings
Control Systems Wake on Lan must be enabled to control the unit via a control system. Only one active connection to the unit will be available at any given point. We recommend setting up and tuning the unit via the web portal before connecting to a control system. - Page 12 7.2 Input / Output Settings In the Input / Output Settings tab, configuration of the routing for each input to a selected output can be made here. Mode of use, individual trim level and volume parameters can also be set.
- Page 13 Analogue / Digital / AVB* *AVB is available when two or more Bowers & Wilkins CDA amplifiers (CDA-2HD or CDA-4D) are connected to the same wired network using AVB enabled network hardware (AVB enabled switch). Analogue or digital input sources from other CDA amplifiers can be selected as an input source.
- Page 14 7.2.2 Mode of Use The Mode of Use defines the system setup and the number of possible speaker configuration variants. There are 3 options: Speaker Mode, Bridged-Tied Load Mode and 2.1 System Mode. Speaker Mode Four channels driving four speakers in stereo or mono. Choosing a different mode will determine the type of Bowers &...
-
Page 15: Amplifier Mode
Bridge-Tied Load product. 7.2.4 Zone Zone CDA-4D has 2 output zone, Zone 1 or Zone 2. This groups the settings Output Volume, Turn On Volume and Mute across channels which have the same Zone. - Page 16 Bowers & Wilkins products In the DSP Configuration tab, you can make fine adjustment like Phase, Delay and Tone Control on Bowers & Wilkins products. CDA-4D is designed to provide the best audio quality when used with Bowers & Wilkins speakers.
- Page 17 Third-party products when a User Preset is selected...
- Page 18 7.3.2 Test Signal Phase (available when a Bowers & Wilkins The CDA-4D includes a built-in pink noise generator. subwoofer or a User Preset is selected) The pink noise signal can be used in conjunction Phase default is set at OFF, when turn ON, with a spectrum analyser to measure the speakers.
- Page 19 EQ Graph The EQ graph reflects the changes to the EQ Parameter. EQ Parameter The CDA-4D features an 8 band parametric EQ. Adjustments made to the EQ will be displayed on the output frequency response graph with the following configurable settings:...
- Page 20 8. LED status Diagram 13. LED status Power LED Status Dark / unlit Dim white Standby White Fault Zone status LED Status Dark / unlit Off / Signal not present / PSU fault White On and signal present Zone fault Network status LED Status White...
-
Page 21: Specifications
10. Specifications Audio Specifications Load impedance range: >3Ω per channel (>6Ω in bridge mode) 60W into 8Ω Output Power per channel, non-clipped: 125W into 4Ω 250W into 8Ω Output Power bridge mode, non-clipped: 500W short term Output Power total, all channels: >125W continuous DC offset voltage: <50mV...
Need help?
Do you have a question about the CDA-4D and is the answer not in the manual?
Questions and answers