Table of Contents
Advertisement
Quick Links
Advertisement
Table of Contents

Related Manuals for Smeg ST4523IN


Summary of Contents for Smeg ST4523IN
- Page 1 User Manual Dishwasher ST4523IN...
-
Page 2: Table Of Contents
General information and tips Environmental information VISIT OUR WEBSITE TO: Get usage advice, brochures, trouble shooter, service and repair information: www.smeg.com/services/customer-service Subject to change without notice. SAFETY INFORMATION Before the installation and use of the appliance, carefully read the supplied instructions. The manufacturer is not responsible for any injuries or damage that are the result of incorrect installation or usage. - Page 3 Children between 3 and 8 years of age and persons with • very extensive and complex disabilities shall be kept away from the appliance unless continuously supervised. Children of less than 3 years of age should be kept away • from the appliance unless continuously supervised.
-
Page 4: Safety Instructions
The appliance is to be connected to the water mains using • the new supplied hose-sets. Old hose sets must not be reused. SAFETY INSTRUCTIONS Installation • Connect the mains plug to the mains socket only at the end of the WARNING! Only a qualified installation. - Page 5 mains socket. Contact the Authorised related to door assemblies, printed Service Centre to replace the water circuit boards, electronic displays, inlet hose. pressure switches, thermostats and sensors, software and firmware including reset software. Please note that some of these spare parts are only •...
-
Page 6: Product Description
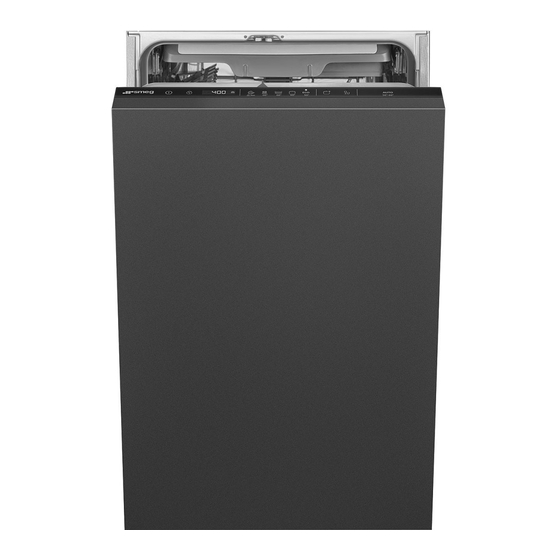
PRODUCT DESCRIPTION Upper spray arms Lower basket Lower spray arm Upper basket Filters Cutlery drawer Rating plate The graphic is a general overview. For more details, Salt container refer to other chapters or Air vent documents provided with the Rinse aid dispenser appliance. -
Page 7: Control Panel
CONTROL PANEL On/Off button / Reset button Option buttons Delay start button programme button Display Programme buttons Display A. Indicators B. Time indicator Indicators Indicator Description Rinse aid indicator. It is on when the rinse aid dispenser needs refilling. Refer to "Before first use". -
Page 8: Programme Selection
PROGRAMME SELECTION Programmes crockery and cutlery with normal soil. This is the standard programme for test institutes. (Auto) This programme automatically adjusts the dishwashing cycle to the type of load. The appliance senses the degree of soil and the amount of dishes in the baskets. It •... - Page 9 Pro‐ Dishwasher Degree of Programme phases Options gramme load soil Crockery, Fresh, lightly • Dishwashing 60 °C • cutlery dried-on • Intermediate rinse • Final rinse 50 °C • • Dry Assist Crockery, Normal, • Dishwashing 60 °C • cutlery, pots, lightly dried- •...
-
Page 10: Basic Settings
Water (l) Energy (kWh) Duration (min) 1) 2) Programme 9.3 - 11.4 0.772 - 0.944 9.4 - 11.5 0.876 - 1.071 0.754 8.3 - 11.5 0.677 - 1.036 120 - 170 Self Clean 8.3 - 10.1 0.593 - 0.725 1) The pressure and the temperature of the water, the variations of the mains supply, the options, the quantity of dishes and the degree of soil can change the values. - Page 11 Num‐ Settings Values Description Latest pro‐ 1H (on) Enable or disable the automatic selection of gramme selec‐ 0H (off) the most recently used programme and op‐ tion tions. Factory setting: 0H. 1) For more details, refer to the information provided in this chapter. You can change the basic settings in How to enter setting mode setting mode.
- Page 12 The water softener The water softener should be adjusted according to the hardness of the water in The water softener removes minerals from your area. Your local water authority can the water supply, which would have a advise you on the hardness of the water in negative effect on the washing results and your area.
- Page 13 The rinse aid level Water softener Amount of water The rinse aid helps to dry the dishes level without streaks and stains. It is automatically released during the hot rinse phase. It is possible to set the released quantity of rinse aid. When rinse aid chamber is empty, the rinse aid indicator is on notifying to refill In case of the high water softener setting,...
-
Page 14: Before First Use
Key tones The duration of the drying phase and the door opening time vary depending on the The buttons on the control panel make a selected programme and options. click sound when you press them. You When Dry Assist opens the door, the can deactivate this sound. -
Page 15: Daily Use
CAUTION! The compartment (C) is for rinse aid only. Do not fill it with detergent. CAUTION! Only use rinse aid designed specifically for dishwashers. 1. Press the release element (A) to open the lid (B). 2. Pour the rinse aid in the dispenser (C) 4. - Page 16 How to select and start a 2. Press and hold until the appliance programme is activated. 3. Fill the salt container if it is empty. 1. Press the button dedicated to the 4. Fill the rinse aid dispenser if it is programme you want to set.
- Page 17 How to select and start the The appliance returns to the programme selection. programme Make sure that there is 1. Press detergent in the detergent • The light related to the button is on. dispenser before you start a • The display shows the programme new programme.
-
Page 18: Hints And Tips
HINTS AND TIPS General – Follow the instructions in the chapter "Care and cleaning". Follow the hints below to ensure optimal cleaning and drying results in daily use Using salt, rinse aid and and to protect the environment. detergent • Washing dishes in the dishwasher as •... -
Page 19: Care And Cleaning
2. Make sure that the salt and rinse aid • Do not wash the following materials in containers are full. the dishwasher: wood, horn, pewter, copper, aluminium, delicate 3. Start the programme. Do not add ornamented porcelain and unprotected detergent and do not put dishes in the carbon steel. - Page 20 1. Disassemble the filters system as How to start the Self Clean instructed in this chapter. programme 2. Remove any foreign objects manually. 3. Reassemble the filters as instructed in Before starting the Self Clean this chapter. programme, clean the filters and spray arms.
- Page 21 3. Remove the flat filter (A). 4. Wash the filters. CAUTION! An incorrect position of the filters can cause bad washing results and damage to the appliance. Cleaning the lower spray arm We recommend to clean the lower spray arm regularly to prevent soil from clogging the holes.
- Page 22 3. Wash the spray arm under running water. Use a thin pointed tool, e.g. a toothpick, to remove particles of soil from the holes. Cleaning the upper spray arms We recommend to clean the upper spray arms regularly to prevent soil from clogging the holes.
-
Page 23: Troubleshooting
TROUBLESHOOTING to contact an Authorised Service WARNING! Improper repair of Centre. the appliance may pose a Refer to the below table for information on danger to the safety of the possible problems. user. Any repairs must be performed by qualified With some problems, the display shows personnel. - Page 24 Problem and alarm code Possible cause and solution The temperature of the wa‐ • Make sure that the temperature of the inlet water does not ter inside the appliance is exceed 60°C. too high or malfunction of • Switch the appliance off and on. the temperature sensor oc‐...
- Page 25 Problem and alarm code Possible cause and solution The appliance trips the cir‐ • The amperage is insufficient to supply simultaneously all cuit-beaker. the appliances in use. Check the socket amperage and the capacity of the meter or turn off one of the appliances in use.
- Page 26 Problem Possible cause and solution The interior of the appliance is • This is not a defect of the appliance. Humidity conden‐ wet. sates on the appliance walls. Unusual foam during washing. • Use the detergent designed specifically for dishwashers. •...
-
Page 27: Technical Information
TECHNICAL INFORMATION Dimensions Width / height / depth (mm) 446 / 818 - 898 / 550 Voltage (V) 220 - 240 Electrical connection Frequency (Hz) Water supply pressure Min. / max. bar (MPa) 0.5 (0.05) / 10 (1.0) Water supply max 60 °C Cold water or hot water Capacity... - Page 28 156803022-A-422021...
Need help?
Do you have a question about the ST4523IN and is the answer not in the manual?
Questions and answers