Table of Contents
Advertisement
Quick Links
Advertisement
Table of Contents

Related Manuals for Smeg ST4522IN


Summary of Contents for Smeg ST4522IN
- Page 1 User Manual Dishwasher ST4522IN...
-
Page 2: Table Of Contents
General information and tips Environmental information VISIT OUR WEBSITE TO: Get usage advice, brochures, trouble shooter, service and repair information: www.smeg.com/services/customer-service Subject to change without notice. SAFETY INFORMATION Before the installation and use of the appliance, carefully read the supplied instructions. The manufacturer is not responsible for any injuries or damage that are the result of incorrect installation or usage. - Page 3 Children between 3 and 8 years of age and persons with • very extensive and complex disabilities shall be kept away from the appliance unless continuously supervised. Children of less than 3 years of age should be kept away • from the appliance unless continuously supervised.
-
Page 4: Safety Instructions
The appliance is to be connected to the water mains using • the new supplied hose-sets. Old hose sets must not be reused. SAFETY INSTRUCTIONS Installation access to the mains plug after the installation. WARNING! Only a qualified • Do not pull the mains cable to person must install this disconnect the appliance. - Page 5 • Please note that self-repair or non- professional repair can have safety • Do not put flammable products or items consequences and might void the that are wet with flammable products guarantee. in, near or on the appliance. • The following spare parts will be •...
-
Page 6: Product Description
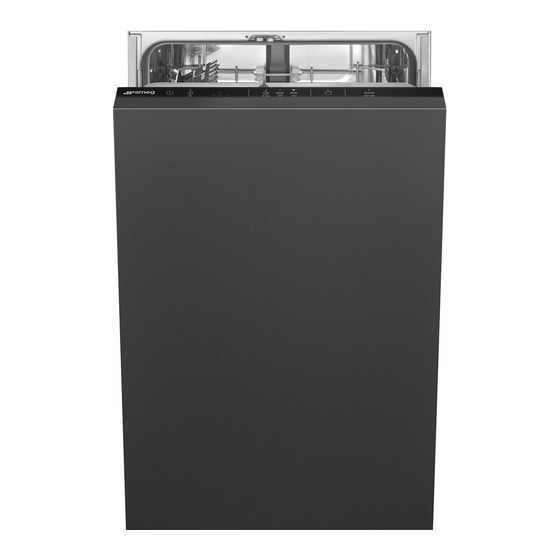
PRODUCT DESCRIPTION The graphics below is just a general product overview. For more detailed information, refer to other chapters and/or documents provided with the appliance. Upper spray arms Rinse aid dispenser Lower spray arm Detergent dispenser Filters Cutlery basket Rating plate Lower basket Salt container Upper basket... -
Page 7: Programme Selection
Option button programme button Indicators Indicator Description Rinse aid indicator. It is on when the rinse aid dispenser needs refilling. Refer to "Before first use". Salt indicator. It is on when the salt container needs refilling. Refer to "Before first use". Self Clean indicator. -
Page 8: Programmes Overview
PROGRAMMES OVERVIEW Pro‐ Type of load Degree of Programme phases Options gramme soil • Crockery • Fresh • Wash 50 °C • • Cutlery • Intermediate rinse • Final rinse 45 °C • Dry Assist • All types • All de‐ •... -
Page 9: Basic Settings
Water (l) Energy (kWh) Duration (min) 1) 2) Programme 8.5 - 10.4 0.743 - 0.909 / 9.9 0.689 / 0.704 / 240 8.0 - 10.5 0.683 - 1.047 120 - 170 Self Clean 7.4 - 8.9 0.396 - 0.484 1) The pressure and the temperature of the water, the variations of the mains supply, the options, the quantity of dishes and the degree of soil can change the values. - Page 10 You can change the basic settings in C. Next button setting mode. Use Previous and Next to switch between the basic settings and to change When the appliance is in setting mode, the their value. indicators on the control panel represent available settings.
- Page 11 negative effect on the washing results and your area. Your local water authority can on the appliance. advise you on the hardness of the water in your area. It is important to set the right The higher the content of these minerals, level of the water softener to assure good the harder your water is.
- Page 12 automatically released during the hot rinse phase. It is possible to set the released Water softener Amount of water quantity of rinse aid. level When rinse aid chamber is empty, the rinse aid indicator is on notifying to refill rinse aid. If the drying results are satisfactory while using multi-tablets only, In case of the high water softener setting, it is possible to deactivate the dispenser...
-
Page 13: Before First Use
Key tones CAUTION! Do not try to close the appliance door within 2 The buttons on the control panel make a minutes after automatic click sound when you press them. You opening. This can cause can deactivate this sound. damage to the appliance. CAUTION! If children have access to the appliance, we advise to deactivate Dry Assist. -
Page 14: Daily Use
How to fill the rinse aid CAUTION! Only use rinse aid dispenser designed specifically for dishwashers. 1. Press the release element (A) to open the lid (B). 2. Pour the rinse aid in the dispenser (C) until the liquid reaches the marking "FILL". - Page 15 How to delay the start of a The light related to the button flashes. programme 2. Activate if desired. 3. Close the appliance door to start the You can delay the start of the selected programme. programme by 3 hours. 1.
-
Page 16: Hints And Tips
• When the programme is completed. If the door is opened for more • After 5 minutes if a programme was not than 30 seconds during the started. drying phase, the running programme ends. It does not End of the programme happen if the door is opened by When the programme is complete, the Dry Assist function. - Page 17 • Always use the correct quantity of • There is enough salt and rinse aid detergent. Insufficient dosage of (unless you use multi-tablets). detergent can result in poor cleaning • The arrangement of the items in the results and hard-water filming or baskets is correct.
-
Page 18: Care And Cleaning
CARE AND CLEANING Internal cleaning WARNING! Before any maintenance other than • Carefully clean the appliance, including running the programme Self the rubber gasket of the door, with a Clean, deactivate the appliance soft damp cloth. and disconnect the mains plug •... - Page 19 5. Make sure that there are no residues 1. Turn the filter (B) counterclockwise of food or soil in or around the edge of and remove it. the sump. 6. Put back in place the flat filter (A). Make sure that it is correctly positioned under the 2 guides.
- Page 20 Cleaning the upper spray arms CAUTION! An incorrect position of the filters can cause We recommend to clean the upper spray bad washing results and arms regularly to prevent soil from damage to the appliance. clogging the holes. Clogged holes can cause unsatisfactory washing results.
-
Page 21: Troubleshooting
and fix it in the duct by turning it counterclockwise. Make sure that the mounting element locks into place. 4. To install the spray arm back, insert the mounting element in the spray arm TROUBLESHOOTING to contact an Authorised Service WARNING! Improper repair of Centre. - Page 22 Problem and alarm code Possible cause and solution The appliance does not • Make sure that the sink spigot is not clogged. drain the water. • Make sure that the interior filter system is not clogged. • The lights related to the •...
- Page 23 Problem and alarm code Possible cause and solution The level of water inside the • Switch the appliance off and on. appliance is too high. • Make sure that the filters are clean. • The lights related to the • Make sure that the outlet hose is installed at the right programme buttons flash height above the floor.
- Page 24 The dishwashing and drying results are not satisfactory Problem Possible cause and solution Poor washing results. • Refer to "Daily use", "Hints and tips" and the basket loading leaflet. • Use more intensive washing programme. • Activate the option to improve the washing results of a selected programme.
-
Page 25: Technical Information
Problem Possible cause and solution Odours inside the appliance. • Refer to "Internal cleaning". • Start the Self Clean programme with a descaler or a cleaning product designed for dishwashers. Limescale deposits on the ta‐ • The level of salt is low, check the refill indicator. bleware, on the tub and on the •... - Page 26 Link to the EU EPREL database EPREL database using the link https:// eprel.ec.europa.eu and the model name The QR code on the energy label supplied and product number that you can find on with the appliance provides a web link to the rating plate of the appliance.
Need help?
Do you have a question about the ST4522IN and is the answer not in the manual?
Questions and answers