Table of Contents
Advertisement
Quick Links
PT4900-PTZ
Profesional 19" High-Bright PTZ-Compatible Teleprompter
OVERVIEW
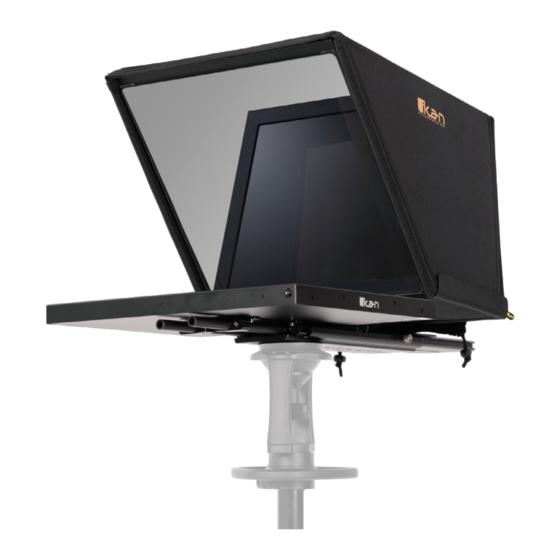
The 19" PTZ Teleprompter from Ikan is a professional solution for teleprompting with PTZ cameras. The package provides an extra-wide hood
assembly to allow considerable movement of the camera within the wide beam splitter glass. The PTZ Teleprompter features a 19" 1000 cd/
m² monitor, 70/30 20"-wide beamsplitter glass, and a 25' reading range. The teleprompter is designed for use with a wide range of PTZ
cameras, as the wide beamsplitter provides for a wide amount of left-right panning. The teleprompter includes a base system that can be
easily shifted forward and backwards, which enables mounting the camera to the prompter without requiring counterweights.
Please note that the PTZ4900-PTZ includes parts to build two types of teleprompter systems, a standard 19" Teleprompter that is compatible
with various types of mirrorless and broadcast cameras, and a 19" PTZ teleprompter that is compatible with a wide range of PTZ cameras.
This Quick Start Guide will show you how to set up the 19" Teleprompter for PTZ cameras. For instructions on how to set up the PT4900 for
broadcast or mirrorless cameras, please refer to the PT4900 Quick Start Guide on our website.
www.ikancorp.com | 1.713.272.8822 | sales@ikancorp.com
Quick Start Guide
Advertisement
Table of Contents

Related Manuals for Ikan PT4900-PTZ-TM-OTTICA


Summary of Contents for Ikan PT4900-PTZ-TM-OTTICA
- Page 1 OVERVIEW The 19” PTZ Teleprompter from Ikan is a professional solution for teleprompting with PTZ cameras. The package provides an extra-wide hood assembly to allow considerable movement of the camera within the wide beam splitter glass. The PTZ Teleprompter features a 19” 1000 cd/ m²...
-
Page 2: What's Included
What’s Included Monitor Large Riser DSLR/Mirrorless Riser Medium Riser Bottom Plate Base Glass Frame Holder Bracket Glass w/ Rod Clamps Hood Attachment Frame Glass Holder Hood Glass Frame Screws 15mm Rod Clamps 15mm Rods Large Riser Bracket Glass Frame Holder Bracket PTZ Camera Riser PTZ Hood w/ Rod Clamps for PTZ Cameras... - Page 3 Teleprompter Assmebly Setup Step 1 Step 2 Place the Hood Attachment Frame over the Glass Holder. Then place the Secure the Glass Holder by fastening the knurled nuts to the screws as glass against the Glass Holder. Make sure the screws pass through the pictured below.
- Page 4 Step 5 After the monitor mounts are attached, adjust the 15mm rods to accommodate the monitor. Leave about 1 inch of room for the teleprompter bracket. Make sure the 15mm rods go through both set of monitor mounts. Please ensure that all screws are properly tightened after inserting the monitor. *SAFETY NOTE* Make sure to leave at least 2 inches of the rods inside the teleprompter base.
- Page 5 Ikan OTTICA PTZ Cameras To connect the PTZ Camera Riser to the Ikan OTTICA camera, fasten To connect the PTZ Camera Riser to the other PTZ cameras, Remove the the ¼-20 screw on the PTZ Riser Plate to the thread on the bottom of plate on top of the PTZ Riser by unfastening the four screws on the surface the OTTICA camera.
- Page 6 Step 10 Set the PTZ camera inside the hood by aligning the screws on the riser plate to the slot on the Base. Once the screws are aligned, Slide the riser plate into the Base. Step 11 To prevent light from leaking through the hood, seal both zippers down, attach the velcro straps along the back and sides of the hood. Connect the cables to the back of your PTZ camera by putting them through the slot on the back of the PTZ Hood.
- Page 7 Step 12 Mount your own tripod plate to the bottom plate by aligning the 1/4-20 and/or 3/8-16 screws and fastening them to the Bottom Plate. It is recommended that you connect your tripod plate to front of the Bottom Plate so that you can balance your teleprompter easier. Once your tripod plate is connected to the Bottom Plate, mount the tripod plate to your tripod head.
- Page 8 Step 14 To secure your teleprompter system, insert the included headless screws into the threads behind and in front of the Base. Step 15 The headless screws should be inserted to the threads as pictured below. www.ikancorp.com | 1.713.272.8822 | sales@ikancorp.com...
-
Page 9: Monitor Ports
Monitor Ports Monitor Menu Settings Video Config Contrast (White Level) Brightness (Black Level) Tint (Chroma Hue) Chroma (Chroma Saturation) Sharpness (Detail) RGB Setup – Manually configure RGB Return System Config Menu Duration – Set duration of how long menu stays on screen Video Ratio –... - Page 10 Watch our VIDEO TUTORIAL on how to assemble Ikan Professional Telepromopters https://youtube.com/playlist?list=PLcjaK5n9Y8ctrbYS3t2g4nyx2uADOXjuF Specifications for PT4900-PTZ TELEPROMPTER SPECS MONITOR SPECS Low: 2.06 in./52.5mm | Aspect Ratio 4:3 Medium: 3.74 in./95mm| High: Maximum Brightness 1000 cd/m2 Riser Plate Height 5.31 in./135mm | DSLR: 6.29 Screen Size (Diagonal) ...
-
Page 11: Optional Accessories
Foam Case To make your teleprompter more portable, we packed it in a reusable, high-quality foam. The shape and size of the foam was designed to fit into Ikan’s PT-CASE-V2. ** DO NOT THROW AWAY FOAM CASE ** www.ikancorp.com | 1.713.272.8822 | sales@ikancorp.com... - Page 12 Quick Start Guide PT19-TM Talent Monitor Add On Kit for PT4900 What’s Included 1 x Teleprompter Monitor w/ Aluminum Chassis 1 x Power Adapter with Cable 1 x VESA Monitor Mount 1 x 15mm Rod Adapter 1 x Mounting Knob 4 x 10mm Screws 4 x 15mm Screws 2 x Large Screws...
-
Page 13: Assembly Steps
Assembly Steps Setting Up the Talent Monitor Using the shorter 4 x 10mm Screws, attach the VESA Monitor Mount. Make sure that the long end of the VESA Monitor Mount is pointing in the direction of the power button like the image above. Use the Mounting Knob to tighten the 15mm Rod Adapter to the VESA Monitor Mount. Setting Up the Teleprompter Monitor (Monitor from the PT4900) If the mounting brackets where previously installed on the teleprompter monitor, remove those screws. - Page 14 Attaching the Talent Monitor After both the talent monitor and teleprompter monitor are set up, slide the talent monitor on to the PT4900. *WARNING* We recommend at least 1 inch of rod should be left inside the teleprompter base. www.ikancorp.com | 1.713.272.8822 | sales@ikancorp.com because we’re filmmakers too...
-
Page 15: Specifications
1920x1080psf @ 24, 25, 29.97, 30 Hz 1920x1080p @ 23.98, 24, 25, 29.97, 30, 50, 59.94, 60 Hz Optional Accessories Some other products that work well with this item available from Ikan include: PT4900 19” High Bright Beam Splitter Teleprompter www.ikancorp.com | 1.713.272.8822 | sales@ikancorp.com... -
Page 16: Learn More
Damage caused by abuse or misuse, dismantling, or changes to the product not made by the company. • Damage caused by natural disaster, abnormal voltage, and environmental factors, etc. ©2022 Ikan International. All rights reserved. www.ikancorp.com | 1.713.272.8822 | sales@ikancorp.com...
Need help?
Do you have a question about the PT4900-PTZ-TM-OTTICA and is the answer not in the manual?
Questions and answers