Table of Contents
Advertisement
Quick Links
Advertisement
Table of Contents

Subscribe to Our Youtube Channel
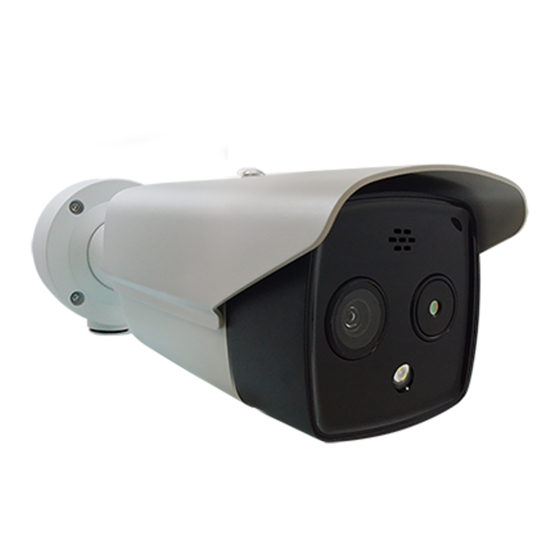
Summary of Contents for ACTi VMGB-352
- Page 1 Metadata Camera Hardware Manual VMGB-352 Ver. 2022/08/05...
-
Page 2: Table Of Contents
Using the Cable Gland ..............15 Using a Power Adapter (Optional) ..........18 Waterproof Other Cables ............. 18 Connect to Network ................ 19 Accessing the Camera Activate the Camera ............... 20 Activate via Web Browser ............20 Activate via IP Utility ..............21 www.acti.com... -
Page 3: Precautions
When connecting to an external interface, use an existing connection terminal, and ensure that the cable terminal (latch or clamp) is in good condition and properly fastened. Ensure that the cable is not tense during mounting, with a proper margin reserved to avoid poor port www.acti.com... - Page 4 Do not use organic solvents (such as benzene and alcohol) to clean the transparent dome cover. www.acti.com...
- Page 5 European Union. For proper recycling, return this product to your local supplier upon the purchase of equivalent new equipment, or dispose of it at designated collection points. For more www.recyclethis.info. information see: www.acti.com...
- Page 6 (Cd), lead (Pb), or mercury (Hg). For proper recycling, return the battery to your supplier or to a designated collection point. For more information see: www.recyclethis.info. Industry Canada ICES-003 Compliance This device meets the CAN ICES-3 (A)/NMB-3(A) standards requirements. www.acti.com...
-
Page 7: Safety Instructions
Please refer to technical specifications for detailed information. Use the power adapter provided by qualified manufacturer. Refer to the product specification for detailed power requirements. It is recommended to provide independent power adapter for each device as adapter overload may cause www.acti.com... - Page 8 DO NOT aim the lens at the sun or any other bright light. Keep the camera away from liquid while in use. Emergency If smoke, odor, or noise arises from the device, immediately turn off the power, unplug the power cable, and contact the service center. www.acti.com...
-
Page 9: Introduction
When the camera is taken out from the box, the lens cover is covered by a thin film. DO NOT remove this film. It is used to protect the lens cover from scratches or fingerprint marks which may happen during installation. Remove this film only after the camera is securely installed and all connections are complete. www.acti.com... -
Page 10: Physical Description
Digital output cables are labeled as 1A,1B and 2A, 2B. To reset the camera to default parameters, hold the Reset Button and power on the camera. After powering on the camera, continue holding the Reset Button for about 10 seconds. www.acti.com... -
Page 11: Installation Procedures
Make sure that there is no reflective surface too close to the camera lens. The IR light from the camera may reflect back into the lens causing reflection. DO NOT drag the camera with its waterproof cables, or the waterproof performance is affected. www.acti.com... -
Page 12: Install The Memory Card
2. Insert the memord card into the slot until the card clicks into place. 3. Cover the memory card slot and fix the screws on the memory card slot cover. www.acti.com... -
Page 13: Determine Wide Range Coverage
Identify target: The target should be at least 12 pixels on the image. NOTE: This table is for reference only, and the actual detection range may vary according to different camera settings, mounting condition, monitor, and so on. www.acti.com... -
Page 14: Install The Camera
(recommended depth: 25 mm) and insert the expansion screws. Otherwise, skip the step. 3. Drill a cable hole in the center. 4. Install the camera using the supplied screws. Wall Mounting Ceiling Mounting 5. Adjust the camera tilt angle, then fasten the head screw to fix the camera angle position. www.acti.com... -
Page 15: Manage The Cables
Adapter (Optional) on page 18 for more information. DISCLAIMER: ACTi will not be responsible for camera damage caused by water entering the cable connections. Using the Cable Gland This section describes how to waterproof the cable-out or “pigtail” of the camera using the bundled cable gland. - Page 16 Hardware Manual 3. Insert the clamping nut into the Ethernet cable. 4. Insert the sealing insert through the Ethernet cable. 5. Insert the cable through the gland body. 6. Push the sealing insert into the gland body. www.acti.com...
- Page 17 8. Attach the gland body to the camera connector. 9. Attach the clamping nut to the gland body to complete the cable solution. NOTE: Make sure the clamping nut is tightly attached to the cable gland body and the sealing insert is squeezed tightly. www.acti.com...
-
Page 18: Using A Power Adapter (Optional)
DC interface Plug Waterproof Other Cables After routing and connecting the cables, use waterproof tape to wrap up the cables. Connected cables and spare cables should all be wrapped up for protection. www.acti.com... -
Page 19: Connect To Network
PC and a power source. See Power-over-Ethernet (PoE) example connection diagram below. Network Ethernet Cable Ethernet Cable (Data) PoE Injector / Power Cable PoE Switch Ethernet Cable AC Power (Data + Power) Source Camera www.acti.com... -
Page 20: Accessing The Camera
When DHCP is enabled, you can activate the camera via IP Utility. 3. Follow the on-screen instructions, and type the desired password. 4. Confirm the password. 5. Click OK to save the password and enter the live view interface. www.acti.com... -
Page 21: Activate Via Ip Utility
IP and MAC addresses, serial numbers, firmware versions, etc, and allows quick configuration of multiple devices at the same time. The IP Utility can be downloaded for free from http://www.acti.com/IP_Utility. 1. Open IP Utility. 2. Check the camera model and then click Active Device. - Page 22 Copyright © 2022, ACTi Corporation All Rights Reserved 7F, No. 1, Alley 20, Lane 407, Sec. 2, Ti-Ding Blvd., Neihu District, Taipei, Taiwan 114, R.O.C. TEL : +886-2-2656-2588 FAX : +886-2-2656-2599 Email: sales@acti.com...


Need help?
Do you have a question about the VMGB-352 and is the answer not in the manual?
Questions and answers