Advertisement
Available languages
Available languages
Quick Links
Advertisement

Related Manuals for MD SPORTS 39003


Summary of Contents for MD SPORTS 39003
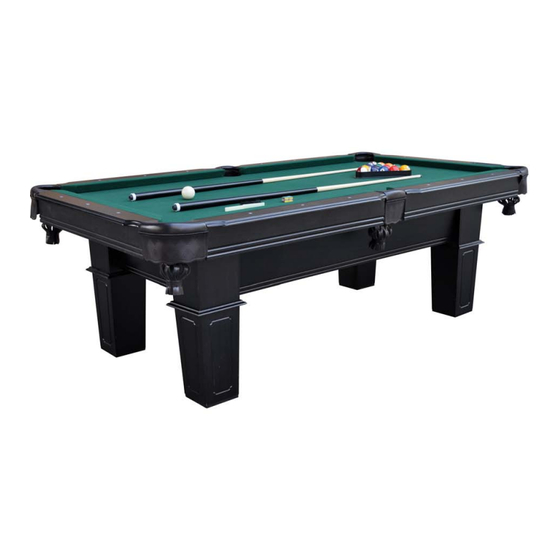
- Page 1 INSTRUCTIONS D`ASSEMBLAGE Please contact us before returning the product to the store. Toll Free: 877-472-4296 S'il vous plaît nous contacter avant de retourner le produit au magasin. Numéro sans frais: 877-472-4296 MODEL/MODÈLE: 39003...
- Page 2 LIMITED 90 DAYS WARRANTY This product is covered by a limited warranty that is effective for 90 days from the date of purchase. The warranty covers any defects in parts and workmanship. This Limited Warranty gives you specific legal rights and you may also have other rights which very from one state (province) to another.
-
Page 3: Tools Required
IMPORTANT NOTICE! Please contact us before returning the product to the store. Please Keep Your Instructions! Your Model number is necessary should you need to contact us. Please read through this instruction manual book to familiarize yourself with all parts and assembly steps. - Page 4 39003 PARTS LIST Main Cabinet Lower Side Apron Lower End Apron Leg Cabinet - A Leg Cabinet - B 1 Piece 2 Pieces 2 Pieces 4 Pieces 4 Pieces Bottom Leg Base Decorative Plastic Panel 8 x 38mm Bolt 8 x 19mm Washer...
- Page 5 ASSEMBLY INSTRUCTIONS 1. Find a clean, level place to begin the assembly of your 2 in 1 Multi Table. The table will be assembled upside down and then turned over on its legs once the assembly completed. This game table is heavy, and turning it over will require at least four strong adults. 2.
- Page 6 FIG.2 6. Attach the previous-assembled Legs onto the support frame of the Cabinet (#1) using four Bolts (#8) and four Washers (#9) per Leg. See FIG.2. NOTE: PLEASE DON’T LOCK THE BOLTS TOO TIGHT AT THIS STEP. 7. Screw the Leg Leveler (#15) into the Bottom Leg Base (#6). See FIG.2. FIG.
- Page 7 FIG.3 8. Attach the Lower Side Apron (#2) to the Legs using two Bolts (#10), four Washers (#9), two M8 Nuts (#11) and four Bolts (#14) per Lower Side Apron. See FIG.3. NOTE: PLEASE DON’T LOCK THE BOLTS TOO TIGHT AT THIS STEP. 9.
- Page 8 FIG.4 12. Slide the Decorative Plastic Panel (#7) to the Leg using two Screws (#13) per Decorative Plastic Panel. See FIG.4. 13. Repeat the steps above for the other Decorative Plastic Panels. FIG. 4...
- Page 9 14. Lift the table assembly from the floor with four strong adults, turn it over, and set table on its legs in the location where you play. DO NOT LEAN THE CABINET DO NOT HOLD TABLE TABLE ON ITS LEGS! HOLD THE CAUTION: Four strong adults are recommended to turn the table over as shown.
- Page 10 FIG.6 16. Tear off the backside paper of the EVA Pad (#38) and stick them at the bottom of the Table Tennis Surface - A and B (#23 and #24). See FIG.6A. 17. Insert the Plastic Dowel (#33) into the holes on the Table Tennis Surface. See FIG.6B. And assemble the Table Tennis Surface - A (#23) and Table Tennis Surface - B (#24) together.
- Page 11 FIG.7 19 . Drill pilot holes on the wall, and insert the Plastic Screw Anchors (#29) into the hole. See FIG 7A. 20. Assemble the Bottom Cue Rack (#30) and Top Cue Rack (#31) on the wall using four Screws (#32). See FIG.7. FIG.7A Left View FIG.7...
-
Page 12: Garantie Limitée De 90 Jours
GARANTIE LIMITÉE DE 90 JOURS Ce produit est couvert par une garantie limitée valide pour une durée de 90 jours à partir de la date d'achat. La garantie couvre tout défaut de pièce et de fabrication. Cette garantie limitée vous donne des droits légaux spécifiques etil se peut que vous ayez également d'autres droits en fonction de l'État (ou de la province) où... -
Page 13: Outils Requis
IMPORTANTE MISE EN GARDE ! Ne retournez pas ce produit au magasin. Veuillez conserver ces instructions! Vous aurez besoin de votre numéro de modèle si vous nous contactez. Veuillez lire attentivement les instructions de ce manuel a n de vous familiariser avec les di érentes pièces de votre produit et les di érentes étapes de son assemblage. - Page 14 39003 LISTE DE PIÈCES Cabinet Principal Tablier Latéral Inférieur Tablier de Bout Inférieur Cabinet de Pied – A Cabinet de Pied – B 1 Pièce 2 Pièces 2 Pièces 4 Pièces 4 Pièces Base Inférieure de Pied Panneau Plastique Décoratif...
- Page 15 INSTRUCTIONS D’ASSEMBLAGE Trouvez un endroit propre et plat pour commencer à assembler votre Table Polyfonctionnel 2 en 1. La table sera assemblée à l’envers et puis renversée sur ses pieds une fois que l’assemblage est terminé. Cette table de jeux et lourde, donc au moins de quatre adultes robustes sont requis pour la renverser.
- Page 16 FIG.2 Attachez les Pieds Pré-installés sur le cadre de support du Cabinet (#1) avec quatre Boulons (#8) et quatre Rondelles (#9) chaque Pied. Voir FIG.2. NOTE : NE PAS VISSER LES BOULONS TROP SERREMENT A CETTE ETAPE. Vissez le Redresseur de Pied (#15) dans la Base Inférieure de Pied (#6). Voir FIG.2. FIG.
- Page 17 FIG.3 Attachez le Tablier Latéral Inférieur (#2) aux Pieds avec deux Boulons (#10), quatre Rondelles (#9), deux Ecrous M8 (#11) et quatre Boulons (#14) chaque Tablier Latéral Inférieur. Voir FIG.3. NOTE : NE PAS VISSER LES BOULONS TROP SERREMENT A CETTE ETAPE. Attachez le Tablier de Bout Inférieur (#2) aux Pieds avec un Boulon (#10), deux Rondelles (#9), un Ecrou M8 (#11) et quatre Boulons (#14) chaque Tablier de Bout Inférieur.
- Page 18 FIG.4 12. Glissez le Panneau Plastique Décoratif (#7) au Pied avec deux Vis (#13) chaque Panneau Plastique Décoratif. Voir FIG.4. 13. Répétez les étapes ci-dessus pour les autres Panneaux Plastiques Décoratif. FIG. 4...
- Page 19 14. Lever l’assemblage de table par au moins de quatre adultes robustes, le renverser et installer l’assemblage de table sur ses pieds dans l’endroit où vous jouez. STRUCTURE DE LA TABLE NE PAS NE PAS APPUYER LA TENIR LA TABLE SUR SES PIEDS TENIR LA TABLE ATTENTION : Il est recommandé...
- Page 20 FIG.6 16. Arrachez le papier postérieure d'ÈVE PAD (#38) et collez-les dans l'inférieur de la Surface de Tennis de Table -A et B (#23 et #24). Voir FIG.6.A. 17. Insérez le Goujon Plastique (#33) dans les trous sur la Surface de Tennis de Table. Voir FIG.6A.
- Page 21 FIG.7 19. Forez les trous sur le mur, et insérez les Ancres Plastiques de Vis (#29) dans le trou. Voir FIG.7A. 20. Assemblez la Porte-Queue Inférieure (#30) et la Porte-Queue Supérieure (#31) sur le mur avec quatre Vis (#32). Voir FIG.7. FIG.7A Vue Gauche FIG.7...
Need help?
Do you have a question about the 39003 and is the answer not in the manual?
Questions and answers