
Related Manuals for Graywind 58436


Summary of Contents for Graywind 58436
- Page 1 MANUAL VERTICAL/SHEER VERTICAL BLINDS INSTRUCTION ANLEITUNG FÜR MANUELLE VERTIKAL-/ SCHIER-VERTIKALJALOUSIEN 手動縦型ブラインド/シアー縦型ブラインド 取扱説明書 58436 Version : 2.0 Date : Aug, 31, 2022...
-
Page 2: Table Of Contents
CONTENTS Preparation Accessories 3-11 Valance Installation 12-17 Side Wall Mount 18-22 Ceiling Mount 23-29 Vanes Installation Wand Control Type 31-32 Chain And Cord Control Type Vertical Blinds Slats Cleaning 34-38 Sheer Vertical Blinds Vanes Cleaning KATALOG Vorbereitung Zubehör Gehäuseinstallation 3-11 Seitenwandhalterung 12-17 Deckenhalterung... - Page 3 目次 事前準備 出荷一覧 3-11 バランスの取付方法 12-17 正面取付け 18-22 天井取付け 23-29 スラットの取付方法 バトンコントロール式 31-32 ビーズチェーン&コード式 縦型ブラインド スラットのお手入れ方法 34-38 シアー縦型ブラインド スラットのお手入れ方法...
-
Page 4: Vorbereitung
PREPARATION|VORBEREITUNG|事前準備 * Punch Diameter 0.2”(6mm)&0.3”(8mm) * Größe des Bohrlochs 0.2”(6mm)&0.3”(8mm) と * 穴のサイズ0.2インチ(6mm) 0.3インチ(8mm) -
Page 5: Accessories
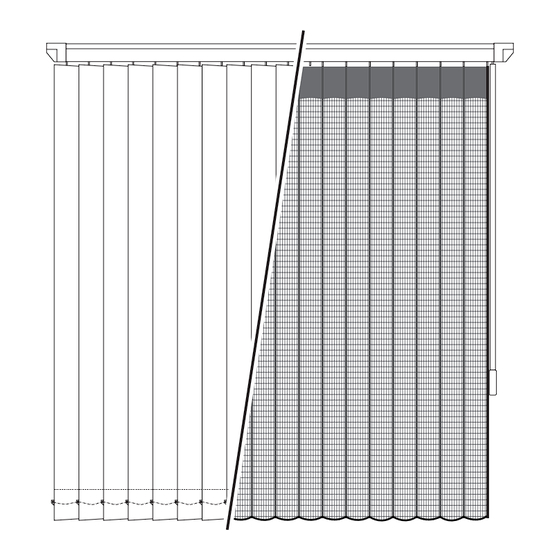
ACCESSORIES|ZUBEHÖR| 出荷一覧 Vertical Blinds Slats Vertikaljalousien Lamellen 縦型ブラインド スラット Sheer Vertical Blinds Vanes Schier Vertikale Jalousien Lamellen シアー縦型ブラインド スラット... -
Page 6: Valance Installation
VALANCE INSTALLATION GEHÄUSEINSTALLATION バランスの取り付け Valance Accessories (Standard Version) Gehäusezubehör (Standardversion) 取り付け用の部品 (標準版) P14-16 Installation|Installation| 取り付けについて EXTRA ACCESSORIES FOR OUTSIDE MOUNT ZUSÄTZLICHES ZUBEHÖR FÜR DIE AUßENMONTAGE 正面付けの追加アクセサリー Valance Accessories (Joinable Track Version) Gehäuse-Zubehör (Version mit Verlängerungsschiene) 取り付け用の部品 (延長トラック) P17-21 Installation|Installation| 取り付けについて EXTRA ACCESSORIES FOR OUTSIDE MOUNT ZUSÄTZLICHES ZUBEHÖR FÜR DIE AUßENMONTAGE 正面付けの追加アクセサリー... - Page 7 Valance Installation (Standard Version) Gehäuse-Montage (Standardversion) バランスの取り付け (標準版) INSIDE MOUNT|INNENMONTAGE|天井付け...
- Page 8 OUTSIDE MOUNT|AUßENMONTAGE|正面付け...
- Page 10 Valance Installation (Joinable Track Version) Gehäuse-Installation (Version mit Verlängerungsschiene) バランスの取付方法 (延長トラック) Loosen the screws Lösen Sie die Schrauben ネジを緩めます。 Move it to the middle Bewegen Sie es in die Mitte 真ん中に移動させます。 Tighten the screws Schrauben festziehen ネジを締めます。...
- Page 11 Tighten the screws Schrauben festziehen ネジを締めます。...
- Page 12 INSIDE MOUNT|INNENMONTAGE|天井付け...
- Page 13 OUTSIDE MOUNT|AUßENMONTAGE|正面付け...
-
Page 15: Side Wall Mount
SIDE WALL MOUNT SEITENWANDHALTERUNG 正面取付け ≥4”(100mm) * Punch Diameter 0.3”(8mm) * The side view * Größe des Bohrlochs 0.3”(8mm) * Die Seitenansicht * 穴のサイズ0.3インチ(8mm) 側面図... - Page 16 1“ 1“ (25mm) (25mm) 10“(254mm) Drilling positions are equidistant. In gleichem Abstand markieren 等距離にマークします 14” 14” (≈356mm) (≈356mm) Mark more punch positions in the middle at equal distance and install the mounting brackets. Markieren Sie weitere Stempelpositionen in der Mitte in gleichem Abstand und montieren Sie die Befestigungswinkel.
- Page 18 Assemble the valance brackets (Optional) Montieren Sie die Gehäusehalterungen (Optional) 上飾り金具を組み立てる (オプション) <8” (≈200mm) <8” (≈200mm)
- Page 20 Assemble the valance brackets (Optional) Montieren Sie die Gehäusehalterungen (optional) 上飾り金具を組み立てる (オプション)...
-
Page 21: Ceiling Mount
CEILING MOUNT DECKENHALTERUNG 天井取付け Depth|Tiefe| 深さ or| oder| また ≥2.5”(64mm) * Punch Diameter 0.2”(6mm) * Größe des Bohrlochs 0.2”(6mm) * 穴のサイズ0.2インチ(6mm) * The side view * Die Seitenansicht 側面図... - Page 22 Stick the tape on the wall horizontally and leave 10” of space on both sides. Kleben Sie das Klebeband horizontal an die Wand und lassen Sie auf beiden Seiten 25 CM Platz. テープを壁に水平に貼り付け、両側に 25cm のスペースを空けます。 1” 1” (25mm) (25mm) 10” (254mm)...
- Page 23 Assemble the valance brackets (Optional) Montieren Sie die Gehäusehalterungen (Optional) 上飾り金具を組み立てる (オプション) <8” (≈200mm) <8” (≈200mm)
- Page 25 Assemble the valance brackets (Optional) Montieren Sie die Gehäusehalterungen (optional) 上飾り金具を組み立てる (オプション) Properly pull down the tail of part "h" to expose the buckle "p " of the headspace. Ziehen Sie das Ende von Teil „h“ richtig nach unten, um die Schnalle „p2“ des Kopfraums freizulegen パーツ「h」のテールを適切に引き下げて、バックル「p 」を露出させます...
-
Page 26: Vanes Installation
VANES INSTALLATION EINBAU DER LAMELLEN スラットの取付方法 Please pull or push the wand when the vanes are vertical to the track to avoid the damage to the track and unevenness of the vanes. Bitte ziehen oder schieben Sie die Tastnadel, wenn die Lamellen senkrecht zur Schiene stehen, um Schäden an der Schiene und Unebenheiten der Lamellen zu vermeiden. - Page 27 Vertical Blinds Slats Installation Vertikale Jalousien Lamellen Installation 縦型ブラインド スラットの取付方法...
- Page 28 Bottom chain installation Montage der unteren Kette ボトムコードの取付け方法 Removing the chain Entfernen der Kette ボトムコードの取外し方法...
- Page 29 Sheer Vertical Blinds Vanes Installation Schier Vertikale Jalousien Lamellen Installation シアー縦型ブラインドスラットの取付方法 Vanes introduction|Lamellen Einführung| スラットの取付方法 Front side|Vorderseite| Back side|Rückseite| 前側 背面側...
- Page 30 Installtion of the first vane Einbau der ersten Lamelle 最初のスラットの取付方法...
- Page 31 Repeat this step to install the other vanes(Except the last vane) Wiederholen Sie diesen Schritt, um die anderen Lamellen zu installieren (außer der letzten Lamelle). この手順を繰り返して、他のスラットを取り付けます (最後のスラットを除く)。...
- Page 32 Installtion of the last vane Einbau der letzten Lamelle 最後のスラットの取付方法...
-
Page 33: Wand Control Type
WAND CONTROL TYPE TYP DER STABSTEUERUNG バトンコントロール式 Twist the wand (L/R) for tilt the light Drehen Sie den Stab (L/R), um den Winkel der Lamellen einzustellen. バトン (左/右) をひねって、スラットの角度を調整します。 0-179° Pull and push the wand (L/R)to open and close Ziehen und schieben Sie den Stab (L/R)zum Öffnen und Schließen バトン... -
Page 34: Chain And Cord Control Type
CHAIN AND CORD CONTROL TYPE KETTEN- UND SCHNURSTEUERUNGSART ビーズチェーン&コード式 Pull the chain for tilt the light Ziehen Sie an der Kette, um den Winkel der Lamellen einzustellen チェーンを引いてスラットの角度を調整します。 0°-179°... - Page 35 Pull the cord to open and close Ziehen Sie an der Schnur, um das Rollo zu öffnen oder zu schließen. コードを引っ張ってブラインドを開閉します。 90° (Do it before the vanes are turned to 90°) (Drehen Sie die Lamelle vor dem Betrieb auf 90°) (操作前にスラットを90°回転させてください)...
-
Page 36: Vertical Blinds Slats Cleaning
VERTICAL BLINDS SLATS CLEANING VERTIKALJALOUSIEN LAMELLEN REINIGUNG 縦型ブラインド スラットのお手入れ方法 Cloth cleaning Vacuum Cleaner Low Temperature Ironing Tuchreinigung Staubsauger Wenig Eisen ファブリックのお手入れ方法 掃除機 低温アイロン *Please note that the cleaning cloth needs to be half wet or dry. Please try it before cleaning the fabric. *Bitte beachten Sie, dass das Reinigungstuch halb nass oder trocken sein muss. -
Page 37: Sheer Vertical Blinds Vanes Cleaning
SHEER VERTICAL BLINDS VANES CLEANING SCHIER VERTIKALE JALOUSIEN LAMELLEN REINIGUNG シアー縦型ブラインド スラットのお手入れ方法 Vanes disassembly|Lamellen Demontage| スラットの分解 Partial Disassembly|Teilweise Demontage| 一部の分解... - Page 39 Complete Disassembly|Komplette Demontage| 完全な分解...
- Page 41 Vanes cleaning|Lamellen Reinigung| スラットの洗濯について...
Need help?
Do you have a question about the 58436 and is the answer not in the manual?
Questions and answers