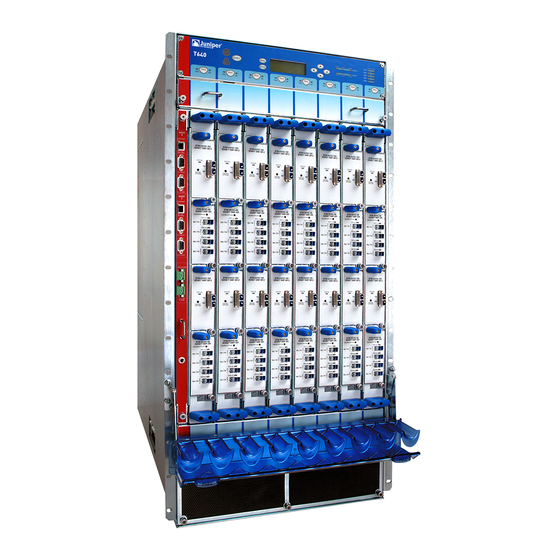
Juniper T640 Replacing
Hide thumbs
Also See for T640:
- Hardware manual (580 pages) ,
- Quick start manual (52 pages) ,
- Upgrade manual (56 pages)
Advertisement
Quick Links
Replacing T640 Power System Components
Replacing a T640 Two-Input 160-A Power Supply
The router has either one nonredundant power supply or two redundant, load-sharing
DC power supplies. Each redundant power supply is hot-insertable and hot-removable.
When a redundant power supply is powered down or removed, the other power
supply automatically assumes the entire electrical load for the router. If you have
only one power supply, you must power off the system before removing the power
supply. See Powering Off the T640 Router.
To replace a power system component, perform the following procedures:
Replacing a T640 Two-Input 160-A Power Supply on page 1
Replacing a T640 Three-Input 240-A Power Supply on page 7
Replacing a T640 Four-Input 240-A DC Power Supply on page 17
Replacing a T640 Power Supply Cable on page 23
Replacing a T640 Power Supply Filter Element on page 30
Removing a T640 Two-Input 160-A Power Supply on page 1
Installing a T640 Two-Input Power Supply on page 4
Removing a T640 Two-Input 160-A Power Supply
The power supplies are located at the rear of the chassis below the SIBs. Each
two-input 160-A power supply weighs approximately 23 lb (10.5 kg).
CAUTION: Do not leave a power supply slot empty for more than 30 minutes while
the router is operational. For proper airflow, the power supply must remain in the
chassis, or a blank panel must be used in an empty slot.
Replacing T640 Power System Components
1
Advertisement

Related Manuals for Juniper T640


Summary of Contents for Juniper T640
- Page 1 Replacing a T640 Two-Input 160-A Power Supply on page 1 Replacing a T640 Three-Input 240-A Power Supply on page 7 Replacing a T640 Four-Input 240-A DC Power Supply on page 17 Replacing a T640 Power Supply Cable on page 23...
- Page 2 For a nonredundant power supply, power off the system. See Powering Off the T640 Router. For redundant power supplies, check that the other power supply is functional. Attach an electrostatic discharge (ESD) grounding strap to your bare wrist, and connect the strap to one of the ESD points on the chassis.
- Page 3 CAUTION: Each two-input 160-A power supply weighs approximately 23 lb (10.5 kg). Be prepared to support the full weight of the power supply as you remove it from the router. Removing a T640 Two-Input 160-A Power Supply...
- Page 4 Figure 2: Removing a Power Supply Figure 3: Rear of the Power Supply Showing Midplane Connectors Installing a T640 Two-Input Power Supply To install a power supply (see Figure 4): Installing a T640 Two-Input Power Supply...
- Page 5 INPUT 1 on the three-input 240-A DC power supply in slot PEM1 must be powered by dedicated power feeds derived from feed B. This configuration provides the commonly deployed A/B feed redundancy for the system. Installing a T640 Two-Input Power Supply...
- Page 6 NOTE: After powering on a power supply, wait at least 60 seconds before turning it off. If you have only one power supply, power off the system before turning off the power supply. See Powering Off the T640 Router. Installing a T640 Two-Input Power Supply...
- Page 7 To replace a three-input 240-A power supply, perform the following procedures: Removing a T640 Three-Input 240-A Power Supply on page 8 Setting the T640 Input Mode Switch on a Three-Input 240-A Power Supply on page 11 Installing a T640 Three-Input 240-A Power Supply on page 12...
- Page 8 Replacing the T640 Cable Restraint on a Three-Input 240-A Power Supply on page 13 Connecting DC Power to a Three-Input 240-A Power Supply in a T640 Router on page 15 Powering On a T640 Three-Input 240-A Power Supply on page 17...
- Page 9 Grasp the handle on the power supply faceplate and pull firmly. Slide it halfway out of the chassis (see Figure 9). Place one hand underneath the power supply to support it, and slide it completely out of the chassis. Removing a T640 Three-Input 240-A Power Supply...
- Page 10 CAUTION: Do not leave a power supply slot empty for more than a short time while the router is operational. For proper airflow, the power supply must remain in the chassis or a blank panel must be used in an empty slot. Removing a T640 Three-Input 240-A Power Supply...
- Page 11 Figure 9: Removing a Power Supply Setting the T640 Input Mode Switch on a Three-Input 240-A Power Supply NOTE: Do not set the input mode switch if the power supply is installed in the chassis. If the power supply is already installed, you must disconnect all cables and remove the power supply before setting the input mode switch.
- Page 12 Figure 10: Three-Input 240-A Power Supply Installing a T640 Three-Input 240-A Power Supply Each three-input 240-A power supply weighs approximately 25 lb (11.3 kg). To install a three-input 240-A power supply: Make sure that the voltage across the DC power source cable leads is 0 V and that there is no chance that the cables might become active during installation.
- Page 13 Figure 11: Installing a Three-Input 240-A Power Supply Replacing the T640 Cable Restraint on a Three-Input 240-A Power Supply Each three-input 240-A power supply is shipped with the standard cable restraint, as shown in “Standard Cable Restraint on a Three-Input 240-A Power Supply” on page 13.
- Page 14 Figure 12: Standard Cable Restraint on a Three-Input 240-A Power Supply Installing the T640 Optional Cable Restraint on a Three-Input 240-A Power Supply To install the optional cable restraint on a three-input 240-A power supply: Align the two captive screws on the optional cable restraint with the two threaded holes located at the right edge of the power supply faceplate.
- Page 15 23 lb-in. (2.6 Nm) and 25 lb-in. (2.8 Nm) of torque to each nut. NOTE: For power supplies set to 2-INPUT mode (required for the T640 routing node), connect two DC power cables, one for RETURN and one for -48 V to Input 0 and two DC power cables, one for RETURN and one for -48 V to Input 1.
- Page 16 Replace the clear plastic cover over the terminal studs on the faceplate. Figure 14: Connecting Power Cables to the Power Supply Connecting DC Power to a Three-Input 240-A Power Supply in a T640 Router...
- Page 17 After powering off a power supply, wait at least 60 seconds before turning it back Replacing a T640 Four-Input 240-A DC Power Supply 1. Removing a T640 Four-Input 240-A DC Power Supply on page 18 2. Installing a T640 Four-Input 240-A DC Power Supply on page 20...
- Page 18 Removing a T640 Four-Input 240-A DC Power Supply The router has two redundant, load-sharing DC power supplies. Each power supply is hot-insertable and hot-removable. When one power supply is powered down or removed, the other power supply automatically assumes the entire electrical load for the router.
- Page 19 CAUTION: Each four-input 240-A DC power supply weighs approximately 26.6 lb. (12.0 kg). Be prepared to support the full weight of the power supply as you remove it from the routing platform. Removing a T640 Four-Input 240-A DC Power Supply...
- Page 20 Figure 18). They can contain dangerous voltages. Figure 18: Rear of the Power Supply Showing Midplane Connectors Installing a T640 Four-Input 240-A DC Power Supply Each four-input 240-A DC power supply weighs approximately 26.6 lb. (12.0 kg). To install a four-input 240-A DC power supply: Make sure that the voltage across the DC power source cable leads is 0 V and that there is no chance that the cables might become active during installation.
- Page 21 CAUTION: You must use an appropriate torque-controlled tool to tighten the nuts. Applying excessive torque damages the terminal studs and the power supply. The absolute maximum torque that may be applied to this nut is 45 in-lb (5.0 Nm). Installing a T640 Four-Input 240-A DC Power Supply...
- Page 22 LEDs on the power supply, the command output displays, and messages on the LED display on the craft interface—to indicate that the power supply is functioning normally. Ignore error indicators that appear during the first 60 seconds. Installing a T640 Four-Input 240-A DC Power Supply...
- Page 23 Three-Input 240-A DC power supply, or a Four-Input 240-A DC power supply. To remove a T640 DC Power Supply Cable: Locate a replacement power cable that meets the specifications defined in T640 DC Power Cable Specifications. CAUTION: A licensed electrician must attach a cable lug to the power cable that you supply.
- Page 24 Loosen the captive screw or screws on the cable restraint on the right edge of the power supply faceplate. Carefully move the power cable out of the way. Figure 21: Disconnecting a DC Power Cable from a Two-Input 160-A DC Power Supply Removing a T640 DC Power Supply Cable...
- Page 25 Figure 22: Disconnecting a DC Power Cable from a Three-Input 240-A DC Power Supply Removing a T640 DC Power Supply Cable...
- Page 26 Installing a T640 DC Power Supply Cable NOTE: Only INPUT 0 and INPUT 1 are supported for the T640 router. INPUT 2 on the three-input 240-A power supply is not supported. Do not connect the replacement cable to INPUT 2 .
- Page 27 For a three-input 240-A power supply, verify that the INPUT PRESENT LED is lit steadily, indicating that the input is receiving power. Switch the circuit breakers on the power supply to the on position ( | ). Installing a T640 DC Power Supply Cable...
- Page 28 Verify that the DC OK LED on the power supply faceplate is lit steadily, indicating that the power cable is correctly installed and the power supply is functioning normally. Figure 24: Connecting a DC Power Cable to a Two-Input 160-A DC Power Supply Installing a T640 DC Power Supply Cable...
- Page 29 Figure 25: Connecting a DC Power Cable to a Three-Input 240-A DC Power Supply Installing a T640 DC Power Supply Cable...
- Page 30 Cable lug Terminal studs Locking washer Replacing a T640 Power Supply Filter Element To replace a power supply filter element (see Figure 27): Grasp the filter cover on the power supply faceplate and pull it straight off the power supply.
- Page 31 Figure 27: Replacing the Power Supply Filter Cover T640 Power System Description Related Topics T640 Power Supply Electrical Specifications Maintaining the T640 Power Supplies Site Electrical Wiring Guidelines for M Series, MX Series, and T Series Routing Platforms Published: 2009-11-25 Replacing a T640 Power Supply Filter Element...
Need help?
Do you have a question about the T640 and is the answer not in the manual?
Questions and answers