
Related Manuals for ProActiv LIFT activ


Summary of Contents for ProActiv LIFT activ
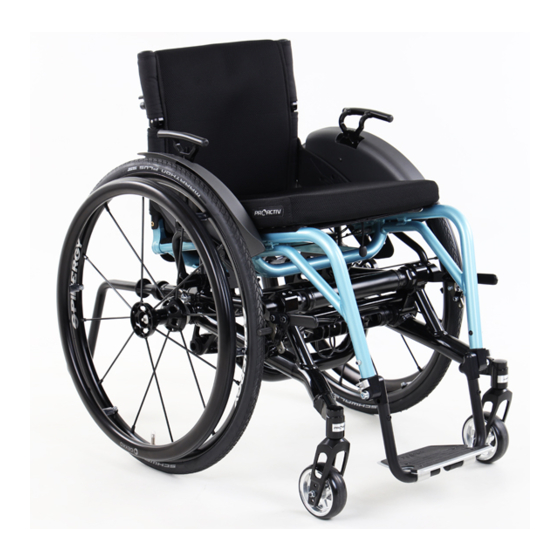
- Page 1 LIFT activ & solid usage instructions Usage instructions Service booklet LIFT activ LIFT solid mechanical & electric...
-
Page 2: Table Of Contents
18.2.2 Adaptation by replacing the caster fork ............... 14 18.2.3 General instructions ..................... 14 18.3 Adjusting the tipping point ......................14 18.3.1 Adaptation on the LIFT activ ..................15 18.3.2 Adaptation on the LIFT solid ..................15 18.3.3 General instructions ..................... 16... - Page 3 LIFT activ & solid usage instructions 19.1 Lumbar support/curvature ......................16 19.1.1 Back tube with lumbar joint (LIFT activ) ............... 16 19.1.2 Back tube with lumbar curvature ................. 17 19.2 Backrest angle .......................... 17 19.2.1 Adjustment option for folding backrest ................. 17 19.2.2 Instructions for sitting posture with an adjustable backrest .........
- Page 4 Setting the brake on the LIFT solid installed on the armrest ....... 49 26.1.4 Setting the brake on the LIFT solid, double knee lever brake ......50 26.2 Integral parking brake on the LIFT activ ................... 50 26.2.1 Opening and closing the brake ..................50 26.2.2 Setting the integral brake ..................
- Page 5 The following instructions are intended for and may only be carried out by the rehabilitation specialist dealer or PRO ACTIV. This document is available in PDF format at www.proactiv-gmbh.com for visually impaired people. Using the zoom function, the font can be increased as desired.
-
Page 6: Preface
Technik GmbH, this declaration becomes void. questions you may have about using it. Manufacturer The LIFT activ & solid products differ in the individual design of the frame geometry and PRO ACTIV Reha-Technik GmbH the options available. If there is a difference in Im Hofstätt 11... -
Page 7: Introduction
LIFT activ & solid usage instructions lift mechanism must always be blocked by this You, your carers, and assistants should also safety belt. seek advice from your therapists and doctors as well as the rehabilitation specialist dealer Please check the product immediately upon... -
Page 8: Proper Use
(e.g. storms), as this may result in incalculable risks. Load weight Thanks to the infinitely variable seat height adjustment, the LIFT activ & solid active Maximum load weight, LIFT activ: wheelchairs are particularly suited for use at Up to 100 kg payload... -
Page 9: Basic Equipment And Dimensions
LIFT activ & solid usage instructions Turning circle: approx. 1.3 m without manoeuvring back and forth approx. 1.1 m with manoeuvring back and forth (strongly dependent on the number of manoeuvres) Basic equipment and dimensions CE marking In the basic equipment, the product is “European conformity”... -
Page 10: Introduction To The Product & The Surroundings
LIFT activ & solid usage instructions field representative or by a product consultant 12 Safety instructions – prior to from PRO ACTIV. driving/use You will be fully instructed in the use of the product based on the usage instructions in- When getting into the wheelchair, do not cluded in the delivery. -
Page 11: Safety Instructions - While Driving/Using
LIFT activ & solid usage instructions wearing appropriately insulating clothes, for Before each use of the product, make example. sure that the anti-tipping supports and push handles are firmly attached and the quick- You may only drive on slopes where the... -
Page 12: Lift Mechanism - Safety Instructions
During the lifting or lowering movement here, particularly while in motion. If you have with the LIFT activ, both hands must be limited coordination of your limbs, then you holding the release handles in the middle, should cover the spokes with a spoke shield, the fingers must not be spread apart. -
Page 13: Safety Instructions Regarding Obstacles
Before crossing an obstacle (steps, thresholds, etc.), the anti-tipping supports must When driving in a curve or turning on hills be swivelled (LIFT activ) or plugged (LIFT or downward slopes, there may be an in- solid) from the operating to the passive posi-... -
Page 14: Safety Instructions - After Driving/Use
LIFT activ & solid usage instructions the changes in the centre of gravity. Avoid 18 Individual setting options such driving manoeuvres. If these cannot be The following instructions are intended for avoided, perform these driving manoeuvres and may only be carried out by a rehabilitation... -
Page 15: Adaptation By Replacing The Caster Fork
LIFT activ & solid usage instructions Size 1 Size 3 Size 2 125 mm 185 mm 155 mm Angle of Top position seat/front seat height reduce Middle position Angle of seat/front 125 mm Bottom position seat height increase Figure 1: Three positions in the caster fork for posi-... -
Page 16: Adaptation On The Lift Activ
LIFT activ & solid usage instructions manage a slightly uneven surface or edges by 18.3.2 Adaptation on the LIFT solid tipping slightly. Driving on both drive wheels (doing a wheelie) is relatively easy to learn. Inexperienced wheelchair users must be pre- vented from tipping over backwards by means of anti-tipping supports. -
Page 17: General Instructions
LIFT activ & solid usage instructions 18.3.3 General instructions After each change to the tipping point: Release slider the wheel track of the drive wheels must be checked and readjusted if necessary (see Chapter 22.2). Lumbar joint the caster wheel axles must be readjusted (see Chapter 23.4) (LIFT solid). -
Page 18: Back Tube With Lumbar Curvature
LIFT activ & solid usage instructions Then pull out the cylindrical pin on both sides 19.2 Backrest angle and position the lumbar joint in the desired 19.2.1 Adjustment option for folding position (Fig. 10). backrest Cylindrical Pos. 1: 3 cm Pos. -
Page 19: Adaptation Of The Backrest Angle For The Folding Backrest
LIFT activ & solid usage instructions If the angle of the seat has been changed Locking pin (see Chapter 19.2), the angle of the backrest can be respectively readjusted. When driving on slopes and when trans- porting baggage (e.g. backpacks) on the... -
Page 20: Adjustable Back & Its Adjustment Options
The belt system located underneath has been set in the factory that the Optional: On the LIFT activ, the back equip- top and the bottom belts have a slack of ap- ment can be additionally equipped with the prox. - Page 21 LIFT activ & solid usage instructions Pull the rear loop part to the left: Reduce the slack Top belt Middle belts Bottom belt Figure 19: Belt system of the adaptable backrest Figure 22: Reduce the slack upholstery with four belts...
- Page 22 LIFT activ & solid usage instructions Figure 25: Tensioning loops applied slightly to the Figure 28: Step 3: Pulling the belt through back system Then reinstall the back padding using the Vel- cro straps. If the belt should have mistakenly been...
-
Page 23: Ergonomic Back Shell & Its Setting Options
LIFT activ & solid usage instructions 19.4 Ergonomic back shell & its setting options The "ergonomic back shell" back system con- sists of an aluminium shell, Velcro cross-straps and back padding. Slack is already integrated into the back shell due to its shape. It cannot be adjusted. -
Page 24: Ergo Back Backrest Bar And Its Adjustment Possibilities
LIFT activ & solid usage instructions 19.5 Ergo Back backrest bar and its adjustment possibilities The "Ergo Back backrest bar" back system normally consists of a backrest bar (with or without lumbar curvature) and an adjustable backrest upholstery including customised back padding. -
Page 25: Clothing Guard
21 Clothing guard 21.1 Overview of terms 21.1.1 Overview for LIFT activ Screwed connections with M5 oval headscrews Recess for side panel guide and locking pin Figure 46: Clothing guard removed from product Figure 43: Clothing guard – LIFT activ... -
Page 26: Removing And Attaching The Clothing Guard (Lift Solid)
LIFT activ & solid usage instructions To attach the clothing guard, the clothing guard is plugged in. At the front, the clothing guard rests on the recess (Fig. 46) on the side Side panel guide panel guide and the locking pin (Fig. 47). Then press the clothing guard down at the back until it rests on the side section (Fig. -
Page 27: Checking And Adjusting The Wheel Tracking Of The Drive Wheel
LIFT activ & solid usage instructions Index groove Green marking = drive wheel is locked in place on the product Figure 51: Quick release axle with index groove Figure 53: Tetra Clip with locked quick release axle The quick-release axle is equipped with the small standard locking knobs (see previous figure) as standard. - Page 28 Drive wheel bushing tracking needs to be corrected. Figure 58: Drive wheel bushing and aluminium lock- ing nut (view from the rear; LIFT activ) 2. Correctly adjust the track by turning the drive wheel bushing (AF 22 mm). Here it...
-
Page 29: Wheel Camber
(with inte- Figure 59: Front distance to the frame (LIFT activ) grated wheel camber). If you would like to change the camber, contact your rehabilitation specialist dealer or PRO ACTIV. -
Page 30: Other
LIFT activ & solid usage instructions To check or correct the tyre pressure, pro- Clamp lever ceed as follows: 1. Secure the product to prevent it rolling away. 2. The drive wheel is normally fitted with a car tyre valve. Unscrew the valve cap. -
Page 31: Replacing The Caster Wheels When Mounted Using Two Axle Fixing Screws
LIFT activ & solid usage instructions 23.1.1 Replacing the caster wheels when able to remove in order for it to be reused later mounted using two axle fixing when reinstalling the new caster wheel. If you screws want to install a different type of caster wheel,... -
Page 32: Caster Wheels Flapping
LIFT activ & solid usage instructions 23.2 Caster wheels flapping Uncontrolled swivelling backwards and for- wards of the caster wheels around their axes on the caster fork (while moving) is known as "fluttering". If the caster wheels start to flutter, imme-... -
Page 33: Replacing The Caster Forks
LIFT activ & solid usage instructions Caster wheel for rotary axle tilted maximum in the direction of travel Caster wheel for rotary axle Max. 4 mm Wheel contact Wheel contact point point Caster length Increased caster length Figure 72: Caster length... -
Page 34: Caster Fork With Screw-On Axle With Welded Caster Wheel Bearing Blocks
LIFT activ & solid usage instructions 23.3.2 Caster fork with screw-on axle with welded caster wheel bearing blocks The following instructions are intended for and may only be carried out by a rehabilita- tion specialist dealer or PRO ACTIV Aluminium cap... -
Page 35: Caster Forks With Quick-Release Axles
LIFT activ & solid usage instructions When mounting the caster wheel fork with 23.4 Adjustment of the caster fork ro- screw-on axle, insert the caster wheel axle tary axles (LIFT solid) back into the caster wheel bearing block, use The following instructions are intended... - Page 36 LIFT activ & solid usage instructions Middle alignment of the slider and caster wheel bear- ing block Slider M6 fixing screw, with washer if necessary Angle Figure 81: M6 fixing screw on frame inner side, washer fitted with G-shape frames but not V-shape...
-
Page 37: Footrests
LIFT activ & solid usage instructions Footrest After performing adjustment work on the Footplate support support plate caster wheel bearing block twice, renewing the screw locking fluid for the M6 fixing screws (AF 5 mm) on the outer and inner sides of the frame is recommended. -
Page 38: Footrest Fold Up To The Rear
LIFT activ & solid usage instructions To fold up the footrest to the rear, move the locking pin lever on the right and left side to the vertical position to the footbar joints. Now you M6 fixing screw with washer can move the footrests to the rear. -
Page 39: Footrest Fold Up To The Rear With Spring Locking Mechanism
LIFT activ & solid usage instructions Locking pin M6 fixing screw lever in with washer horizontal position, engaged Figure 90: M6 fixing screw with washer to adjust the Figure 89: Locking pin lever in horizontal position, lower leg length engaged and thus resting against the footbar joint... -
Page 40: Divided Footrest
LIFT activ & solid usage instructions 2 cm with the existing lower leg tube. If a larger extension is required, longer lower leg tubes can be ordered. Once the lower leg length is adjusted, fix it in position by inserting the M6 fixing screws (with polymer dry locking coating, AF 4 mm) on both sides and tightening them to 7 Nm. -
Page 41: Removable Frame Stem, Foldable With Divided Footrest
LIFT activ & solid usage instructions To fold up one of the two footrest parts, grasp Note: it and fold it up to the side. Moreover, you can With a V-shaped product frame or with a larger also turn or pivot the footplate support out- lower leg width at the top than the bottom, it is wards. -
Page 42: Swing Away Footrest (Lift Solid)
LIFT activ & solid usage instructions Installing the footrest: Note: With a V-shaped product frame or with a larger 1. Insert the pintle (Fig. 99) into the support lower leg width at the top than the bottom, it is tube, whereby the footrest is pointing 90°... - Page 43 LIFT activ & solid usage instructions Figure 104: Swing away footrest removed Figure 102: Both footrest parts folded up and pivot- ed outwards To adjust the length of the footrest support tubes or adapt the lower leg length, the M6...
-
Page 44: Safety Instructions
LIFT activ & solid usage instructions 24.8 Safety instructions Anti-tipping support sleeve Ensure when setting the lower leg length, that no strong pressure is produced between the underneath of the lower leg of the wheel- Locking knob chair user and the edge of the seating system. - Page 45 LIFT activ & solid usage instructions If handling by turning inwards for adjusting the anti-tipping support in operating or passive position does not work for you, it can be changed to turning outwards. To do so, pro- ceed as follows: 1.
-
Page 46: Lift Solid
LIFT activ & solid usage instructions 25.2 LIFT solid 25.2.1 Overview of terms The anti-tipping support is fixed on the lower frame with a quick pin, which can also be used to remove it. Operating position Passive position Figure 116: Operating and passive position of anti-... -
Page 47: Safety Instructions
LIFT activ & solid usage instructions Removing the anti-tipping support: The lower edge of the anti-tipping wheels 1. Take off the drive wheel (Chapter 22.1; may not be more than 5 cm from the ground. If only necessary on the LIFT activ). -
Page 48: Setting The Brake In A Low Position & Installed At The Rear (Lift Solid) & Installed At The Front (Lift Activ)
Sliding directions Open brake Figure 120: Brake closed; opening done by pulling the brake lever up and rearwards Figure 121: Sliding directions (LIFT activ; view from the inside of the wheelchair) - Page 49 LIFT activ & solid usage instructions M5 fixing screws Figure 122: M5 fixing screws on the brake holding Distance 3-4 mm rail (installed at the front); LIFT activ Brake holding Figure 125: Distance between the brake pin and rail tyre of approx. 3 to max. 4 mm with the brake opened (installed at the front) 4.
-
Page 50: Setting The Brake On The Lift Solid Installed On The Armrest
LIFT activ & solid usage instructions Settings on the brake could be necessary for the following reasons: You have changed the tyre or the tyre pressure. You have changed the wheel tracking or the position of the drive wheels. -
Page 51: Setting The Brake On The Lift Solid, Double Knee Lever Brake
LIFT activ & solid usage instructions 3. Position the opened brake on the brake 26.1.4 Setting the brake on the LIFT solid, holding rail so that there is a distance of double knee lever brake between approx. 3 to max. 4 mm between The following instructions are intended for the brake pin and the tyre. -
Page 52: Setting The Integral Brake
LIFT activ & solid usage instructions Press the front part of the control ele- Press the front part ment to the inside of the control ele- ment to the outside Figure 134: Integral brake closed, the brake is opened by pressing the control element towards the... -
Page 53: Push Handles
LIFT activ & solid usage instructions can be moved on the brake holding rail ment (at prescribed air pressure in the (Fig. 133). tyres). 3. Press the front part of the control element to the right or left outwards until the brake 27 Push handles element rests against the tyre. -
Page 54: Push Handles, Horizontally Screwed In Back Tube
LIFT activ & solid usage instructions To install the push handles, place these in the 27.4 Safety push handles with contin- back tube and insert the M6 fixing screws (AF uous height adjustment 4 mm) (with washers) into the each of the holes of the back tube and push handle. -
Page 55: Safety Push Handles Back-Positioned
LIFT activ & solid usage instructions Quick release lever Pull the clamp lever out ver- tically to the rotary axle Figure 142: Put the clamp lever in another angled position by pulling out Open To remove the push handles, turn the clamp... -
Page 56: Safety Instructions
28.1.2 Unlocking & locking the lift function can be selected. It is always fastened on one side on the LIFT activ and LIFT solid (left or The lift mechanism can be locked by the lock- right). The following images show the release ing mechanism on the release handle. -
Page 57: Adjusting The Seat Height
LIFT activ & solid usage instructions Video Locking the release handle: Please observe the safety instructions https://www.youtube.com/watch?v=xtAb2Jv regarding the lift function in chapter 14 before nMVc using the lift mechanism. Video Seat height adjustment on the 28.1.3 Adjusting the seat height... -
Page 58: Folding The Armrests Up/Down Before/After Transport
LIFT activ & solid usage instructions Adjusting the seat height (standard ver- Video Seat height adjustment on the LIFT solid mechanical: sion): https://www.youtube.com/watch?v=hGphwh 1. Close the parking brake. VNKSQ 2. Grasp the bars of the armrest in the middle with both hands. Make sure that your 28.2.1 Folding the armrests up/down be-... -
Page 59: Rechargeable Battery & Charger For Electric Seat Height Adjustment On The Lift Solid
LIFT activ & solid usage instructions Adjusting the seat height: 1. Close the parking brakes (Chapter 26). 2. Press the control button (Fig. 153; red = lift, green = lower) to adjust the seat sur- face up or down. 3. As soon as you let go of the corresponding control knob, the product stops at the de- sired height. -
Page 60: Removing The Rechargeable Battery
LIFT activ & solid usage instructions The maximum charging time for completely 29.3 Removing the rechargeable bat- discharged batteries is approx. 7 hours. When tery the battery is fully charged, the charger auto- Disconnect the plug connection (Fig. 159). To matically switches to trickle charging. -
Page 61: Safety Instructions
LIFT activ & solid usage instructions 29.4 Safety instructions The charger may only be cleaned with a dry cloth. Improper handling of the rechargeable battery can cause electrolyte fluid to leak. This can cause skin injuries or damage to clothing. -
Page 62: Transport
Do not hold the product by the release 3. Block the lift mechanism with the safety handle of the lift mechanism. belt (Chapter 4). On the LIFT activ, you must also lock the release handle (Chapter 28.1). 31.2 Passenger transport in motor ve- hicles 4. -
Page 63: Passenger Transport Over Obstacles In The Product
Climbing up stairs: classified as hazardous goods for transport by air. Claiming the right to air transport is not 1. Lock the lift function on the LIFT activ (see permitted. The decision about the transport is Chapter 28.1). the sole responsibility of the airline and this 2. -
Page 64: Maintenance
LIFT activ & solid usage instructions not be exposed to any aggressive environmen- tread on the tyres, the tyres must be changed tal influences. If this cannot be avoided, the as otherwise there is an increased risk of an product must always be cleaned immediately accident. -
Page 65: Proof Of Maintenance
LIFT activ & solid usage instructions 35 Disposal & recycling If you should discover any problems dur- ing these checks, please immediately contact At the end of the service life, the product can your rehabilitation specialist dealer or be returned to PRO ACTIV or your rehabilita- PRO ACTIV. -
Page 66: Re-Use
LIFT activ & solid usage instructions to prevent possible environmental and health 37 Warranty damage. PRO ACTIV guarantees that the product was These guidelines are applicable only to devic- free of any defects at the time it was handed es that are installed or operated in the EU. -
Page 67: Liability
LIFT activ & solid usage instructions 38 Liability As the manufacturer of the product, PRO ACTIV is not responsible for its safety if: The product is handled improperly. The product is not maintained in accord- ance with the maintenance schedule laid down by PRO ACTIV. -
Page 68: Appendix: Tightening Torques, Securing Details And Tools
LIFT activ & solid usage instructions 39 Appendix: Tightening torques, securing details and tools The following table shows the torques for shaft screws with a metric control thread (valid providing the drawing, assembly, or usage instructions do not state different values!):... -
Page 69: Appendix: Medical Product Passport/Record Of Training
LIFT activ & solid usage instructions 40 Appendix: Medical product passport/record of training Product specifications: Serial number: Customer data: Surname, forename: Street: Postcode, city: Phone: Paying organisation: Training carried out by: Rehabilitation specialist dealer PRO ACTIV Field Representative/ Product adviser... -
Page 70: Appendix: Hand-Over Certificate
LIFT activ & solid usage instructions 41 Appendix: Hand-over certificate 41.1 Required compliance criteria to authorise use Completed/ Topics Remarks fulfilled The product is suitable for the customer based on their own judgement and the customer infor- mation received regarding the disability-related restrictions. -
Page 71: Check List For Training The User
LIFT activ & solid usage instructions 41.2 Check list for training the user Com- Topics pleted/ fulfilled All mechanical function control elements were explained and their function demonstrat- Use of the brakes was demonstrated and then performed by the user themselves and/or their assistant. -
Page 72: Appendix: Inspection Lists
LIFT activ & solid usage instructions 42 Appendix: Inspection lists Initial inspection: after 6 weeks not OK resolved Serial number: ___________________ carried out Check that all screws/fastening elements are firmly seated Check that the wheel tracking and drive wheel bushing are firmly... - Page 73 LIFT activ & solid usage instructions Subsequent inspection: One year later after the last inspection or earlier following heavy OK / not OK resolved Serial number: ___________________ carried out Check that all screws/fastening elements are firmly seated Clean and oil/grease all pivot points, quick release axles and...
- Page 74 LIFT activ & solid usage instructions Subsequent inspection: One year later after the last inspection or earlier following heavy OK / not OK resolved Serial number: ___________________ carried out Check that all screws/fastening elements are firmly seated Clean and oil/grease all pivot points, quick release axles and...
- Page 75 LIFT activ & solid usage instructions Subsequent inspection: One year later after the last inspection or earlier following heavy OK / not OK resolved Serial number: ___________________ carried out Check that all screws/fastening elements are firmly seated Clean and oil/grease all pivot points, quick release axles and...
- Page 76 LIFT activ & solid usage instructions Subsequent inspection: One year later after the last inspection or earlier following heavy OK / not OK resolved Serial number: ___________________ carried out Check that all screws/fastening elements are firmly seated Clean and oil/grease all pivot points, quick release axles and...
- Page 77 LIFT activ & solid usage instructions Subsequent inspection: One year later after the last inspection or earlier following heavy OK / not OK resolved Serial number: ___________________ carried out Check that all screws/fastening elements are firmly seated Clean and oil/grease all pivot points, quick release axles and...
- Page 78 LIFT activ & solid usage instructions Subsequent inspection: One year later after the last inspection or earlier following heavy OK / not OK resolved Serial number: ___________________ carried out Check that all screws/fastening elements are firmly seated Clean and oil/grease all pivot points, quick release axles and...
- Page 79 LIFT activ & solid usage instructions Subsequent inspection: One year later after the last inspection or earlier following heavy OK / not OK resolved Serial number: ___________________ carried out Check that all screws/fastening elements are firmly seated Clean and oil/grease all pivot points, quick release axles and...
- Page 80 LIFT activ & solid usage instructions Your rehabilitation specialist dealer: PRO ACTIV Reha-Technik GmbH Im Hofstätt 11 72359 Dotternhausen – Germany Phone +49 7427 9480-0 Fax +49 7427 9480-7025 Email: info@proactiv-gmbh.de www.proactiv-gmbh.com...
Need help?
Do you have a question about the LIFT activ and is the answer not in the manual?
Questions and answers