
Subscribe to Our Youtube Channel
Related Manuals for Midea MY6021D


Summary of Contents for Midea MY6021D
- Page 1 使用說明書 電壓力鍋 型號:MY6021D 額定電壓:220-240V~ 額定頻率:50/60Hz 額定功率:1000W 容量:5.7L 本指南的所有內容均已仔細核 對。如有印刷錯誤或誤解,請 聯繫美的客服。 注:如有技術改進,將編入新 版指南,不再另行通知。產品 外觀、顏色如有改動,以實物 為準。 MY6021D...
- Page 2 安全警告 注意 1. 使用本產品前,請先詳細閱讀使用指南。 2. 本電器僅供家庭使用。請勿在戶外使用。 3. 八歲以上的小孩/感官與感知能力受限/缺乏相關知識或經 驗人士,均須在適當人員監督下安全使用。八歲或以下小孩 均不建議使用本產品。 4. 除非有適當人員監督下或給予如何安全使用本機的指示并讓 其了解涉及的風險,本機並非設計給運動,感官與感知能力 受限,或缺乏相關知識或使用經驗的人(包括孩童)來使用 的。 5. 應監督兒童以避免將本產品當成玩具,電器及電源線亦應放 在兒童無法接觸的地方。 6. 如發現電源線損壞,請即停止使用本產品及聯繫本公司的售 後服務團隊,以作預約安排美的授權的合資格技術員作檢查 及維修。 7. 請先關閉本產品及拔下插頭,再進行清潔、維護、重新放置 或儲存電器。 8. 請勿將電器的任何部分浸入水或其他液體中。 9. 應當定期檢查排出蒸氣的壓力調節器,以確保其未被堵塞。 10. 在壓力充分降低之前不得打開容器。 11. 在使用本產品後,加熱零件會有餘熱,請勿觸摸。 12. 警告:避免食物溢出到連接器上。 13. 警告:濫用可能導致潛在的傷害。...
- Page 3 安全警告 警告 14. 請勿通過外部計時器或單獨的遙控系統操作本電器。 15. 請勿將壓力鍋放入加熱的烤箱中。 16. 請小心使用手柄或頂蓋旋鈕來移動加壓的壓力鍋。請勿觸 摸變熱的表面。如有必要,請使用保護措施。 17. 請勿讓兒童靠近正在運作的壓力鍋。 18. 除了正常煮食外,請勿將壓力鍋用於其他用途。 19. 本電器採用壓力烹飪。壓力鍋使用不當可能導致燙傷。在 加熱之前,請確保壓力鍋處於關閉狀態,請參閱“使用說 明”。 20. 切勿強行打開壓力鍋。在內部壓力完全下降之前請勿打開。 請參閱“使用說明”。 21. 切勿在未加水或食物的情況下使用壓力鍋,否則會導致嚴重 損壞。 22. 壓力鍋擺放食物不得超過其容量的2/3。如果食物在烹飪過 程中會膨脹(例如米飯或脫水蔬菜),請勿超過壓力鍋容量 的一半。 23. 根據使用說明使用合適的火力烹煮相關食材。 24. 烹飪肉類時,如果肉類表皮在壓力作用下會膨脹(例如牛 舌),請勿刺破已膨脹的肉,否則可能導致燙傷。 25. 烹飪意粉時,請在打開鍋蓋前輕輕搖動壓力鍋,以免食 物彈出。 26. 每次使用前,請檢查閥門是否被阻塞。請參閱“使用說明”。 27. 切勿使用壓力鍋在加壓模式下油炸食物。...
- Page 4 安全警告 注意 28. 請根據使用指南所提及的說明進行維謢。 29. 請使用製造商指定的原裝配件。如鍋蓋或主機出現任何問題 或損壞,請即聯繫售後服務團隊,以作維修或配售相關配 件。 30. 妥善保管本使用指南。...
- Page 5 產品結構 提示: 1. 請用鍋體手柄移動產品; 2. 請用布擦去外殼蓋上的水。 注意: ① 排氣閥:從鍋蓋上拉出排氣閥。每月至少用刷子和布清潔排氣閥的內側和鍋 蓋的排氣閥和浮閥一次。 ② 密封圈:請用清潔劑和刷子清除密封圈上的油污和污垢。 ③ 水箱:烹飪後,蒸氣水份會積聚在主機水箱中。為避免產生異味,應將箱內的 水除去,並用乾淨的布擦拭。 拆裝防堵蓋和密封圈 拆裝防堵蓋 1. 每次使用前檢查密封圈 拆卸 安裝 和防堵蓋是否正確安裝 向上拉出 按下進行安裝 在上蓋中。 2. 使用後,請清潔防堵蓋 的密封圈及四周,以免 防堵蓋 卡住防堵蓋,保持清潔 以免產生異味。 拆裝密封圈 安裝 拆卸 1. 請勿拉動密封圈,否則 向上拉出 按下進行安裝 密封圈變形會影響密封 和壓力效果。 2.
- Page 6 使用和保養內膽 3. 保持清潔,延長使用壽命 請勿將其長時間浸入水中。 用肥皂、溫和的清潔劑或溫水清潔內膽,以去除灰塵、油污和污垢。 4. 請勿使用金屬鏟或其他硬工具進行清潔,否則會損壞鍋內表面。 準備烹飪 1. 正確打開鍋蓋 • 握住上蓋手柄,逆時針旋轉約30°,直到上蓋 處於解鎖狀態,然後抬起上蓋。 開鎖狀態 2. 檢查鍋蓋的零件是否安裝好 • 檢查浮閥和排氣閥是否卡住,確認密封圈和 防堵蓋是否安裝好。 3. 取出內膽,將食物和水放入內膽 • 食物和水的總量不得超過內膽上標示的最高 位。 4. 將內膽放入壓力鍋中 • 擦拭乾淨內膽表面,電壓力鍋內表面不允 許有異物和水; 最高 可用容量 • 左右轉動內膽,確保與加熱板接觸良好。 5. 安全合上鍋蓋 • 蓋上鍋蓋前,檢查密封圈是否安裝好。 • 握住上蓋把手,將鍋蓋對準“開鎖狀態”, 將頂蓋水準放在鍋體上,順時針轉動上蓋約 30°到鎖定位置為“上鎖狀態”。...
- Page 7 準備烹飪 排氣時,請勿將身體的任何部位放在排氣口上方; 密封示意圖 排氣示意圖 • 開機前檢查浮閥是否下降(加熱前浮閥下降)。 一般功能 1. 如連接電源後按鍵無效,請確認鍋蓋是否正確合上,如果鍋蓋沒有正確關閉,則 按鍵無效。 2. 烹飪完成後,壓力鍋會自動進入保溫狀態(某些功能),指示燈顯示“L0:00( 0分鐘)、L0:01(1分鐘)、L1:00(1小時)。 提示: 壓力鍋運作時發出輕微聲響屬正常現象,請放心使用。 烹調少量食物時,打開鍋蓋可能會使內膽被抬起,請搖動鍋蓋使內膽掉入主機 內,然後取下鍋蓋。 安全地打開鍋蓋 1. 切斷電源或拔下電源插頭 2. 排氣方式 A. 快速開蓋(非流質食物) 將排氣閥轉至排氣處排氣,直至浮閥下降。 B. 一般開蓋 等待電壓力鍋自然冷卻,直到浮閥落下。 3. 打開鍋蓋 左手逆時針轉動上蓋,轉動到開蓋限位處,右手抬起上蓋打開鍋蓋。 鍋內壓力未完全釋放前請勿打開鍋蓋,難以打開時請勿用力打開鍋蓋。 轉動排氣閥時不要拉出排氣閥。 煮完流質食物(粥和湯)後,不要轉動排氣閥或按蒸氣釋放按鈕,請切斷電源, 使其自然冷卻,直到浮子落下再打開鍋蓋。...
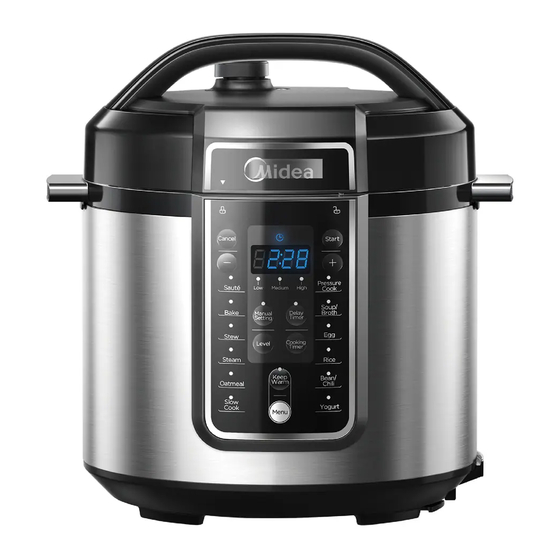
- Page 8 產品參數 型號 容量 電源 額定功率 產品尺寸(長x寬x高) 淨重 220-240V~ 330x310x337毫米 4.4公斤 5.7L 1000W MY6021D 50/60Hz 勺子 說明書 電源線 配件 產品簡介 說明 編號 排氣閥手柄 上蓋手柄 密封環 排氣手動控制器 排氣口 浮閥 密封圈 防堵蓋 內膽 主機手柄 主機 控制面板 顯示幕 取消按鈕 開始按鈕 取消 開始 時間(-)按鈕 時間(+)按鈕...
- Page 9 功能選擇 操作指南 功能 操作指南 在任何狀態下,按“取消”按鈕可取消當前工作狀態,返回待 取消 機狀態。 待機狀態下,按“保溫”按鈕,指示燈亮起,顯示屏顯示預設 運作時間。按“烹飪時間”按鈕,然後按“+”或“-”按鈕調 整運作時間。按“開始”按鈕進入保溫狀態。 保溫 待機狀態下,按“菜單”按鈕選擇“開蓋煎炒”功能,指示燈 亮,顯示屏顯示預設運作時間。按“烹飪時間”按鈕,然後按 “+”或“-”按鈕調整運作時間。按“開始”按鈕進入烹飪狀 開蓋煎炒 態。開始倒計時,工作完成後進入待機狀態。 待機狀態下,按““菜單”按鈕選擇“烤焗”功能,指示燈亮, 顯示屏顯示預設運作時間。按“烹飪時間”按鈕,然後按“+” 或“-”按鈕調整運作時間。按“開始”按鈕進入烹飪狀態。溫 烤焗 度上升到運作溫度後,顯示屏開始倒計時。完成運作後進入保 溫狀態。 待機狀態下,按“菜單”按鈕選擇“慢煮”功能,指示燈亮, 顯示屏顯示預設運作時間。按“烹飪時間”按鈕,然後按“+” 或“-”按鈕調整運作時間。按“開始”按鈕進入烹飪狀態。顯 慢煮 示屏開始倒計時,完成運作後進入保溫。...
- Page 10 功能選擇 功能 操作指南 牛/羊肉 燉雞肉 待機狀態下,按“菜單”按鈕選擇對應的功能,指示燈亮,顯 蔬菜 示屏顯示預設運作時間。按“烹飪時間”按鈕,然後按“+”或 蒸煮 “-”按鈕調整運作時間。按“開始”按鈕進入烹飪狀態。壓力 上升至運作壓力後,顯示屏開始倒計時。完成運作後進入保溫狀 咖喱 態。 濃湯 清湯 豆類/牛筋 煮飯 手動設置 預訂烹飪:烹飪程序開始前,按“預設時間”按鈕。顯示屏顯示 預設的開始時間。按“預設時間”按鈕,然後按“+”或“-”按 鈕調整延遲時間。再次按“預設時間”按鈕可切換小時和分鐘的 設定。按“啟動”按鈕,裝置開始延時倒計時。當倒計時結束時, 預設時間 程式開始工作。 注意:開蓋煎炒、烤焗、保溫功能不能設置預設時間。 烹飪開始前,您可以按“火力”按鈕將烹調火力更改為“低”、 火力 “中”或“高”。...
- Page 11 日常檢查和維護 為安全使用產品,延長使用壽命,請仔細檢查和維護。 如果出現以下情況 解決方法 • 電源線和插頭膨脹、變形、損壞、變色。 • 電源線和插頭的一部分變熱。 停止使用,請到授權 • 電源線不連續供電。 維修中心維修。 • 電壓力鍋發熱異常,產生異味。 • 供電時有異常噪音或振動。 清除灰塵或污垢。 • 插頭或插座上有灰塵或污垢。 安全須知 為避免人身傷害和財產損失,請務必遵守以下安全注意事項。 • 標誌的含義: 一般禁止 禁止拆卸 禁止濕手操作 表示“禁止”的 事項 禁止觸摸 禁止灑水 表示“強制性” 必須執行 拔出電源插頭 項目 • 忽視以下警告,錯誤使用可能造成以下兩個等級的危險。 不遵守警告事項可能會導致死亡或重傷。 警告 不遵守小心事項可能會造成人身傷害或財產損失。 小心 安全須知...
- Page 12 安全須知 警告 使用單獨的插座 • 需單獨使用額定電流10A以上帶接地線的插座; • 如果與其他電器共用,插座可能會引起異常發熱並導 致火災。 嚴禁使用其他鍋蓋 • 嚴禁使用其他鍋蓋加熱,在(開啟)過程中,不得使 用非原裝鍋蓋。 • 否則可能會導致觸電或安全隱患。 如果電源線損壞,請停止使用 • 請聯繫美的售後服務團隊,以作預約檢查及維修。 請勿放置異物 • 禁止在縫隙中插入金屬屑、針等異物。 • 否則可能會導致觸電或運動異常。 將電器放置在嬰兒無法接觸的地方 • 將電器放置在嬰兒無法接觸的地方。 • 以避免觸電和燙傷。 禁止改裝 • 禁止非專業人員改裝或修理。 • 違規可能會導致火災或觸電。 • 請聯繫美的售後服務團隊以作預約檢查及維修更換零件。 產品不得浸入水中或淋水 • 否則可能會導致觸電和短路。...
- Page 13 安全須知 警告 開蓋警告 • 電壓力鍋不工作時,鍋內無壓力,浮閥下降; • 電壓力鍋工作時,鍋內壓力上升,浮閥上升;在壓力完全釋放之前,請 勿用力打開鍋蓋; • 如果難以打開鍋蓋,請勿用力打開,否則可能會造成燙傷或人身傷害。 定期檢查 • 務必定期檢查防堵蓋和排氣閥芯,確保其沒有被堵 住; • 請勿用重物蓋住排氣閥或用其他物體更換。 小心 切勿用濕手拔插頭 • 以避免觸電。 拔插頭時一定要捏住插頭 • 拔插頭時,必須捏住插頭; • 請勿拉扯電源線,否則會損壞電源線,造成觸電和 短路。 不使用時拔掉插頭 • 否則可能導致洩漏、火災或故障。 工作時,切勿將手靠近排氣口。 • 在烹飪過程中,切勿將手靠近排氣口,以免燙傷。 • 在烹飪過程中,請勿用布和其他物品蓋住通風口。...
- Page 14 安全須知 小心 壓力鍋工作時,請勿觸摸鍋蓋 • 壓力鍋工作時,鍋蓋溫度很高,請勿觸摸; • 否則可能會導致燙傷。 食物和水的總量不能超過最大刻度 • 食物和水的總量不能超過最大刻度,否則食物可能 無法煮熟,或導致故障。 只能使用專用鍋具 • 如果鍋底和加熱板表面有異物,使用前請清除異物。 • 否則可能導致過熱和工作異常等。 請勿將內膽放在其他器具上加熱 • 以避免變形或故障。 • 請使用專用內膽。 移動產品時,請握住鍋體把手 • 移動產品時,請勿直接握住鍋蓋把手,以免鍋蓋 掉落。 請勿在以下場所使用 • 請勿在不穩定的地方使用; • 請勿在靠近水和火的地方使用; • 請勿在靠近牆壁和傢俱的地方使用; • 請勿在陽光直射和油濺的地方使用。 • 請勿靠近爐灶以避免火災。 產品存放環境 • 定期清潔壓力鍋並清除桌子上的油污。 • 將電壓力鍋與其他廚房用具保持30釐米的距離。...
- Page 15 使用後清潔 1. 每次使用後清潔。 2. 清潔保養前,請先拔掉電源線,待產品冷卻後再操作。 3. 取下鍋蓋和內膽,先用清潔劑清洗,然後用水沖洗乾淨,再用軟布擦乾。 4. 用水清洗鍋蓋內側,密封圈、防堵蓋、排氣閥芯和浮閥可拆下清洗,洗後及 時正確安裝,然後用布擦乾鍋蓋內側。 5. 用抹布將鍋體擦乾淨,禁止將鍋體浸入水中或噴水。 故障排除 當出現以下情況時,並非壓力鍋發生故障,請在送修前仔細檢查一次。 序號 問題 原因 解決方案 密封圈安裝不正確 將密封圈放置好 難以合上鍋蓋 浮閥夾住推杆 輕推推杆 浮閥處於彈起位置 用筷子輕輕按壓浮閥。 難以打開鍋蓋 待壓力完全釋放後打 鍋內有壓力 開鍋蓋。 密封圈安裝不當 按要求安裝密封圈 蒸氣從鍋蓋洩漏 食物殘渣附著在密封圈上 清潔密封圈 密封圈損壞 更換密封圈 鍋蓋沒有正確蓋上 正確蓋好鍋蓋 浮閥墊片上有食物殘渣 清潔浮閥墊片 蒸氣從浮閥洩漏...
- Page 16 故障排除 序號 問題 原因 解決方案 排氣閥未處於密封位置 將排氣閥轉至密封位置 蒸氣從排氣閥不停 地流出 壓力控制失效 送服務中心維修 電源指示燈不亮 電源插座接觸不良 請檢查電源插座 顯示幕顯示E1 底部感測器故障 送服務中心維修 顯示幕顯示E2 由於內膽沒有水,所以溫 根據需要加水 度很高 顯示幕顯示C1 由於內膽沒有水,所以溫 正確放置內膽 度很高 顯示幕顯示E8 壓力開關故障 送服務中心維修 水太少 相應地加水 米飯半熟或太硬 烹飪完成後,等待5分鐘 過早打開鍋蓋 再打開鍋蓋。 米飯太軟 加水過多 相應地減少水 ——如果以上檢查後故障仍未排除,請聯繫我司授權服務中心維修。...
- Page 17 ELECTRIC PRESSURE COOKER MY6021D Rated voltage: 220-240V~ Rated frequency: 50/60Hz Rated power:1000W Capacity:5.7L MY6021D...
-
Page 18: Safety Warning
5. Keep the appliance and its cord out of reach of children, ensure that they do not play with the appliance; 6 Please contact with Midea customer service team if the supply cord is damaged, for check and repair reservation. - Page 19 SAFETY WARNING Caution 11.Do not touch the appliance surface once finish the cooking program, as it have chance to get hurt by the heating surface. 12.Warning: Avoid spillage on the connector. 13.Warning: Misuse may cause potential injury; 14.The appliance is not intended to be operated by means of an external timer or a separate remote-control system.
- Page 20 28.Do not tamper with any of the safety systems beyond the maintenance instructions specified in the instructions for use. 29.Only use authorized model spare parts in accordance In particular, please contact with Midea customer service team if have to checking the appliance or purchase the. 30.KEEP THESE INSTRUCTIONS.
- Page 21 Product Structure Tips: 1. Please move the product with the handle of the cooker body; 2. Please remove the water from the housing cover with cloth. Note: ① Exhaust valve: Pull out the exhaust valve from the lid. Clean the internal side of the exhaust valve and the exhaust valve and float valve of the lid with brush and cloth at least once a month.
-
Page 22: Prepare For Cooking
Use and maintain the inner pot 3. Keep it clean to prolong the service life Do not immerse it in water for a long period. Clean the inner pot with soap, mild detergent or warm water to remove dust, oil and dirt. Do not use a metal shovel or other hard tool, otherwise it will damage the inner surface of pot. -
Page 23: General Function
Prepare For Cooking when exhausting, do not keep the hands or Sealing schematic Exhaust schematic face above the exhaust opening; diagram diagram • Check if the floater valve drops down before working (before heating, the floater valve is down). General Function 1. -
Page 24: Product Structure
Technical Data Of The Product Power Rated Model Capacity Product Size(LxWxH) Net Weight Supply Power 220-240V~ 5.7L 1000W 330x310x337mm 4.4kg MY6021D 50/60Hz Spoon User Manual Power Cord Accessories Product Structure Description Exhaust valve handle Upper cover handle Seal ring Control Box Exhaust opening... - Page 25 Function Selection Operation Guidelines Function Operation Guidelines Under any state, press “Cancel” button to cancel the current Cancel work state and return standby state. Under standby state, press “Keep Warm” button, the indicator light is on and the digital screen shows default working time. Press “Cooking Timer”...
-
Page 26: Function Selection
Function Selection Function Operation Guidelines Meat Curry Under standby state, press “Menu” button, the indicator light is Soup on and the digital screen shows default working time. Press Broth “Cooking Timer” button, then press “+” or “-” button to adjust the Steam working time. -
Page 27: Daily Check And Maintenance
Daily Check And Maintenance For use the product safely with a longer service life, please carefully check and maintain it. If followings occur Solutions • Power cord and plug is expanded, deformation, damaged and it color is changed. • One part of the power cord and plug are hotter. Stop using, and repair •... - Page 28 Safety Precautions Warning A socket shall be used alone • A socket of more than 10A rated current with ground- ing wire shall be used alone; • If shared with other electrical appliances, the socket may cause abnormal heat and result in fire. It is strictly prohibited to use other lid •...
- Page 29 Safety Precautions Warning Warning on Opening the lid • When the electric pressure cooker is not working, there isn't pressure in the pot, the float valve is down; • When the electric pressure cooker is working, pressure in the cooker rises, float valve ascends;...
- Page 30 Safety Precautions Caution When the cooker is working, please do not touch the lid • When the cooker is working, lid has high temperature, do not touch it; • Otherwise, it may possibly cause scalding. The total amount of food and water can not exceed Max scale •...
-
Page 31: Clean After Use
Clean After Use 1. Clean after each use. 2. Before cleaning and maintenance, please unplug the power cord until the product cools. 3. Remove the lid and inner pot, clean with detergent first, then rinse well with water, and wipe dry with a soft cloth. 4. - Page 32 Troubleshooting Problem Reason Solution Exhaust valve not in sealing Turn the exhaust valve to position the sealing position Steam comes out from Send to the service center exhaust valve non-stop Pressure control fails for repair Power indicator doesn’t Please check the power Power socket bad contact light on socket...
Need help?
Do you have a question about the MY6021D and is the answer not in the manual?
Questions and answers