Table of Contents
Advertisement
Quick Links
ELECTRIC PRESSURE COOKER
USER MANUAL
MPC6018AASS
Warning notices: Before using this product, please read this manual carefully and keep it for future reference.
The design and specifications are subject to change without prior notice for product improvement.
Consult with your dealer or manufacturer for details.
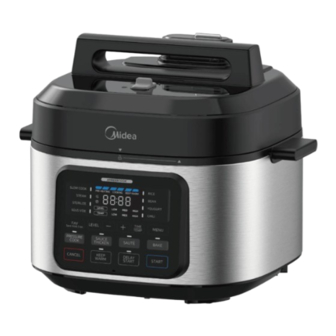
The diagram above is just for reference. Please take the appearance of the actual product as the standard.
Advertisement
Table of Contents

Related Manuals for Midea MPC6018AASS


Summary of Contents for Midea MPC6018AASS
- Page 1 ELECTRIC PRESSURE COOKER USER MANUAL MPC6018AASS Warning notices: Before using this product, please read this manual carefully and keep it for future reference. The design and specifications are subject to change without prior notice for product improvement. Consult with your dealer or manufacturer for details.
-
Page 2: Table Of Contents
THANK YOU LETTER Thank you for choosing Midea! Before using your new Midea product, please read this manual thoroughly to ensure that you know how to operate the features and functions that your new appliance offers in a safe way. -
Page 3: Safety Instructions
SAFETY INSTRUCTIONS Intended Use The following safety guidelines are intended to prevent unforeseen risks or damage from unsafe or incorrect operation of the appliance. Please check the packaging and appliance on arrival to make sure everything is intact to ensure safe operation. If you find any damage, please contact the retailer or dealer. - Page 4 IMPORTANT SAFEGUARDS CAUTION READ ALL INSTRUCTIONS. Do not touch hot surfaces. Only use side handles or ● knobs for carrying or moving. To protect against electrical shock, do not immerse the ● power cord, plugs, or appliance in water or other liquid. Close supervision is necessary when the appliance is ●...
- Page 5 result in scalding injury. Make certain unit is properly closed before operating. Please see the “Getting Started” section. Do not fill the appliance over 2/3 full. When cooking ● foods that expand during cooking such as rice or dried vegetables, do not fill the appliance over 1/2 full. Over filling may cause a risk of clogging the vent pipe and developing excess pressure.
- Page 6 pressure cooker. When the normal operating pressure is reached, turn the ● heat down so all the liquid, which creates the steam, does not evaporate. A short power-supply cord is used to reduce the risk ● resulting from it being grabbed by children, becoming entangled in, or tripping over a longer cord.
-
Page 7: Specifications
SPECIFICATIONS Product Model MPC6018AASS Capacity 6.5Qt Power Supply 120V~ 60Hz Rated Power 1500W Working Pressure 80kPa Keep Warm Temperature 140° F~176° F... -
Page 8: Product Overview
PRODUCT OVERVIEW Component Name Float valve Exhaust valve handle Upper cover handle Seal ring Sealing ring Block proof cover Inner pot Cooker body handle Control box Cooker body Parts List Spoon Measuring cup Soup Spoon User Manual Steamer NOTE All the pictures in this manual are for explanation purpose only. Any discrepancy between the real object and the illustration in the drawing shall be subject to the real subject. -
Page 9: Quick Start Duide
QUICK START GUIDE Tips: • Please move the product with the handle of the cooker body; • Please remove the water from the housing cover with cloth. NOTE • Exhaust valve: Pull out the exhaust valve from the lid. Clean the internal side of the exhaust valve and the exhaust valve and float valve of the lid with brush and cloth at least once a month. - Page 10 Use and Maintain the Inner Pot 1. Do not leave appliance on and empty of liquids for a long time. It may cause yellowish and spotted inner pot or distorted bottom if it is empty for a long time. 2. Do not use it to store the acid, alkali and preserved foods for a long period Although the inner pot has excellent anti-corrosion performance, it may cause corrosion of certain degree, the suggested time of keep warm shall not exceed 2h.
- Page 11 Prepare for Cooking 1 Opening the lid correctly • Hold the handle of upper cover, turn it anticlockwise for about 30°till the lid at unlock state, and then lift the upper cover. Unlock State 2 Check if the parts and accessories of lid are well installed •...
- Page 12 5 Safely close the lid • Before closing the lid, check if the sealing ring is well installed. • Hold the handle of upper cover, aim the lid as “unlock state”, put the top cover horizontally on the cooker body, turn the upper cover clockwise for about 30°to the lock place as “Lock State”.
- Page 13 General Function 1. When you switch on, if the buttons are inactive, please confirm that the lid is closed at the right place. 2. After cooking, the cooker may automatically enter into the keep warm state (PRESSURE COOK, CHILI, STEAM, BEAN, RICE, SLOW COOK). and the indicator display “00:00 (0 min), 00:01 (1 min)...
-
Page 14: Operation Instructions
OPERATION INSTRUCTIONS Operation Part Function description Pressure Cook Button ● Cancel Button ● Menu Button ● Bake Button ● Deplay Start Button ●... - Page 15 Function Selection Function Operation Guidelines During function setting or delay start setting, press the “START” ● START button to start heating or delay start. During function setting or delay start setting, press the “CANCEL” ● button to return to standby mode. During the heating or delay CANCEL start waiting process, pressing the “CANCEL”...
- Page 16 Function Operation Guidelines In standby mode, use the “MENU” button to select the YOGURT ● function. The “YOGURT” LED will be ON, and the screen will show the cooking time and temperature level. Adjust the time using the “+” or “-” buttons. If you need to adjust the cooking temperature YOGURT level, press the “TIME/TEMP”...
- Page 17 Function Operation Guidelines In standby mode, press the “BAKE” button. The “BAKE” button ● LED will be ON, and the screen will show the default time. Adjust the time using the “+” or “-” buttons. If you need to adjust the BAKE cooking temperature, press the “TIME/TEMP”...
-
Page 18: Cleaning And Maintenance
CLEANING AND MAINTENANCE For use the product safely with a longer service life, please carefully check and maintain If followings occur Solutions • Power cord and plug is expanded, deformation, damaged and it color is changed. • One part of the power cord and plug are hotter. •... - Page 19 Safety Precautions To avoid personal injury and property loss, be sure to observe the following safety precautions. • Meanings of the marks: General Disassemble Wet hands Forbid Forbidden Forbidden Means “Forbidden” items Contact Spray Water Forbidden Forbidden Means Must be Remove the “Mandatory”...
- Page 20 WARNING It is strictly prohibited to use other lid • It is strictly prohibited to use other lid for heating, and in the (switching on) process, the use of non-original lid is not allowed. • As this may cause electric shock or safety hazards.
- Page 21 WARNING Warning on Opening the lid • When the electric pressure cooker is not working, there isn't pressure in the pot, the float valve is down; • When the electric pressure cooker is working, pressure in the cooker rises, float valve ascends; do not fiercely open the lid before the pressure has been completely released;...
- Page 22 CAUTION In working, never move your hands to close to the exhaust port. • In cooking process, never move your hands to close to the exhaust port to avoid burns. • During cooking, do not cover the vent with a cloth and other items.
- Page 23 CAUTION Do not use in the following locations • Do not use in unstable locations; • Do not use in locations near water and fire; • Do not use near walls and furniture; • Do not use in locations exposed to direct sunlight and oil splatter. •...
-
Page 24: Troubleshooting 2
TROUBLESHOOTING Operation of your appliance can lead to errors and malfunctions. The following tables contain possible causes and notes for resolving an error message or malfunction. It is recommended to read the tables carefully below in order to save your time and money that may cost for calling to the service center. - Page 25 Problem Reason Solution Solution • Exhaust valve not in • Turn the exhaust valve to sealing position. the sealing position. Steam comes out from exhaust valve non-stop • Send to the service center • Pressure control fails for repair. Power indicator doesn’t •...
-
Page 26: Trademarks, Copyrights And Legal Statement
Midea may constitute trademark infringement or unfair competition in violation of relevant laws. This manual is created by Midea and Midea reserves all copyrights thereof. No entity or individual may use, duplicate, modify, distribute in whole or in part this manual, or bundle or sell with other products without the prior written consent of Midea. -
Page 27: Data Protection Notice
European Economic Area. Further information are provided on request. You can contact our Data Protection Officer via MideaDPO@midea.com. To exercise your rights such as right to object your personal date being processed for direct marketing purposes, please contact us via... -
Page 28: Year Limited Warranty
Please note that failure to complete and submit this form does not diminish your warranty. In the event of a warranty period claim, question, comments or if service is required for this product, please contact us at the following: customerserviceusa@midea.com 1-866-646-4332...
Need help?
Do you have a question about the MPC6018AASS and is the answer not in the manual?
Questions and answers