Table of Contents
Advertisement
文件类型
文件编号
制定
日期
文件编号
ECR/PCN
版本
TCN
A1.0
ECR20200915
A2.0
ECR20201223
A3.0
ECR20210726
A4.0
ECR20220310
2.0
ECR20220318
发放部门
存档方式
技术文件
H-1.601.00224
202-英文说明书
审核
日期
参 考 资 料
修 订 记 录
更 改 内 容
封面修改;6.2 内容调整。
修改 1.5、3.2、7.3 和 9.1 章节内容。
修改供货配置,更换 UI
公司名称、官网、邮箱变更
生产部
采购部
电子文档
纸文档
项目编号
打印要求
说明
新增
品质部
□ 市场部
□
其它:
202
□
彩色
批准
日期
制 定
谢荣锋
谢荣锋
骆万锟
韦雪雪
邓伟良
研发系统
黑白
批准日期
2020.09.22
2020.12.20
2021.07.26
2022.1.19
Advertisement
Table of Contents

Related Manuals for Amoul E6


Summary of Contents for Amoul E6
- Page 1 文件类型 技术文件 项目编号 □ 文件编号 H-1.601.00224 打印要求 彩色 黑白 202-英文说明书 制定 审核 批准 日期 日期 日期 参 考 资 料 文件编号 说明 修 订 记 录 ECR/PCN 版本 更 改 内 容 制 定 批准日期 A1.0 ECR20200915 新增 谢荣锋...
- Page 3 Blank page...
-
Page 4: Table Of Contents
5.7 Change battery during operation................... 35 5.8 Charging battery........................37 5.9 Battery management......................38 5.10 Adjuvant treatment.......................39 5.11 Remove E6 from patient....................... 40 6 Sanitary treatment........................41 6.1 General cleaning procedures....................41 6.2 Removing and installing the suction cup................41 7 Faults and trouble shooting...................... 42 7.1 Technical faults........................42... - Page 5 8.1 Regular check.......................... 45 8.2 Uninstall and install patient fixing belt................... 45 8.3 Uninstall and install patient stabilizing belt................46 8.4 Remove battery and charge....................46 9 E6 Packing............................47 9.1 Standard configuration......................47 9.2 Optional...........................47 10 Technical parameters........................ 48 10.1 Medical Devices Management Category................48 10.2 Physical Specifications......................
- Page 6 H-1.601.00149-2.0 Product Information Thank you for purchasing E6 Cardiopulmonary Resuscitator. Before using the equipment, please read this manual carefully and understand the information contained in it so as to operate it properly. Keep this manual properly in any accessible place.
- Page 7 H-1.601.00149-2.0 Intellectual Property Right © 2020 Ambulanc (Shenzhen) Tech. Co., Ltd. All rights reserved This product and its operating manual are the intellectual property of Ambulanc (Shenzhen) Tech. Co. Ltd., including but not limited to patent right, trademark right and copyright. Ambulanc has the final right to interpret this manual.
- Page 8 H-1.601.00149-2.0 Statement Ambulanc reserves the right to modify this manual without prior notice. Ambulanc reserves the right to change related technology without prior notice. Ambulanc reserves the right to alter product specification without prior notice. Ambulanc makes no warranty in any form concerning this manual, including (but not limited to) guarantee for implied marketability and adaptability for a specific purpose.
- Page 9 H-1.601.00149-2.0 Maintenance Service Scope of Charge-Free Service: • Charge-free service is provided for any equipment in the range of Ambulanc's warranty terms. Scope of Paid Service: • Paid service is provided for any equipment beyond the range of Ambulanc's warranty terms. As well as in one of the following cases even during the warranty period: •...
- Page 10 H-1.601.00149-2.0 Return Return Procedure Any return as necessary shall comply with the following procedure: • Acquire right of return: Contact Ambulanc's customer service, and provide the product ID labeled on external packaging of the instrument, which must be legible for return approval. Indicate product model and describe the reason for return.
- Page 11 H-1.601.00149-2.0 the operator's fault or any exceptional condition. 9. This manual contains warnings for foreseeable potential hazards. User shall keep watch at any time for any hazard not stated in the manual. Ambulanc takes no responsibility for damage or loss resulted from negligence or failure to observe the preventive measures stated in this manual.
- Page 12 H-1.601.00149-2.0 Blank page...
-
Page 13: Safety Instructions
Improper use of it may cause serious injury to body. • [Fire] Do not use E6 in an oxygen-rich environment or with flammable or flammable anesthetics. • [Scope of Application] Only use E6 for the intended purpose (see "2.1... -
Page 14: Software
Do not use an external power source when it is not necessary, but use the battery inside the cardiopulmonary resuscitation machine. • [Liquid] Do not immerse the E6 in a liquid. If liquid enters the hood, it will cause damage to the equipment. 1.3 Software •... -
Page 15: Symbol Description
CE symbol in basic requirements in Appendix I of the Directive. 1.6 Battery Warning: • [Battery Low] When a low battery alarm occurs, do one of the following: • Replace the battery with a fully charged battery. • Connect an external E6 power supply. Note: Page 3... -
Page 16: Operation
• Please pause or turn off the machine when replacing the battery 1.7 Operation Warning: • [Unsatisfactory position] If the E6 cannot be safely and correctly placed on the patient's chest, perform an manual cardiopulmonary resuscitation again. • [Incorrect position on the chest] If the relative position of the compression pad to the sternum is incorrect, it will increase the risk of damage to the chest and internal organs. - Page 17 Remove all gels before placing the suction cup. • [Application Stabilizer] If the E6 Stabilizer Band is used to prevent or delay any treatment for the patient, the device should be deferred. • [Auxiliary Therapy] Using other medical devices or drugs with E6 will affect the treatment.
-
Page 18: Device Description
“insufficient pressing depth” by message and voice prompts. • The patient is too large: The upper part of the E6 cannot be locked to the back panel without pressing the patient's chest. -
Page 19: Structural Composition
• Back plate, located under the patient to support chest compression • The upper part, which includes a rechargeable E6 battery and a compression mechanism with a single suction cup • Stabilizing belt, to help secure the unit to the patient •... -
Page 20: E6 Host Description
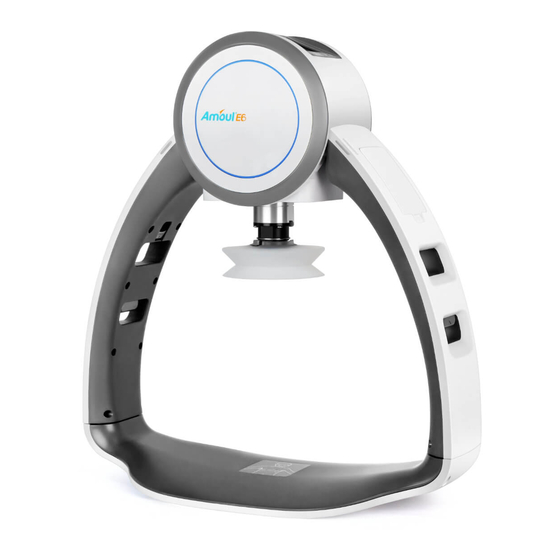
H-1.601.00149-2.0 3 External battery charger (optional) 4 Battery 5 Power adapter 2.7 E6 host description 2.7.1 Host – front view Fig. 2 Host (front view) Parts 1 Host shell 2 The top-loading section 3 Bellow 4 Suction cup 5 Machine leg... - Page 21 H-1.601.00149-2.0 2.7.2 Host – side view Fig. 3 Host (side view) Parts 1 EtCO port 2 External power port 3 miniUSB port 4 Battery 5 Gripper hole 6 Lock catch 2.7.3 Host – up view Fig. 4 Host (up view) Parts 1 Alarming light 2 Touch screen...
- Page 22 H-1.601.00149-2.0 3 Power on/off button 4 Battery indicator 2.7.4 Host – bottom view Fig. 5 Host (buttom view) Parts 1 Air hole 2 Battery button 3 Lock catch Page 10...
-
Page 23: Interface
H-1.601.00149-2.0 Interface 3.1 Main interface Fig. 6 Main interface Interface Description 1 Time Shows the current time 2 Alarm Mute Icon Displays the current alarm/mute status 3 Alarm/Prompt If any fault occurs during operation, the Information Area alarm light will be on 4 Bluetooth Displays Bluetooth function. -
Page 24: Function Menu Description
H-1.601.00149-2.0 9 Stop Stop pressing and return to the initial position 3.2 Function Menu Description After the positioning is completed and the pressing depth is set, you can enter the menu interface by pressing the button In the menu interface, you can set system parameters, view alarm log, configure peripheral module on/off, set time, enter maintenance, and view local information. - Page 25 H-1.601.00149-2.0 Fig. 7 Setting interface Function Description 1 System setting Set system parameters 2 Alarm log View alarm information 3 Data transit Bluetooth and WiFi data on and off 4 Time Set current time 5 Maintainance Perform password modification and displacement sensor calibration 6 About host See the host software version...
- Page 26 H-1.601.00149-2.0 3.2.1 System setting The system settings page is shown below. 1. Press the Back button to return to the menu interface. 2. Press "<" “>”in the "Language" column to switch between languages. 3. Press "<" “>”in the “Volume” column to adjust the voice volume. Volume adjustable range : 0~7 level, when adjust the voice volume to 0 level, the mute icon is displayed.
- Page 27 H-1.601.00149-2.0 Fig. 9 Alarm log 3.2.3 Data transit The data transfer interface is shown below. 1. Press the Back button to return to the menu interface. 2. Press the switch button in the “Bluetooth” bar to open or close the Bluetooth module.
- Page 28 H-1.601.00149-2.0 3.2.4 Time The time calibration interface is shown below. 1. Press the Back button to return to the menu interface. 2. “Time” label displays gray when unmodified, and highlights when modified; press “Save” button, the label turns gray if saving is successful, or the label turn red when saving failed.
- Page 29 H-1.601.00149-2.0 3. After entering the maintenance interface, the interface is as shown below. Fig. 12 Maintainance 4.Press the “Change Password” column to enter the password modification operation. Fig. 13 Change password 5.Press the “Displacement Sensor Calibration” column to enter the displacement sensor calibration operation.
-
Page 30: Alarm Information Bar
H-1.601.00149-2.0 Fig. 13 Calibration 6.When the pressing depth is not correct, press the “Start” button of the displacement sensor calibration interface to perform the automatic calibration of the displacement sensor. Be sure that there is no obstacle under the compressing head during automatic calibration! Other operations of the calibration interface are not supported after calibration begins. - Page 31 H-1.601.00149-2.0 Fig. 15 Alarm information bar Page 19...
-
Page 32: Installation
Prepare the carrying case (as shown below): 1. Insert a fully charged E6 battery into the battery slot on the E6 leg. 2. Make sure the suction cup is installed correctly. 3. Place the upper part in the carrying case. Note that the main unit is facing as shown below. -
Page 33: Battery Installation
7 Back plate 4.2 Battery installation The lithium polymer battery is a dedicated power supply for the E6. You can remove the battery from the E6 and charge it. The E6 and battery in the battery charger are mechanically keyed to ensure they are properly installed. -
Page 34: Fixing Belt Install
Fig. 17 Battery install 4.3 Fixing belt install Attach the fixing belt to the E6 legs before using the E6. (As shown below) 1. Attach the fixing belt to the leg with the mounting hole. 2. Stick to the Velcro. -
Page 35: Etco Install (Optional)
H-1.601.00149-2.0 Fig. 19 Stabilizing belt install 4.5 EtCO install (optional) If an optional EtCO2 module is available, it can be connected to the corresponding breathing circuit as shown below. Fig. 20 EtCO2 install Page 23... -
Page 36: Operation
2. Stop manual CPR 3. Make sure to support the patient's head. 4. Carefully place the E6 back plate under the patient (new the armpit). Do one of the following: a) hold the patient's shoulder and lift the patient's upper body slightly;... - Page 37 Tip: The correct position of the back plate will make it easier to place the suction cup more quickly and correctly. Fig. 23 Back plate position 5. Re-start manual CPR 6. Grasp the legs as shown below to remove the E6 upper part from the bag. Page 25...
- Page 38 H-1.601.00149-2.0 Fig. 24 Remove upper part 7. After removing the upper part, press the “On/Off” button to activate the device in advance to save boot time, and move close to the patient. Fig. 25 Start device in advance 8. Stop manual CPR 9.
- Page 39 Warning: • [Patient too large] If the patient is too large, the upper part of the E6 cannot be locked to the back panel without pressing the patient's chest. Please abandon using the E6 under such case and continue manual CPR.
-
Page 40: Adjust And Start Pressing
H-1.601.00149-2.0 5.4 Adjust and start pressing The compression point should be the same as the manual cardiopulmonary resuscitation position and should meet the guidelines. The center position of the suction cup should be in the middle between the patient's nipples. Fig. - Page 41 H-1.601.00149-2.0 2. Press the“ ”“ ” button to set press deep. Fig. 30 Pressing depth setting 3. Press the“ ”“ ” button to set press mode. Fig.31 Pressing mode setting 4. The following EtCO2 monitoring interface will appear on the display. Tip: EtCO2 needs to be connected to the circuit of the auxiliary ventilation device to realize the monitoring of EtCO2.
- Page 42 CPR again. • [Patient too small] If the E6 sends 3 quick alarms when lowering the suction cup, and you cannot enter setting of the pressing depth and pressing mode. Restart the manual CPR •...
-
Page 43: Use Stabilizing Belt
[Fault] If an interruption occurs during operation, or the pressing becomes insufficient, or an abnormal condition occurs: Press the On/Off key for 3 seconds to stop E6 and remove the device. Begin manual CPR. • [Battery Low] When a low battery alarm occurs, do one of the following: a) Replace the battery with a fully charged battery. - Page 44 H-1.601.00149-2.0 Otherwise, please adjust the position as below: a) Press the stop button. Fig.34 Stop b) Separate the buffer belt from the leg strap. c) Adjust the position of the suction cup (as described in section 4.4). d) Reconnect the buffer ( See steps 2 - 5 above) Page 32...
-
Page 45: Move Patient
• • [Do not use the fixing belt to lift the patient] Do not use the fixing belt to lift the patient. The belt is only used to secure the patient to the E6. • [Skin burns] The temperature of the cover and battery may rise above 118°F / 48°C. - Page 46 H-1.601.00149-2.0 5.6.2 Preparing to lift the patient 1. Decide which device you will be moving and where to place it. 2. Personnel on the side of the patient: a) place one hand under the back plate at the bottom of the leg; b) Hold the patient's belt, pants or thighs with the other hand.
-
Page 47: Change Battery During Operation
5.7 Change battery during operation When the battery is about to run out, E6 sends an alarm by lighting an alarm light (red alarm), displaying an alarm message in the message bar, and an audible (or voice) alarm. - Page 48 2. Press the battery button and take the battery out of the gap. Fig. 39 Remove battery 3. Install the fully charged E6 battery, load it in the direction shown in the figure, press it after loading, you can hear the click of the battery button reset, and make sure the battery is installed.
-
Page 49: Charging Battery
Method 2: Installed in E6. (As shown below) • Place the battery in the slot of the E6 leg • Connect the power supply to the DC input on the E6 side. • Connect the power supply to a wall outlet. -
Page 50: Battery Management
• [Use only approved accessories] Only accessories approved by the Ambulanc company are allowed to be used with the E6. If you are using an unauthorized attachment, E6 will not operate correctly. Use only E6 batteries for E6 and E6 power supplies. If you use a different battery or power source, it may cause permanent damage to the E6. -
Page 51: Adjuvant Treatment
Instructions for Use to ensure they are suitable for use with CPR. 5.10.1 Defibrillation Defibrillation can be performed while the E6 is running. 1. You can use the defibrillation electrodes before or after positioning the E6. Defibrillation according instructions defibrillator manufacturer. -
Page 52: Remove E6 From Patient
5.11 Remove E6 from patient 1. Press the On/Off key for 3 seconds to turn off the power. 2. If the E6 stabilizing belt is connected to the E6, remove the buffer belt that is part of the stabilizing part from the E6 leg 3. -
Page 53: Sanitary Treatment
Follow the instructions provided by the disinfectant manufacturer. Note: Do not immerse the E6 in a liquid. If liquid enters the hood, it will cause damage to the equipment. Allow the E6 to dry before wrapping it. 6.2 Removing and installing the suction cup Pull the suction cup down,Dispose it as contaminated medical waste,Install a new suction cup. -
Page 54: Faults And Trouble Shooting
Ambulanc (Shenzhen) Tech. Co., Ltd. Please do not continue to use the machine to avoid unnecessary damage. 7.1 Technical faults Fault Cause Remedy E6 can't start Give to manufacturer or E6 is faulty authorized distributor Battery is finished Charge the battery Long press “On/Off”... -
Page 55: System Prompts
H-1.601.00149-2.0 High Pressing Red LED light Voice: Pressing Re-start priority motor system error motor machine abnormal intermittently Sound: abnorma Dididi--didi High EEPROM Red LED light Voice: CB’s Re-start priority abnormal system error EEPROM machine intermittently Sound: error Dididi--didi High displacement Red LED light Voice: displace... - Page 56 H-1.601.00149-2.0 concentration Indicate that the patient is concentration is more rises breathing now, and the user should than 20 (only for E6) stop using the E6 CPR Page 44...
-
Page 57: Maintainance
5. Press up and release the lock button to ensure that the lock can be opened and reset. 6. Press ON/OFF to have E6 perform a self-test to ensure that it passes the self-test. 7. After turning the power on, observe the battery level to make sure the battery is fully charged. -
Page 58: Uninstall And Install Patient Stabilizing Belt
8.4 Remove battery and charge 1. Replace the battery with a fully charged battery. 2. Charge the used battery for future use. You can charge the E6 battery in two ways. For details, see 5.8 Note: • [Keep battery installed] In order for E6 to operate, the battery must always be installed (even when powered by an external power source). -
Page 59: E6 Packing
H-1.601.00149-2.0 E6 Packing 9.1 Standard configuration Description Maternal no. Qty(pcs) Remarks E6 machine (upper 2.202.00007 1(set) part and back board) Suction cup 1.402.00191 2 (pcs) Carrying case 1.504.00058 1 (pc) 《user's manual》 1.601.00150 1 (pc) Rechargeable 2.202.00016 2 (pcs) battery Power adapter 2.202.00028... -
Page 60: Technical Parameters
H-1.601.00149-2.0 10 Technical parameters 10.1 Medical Devices Management Category Medical Devices Management Category Category Class-IIb 10.2 Physical Specifications Machine size Size length: 533mm width: 242mm height: 593mm Weight (including battery) 8.9 kg Screen Types Color TFT Size 3.5 “ Resolution 320 x 240 pixels Features With resistor type touch screen control... -
Page 61: Patient
Description Types Suitable patients Adult patients with: • sternal height from 165 to 305 mm • Maximum chest width 450 mm Usage of E6 is not subject to patient’s weight limit. 10.6 Pressing parameters Description Parameters Pressing depth 30-53mm,error ±3mm. -
Page 62: Battery Environment Specs
H-1.601.00149-2.0 10.8 Battery environment specs. Description Parameters Operating temperature 0°C ~ +40°C Charging temperature 10°C ~ +45°C Storage temperature -20°C ~ +50°C, less than 1 month -20°C ~ +40°C, less than 3 month -20°C ~ +20°C, less than 1 year Page 50... -
Page 63: Emc
E6 increased working or reduced immunity. EMR Statement E6 can be used in the following specific EMR environment, in which user shall ensure to operate this equipment. EMR Testing Compliance... - Page 64 H-1.601.00149-2.0 EMI Statement - Requirements for All Equipment and Systems E6 can be used in the following specific EMR environments, and the user shall ensure to operate this equipment in the following EMR environments. EMI Type YY0505 Testing Compliance EMR Environment Guide...
- Page 65 GB/T 17626.6 150 kHz~80 MHz E6 Emergency Ventilator (except ISM (including cable) than as recommended. Such distance bandsa) is determined based on a formula related to transmitter frequency.
- Page 66 If field strength measured at the place where E6 Emergency Ventilator is located is higher than the aforesaid applicable radio frequency compliance level, then E6 Emergency Ventilator shall be observed to verify its normal operation. If any abnormal property is found, related remedial measure may be required, such as re-adjustment of orientation or position of E6 Emergency Ventilator.
- Page 67 The E6 cardiopulmonary resuscitator can work normally according to the parameter settings. See Chapter 5 of the manual for details. Alarms can be issued based on real-time monitoring of the E6 status, and to ensure the accuracy of the parameters below of the E6 in the electromagnetic compatibility environment: Pressing depth 30-53mm,error ±3mm.
-
Page 68: Warranty
H-1.601.00149-2.0 12 Warranty 1. Within two years of purchase, any quality defect occurring in proper operation pursuant to this manual will be subject to Ambulanc's repair service free of charge. If the shelf life as labeled on the product is less than two years, this warranty will become invalid with expiration of such shelf life. -
Page 69: Classification Of Toxic/Harmful Substances
H-1.601.00149-2.0 13 Classification of Toxic/Harmful Substances Name & Content of Toxic/Harmful Substances Name of Part Cadmi Merc Lead Hexavalent PBDE (Pb) Chrome (Cd) (Hg) (Cr-VI) Display Screen × × × × × × Lithium Battery × × × × × ×... -
Page 70: Storage And Transport
H-1.601.00149-2.0 14 Storage and transport The packaged product can be transported on road, by air or by train. Impact, extreme vibration and humidity shall be prevented during transportation. Graphics DESCRIPTION Graphics DESCRIPTION This way up Handle with care Keep dry Stacking limit:5 Temp.Limit:-20~55℃... - Page 71 H-1.601.00149-2.0 Page 59...
Need help?
Do you have a question about the E6 and is the answer not in the manual?
Questions and answers