
Related Manuals for Memorex MVDP1086


Summary of Contents for Memorex MVDP1086
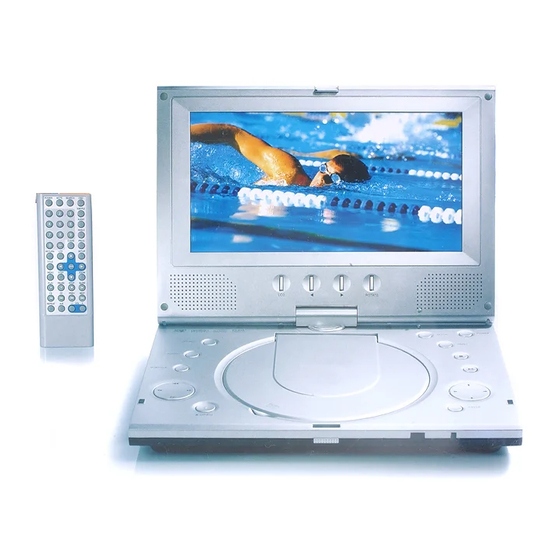
- Page 1 MVDP1086 User’s Guide 8'' TFT DISPLAY PORTABLE DVD PLAYER WITH REMOTE CONTROL Before operating this product, please read these instructions completely.
-
Page 2: Table Of Contents
Contents ......1 Important Safety Instructions ..2 Precautions . -
Page 3: Important Safety Instructions
CAUTION: TO REDUCE THE RISK OF ELECTRIC SHOCK, DO NOT REMOVE COVER (OR BACK). NO USER-SERVICEABLE PARTS INSIDE. REFER SERVICING TO QUALIFIED SERVICE PERSONNEL. DANGEROUS VOLTAGE: The lightning flash with arrowhead symbol within an equilateral triangle is intended to alert the user to the presence of uninsulated dangerous voltage within the product’s enclosure that may be of sufficient magnitude to constitute a risk of electric shock to persons. -
Page 4: Surge Protectors
SURGE PROTECTORS: It is recommended to use a surge protector for AC connection. Lightning and power surges ARE NOT covered under warranty for this product. LASER WARNING: This unit employs a laser. Only qualified service personnel should attempt to service this device due to possible eye injury. - Page 5 Dear Customer: Selecting fine audio equipment such as the unit you’ve just purchased is only the start of your musical enjoyment. Now it’s time to consider how you can maximize the fun and excitement your equipment offers. This manufacturer and the Electronic Industries Association’s Consumer Electronics Group want you to get the most out of your equipment by playing it at a safe level.
-
Page 6: Notes On Handling
NOTES ON HANDLING: • When shipping the DVD player, always use the original shipping carton and packing materials. For maximum protection, repack the unit as it was originally packed at the factory. • Do not use volatile liquids, such as insect spray, near the DVD player. Do not leave rubber or plastic products in contact with the DVD player for a long time. -
Page 7: To Obtain A Clear Picture
TO OBTAIN A CLEAR PICTURE: The DVD player is a high technology, precision device. If the optical pick-up lens and disc drive parts are dirty or worn down, the picture quality becomes poor. To obtain a clear picture, we recommend regular inspection and maintenance (cleaning or parts replacement) every 1,000 hours of use depending on the operating environment. -
Page 8: Power Sources
AC CONNECTION Insert the small end of the AC adapter into the DC IN jack (located on the side of the unit) and connect the other end to a wall outlet having 120V AC, 60 Hz. AC Adapter, DC 9V Z NOTES: •... -
Page 9: Charging The Battery Pack
CHARGING THE BATTERY PACK “Low Battery” will appear on the screen when the battery is low and needs recharging. The battery can be charged while attached to the unit as follows: With the Battery Pack attached, insert the small end of the AC adapter into the DC IN jack on the side of the unit. -
Page 10: Location Of Controls
MAIN UNIT Display Alternate Navigation (√) Button LCD Button Left Speaker Disc Compartment SOURCE Button AUDIO Button SUBTITLE Button Skip o Button 10. Search √√ Button 11. Right Speaker 12. Alternate Navigation (®) Button 13. ROTATE Button 14. POWER Button 15. -
Page 11: Side
SIDE AUDIO (IN/OUT) Jack Headphone 2 Jack Headphone 1 Jack VOLUME Control PUSH (Release) Button (Top of the Battery Pack) REMOTE Battery Pack CHARGE Indicator (Top of the Rechargeable Battery) VIDEO (IN/OUT) Jack COAXIAL OUT Jack DC IN Jack 9V z 1. -
Page 12: Remote Control
BATTERY INSTALLATION Follow these precautions when using a battery in this device: Use only the size and type of battery specified. Be sure to follow the correct polarity when installing the battery as indicated next to the battery compartment. A reversed battery may cause damage to the device. If the device is not to be used for a long period of time, remove the battery to prevent damage or injury from possible battery leakage. -
Page 13: Connecting The Unit To A Tv Using The A/V Cable
CONNECTING THE UNIT TO A TV USING THE A/V CABLE (INCLUDED) NOTES FOR CONNECTING TO A TV: • Set the TV’s TV/VIDEO button or switch to the VIDEO setting. • When connecting the unit, refer to the owner’s manual of the TV, as well as this manual. -
Page 14: Connecting The Dvd To A Home Theater System (Audio Jack)
CONNECTION (CONTINUED) CONNECTING THE DVD TO A HOME THEATER SYSTEM (AUDIO JACK) Place the subwoofer, front, rear and center speakers in locations as shown/described here. After correctly positioning the speakers, perform the Tone Test on the AV Amplifier and adjust the Volume control(s) until the desired sound is achieved. -
Page 15: Connecting The Dvd To A Home Theater System (Coaxial Jack)
CONNECTING THE DVD TO A HOME THEATER SYSTEM (COAXIAL JACK) Place the subwoofer, front, rear and center speakers in locations as shown/described here. After correctly positioning the speakers, perform the Tone Test on the AV Amplifier and adjust the Volume control(s) until the desired sound is achieved. -
Page 16: Connecting The Unit To Another Media
CONNECTING THE UNIT TO ANOTHER MEDIA PLAYER (To view the image/hear the sound from an external unit): NOTES FOR CONNECTING: • When connecting the unit, refer to the owner’s manual(s) of the external unit(s), as well as this manual. • When connecting the unit, make sure the power is off and all units are unplugged before making any connections. -
Page 17: Playable Discs
ABOUT DISCS The region number for this DVD Player is: See the following page for information regarding region numbers. PLAYABLE DISCS: The following discs can be played back on this DVD player: DISC TYPES: Data on most DVDs is divided into sections called “titles”... - Page 18 ABOUT DISCS (CONTINUED) Notes on Copyright: It is forbidden by law to copy, broadcast, show, broadcast on cable, play in public and rent copyrighted material without permission. DVD video discs are copy protected, and any recordings made from these discs will be distorted. This product incorporates copyright protection technology that is protected by method claims of certain U.S.
-
Page 19: Setup Menu
The Setup Menu lets you customize the DVD player by allowing you to select various language preferences, set video/audio settings, adjust what type of television screen you have and more. Use the following instructions to navigate and change the options as described on the upcoming pages. -
Page 20: Language Setup Menu
LANGUAGE SETUP MENU: Press the SETUP button to enter the menu, select LANGUAGE using the Navigation (√,®) buttons, then press the ENTER button to select it. Select/change the Setup option as described on page 18. OSD LANGUAGE Select the desired language (ENGLISH, FRENCH, SPANISH) for the On-Screen display to display text. -
Page 21: Video Setup Menu
SETUP MENU (CONTINUED) VIDEO SETUP MENU: Press the SETUP button to enter the menu, select VIDEO using the Navigation (√,®) buttons, then press the ENTER button to select it. Select/change the Setup option as described on page 18. TV SHAPE (TV DISPLAY) 4:3/PS: Pan Scan. -
Page 22: Reset Setup Menu
SETUP MENU (CONTINUED) RESET SETUP MENU: Press the SETUP button to enter the menu, select RESET using the Navigation (√,®) buttons, then press the ENTER button to select it. RESET Press the ENTER button to reset the functions of the player to the original factory settings. -
Page 23: Basic Operation
When “ ” appears while pressing a button, this means that the corresponding function cannot be performed either on the disc inserted, or MUTE BUTTON Press the MUTE button once to mute the sound; the Mute indicator will appear on the screen. -
Page 24: Osd Button
OSD BUTTON While playing a DVD, press the OSD button to cycle as follows: 1st press: Title elapsed and remaining time 2nd press: Title elapsed and remaining time and the various DVD settings. 3rd press: Display off LCD BUTTON Press the LCD button 1 to access the on- screen picture display menu. -
Page 25: Important Notes
IMPORTANT NOTES: • After plugging in, the unit will be in the Power Off mode. Press the Power button on the main unit to turn on the unit. • “ ” will appear on the screen during operation if you try to access a function that is not available on the disc. - Page 26 Close the disc tray. After loading, the menu screen of the DVD should appear. Use the Navigation (√,®,π,†) buttons 1 to select the desired option and press the ENTER button 2 to select it. Adjust the volume as described on page 23. NOTE: If the menu screen does not appear, press the MENU button 3 to access it.
-
Page 27: Skip
SKIP Press the Skip (n) button 1 to advance the DVD to the beginning of the next chapter. Press the Skip (o) button 2 to move the DVD to the beginning of the current or previous chapters. SLOW MOTION Use this feature to move the DVD in slow motion. During playback, press the SLOW button 1 to move the DVD forward in slow motion speeds of 1/2, 1/4, 1/6, 1/7 and resume... -
Page 28: Time Search
TIME SEARCH Use this feature to directly go to a specific time. Press the SEARCH button 1 once. Press the Navigation (√,®) buttons 2 to select “-- :--:--” after TIME, then use the Number buttons 3 to select the desired time (Hour/Minutes/Seconds). -
Page 29: Bookmark
BOOKMARK This unit can allow you to bookmark up to 3 sections of a DVD for later viewing as follows: During playback, press the SEARCH button 1 twice; the bookmark menu will appear on the screen. Use the Navigation (π,†) buttons 2 to select a blank bookmark box, then when the desired scene appears, press the ENTER button 3 to bookmark it. -
Page 30: Repeat Playback
REPEAT PLAYBACK While playing back a DVD, this unit can repeatedly playback a chapter or title. While in the Playback mode, press the REPEAT button once; “REPEAT OFF” will appear on the screen. Press the REPEAT button a second time; “REPEAT CHAPTER”... -
Page 31: Audio Menu
AUDIO MENU Press the AUDIO button repeatedly to change the audio language. This feature is not available on all discs. DVD MENU Press the MENU button 1, and the Main Menu of the disc will appear. Use the Navigation (√,®,π,†) buttons 2 to select the desired option, and then press the ENTER button 3. -
Page 32: Zoom In
ZOOM IN The image on the screen can be magnified as follows: Press the ZOOM button 1 once during Normal, Slow or Still playback modes, and the unit will zoom in one level. Repeatedly press to select zoom-in levels 2-4. Press yet again to resume normal view. -
Page 33: Programmed Playback
PROGRAMMED PLAYBACK The DVD player in this unit has a 16 chapter programmable memory that allows you to program up to 16 chapters on any disc for playback in any desired order. You may program 16 different chapters or you may also program certain chapters to play more than once. To perform Programmed Playback, proceed as follows: While in the Stop mode, press the PROG. -
Page 34: Cd Operation
PLAYBACK OF A CD Press the POWER button to turn on the unit. Close the disc tray. After loading, playback will start automatically and the elapsed track and remaining track time will appear, as well as the track number. To stop playback, press the Stop (X) button 1;... -
Page 35: Skip
SKIP Press the Skip (n) button 1 to advance to the beginning of the next file. Press the Skip (o) button 2 to move to the beginning of the previous file. TRACK TIME SEARCH Use this feature to directly go to a specific time within the current track. -
Page 36: Disc Time Search
DISC TIME SEARCH Use this feature to directly go to a specific time within the disc. Press the SEARCH button 1 twice. Press the Navigation (√,®) buttons 2 to select “--:--:--” after TIME, then use the Number buttons 3 to select the desired time (Hour/Minutes/Seconds) within the disc. -
Page 37: Selecting Tracks Using The Number Buttons
SELECTING TRACKS USING THE NUMBER BUTTONS During playback, press the Number buttons corresponding to the track number to select your desired track, and the unit will playback the desired track automatically. NOTE: To enter a track number larger than 9, press the 10+ button, followed by the Number button (0- 9). -
Page 38: Programmed Playback
CD OPERATION (CONTINUED) PROGRAMMED PLAYBACK The DVD player in this unit has a 16 track programmable memory that allows you to program up to 16 tracks on any disc for playback in any desired order. You may program 16 different tracks or you may also program certain tracks to play more than once. To perform Programmed Playback, proceed as follows: While in the Stop mode, press the PROG. -
Page 39: Picture Cd Operation
Press the POWER button to turn on the unit; the Power indicator will light. After loading a picture CD, the pictures will automatically show as a slideshow on the screen. Press the Skip (n) 1 or (o) 2 button to select the previous or next picture. After the slideshow is done, it will stop. -
Page 40: Troubleshooting Guide
Check the following before requesting service: SYMPTOM GENERAL No power. Power on, but unit not functioning properly. No picture. No sound. Playback picture rolls. The playback picture is poor. The Search feature is not working. The picture is not fitting properly. The remote control is not working. - Page 41 CONTACT CUSTOMER SERVICE AT PLEASE KEEP ALL PACKAGING MATERIAL FOR AT LEAST 90 DAYS IN CASE YOU NEED TO RETURN THIS PRODUCT TO YOUR PLACE OF PURCHASE OR MEMOREX. FOR PARTS AND ACCESSORIES, CONTACT FOX INTERNATIONAL AT 1-800-321-6993. POSSIBLE CAUSE DVD not inserted, or inserted upside-down.
-
Page 42: Care And Maintenance
Caring for Discs • Treat the disc carefully. Handle the disc only by its edges. Never allow your fingers to come in contact with the shiny, unprinted side of the disc. • Do not attach adhesive tape, stickers, etc. to the disc label. •... -
Page 43: Compact Disc
Power Requirements ...DC IN 9V (Center Positive z) Battery Pack...Li-ion Rechargeable Battery DC 7.4V 2600mAh Weight ...2 Lbs Dimensions...(Main unit without battery pack) 9 (L) x 6.5 (W) x 1.5 (Thickness) inches Operating Temperature ...41° to 95°F Operating Humidity Range ...5% to 90% (no condensation) Accessories Discs Played: DVD-VIDEO Disc... - Page 44 Memcorp, Inc. Weston, FL Printed in Hong Kong Visit our website at www.memorexelectronics.com...
Need help?
Do you have a question about the MVDP1086 and is the answer not in the manual?
Questions and answers