
Related Manuals for Cameo P2 T


Summary of Contents for Cameo P2 T
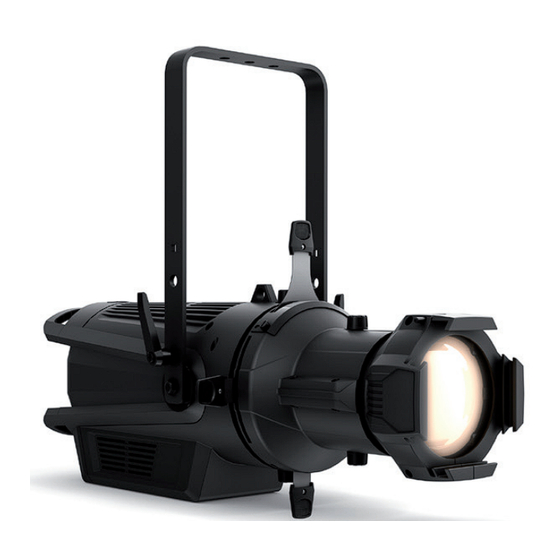
- Page 1 USER´S MANUAL BEDIENUNGSANLEITUNG MANUEL D`UTILISATION MANUAL DE USUARIO INSTRUKCJA OBSŁUGI MANUALE D‘ USO P2 T TUNGSTEN PROFILE SPOTLIGHT CLP2T P2 D DAYLIGHT PROFILE SPOTLIGHT CLP2D...
-
Page 2: Table Of Contents
CONTENTS / INHALTSVERZEICHNIS / CONTENU / CONTENIDO / TREŚĆ / CONTENUTO ENGLISH INFORMATION ON THIS USER MANUAL INTENDED USE DEFINITIONS AND SYMBOL EXPLANATIONS SAFETY INSTRUCTIONS NOTES FOR MOBILE INDOOR DEVICES INCLUDED INTRODUCTION CONNECTIONS, OPERATING AND DISPLAY ELEMENTS OPERATION INSTALLATION INSTALL FIXED BEAM ANGLE LENS TUBE CARE, MAINTENANCE AND REPAIR OPTIONAL ACCESSORIES TECHNICAL DATA... - Page 3 ENTSORGUNG HERSTELLERERKLÄRUNGEN FRANÇAIS INFORMATIONS CONCERNANT CE MANUEL D’UTILISATION UTILISATION CONFORME EXPLICATIONS DES TERMES ET DES SYMBOLES CONSIGNES DE SÉCURITÉ REMARQUES CONCERNANT LES APPAREILS D’INTÉRIEUR MOBILES CONTENU DE LA LIVRAISON INTRODUCTION RACCORDEMENTS, ÉLÉMENTS DE COMMANDE ET D’AFFICHAGE UTILISATION MONTAGE MONTER UN TUBE DE LENTILLE AVEC UN ANGLE DE RAYONNEMENT FIXE ENTRETIEN, MAINTENANCE ET RÉPARATION ACCESSOIRES DISPONIBLES EN OPTION CARACTÉRISTIQUES TECHNIQUES...
- Page 4 DATOS TÉCNICOS DISTANCIA MÍNIMA CON RESPECTO A LA SUPERFICIE ILUMINADA DISTANCIA MÍNIMA CON RESPECTO A MATERIALES NORMALMENTE INFLAMABLES ELIMINACIÓN DECLARACIONES DEL FABRICANTE POLSKI INFORMACJE DOTYCZĄCE NINIEJSZEJ INSTRUKCJI OBSŁUGI UŻYTKOWANIE ZGODNE Z PRZEZNACZENIEM OBJAŚNIENIA TERMINOLOGII I SYMBOLI ZASADY BEZPIECZEŃSTWA UWAGI DOTYCZĄCE PRZENOŚNEGO SPRZĘTU DO STOSOWANIA W POMIESZCZENIACH ZAKRES DOSTAWY WPROWADZENIE PRZYŁĄCZA, ELEMENTY OBSŁUGI I WSKAŹNIKI...
- Page 5 MONTAGGIO DEL TUBO PER LENTI CON ANGOLO DI EMISSIONE FISSO PULIZIA, MANUTENZIONE E RIPARAZIONE ACCESSORI OPZIONALI DATI TECNICI DISTANZA MINIMA DALLA SUPERFICIE ILLUMINATA DISTANZA MINIMA DAI MATERIALI NORMALMENTE INFIAMMABILI SMALTIMENTO DICHIARAZIONI DEL PRODUTTORE DMX CONTROL / DMX STEUERUNG / PILOTAGE DMX / CONTROL DMX / STEROWANIE DMX / CONTROLLO DMX...
-
Page 6: Information On This User Manual
This device has been developed and manufactured to the highest quality standards to ensure many years of problem-free operation. Please read this user manual carefully to be able to use your new Cameo product quickly and optimally. Further information about Cameo Light is avail- able on our website CAMEOLIGHT.COM. -
Page 7: Safety Instructions
This symbol identifies hazards that can cause electric shock. This symbol identifies hazardous areas or hazardous situations. This symbol indicates hazards caused by hot surfaces. This symbol indicates hazards caused by intense light sources. This symbol indicates a device in which there are no user-replaceable parts. This symbol indicates additional information on the operation of the product. - Page 8 ATTENTION: 1. Do not switch on the device if it has been exposed to extreme temperature fluctu- ations (for example, following transport). Moisture and condensation can damage the device. Switch on the device only when it has reached room temperature. 2.
- Page 9 CAUTION: 1. Moving components such as mounting brackets may become jammed. 2. In the case of devices with motor-driven components, there is a risk of injury due to the movement of the device. Sudden movement of the device can cause shock reactions.
-
Page 10: Notes For Mobile Indoor Devices
CAUTION! IMPORTANT INFORMATION REGARDING LIGHTING PRODUCTS! 1. Never look directly into the beam of light, not even for a short period of time. 2. Never look into the beam of light using optical devices such as a magnifying glass. 3. Stroboscopic effects may cause epileptic seizures in susceptible individuals! 4. -
Page 11: Introduction
Operating voltage: 100–240 V AC. The spotlight features the RDM standard (Remote Device Management). Remote device manage- ment allows the user to view the status and configuration of RDM terminals via an RDM-capable controller. Cameo UNICON also provides access to the entire spotlight menu. -
Page 12: Connections, Operating And Display Elements
A suitable power cable with a TRUE1-compatible plug is included. POWER OUT TRUE1-compatible mains output socket. Facilitates power supply to other CAMEO spotlights. Ensure that the total power consumption of all devices connected to the device does not exceed the given ampere (A) value. - Page 13 FUSE Fuse holder for 5 x 20 mm fuses. IMPORTANT: Replace the fuse only with a fuse of the same type and value. In the event of repeated fuse failure, please contact an authorised service centre. DMX IN Male 5-pin XLR socket for connection to a DMX control device (e.g. DMX console). DMX OUT Female 5-pin XLR socket for sending the DMX control signal.
-
Page 14: Operation
• As soon as the spotlight is correctly connected to the power supply, the following will be dis- played in succession: “Welcome to Cameo”, the model name and the software version. After this process, the lamp is ready for operation and starts in the previously enabled mode. - Page 15 CONFIGURING DMX MODE (DMX Mode) Press the encoder to access the main menu. Rotate the encoder to select the menu item DMX Mode (observe left selection arrow) and confirm by pushing the encoder. You can now select the desired DMX mode by rotating the encoder. Confirm the selection by pushing the encoder. Select the arrow symbol at the top of the menu for “back”...
- Page 16 SLAVE MODE Press the encoder to access the main menu. Rotate the encoder to select the menu item Slave (observe left selection arrow) and confirm by pushing the encoder. Slave mode is now enabled, and the main display is automatically displayed. Connect the slave and master unit (same model, same software version) using a DMX cable, and activate stand alone mode on the master unit.
- Page 17 Display = Display lighting Back Off Timer Always On permanently on Off after Deactivates after approximately 20 seconds of 20 s inactivity DMX Fail = Operational status Back with DMX signal Hold Last command is retained fault Blackout Activates blackout Full On Spotlight switches to full on Stand...
- Page 18 = Adjust fan control Back Auto Automatic fan control Deactivated fan with greatly reduced bright- ness Constant Constantly low fan speed with reduced bright- ness, if necessary Constant Constant average fan speed with reduced brightness, if necessary Constant Constant high fan speed High Factory = Reset to factory...
-
Page 19: Installation
System Info Back Firmware = Displays device Main CPU Vx.xx firmware Temperature = Displays temperature Back of LED unit xx °C / xx °F Unit °C (= display in degrees Celsius) °F (= display in degrees Fahrenheit) Operation = Displays operating xx:xx h Displays total operating time in hours Hours... -
Page 20: Install Fixed Beam Angle Lens Tube
INSTALL FIXED BEAM ANGLE LENS TUBE PLEASE NOTE: 1. Do not operate the spotlight during the installation or removal of a lens tube. 2. Be careful not to damage or contaminate the lens when installing or removing a lens tube. Ensure that no foreign bodies enter the spotlight housing. - Page 21 To remove the tube, first loosen the two knurled screws on the top and bottom of the spotlight housing (A). Now turn the tube approximately one eighth of a turn counterclockwise (B) and remove it from the spotlight housing (C) towards the front. To install the tube, proceed in reverse order, making sure that the unit is correctly seated in the corresponding guides in the spotlight housing.
- Page 22 SOFT EDGE FILTER The soft edge filter for light projection with soft and homogeneous edges is located in front of the upper shutter as standard. Leave the soft edge filter in place during operation. GOBO HOLDER AND IRIS The tube with framing unit and the zoom tubes have a built-in bay for insertion of a gobo holder (A) or an iris module (B) (gobo holder and iris module optionally available).
-
Page 23: Care, Maintenance And Repair
CARE, MAINTENANCE AND REPAIR In order to ensure the long-term, proper functioning of the device, it must be regularly cleaned and, if necessary, maintained. The maintenance requirement depends on the intensity of use and the environment in which it is used. We generally recommend a visual inspection before each operation. -
Page 24: Optional Accessories
OPTIONAL ACCESSORIES CLP21530LENS CLP22550LENS Zoom lens tube with 15° to 30° beam angle Zoom lens tube with 25° to 50° beam angle diaphragm slider unit and soft edge filter diaphragm slider unit and soft edge filter included included CLP219LENS Lens tube with 19° beam angle CLP226LENS Lens tube with 26°... - Page 25 DIMENSIONS 235,5 223,5 456,1 633,3 330,7 Shutter closed 683,2...
-
Page 26: Technical Data
TECHNICAL DATA ITEM NUMBER: CLP2D CLP2T Product category Static LED Light Static LED Light Type Ellipsoidal (Profiler) Ellipsoidal (Profiler) Light source 230 W Daylight COB LED with 230 W Warm white COB LED with fixed CT fixed CT Luminous Flux Light engine: 15201lm Light engine: 13984lm 19°... - Page 27 Dimmer; Dimmer fine; Strobe; Device Settings (simple); Dimmer Device Settings (simple); Dimmer Curve; Device Settings (full) Curve; Device Settings (full) RDM functions Cameo RDM Standard Cameo RDM Standard Stand-Alone Encoder Mode Dim Strobe; Slave Encoder Mode Dim Strobe; Slave System Settings DMX Address;...
-
Page 28: Minimum Distance To Illuminated Surface
Minimum distance to 0.2 m 0.2 m normally flammable materials Dimensions 633.3 mm x 330.7 mm x 314 mm 633.3 mm x 330.7 mm x 314 mm (L x W x H) Weight Engine and lens holder Engine and lens holder (as shipped): 8.9 kg (as shipped): 8.9 kg Light engine: 7.3 kg... -
Page 29: Disposal
DISPOSAL Packaging: 1. Packaging can be fed into the reusable material cycle using the usual disposal methods. 2. Please separate the packaging in accordance with the disposal laws and recy- cling regulations in your country. Device: 1. This device is subject to the European Directive on Waste Electrical and Electronic Equipment, as amended. - Page 30 UKCA- DECLARATION OF CONFORMITY Products that are subject to Electrical Equipment(Safety)Regulation 2016, EMC Regulation 2016 or RoHS Regulation can be requested at info@adamhall.com. Products that are subject to the Radio Equipments Regulations 2017 (SI2017/1206) can be down- loaded from www.adamhall.com/compliance/ FCC STATEMENT This equipment has been tested and found to comply with the limits for a Class B digital device, pursuant to part 15 of the FCC Rules.
-
Page 31: Deutsch
Dieses Gerät wurde unter hohen Qualitätsanforderungen entwickelt und gefertigt, um viele Jahre einen reibungslosen Betrieb zu gewährleisten. Bitte lesen Sie diese Bedienungsanleitung sorgfäl- tig, damit Sie Ihr neues Produkt von Cameo Light schnell und optimal einsetzen können. Weitere Informationen über Cameo Light erhalten Sie auf unserer Website CAMEOLIGHT.COM. -
Page 32: Sicherheitshinweise
Dieses Symbol kennzeichnet Gefahren, die einen elektrischen Schlag verursachen können. Dieses Symbol kennzeichnet Gefahrenstellen oder gefährliche Situationen. Dieses Symbol kennzeichnet Gefahren durch heiße Oberflächen. Dieses Symbol kennzeichnet Gefahren durch intensive Lichtquellen. Dieses Symbol kennzeichnet ein Gerät, in dem sich keine vom Benutzer austauschbaren Teile befinden. - Page 33 ACHTUNG: 1. Nehmen Sie das Gerät nicht in Betrieb, wenn es starken Temperaturschwankungen ausgesetzt war (beispielsweise nach dem Transport). Feuchtigkeit und Kondensat könnten das Gerät beschädigen. Schalten Sie das Gerät erst ein, wenn es Umge- bungstemperatur erreicht hat. 2. Stellen Sie sicher, dass die Spannung und die Frequenz des Stromnetzes mit den auf dem Gerät angegebenen Werten übereinstimmen.
- Page 34 VORSICHT: 1. Bei beweglichen Bauteilen wie Montagebügeln, oder sonstigen beweglichen Bau teilen besteht die Möglichkeit sich zu klemmen. 2. Bei Geräten mit motorisch angetriebenen Bauteilen besteht Verletzungsgefahr durch die Bewegung des Gerätes. Plötzliche Gerätebewegungen können zu Schreck reaktionen führen. 3. Die Gehäuseoberfläche des Geräts kann sich im regulären Betrieb stark erwärmen. Stellen Sie sicher, dass ein versehentliches Berühren des Gehäuses ausgeschlos- sen ist.
-
Page 35: Hinweise Für Ortsveränderliche Indoor-Geräte
VORSICHT! WICHTIGE HINWEISE IN BEZUG AUF LICHT-PRODUKTE! 1. Blicken Sie niemals, auch nicht kurzzeitig, direkt in die Lichtquelle. 2. Blicken Sie niemals mit optischen Geräten wie Vergrößerungsgläsern in die Lichtquelle. 3. Stroboskopeffekte können bei empfindlichen Menschen epileptische Anfälle auslösen! 4. In diesen Leuchten sind fest installierte Leuchtmittel verbaut, welche nicht durch den Benutzer zu tauschen sind. -
Page 36: Einführung
Der Scheinwerfer verfügt über den RDM-Standard (Remote Device Management). Diese Geräte- fernverwaltung ermöglicht die Statusabfrage und Konfiguration von RDM-Endgeräten über einen RDM-fähigen Controller, wie den optional erhältlichen Cameo UNICON (Artikelnummer CLIREMOTE). Das Cameo UNICON ermöglicht darüber hinaus den Zugriff auf das gesamte Scheinwerfermenü. -
Page 37: Anschlüsse, Bedien- Und Anzeigeelemente
Ein geeignetes Netzkabel mit TRUE1 kompatiblem Gerätestecker befindet sich im Lieferumfang. POWER OUT TRUE1 kompatible Netzausgangsbuchse. Dient der Netzversorgung weiterer CAMEO Scheinwerfer. Achten Sie darauf, dass die gesamte Stromaufnahme aller angeschlossenen Geräte den auf dem Gerät in Ampere (A) angegebenen Wert nicht überschreitet. - Page 38 FUSE Sicherungshalter für 5 x 20mm Sicherungen. WICHTIGER HINWEIS: Ersetzen Sie die Sicherung ausschließlich durch eine Sicherung des gleichen Typs und mit gleichen Werten. Sollte die Siche- rung wiederholt auslösen, wenden Sie sich bitte an ein autorisiertes Servicezentrum. DMX IN Männliche 5-Pol XLR-Buchse zum Anschließen eines DMX-Kontrollgeräts (z.B.
-
Page 39: Bedienung
HINWEISE • Sobald der Scheinwerfer korrekt am Stromnetz angeschlossen ist, werden während des Start- vorgangs nacheinander „Welcome to Cameo“, die Modellbezeichnung und die Software Version im Display angezeigt. Nach diesem Vorgang ist der Scheinwerfer betriebsbereit und startet in der Betriebsart, die zuvor aktiviert war. - Page 40 DMX BETRIEBSART EINSTELLEN (DMX Mode) Durch Drücken auf den Encoder gelangen Sie in das Hauptmenü. Durch Drehen des Encoders wählen Sie nun den Menüpunkt DMX Mode aus (Auswahlpfeil links beachten) und bestätigen durch Drücken auf den Encoder. Nun können Sie die gewünschte DMX-Betriebsart durch Drehen des Encoders auswählen.
- Page 41 SLAVE-BETRIEB Durch Drücken auf den Encoder gelangen Sie in das Hauptmenü. Durch Drehen des Encoders wählen Sie nun den Menüpunkt Slave aus (Auswahlpfeil links beachten) und bestätigen durch Drücken auf den Encoder. Die Slave-Betriebsart ist nun aktiviert und die Hauptanzeige wird automatisch wieder angezeigt.
- Page 42 Display = Display-Beleuchtung zurück Off Timer Always On permanent an Off after Deaktivierung nach ca. 20 Sekunden Inakti- vität DMX Fail = Betriebszustand bei zurück DMX-Signal-Unter- Hold letzter Befehl wird gehalten brechung Blackout aktiviert Blackout Full On Scheinwerfer wechselt auf Full On Stand Scheinwerfer wechselt auf Betriebsart Stand Alone...
- Page 43 = Lüftersteuerung zurück anpassen Auto Automatische Lüftersteuerung Deaktivierter Lüfter bei stark reduzierter Helligkeit Constant Konstant niedrige Lüftergeschwindigkeit bei reduzierter Helligkeit, falls notwendig Constant Konstant mittlere Lüftergeschwindigkeit bei reduzierter Helligkeit, falls notwendig Constant Konstant hohe Lüftergeschwindigkeit High Factory = Zurücksetzen auf zurück Reset Werkseinstellung...
-
Page 44: Montage
System Info zurück Firmware = Anzeige der Main CPU Vx.xx Geräte-Firmware Temperature = Temperaturanzeige zurück der LED-Einheit xx°C / xx°F Unit °C (= Anzeige in Grad Celsius) °F (= Anzeige in Grad Fahrenheit) Operation = Betriebszeitanzeige xx:xxh Anzeige der Gesamtbetriebszeit in Hours Stunden und Minuten MONTAGE... -
Page 45: Linsentubus Mit Fixem Abstrahlwinkel Montieren
LINSENTUBUS MIT FIXEM ABSTRAHLWINKEL MONTIEREN HINWEISE: 1. Betreiben Sie den Scheinwerfer nicht während der Montage bzw. Demontage eines Linsentu- bus. 2. Achten Sie beim Montieren bzw. Demontieren eines Linsentubus darauf, die Linse nicht zu beschädigen und zu verunreinigen. Achten Sie darauf, dass keine Fremdkörper in das Schein- werfergehäuse gelangen. - Page 46 TUBUS MIT BLENDENSCHIEBEREINHEIT DEMONTIEREN HINWEISE: 1. Betreiben Sie den Scheinwerfer nicht während der Demontage bzw. Montage des Tubus. 2. Achten Sie beim Demontieren bzw. Montieren des Tubus darauf, die dahinterliegende Linse nicht zu beschädigen und zu verunreinigen. Achten Sie darauf, dass keine Fremdkörper in das Scheinwerfergehäuse gelangen.
- Page 47 Demontieren Sie den Tubus mit Blendenschiebereinheit wie zuvor beschrieben. Setzen Sie den Zoom-Linsentubus um circa eine achtel Umdrehung gegen den Uhrzeigersinn versetzt von vorne auf das Scheinwerfergehäuse (A). Drehen Sie nun den Zoom-Linsentubus circa ein achtel Umdrehung im Uhrzeigersinn und achten dabei darauf, dass die gefederte Sicherungshalterung für einen Filterrahmen nach oben gerichtet ist und dass die Einheit korrekt in den entsprechenden Führungen im Scheinwerfergehäuse sitzt (B).
-
Page 48: Pflege, Wartung Und Reparatur
GOBOHALTER UND IRIS Der Tubus mit Blendenschiebereinheit und die Zoom-Tubusse verfügen über einen Einbauschacht, in den ein Gobohalter (A) oder ein Irismodul (B) eingesetzt werden kann (Gobohalter und Irismodul optional erhältlich). Lösen Sie hierfür die beiden Rändelschrauben der Schachtabdeckung leicht (C) und schieben die Abdeckung in Richtung Scheinwerferfront. - Page 49 PFLEGE (vom Anwender durchführbar) WARNUNG! Vor jeglichen Pflegemaßnahmen müssen die Spannungsversorgung und sofern möglich sämtliche Geräteverbindungen getrennt werden. HINWEIS! Unsachgemäße Pflege kann zu Beeinträchtigung des Gerätes führen bis hin zur Zerstörung. 1. Gehäuseoberflächen müssen mit einem sauberen, feuchten Tuch gereinigt werden. Dabei ist darauf zu achten, dass keine Feuchtigkeit in das Gerät eindringen kann.
-
Page 50: Optionales Zubehör
OPTIONALES ZUBEHÖR CLP21530LENS CLP22550LENS Zoom-Linsentubus mit 15° bis 30° Abstrahl- Zoom-Linsentubus mit 25° bis 50° Abstrahl- winkel Blendenschiebereinheit und Soft- Edge- winkel Blendenschiebereinheit und Soft- Filter inklusive Edge-Filter inklusive CLP219LENS Linsentubus mit 19° Abstrahlwinkel CLP226LENS Linsentubus mit 26° Abstrahlwinkel CLP236LENS Linsentubus mit 36°... - Page 51 ABMESSUNGEN 235,5 223,5 456,1 633,3 330,7 Shutter closed 683,2...
-
Page 52: Technische Daten
TECHNISCHE DATEN ARTIKELNUMMER: CLP2D CLP2T Produktkategorie Statisches LED-Licht Statisches LED-Licht Ellipsenförmig (Profiler) Ellipsenförmig (Profiler) Scheinwerfer 230 W Tageslicht COB LED mit 230 W Warmweiße COB-LED mit festem CT festem CT Lichtstrom Light Engine: 15201 lm Light Engine: 13984 lm 19°-Linse: 11364 lm 19°-Linse: 10633 lm 26°-Linse: 13844 lm 26°-Linse: 12644 lm 36°-Linse: 13940 lm 36°-Linse: 12811 lm... - Page 53 Geräteeinstellungen (ein- skop; Geräteeinstellungen (ein- fach); Dimmer-Kurve; Geräteein- fach); Dimmer-Kurve; Geräteein- stellungen (vollständig) stellungen (vollständig) RDM-Funktionen Cameo RDM Standard Cameo RDM Standard Stand-Alone Encoder-Modus Dim Strobe; Slave Encoder-Modus Dim Strobe; Slave Systemeinstellungen DMX-Adresse; DMX-Modus; DMX-Adresse; DMX-Modus; Stand-Alone; Slave; Wireless-Ein- Stand-Alone;...
-
Page 54: Mindestabstand Zur Beleuchteten Fläche
Schutzklasse Schutzklasse 1 Schutzklasse 1 Gehäuse Magnesium-Druckgusslegierung, Magnesium-Druckgusslegierung, schwarze Pulverbeschichtung schwarze Pulverbeschichtung Mindestabstand zur 0,5 m 0,5 m beleuchteten Fläche Mindestabstand zu 0,2 m 0,2 m normal entflamm- baren Materialien Abmessungen (L x 633,3 mm x 330,7 mm x 314 mm 633,3 mm x 330,7 mm x 314 mm B x H) Gewicht Motor und Linsenhalter (Ausliefe- Motor und Linsenhalter (Ausliefe-... -
Page 55: Entsorgung
ENTSORGUNG Verpackung: 1. Verpackungen können über die üblichen Entsorgungswege dem Wertstoffkreislauf zugeführt werden. 2. Bitte trennen Sie die Verpackung entsprechend der Entsorgungsgesetze und Wertstoffverordnungen in Ihrem Land. Gerät: 1. Dieses Gerät unterliegt der europäischen Richtlinie für Elektro- und Elektronik-Altgeräte in der jeweils geltenden aktuellen Fassung. WEEE-Richtlinie Waste Electrical and Electronical Equipment. -
Page 56: Herstellererklärungen
HERSTELLERERKLÄRUNGEN HERSTELLERGARANTIE & HAFTUNGSBESCHRÄNKUNG Adam Hall GmbH, Adam-Hall-Str. 1, D-61267 Neu Anspach / E-Mail Info@adamhall.com / +49 (0)6081 / 9419-0. Unsere aktuellen Garantiebedingungen und Haftungsbeschränkung finden Sie unter: https://cdn-shop.adamhall.com/media/pdf/Manufacturers-Declarations-CAMEO_DE_EN_ES_FR.pdf. Im Servicefall wenden Sie sich an Ihren Vertriebspartner. CE-KONFORMITÄT Hiermit erklärt die Adam Hall GmbH, dass dieses Produkt folgender Richtlinie entspricht (soweit zutreffend): Niederspannungsrichtlinie (2014/35/EU) EMV-Richtlinie (2014/30/EU) -
Page 57: Français
Cet appareil a été conçu et produit suivant des exigences de qualité très strictes pour fonctionner pendant de nombreuses années. Veuillez lire attentivement ce manuel d’utilisation pour pouvoir utiliser rapidement et de manière optimale votre nouveau produit Cameo Light. Vous trouverez de plus amples informations sur Cameo Light sur notre site Web CAMEOLIGHT.COM. -
Page 58: Consignes De Sécurité
Ce symbole indique un danger susceptible de provoquer une décharge électrique. Ce symbole indique une zone ou une situation dangereuse. Ce symbole indique des dangers liés à des surfaces chaudes. Ce symbole signale des dangers liés à des sources lumineuses intenses. Ce symbole indique que l’appareil ne contient aucune pièce remplaçable par l’utilisa- teur. - Page 59 ATTENTION : 1. Ne pas mettre l’appareil en service s’il a été exposé à d’importantes variations de température (par exemple après le transport). L’humidité et la condensation risquent d’endommager l’appareil. N’allumer l’appareil que lorsqu’il est à tempéra- ture ambiante. 2. S’assurer que la tension et la fréquence du réseau électrique correspondent aux valeurs indiquées sur l’appareil.
- Page 60 PRUDENCE : 1. Il existe un risque de pincement dans des pièces mobiles telles que des étriers de montage ou d’autres pièces mobiles. 2. Pour les appareils équipés de composants entraînés par moteur, il existe un risque de blessure dû aux mouvements de l’appareil. Des mouvements soudains de l’ap- pareil peuvent provoquer des réactions brutales.
-
Page 61: Remarques Concernant Les Appareils D'intérieur Mobiles
ATTENTION ! REMARQUES IMPORTANTES CONCERNANT LES SYSTÈMES D’ÉCLAIRAGE ! 1. Ne jamais regarder directement le faisceau lumineux, même pour une courte durée. 2. Ne jamais regarder le faisceau lumineux avec des instruments optiques tels que des verres grossissants. 3. Les effets stroboscopiques sont susceptibles de déclencher des réactions épilep- tiques chez les personnes sensibles ! 4. -
Page 62: Introduction
Le projecteur est équipé de la technologie standard RDM (Remote Device Management). Cette gestion à distance des appareils permet de consulter l’état de fonctionnement des terminaux RDM et de les configurer via un contrôleur compatible RDM, comme le Cameo UNICON disponible en option (référence CLIREMOTE). -
Page 63: Raccordements, Éléments De Commande Et D'affichage
Un câble réseau approprié est fourni avec un connecteur compatible TRUE1. POWER OUT (SORTIE D’ALIMENTATION) Embase secteur de sortie compatible TRUE1. Permet d’alimenter d’autres projecteurs CAMEO. Veiller à ce que la consommation totale de tous les appareils connectés ne dépasse pas la valeur... - Page 64 FUSE (FUSIBLE) Porte-fusible pour fusibles de 5 x 20 mm. REMARQUE IMPORTANTE : Remplacez le fusible exclusi- vement par un fusible de même type et de même valeur. Si le fusible saute de façon récurrente, contactez un centre de réparation agréé. DMX IN (ENTRÉE DMX) Connecteur XLR mâle à...
-
Page 65: Utilisation
• Dès que le projecteur est correctement raccordé à l’alimentation secteur, un message de bienvenue (« Welcome to Cameo »), la désignation du modèle et la version du logiciel s’affichent successivement à l’écran pendant la phase de démarrage. À l’issue de cette phase, le projec- teur est opérationnel et passe au mode précédemment activé. - Page 66 RÉGLAGE DU MODE DE FONCTIONNEMENT DMX (DMX Mode) Appuyer sur l’encodeur pour accéder au menu principal. Tourner l’encodeur pour sélectionner à présent l’option de menu DMX Mode (faire attention à la flèche de sélection à gauche) puis appuyer sur l’encodeur pour valider. Vous pouvez maintenant sélectionner le mode DMX souhai- té...
- Page 67 MODE SLAVE Appuyer sur l’encodeur pour accéder au menu principal. Tourner l’encodeur pour sélectionner à présent l’option de menu Slave (faire attention à la flèche de sélection à gauche) puis appuyer sur l’encodeur pour valider. Le mode Slave est maintenant activé et l’écran principal s’affiche à...
- Page 68 Display = Éclairage de l’écran Retour Off Timer Always On Allumé en permanence Off af- Désactivation au bout d’env. 20 secondes ter 20s d’inactivité DMX Fail = État de fonction- Retour nement en cas Hold Maintien de la dernière commande d’interruption du Blackout Active la fonction Blackout signal DMX...
- Page 69 = Adapter le pilotage Retour du ventilateur Auto Pilotage automatique du ventilateur Ventilateur désactivé en cas de forte réduction de la luminosité Constant Vitesse de ventilation faible et constante en cas de luminosité réduite, si nécessaire Constant Vitesse de ventilation moyenne constante en cas de luminosité...
-
Page 70: Montage
System Info Retour Firmware = Affichage du firmware Main CPU Vx.xx de l’appareil Temperature = Affichage de la Retour température de l’unité xx°C / xx°F à LED Unit °C (= affichage en degrés Celsius) °F (= affichage en degrés Fahrenheit) Operation = Affichage de la durée xx:xxh... -
Page 71: Monter Un Tube De Lentille Avec Un Angle De Rayonnement Fixe
MONTER UN TUBE DE LENTILLE AVEC UN ANGLE DE RAYONNEMENT FIXE REMARQUES : 1. Ne faites pas fonctionner le projecteur pendant le montage ou le démontage d’un tube de lentille. 2. Lors du montage ou du démontage d’un tube de lentille, veillez à ne pas endommager ni conta- miner la lentille. - Page 72 DÉMONTER LE TUBE AVEC L’UNITÉ COULISSANTE DE DIAPHRAGME REMARQUES : 1. Ne faites pas fonctionner le projecteur pendant le démontage ou le montage du tube. 2. Lors du démontage ou du montage du tube, veillez à ne pas endommager ni salir la lentille qui se trouve derrière.
- Page 73 Démontez le tube avec l’unité coulissante de diaphragme comme décrit précédemment. Placez le tube de lentille de zoom sur le boîtier du projecteur (A) en le décalant d’environ un huitième de tour dans le sens inverse des aiguilles d’une montre, par l’avant. Tournez ensuite le tube de lentille de zoom d’environ un huitième de tour dans le sens des aiguilles d’une montre, en veillant à...
-
Page 74: Entretien, Maintenance Et Réparation
SUPPORT DE GOBO ET IRIS Le tube avec unité coulissante de diaphragme et les tubes zoom disposent d’un logement dans lequel un support de gobo (A) ou un module d’iris (B) peut être inséré (support de gobo et module d’iris disponibles en option). Pour cela, desserrez légèrement les deux vis moletées du couvercle du logement (C) et faites glisser le couvercle vers l’avant du projecteur. - Page 75 ENTRETIEN (réalisable par l’utilisateur) AVERTISSEMENT ! Avant toute opération d’entretien, l’alimentation électrique et, dans la mesure du possible, toutes les connexions de l’appareil doivent être débran- chées. REMARQUE ! Un entretien inapproprié peut entraîner une dégradation de l’appareil, voire sa destruction. 1. Les surfaces du boîtier doivent être nettoyées avec un chiffon propre et humide. Veiller à ce qu’aucune humidité...
-
Page 76: Accessoires Disponibles En Option
ACCESSOIRES DISPONIBLES EN OPTION CLP21530LENS CLP22550LENS Tube de lentille zoom avec angle de rayon- Tube de lentille zoom avec angle de rayon- nement de 15° à 30°, unité coulissante de nement de 25° à 50°, unité coulissante de diaphragme et filtre à bords souples inclus diaphragme et filtre à... - Page 77 DIMENSIONS 235,5 223,5 456,1 633,3 330,7 Shutter closed 683,2...
-
Page 78: Caractéristiques Techniques
CARACTÉRISTIQUES TECHNIQUES NUMÉRO D‘ARTICLE : CLP2D CLP2T Catégorie de produit Éclairage LED statique Éclairage LED statique Type Ellipsoïdal (Profileur) Ellipsoïdal (Profileur) Source lumineuse LED COB lumière du jour 230 W LED COB blanc chaud 230 W avec avec CT fixe CT fixe Flux lumineux Moteur d’éclairage : 15201 lm... - Page 79 (simple) ; courbe de dimmer ; (simple) ; courbe de dimmer ; paramètres de l’appareil (complet) paramètres de l’appareil (complet) Fonctions RDM Cameo RDM Standard Cameo RDM Standard Autonome Mode encodeur Dim Strobe ; Mode encodeur Dim Strobe ; Esclave Esclave Paramètres système...
-
Page 80: Distance Minimale Par Rapport À La Surface Éclairée
Mode veille 42 W 42 W Fusible T 6,3 AL 250 V T 6,3 AL 250 V Raccordement élec- True 1 compatible E/S True 1 compatible E/S trique Power-Link 8 unités à 230 V ; 4 unités à 110 V 8 unités à 230 V ; 4 unités à 110 V Classe de protection Classe de protection 1 Classe de protection 1... -
Page 81: Élimination
ÉLIMINATION Emballage : 1. Les emballages peuvent être introduits dans le circuit de recyclage par les voies de collecte habituelles. 2. Trier l’emballage conformément à la législation sur l’élimination des déchets et à la réglementation sur les matériaux recyclables en vigueur dans votre pays. Appareil : 1. -
Page 82: Déclarations Du Fabricant
DÉCLARATIONS DU FABRICANT GARANTIE DU FABRICANT ET LIMITATION DE RESPONSABILITÉ Adam Hall GmbH, Adam-Hall-Str. 1, D-61267 Neu Anspach / E-mail Info@adamhall.com / +49 (0)6081 / 9419-0. Nos conditions de garantie et nos clauses de limitation de responsabilité actuelles sont dispo- nibles sur Internet à... -
Page 83: Español
Este equipo ha sido desarrollado y fabricado según estrictos criterios de calidad con el fin de garantizar muchos años de funcionamiento perfecto. Lee atentamente el presente manual de instrucciones para poder usar rápidamente y de forma óptima tu nuevo producto de Cameo Light. Puedes encontrar más información sobre Cameo Light en nuestro sitio web CAMEOLIGHT.COM. -
Page 84: Instrucciones De Seguridad
Este símbolo indica peligros que pueden causar una descarga eléctrica. Este símbolo indica áreas de peligro o situaciones peligrosas. Este símbolo indica peligros por la existencia de superficies calientes. Este símbolo indica peligros debido a fuentes de luz intensas. Este símbolo indica que en el equipo no hay piezas que pueda sustituir el usuario. Este símbolo identifica información complementaria sobre el uso del producto. - Page 85 ATENCIÓN: 1. No poner en marcha el equipo si ha estado sometido a fuertes fluctuaciones de temperatura (por ejemplo, tras su transporte). La humedad y el agua condensada pueden dañar el equipo. Encender el equipo únicamente después de que su tem- peratura haya alcanzado la temperatura ambiente.
- Page 86 PRECAUCIÓN: 1. Las piezas móviles, como las perchas de montaje u otras piezas, pueden quedarse atascadas. 2. En equipos con componentes motorizados, existe peligro de lesiones por el movi- miento del equipo. Los movimientos repentinos del equipo pueden provocar una reacción brusca.
-
Page 87: Indicaciones Para Equipos Portátiles De Interior
¡PRECAUCIÓN! INSTRUCCIONES IMPORTANTES EN RELACIÓN CON LOS PRODUCTOS DE ILUMINACIÓN 1. Nunca mirar directamente, ni siquiera un instante, la fuente de luz. 2. Nunca mirar la fuente de luz mediante equipos ópticos, como lentes de aumento. 3. ¡Los efectos de estrobo pueden provocar ataques epilépticos en personas sensi- bles! 4. -
Page 88: Introducción
Este sistema de administración de dispositivos a distancia permite consultar el estado y configurar terminales RDM mediante un controlador con función RDM, como el opcional UNICON de Cameo (número de artículo CLIREMOTE). Además, el UNICON de Cameo permite el acceso a todo el menú de los focos. -
Page 89: Conexiones, Elementos De Manejo Y Elementos De Visualización
TRUE1. POWER OUT Toma de salida de red compatible con TRUE1. Sirve para alimentar otros focos CAMEO. Asegú- rese de que el consumo de corriente total de todos los equipos conectados no supere el valor en amperios (A) indicado en el equipo. - Page 90 FUSE Portafusibles para fusibles de 5 x 20 mm. NOTA IMPORTANTE: El fusible deberá sustituirse exclu- sivamente por otro del mismo tipo y con las mismas características técnicas. Si el fusible salta de forma recurrente, diríjase a un centro de servicio técnico autorizado. DMX IN Conector XLR macho de 5 pines para conectar un equipo de control DMX (por ejemplo, una mesa DMX).
-
Page 91: Manejo
«Welcome to Cameo» (Bienvenidos a Cameo), así como la denominación de modelo y la versión del software. Tras este procedimiento, el foco estará listo para funcionar y se activará en el último modo operativo empleado. - Page 92 AJUSTE DEL MODO DMX (DMX Mode) Pulsando el mando giratorio se llega al menú principal. Girando el mando giratorio, seleccione ahora la opción de menú Modo DMX (observar la flecha de selección en el lado izquierdo) y confirme su selección pulsando dicho mando. Ahora puede seleccionar el modo DMX deseado girando el mando giratorio.
- Page 93 MODO ESCLAVO Pulsando el mando giratorio se llega al menú principal. Girando el mando giratorio, seleccione ahora la opción de menú Slave (observe la flecha de selección en el lado izquierdo) y confirme su selección pulsando dicho mando. El modo esclavo está activado en ese momento y se vuelve a mostrar automáticamente la pantalla principal.
- Page 94 Display = Retroiluminación de Atrás Off Timer la pantalla Always On Encendido permanente Off after Desactivación tras aproximadamente 20 se- gundos sin actividad DMX Fail = Estado operativo en Atrás caso de interrupción Hold Se mantendrá el último comando de la señal DMX Blackout Activa el Blackout Full On...
- Page 95 = Adaptar el control Atrás de ventiladores Auto Control automático del ventilador Ventilador desactivado con brillo muy reducido Constant Velocidad del ventilador baja y constante con brillo reducido, si fuese necesario Constant Velocidad del ventilador media y constante con brillo reducido, si fuese necesario Constant Velocidad del ventilador alta y constante High...
-
Page 96: Montaje
Temperature = Visualización de la Atrás temperatura de la xx °C / xx °F unidad LED Unit °C (= visualización en grados Celsius) °F (= visualización en grados Fahren- heit) Operation = Visualización del tiem- xx:xx h Visualización del tiempo de funciona- Hours po de funcionamiento miento total en horas y minutos... -
Page 97: Montar El Tubo De Lente Con Ángulo De Dispersión Fijo
MONTAR EL TUBO DE LENTE CON ÁNGULO DE DISPERSIÓN FIJO INDICACIONES: 1. No utilice el foco mientras desmonta o monta un tubo de lente. 2. Al montar o desmontar un tubo de lente, tenga cuidado de no dañar ni contaminar la lente. Asegúrese de que no entren cuerpos extraños en la carcasa del foco. - Page 98 DESMONTAR EL TUBO CON UNIDAD DE DIAFRAGMA DESLIZANTE INDICACIONES: 1. No utilice el foco mientras desmonta o monta el tubo. 2. Al desmontar o montar el tubo, tenga cuidado de no dañar ni contaminar la lente que se en- cuentra detrás. Asegúrese de que no entren cuerpos extraños en la carcasa del foco. 3.
- Page 99 Desmonte el tubo con la unidad de diafragma deslizante como se ha descrito anteriormente. Co- loque sobre la carcasa del foco (A) el tubo de lente de zoom aprox. un octavo de vuelta en sentido antihorario desplazado desde delante. Gire ahora el tubo de lente de zoom aprox. un octavo de vuelta en sentido horario asegurándose de que el soporte de seguridad con resorte para un por- tafiltros esté...
-
Page 100: Cuidado, Mantenimiento Y Reparación
SOPORTE DE GOBO E IRIS El tubo con unidad de diafragma deslizante y los tubos de zoom tienen una ranura de montaje en la que se puede insertar un soporte de gobo (A) o un módulo de iris (B) (el soporte de gobo y el módulo de iris están disponibles opcionalmente). - Page 101 CUIDADOS (que puede realizar el usuario) ¡ADVERTENCIA! Antes de realizar cualquier tarea para mantener cuidado el equi- po, desconectar la alimentación eléctrica y, si es posible, todas las conexiones del equipo. ¡AVISO! Un cuidado inadecuado puede provocar daños en el equipo e incluso su destrucción.
-
Page 102: Accesorios Opcionales
ACCESORIOS OPCIONALES CLP21530LENS CLP22550LENS Tubo de lente de zoom con ángulo de dis- Tubo de lente de zoom con ángulo de dis- persión de 15° a 30°, unidad de diafragma persión de 25° a 50°, unidad de diafragma deslizante y filtro de bordes suaves incluidos deslizante y filtro de bordes suaves incluidos CLP219LENS Tubo de lente con ángulo de dispersión de 19°... - Page 103 MEDIDAS 235,5 223,5 456,1 633,3 330,7 Shutter closed 683,2...
-
Page 104: Datos Técnicos
DATOS TÉCNICOS NÚMERO DE ARTÍ- CLP2D CLP2T CULO: Categoría de pro- Luz LED estática Luz LED estática ducto Tipo Elipsoidal (perfilador) Elipsoidal (perfilador) Fuente de luz LED COB de luz diurna de 230 W LED COB blanco cálido de 230 W con CT fijo con CT fijo Flujo luminoso... - Page 105 (simple); curva de atenuación; (simple); curva de atenuación; ajustes del dispositivo (full) ajustes del dispositivo (full) Funciones RDM Cameo RDM estándar Cameo RDM estándar Independiente Modo codificador atenuado estro- Modo codificador atenuado estro- boscópico; esclavo boscópico; esclavo Ajustes del sistema Dirección DMX;...
-
Page 106: Distancia Mínima Con Respecto A La Superficie Iluminada
Energía de reserva 42 W 42 W Fusible T 6,3 AL 250 V T 6,3 AL 250 V Conexión eléctrica Entrada/Salida compatible con Entrada/Salida compatible con True 1 True 1 Power-Link 8 unidades a 230 V; 4 unidades a 8 unidades a 230 V; 4 unidades a 110 V 110 V Clase de protección... -
Page 107: Eliminación
ELIMINACIÓN Embalaje: 1. Los embalajes se pueden llevar a reciclar a través de las vías de eliminación habituales. 2. Separe el embalaje conforme a las leyes de eliminación de residuos y las norma- tivas sobre reciclaje de tu país. Equipo: 1. -
Page 108: Declaraciones Del Fabricante
DECLARACIONES DEL FABRICANTE GARANTÍA DEL FABRICANTE Y EXENCIÓN DE RESPONSABILIDAD Adam Hall GmbH, Adam-Hall-Str. 1, D-61267 Neu Anspach (Alemania) / Correo electrónico: info@adamhall.com / +49 (0)6081 / 9419-0. Encontrará las condiciones actuales de la garantía y el texto sobre la exención de responsabilidad en la siguiente página web: https://cdn-shop.adamhall.com/media/pdf/Manufacturers-Declarations-CAMEO_DE_EN_ES_FR.pdf. -
Page 109: Polski
Należy uważnie przeczytać niniejszą instruk- cję obsługi, aby móc jak najszybciej rozpocząć prawidłową eksploatację nowego urządzenia marki Cameo Light. Więcej informacji o marce Cameo Light można znaleźć w naszej witrynie CAMEOLIGHT.COM. INFORMACJE DOTYCZĄCE NINIEJSZEJ INSTRUKCJI OBSŁUGI •... -
Page 110: Zasady Bezpieczeństwa
Ten symbol oznacza niebezpieczeństwa, które mogą być przyczyną porażenia prądem elektrycznym. Ten symbol oznacza niebezpieczne miejsca lub sytuacje. Ten symbol oznacza niebezpieczeństwa związane z gorącymi powierzchniami. Ten symbol oznacza niebezpieczeństwa związane z intensywnym źródłem światła. Ten symbol oznacza urządzenie, w którym nie ma części wymienianych przez użyt- kownika. - Page 111 UWAGA: 1. Nie uruchamiać urządzenia, jeśli było ono narażone na duże wahania temperatu- ry (np. po transporcie). Wilgoć i kondensat mogą uszkodzić urządzenie. Włączyć urządzenie dopiero wtedy, gdy osiągnie temperaturę otoczenia. 2. Sprawdzić, czy napięcie i częstotliwość sieci elektrycznej są zgodne z parametrami podanymi na urządzeniu.
- Page 112 PRZESTROGA: 1. Ruchome elementy, takie jak wsporniki montażowe lub inne, mogą ulec zaklesz- czeniu. 2. W przypadku urządzeń z elementami napędzanymi mechanicznie istnieje niebez- pieczeństwo obrażeń w wyniku ruchów urządzenia. Nagłe ruchy urządzenia mogą wystraszyć użytkownika. 3. Podczas regularnej pracy powierzchnia obudowy urządzenia może się silnie nagrzewać.
-
Page 113: Uwagi Dotyczące Przenośnego Sprzętu Do Stosowania Wpomieszczeniach
PRZESTROGA! WAŻNE INFORMACJE DOTYCZĄCE PRODUKTÓW OŚWIETLENIOWYCH! 1. Nigdy nie patrzeć bezpośrednio w źródło światła, nawet przez krótką chwilę. 2. Nigdy nie patrzeć w źródło światła za pomocą przyrządów optycznych takich jak lupy. 3. Efekty stroboskopowe mogą wywoływać u wrażliwych osób ataki epileptyczne! 4. Lampy te mają zamontowane na stałe źródło światła, którego użytkownik nie może wymienić. -
Page 114: Wprowadzenie
Reflektor może pracować w standardzie RDM (Remote Device Management). Jest to system zdal- nego sterowania urządzeniem, który umożliwia sprawdzanie statusu i konfigurowanie urządzeń końcowych RDM za pomocą sterownika RDM, np. opcjonalnie dostępny Cameo UNICON (numer artykułu CLIREMOTE). Cameo UNICON umożliwia ponadto dostęp do całego menu reflektorów. -
Page 115: Przyłącza, Elementy Obsługi I Wskaźniki
W zestawie znajduje się także odpowiedni kabel sieciowy z wtyczką kompatybilny z TRUE1. POWER OUT Gniazdo wyjściowe kompatybilne z TRUE1. Źródło zasilania dodatkowych reflektorów CAMEO. Całkowity pobór prądu wszystkich podłączonych urządzeń nie może przekroczyć wartości w amperach (A) podanej na urządzeniu. - Page 116 FUSE Oprawa na bezpieczniki 5 x 20 mm. WAŻNA WSKAZÓWKA: Bezpiecznik należy wymieniać wy- łącznie na bezpiecznik tego samego typu i o tych samych parametrach. W razie częstej aktywacji bezpiecznika skontaktować się z autoryzowanym serwisem. DMX IN 5-pinowe złącze męskie XLR do podłączenia kontrolera DMX (np. pulpitu DMX). DMX OUT 5-pinowe złącze żeńskie XLR do przekazywania sygnału sterującego DMX.
-
Page 117: Obsługa
OBSŁUGA WSKAZÓWKI • Po prawidłowym podłączeniu reflektora do sieci zasilania podczas procesu uruchamiania wy- świetlana jest następująca sekwencja komunikatów: „Welcome to Cameo”, nazwa modelu oraz wersja oprogramowania. Następnie reflektor jest gotowy do pracy i przełącza się na ostatnio wybrany tryb. - Page 118 USTAWIANIE TRYBU PRACY DMX (DMX Mode) Nacisnąć enkoder, aby przejść do menu głównego. Poprzez obrócenie enkodera wybrać pozycję menu DMX Mode (zwrócić uwagę na strzałkę wyboru z lewej strony). Aby potwierdzić, nacisnąć enkoder. Teraz można ustawić żądany tryb pracy DMX, obracając enkoder. Potwierdzić ustawie- nia, naciskając enkoder, wybrać...
- Page 119 TRYB SLAVE Nacisnąć enkoder, aby przejść do menu głównego. Obrócenie enkodera umożliwia wybranie pozycji menu Slave (zwrócić uwagę na strzałkę wyboru z lewej strony). Aby potwierdzić, nacisnąć enkoder. Tryb pracy slave jest teraz aktywowany, a wyświetlacz ponownie prezentuje automatycz- nie ekran główny. Połączyć urządzenia slave i master (ten sam model, ta sama wersja oprogra- mowania) kablem DMX i włączyć...
- Page 120 Display = podświetlenie powrót Off Timer wyświetlacza Always On stale włączone Off after Wyłączenie po ok. 20 sekundach bezczynności DMX Fail = stan roboczy powrót w przypadku prze- Hold zachowuje ostatnie polecenie rwania sygnału DMX Blackout aktywuje wygaszenie reflektora Full On reflektor przełącza się...
- Page 121 = dopasowanie stero- powrót wania wentylatorem Auto Automatyczne sterowanie wentylatorem Wentylator wyłączony przy znacznej redukcji jasności Constant Stała niska prędkość wentylatora przy zredu- kowanej jasności, w razie potrzeby Constant Stała średnia prędkość wentylatora przy zre- dukowanej jasności, w razie potrzeby Constant Stała wysoka prędkość wentylatora High Factory = Przywracanie usta-...
-
Page 122: Montaż
Temperature = wyświetlanie tempera- powrót tury modułu LED xx°C / xx°F Unit °C (= wskazanie w stopniach Celsjus- °F (= wskazanie w stopniach Fahren- heita) Operation = wyświetlanie czasu xx:xxh Całkowity czas pracy urządzenia w Hours pracy godzinach i minutach MONTAŻ NIEBEZPIECZEŃSTWO: Montaż... -
Page 123: Montaż Tubusu Soczewki Ze Stałym Kątem Rozwarcia Wiązki Świetlnej
MONTAŻ TUBUSU SOCZEWKI ZE STAŁYM KĄTEM ROZWARCIA WIĄZKI ŚWIETLNEJ WSKAZÓWKI: 1. Nie należy używać reflektora podczas montażu lub demontażu tubusu soczewki. 2. Podczas montażu lub demontażu tubusu soczewki należy uważać, aby nie uszkodzić i nie zabrudzić soczewki. Nie dopuścić, aby do obudowy reflektora dostały się ciała obce. 3. - Page 124 DEMONTAŻ TUBUSU Z PROWADNICĄ PRZYSŁONY WSKAZÓWKI: 1. Nie należy używać reflektora podczas montażu lub demontażu tubusu. 2. Podczas demontażu lub montażu tubusu należy uważać, aby nie uszkodzić i nie zanieczyścić znajdującej się za nim soczewki. Nie dopuścić, aby do obudowy reflektora dostały się ciała obce.
- Page 125 Zdemontować tubus z prowadnicą przysłony zgodnie z wcześniejszym opisem. Umieścić tubus z soczewką zmiennoogniskową na obudowie reflektora (A), obrócony w lewo o około jedną ósmą obrotu. Obrócić tubus z soczewką zmiennoogniskową o około jedną ósmą obrotu w prawo, zwra- cając uwagę na to, aby sprężynowy uchwyt zabezpieczający ramkę filtra był skierowany ku górze, a jednostka była prawidłowo osadzona w odpowiednich prowadnicach w obudowie reflektora (B).
- Page 126 OPRAWKA GOBO I MODUŁ IRYSOWY Tubus z prowadnicą przysłony i tubusy z soczewkami zmiennoogniskowymi są wyposażone w element montażowy, w który można włożyć oprawkę gobo (A) lub moduł irysowy (B) (oprawka gobo i moduł irysowy są dostępne opcjonalnie). W tym celu należy lekko odkręcić obie śruby radełkowane pokrywy (C) i przesunąć...
-
Page 127: Czyszczenie, Konserwacja I Naprawy
CZYSZCZENIE, KONSERWACJA I NAPRAWY Aby zapewnić bezawaryjne działanie urządzenia przez długi czas, należy je regularnie czyścić i w razie potrzeby serwisować. Konieczność czyszczenia lub konserwacji zależy od intensywności użytkowania i rodzaju otoczenia. Generalnie zalecamy kontrolę wzrokową przed każdym uruchomieniem. Ponadto zalecamy przeprowadzanie wszystkich wymienionych poniżej i odpowiednich czynności konserwacyjnych co 500 godzin pracy lub –... -
Page 128: Opcjonalne Akcesoria
OPCJONALNE AKCESORIA CLP21530LENS CLP22550LENS Tubus z soczewką zmiennoogniskową o kącie Tubus z soczewką zmiennoogniskową o kącie wiązki od 15° do 30° z prowadnicą przysłony i wiązki od 25° do 50° z prowadnicą przysłony filtrem Soft Edge w zestawie i filtrem Soft Edge w zestawie CLP219LENS Tubus z soczewką... - Page 129 WYMIARY 235,5 223,5 456,1 633,3 330,7 Shutter closed 683,2...
-
Page 130: Dane Techniczne
DANE TECHNICZNE NUMER ARTYKUŁU: CLP2D CLP2T Kategoria produktu Statyczna lampka LED Statyczna lampka LED Elipsoidalny (profiler) Elipsoidalny (profiler) Źródło światła COB LED Daylight 230 W ze stałym Dioda COB 230 W ciepła biel ze stałym CT Strumień świetlny Mechanizm oświetlenia: 15 201 lm Mechanizm oświetlenia: 13 984 lm Soczewka 19°: 11 364 lm Soczewka 19°: 10 633 lm... - Page 131 (uproszczone); krzywa ściemniania; ustawienia urządze- ściemniania; ustawienia urządze- nia (pełne) nia (pełne) Funkcje RDM Standard Cameo RMD Standard Cameo RMD Wersja autonomiczna Tryb kodera Dim Strobe; Slave Tryb kodera Dim Strobe; Slave Ustawienia systemu Adres DMX; tryb DMX; tryb stand- Adres DMX;...
-
Page 132: Minimalna Odległość Od Powierzchni Oświetlanej
Moc w trybie czuwania 42 W 42 W Bezpiecznik T 6,3 AL 250 V T 6,3 AL 250 V Złącze zasilania True 1, kompatybilne we/wy True 1, kompatybilne we/wy PowerLink 8 jednostek przy 230 V; 4 jednostki 8 jednostek przy 230 V; 4 jednostki przy 110 V przy 110 V Stopień... -
Page 133: Utylizacja
UTYLIZACJA Opakowanie: 1. Opakowania można oddać do recyklingu, wykorzystując zwykłe drogi utylizacji. 2. Opakowanie należy segregować zgodnie z obowiązującymi w danym kraju prze- pisami dotyczącymi utylizacji. Urządzenie: 1. To urządzenie podlega obowiązującej dyrektywie europejskiej w sprawie zużytego sprzętu elektrycznego i elektronicznego. Dyrektywa WEEE (w sprawie zużytego sprzętu elektrycznego i elektronicznego). -
Page 134: Deklaracje Producenta
DEKLARACJE PRODUCENTA GWARANCJA PRODUCENTA I OGRANICZENIE ODPOWIEDZIALNOŚCI Adam Hall GmbH, Adam-Hall-Str. 1, D-61267 Neu Anspach / e-mail Info@adamhall.com / +49 (0)6081 / 9419-0. Nasze aktualne warunki gwarancji oraz informację o ograniczeniu odpowiedzialności można znaleźć na stronie internetowej: https://cdn-shop.adamhall.com/media/pdf/Manufacturers-Declarations-CAMEO_DE_EN_ES_FR.pdf. W sprawie serwisu należy skontaktować się z dystrybutorem. ZGODNOŚĆ... -
Page 135: Italiano
Questo dispositivo è stato sviluppato e prodotto secondo elevati standard qualitativi per garan- tirne il regolare funzionamento per molti anni. Leggere attentamente questo manuale d’uso per utilizzare al meglio il nuovo prodotto di Cameo Light. Per maggiori informazioni su Cameo Light, consultare il nostro sito web CAMEOLIGHT.COM. -
Page 136: Indicazioni Sulla Sicurezza
Questo simbolo indica pericoli causabili da scosse elettriche. Questo simbolo indica punti di pericolo o situazioni pericolose. Questo simbolo indica pericoli dovuti a superfici calde. Questo simbolo indica pericoli dovuti a fonti di luce intense. Questo simbolo indica un dispositivo che non contiene parti sostituibili dall'utente. Questo simbolo indica informazioni complementari sull'utilizzo del prodotto. - Page 137 ATTENZIONE: 1. Non mettere in funzione il dispositivo se sottoposto a forti sbalzi di temperatura (ad esempio dopo il trasporto). Umidità e condensa potrebbero danneggiare il dispositi- vo. Accendere il dispositivo solo quando ha raggiunto la temperatura ambiente. 2. Verificare che la tensione e la frequenza della rete elettrica corrispondano ai valori indicati sul dispositivo.
- Page 138 PRUDENZA: 1. In caso di componenti mobili, come le staffe di montaggio, sussiste il rischio di schiacciamento. 2. Nei dispositivi con componenti azionati a motore sussiste il pericolo di lesioni a causa del movimento del dispositivo. Movimenti improvvisi del dispositivo possono causare reazioni impreviste.
-
Page 139: Avvertenze Per Dispositivi Industriali Portatili
ATTENZIONE! INDICAZIONI IMPORTANTI RELATIVE AI PRODOTTI PER L'ILLUMINAZIONE! 1. Non fissare mai direttamente il fascio di luce, nemmeno per brevi istanti. 2. Non guardare mai il fascio di luce con dispositivi ottici come le lenti d'ingrandimen- 3. In alcuni casi, in persone sensibili, gli effetti stroboscopici possono causare attacchi epilettici! 4. -
Page 140: Introduzione
Il proiettore si avvale dello standard RDM (Remote Device Management). Questo sistema di gestione remota dei dispositivi consente di verificare lo stato e configurare i terminali RDM tramite un apposito controller compatibile, come il Cameo UNICON (codice articolo CLIREMOTE), disponi- bile come optional. -
Page 141: Connettori, Elementi Di Comando E Visualizzazione
Un cavo di alimentazione adatto con connettore IEC compatibile con TRUE1 è compreso nella fornitura. POWER OUT Presa di uscita compatibile con TRUE1. Serve per l’alimentazione di altri proiettori CAMEO. Assi- curarsi che la corrente assorbita totale di tutti i dispositivi collegati all’apparecchio non superi il valore indicato in ampere (A). - Page 142 FUSE Portafusibili per 5 fusibili da 20 mm. NOTA IMPORTANTE: Sostituire il fusibile solo con un altro dello stesso tipo e con gli stessi valori. Se il fusibile continua a saltare, rivolgersi a un centro di assistenza autorizzato. DMX IN Connettore XLR maschio a 5 poli per il collegamento di un dispositivo di controllo DMX (ad es.
-
Page 143: Utilizzo
• Non appena il proiettore è correttamente allacciato alla rete elettrica, durante il processo di avvio sul display appaiono in successione il messaggio “Welcome to Cameo”, la denominazione del modello e la versione del software. Dopo questo processo il proiettore sarà pronto per l’uso e si avvierà... - Page 144 IMPOSTAZIONE DELLA MODALITÀ DI FUNZIONAMENTO DMX (DMXMode) Premendo il codificatore si accede al menu principale. Ruotare il codificatore per selezionare la voce di menu DMX Mode (osservare la freccia di selezione a sinistra) e confermare premendo il codificatore. Ora è possibile selezionare la modalità DMX desiderata ruotando il codificatore. Confermare la voce selezionata premendo il codificatore, selezionare il simbolo freccia “indietro”, nella parte superiore del menu, e premere il codificatore per tornare alla schermata principale.
- Page 145 MODALITÀ SLAVE Premendo il codificatore si accede al menu principale. Ruotare il codificatore per selezionare la voce di menu Slave (osservare la freccia di selezione a sinistra) e confermare premendo il codi- ficatore. La modalità di funzionamento slave è attiva e viene visualizzata la schermata principale. Collegare l’unità...
- Page 146 Display = Illuminazione del indietro Off Timer display Always On Sempre acceso Off dopo Disattivazione dopo circa 20 secondi di 20 s inattività DMX Fail = Condizione di fun- indietro zionamento in caso Hold Mantiene l’ultimo comando di interruzione del Blackout Blackout attivato segnale DMX Full On...
- Page 147 = Regolare il controllo indietro della ventola Auto Controllo automatico della ventola Ventola disattivata con luminosità fortemente ridotta Constant Velocità di ventilazione costantemente bassa con luminosità ridotta, se necessario Constant Velocità di ventilazione costante media con luminosità ridotta, se necessario Constant Velocità...
- Page 148 System Info indietro Firmware = Visualizzazione del Main CPU Vx.xx firmware del dispo- sitivo Temperature = Visualizzazione della indietro temperatura dell’unità xx°C / xx°F Unit °C (= visualizzazione in gradi centigra- °F (= visualizzazione in gradi Fahren- heit) Operation = Visualizzazione del xx:xxh Visualizzazione del tempo di funziona- Hours...
-
Page 149: Montaggio
MONTAGGIO PERICOLO: il montaggio sopratesta richiede una vasta esperienza, incluso il calcolo dei valori limite del carico di lavoro, il materiale di installazione utilizzato e la verifica periodi- ca della sicurezza di tutti i materiali di installazione e dei proiettori. Se non si dispone di queste qualifiche, non tentare di effettuare da soli l’installazione, ma ricorrere all’ausilio di aziende professionali. -
Page 150: Montaggio Del Tubo Per Lenti Con Angolo Di Emissione Fisso
MONTAGGIO DEL TUBO PER LENTI CON ANGOLO DI EMISSIONE FISSO ATTENZIONE: 1. Non utilizzare il proiettore durante il montaggio o lo smontaggio di un tubo per lenti. 2. Durante il montaggio o lo smontaggio di un tubo per lenti, prestare attenzione a non danneggia- re o contaminare la lente. - Page 151 Per smontare il tubo, allentare prima le due viti a testa zigrinata sul lato superiore e inferiore dell’alloggiamento del proiettore (A). A questo punto, ruotare il tubo di circa un ottavo di giro in senso antiorario (B) e rimuoverlo dall’alloggiamento del proiettore (C). Per montare il tubo, seguire la procedura in sequenza inversa, assicurandosi che l’unità...
- Page 152 FILTRO SOFT EDGE Il filtro soft edge, per una proiezione luminosa con bordi morbidi e omogenei, è posizionato di serie davanti al diaframma superiore. Durante il funzionamento, lasciare il filtro soft edge nel dispositivo. SUPPORTO PER GOBO E IRIS Il tubo con l’unità otturatore e i tubi per zoom sono dotati di un alloggiamento integrato in cui è possibile inserire un supporto per gobo (A) o un modulo iride (B) (supporto per gobo e modulo iride disponibili come opzione).
-
Page 153: Pulizia, Manutenzione E Riparazione
PULIZIA, MANUTENZIONE E RIPARAZIONE Per garantire il buon funzionamento del dispositivo nel tempo, è necessario sottoporlo a una pulizia regolare e, se necessario, a manutenzione. La necessità di pulizia e manutenzione dipende dall’intensità e dall’ambiente di utilizzo. In generale si consiglia di effettuare un’ispezione visiva prima di ogni messa in servizio. Si consi- glia inoltre di eseguire tutti gli interventi di pulizia applicabili menzionati di seguito ogni 500 ore di funzionamento o, in caso di minore intensità... -
Page 154: Accessori Opzionali
ACCESSORI OPZIONALI CLP21530LENS CLP22550LENS Tubo per lenti zoom con angolo di emissione Tubo per lenti zoom con angolo di emissione da 15° a 30°, unità otturatore e filtro soft edge da 25° a 50°, unità otturatore e filtro soft inclusi edge inclusi CLP219LENS Tubo per lenti con angolo di emissione di 19°... - Page 155 INGOMBRO 235,5 223,5 456,1 633,3 330,7 Shutter closed 683,2...
-
Page 156: Dati Tecnici
DATI TECNICI NUMERO ARTICOLO: CLP2D CLP2T Categoria di prodotto Luce a LED statica Luce a LED statica Tipo Riflettore ellissoidale (sagomatore) Riflettore ellissoidale (sagomatore) Sorgente luminosa COB LED versione Daylight da 230 LED COB bianco caldo da 230 W W con CT fisso con CT fisso Flusso luminoso Light Engine: 15201 lm... - Page 157 Dimmer; Dimmer fine; Strobo; Impostazioni dispositivo (sempli- Impostazioni dispositivo (sempli- ce); Curva dimmer; Impostazioni ce); Curva dimmer; Impostazioni dispositivo (completo) dispositivo (completo) Funzioni RDM RDM Cameo Standard RDM Cameo Standard Stand-alone Modalità encoder Dim Strobe; Modalità encoder Dim Strobe; Slave Slave Impostazioni di Indirizzo DMX;...
-
Page 158: Distanza Minima Dalla Superficie Illuminata
Collegamento alimen- 8 unità a 230 V; 4 unità a 110 V 8 unità a 230 V; 4 unità a 110 V tazione Classe di protezione Classe di protezione 1 Classe di protezione 1 Alloggiamento Lega di magnesio pressofusa, Lega di magnesio pressofusa, verniciata a polvere nera verniciata a polvere nera Distanza minima dalla... -
Page 159: Smaltimento
SMALTIMENTO Imballaggio: 1. Gli imballaggi possono essere riciclati tramite i consueti canali di smaltimento. 2. Separare l'imballaggio in conformità con le leggi sullo smaltimento e i regolamen- ti sui materiali riciclabili del proprio Paese. Dispositivo: 1. Questo dispositivo è soggetto alla Direttiva europea sui rifiuti di apparecchiature elettriche ed elettroniche e successive modifiche. -
Page 160: Dichiarazioni Del Produttore
DICHIARAZIONI DEL PRODUTTORE GARANZIA DEL PRODUTTORE E LIMITAZIONE DI RESPONSABILITÀ Adam Hall GmbH, Adam-Hall-Str. 1, D-61267 Neu Anspach / E-mail Info@adamhall.com / +49 (0)6081 / 9419-0. Le nostre attuali condizioni di garanzia e la limitazione di responsabilità sono consultabili alla pagina: https://cdn-shop.adamhall.com/media/pdf/Manufacturers-Declarations-CAMEO_DE_EN_ES_FR.pdf. -
Page 161: Dmx Control / Dmx Steuerung / Pilotage Dmx / Control Dmx / Sterowanie Dmx / Controllo Dmx
DMX CONTROL / DMX STEUERUNG / PILOTAGE DMX / CONTROL DMX / STEROWANIE DMX / CONTROLLO DMX Function Values 16Bit Strobe Device Dimmer 000 - 255 0% to 100% Dimmer 000 - 255 0% to 100% fine 000 - 005 Strobe open 006 - 010 Strobe closed 011 - 033 Pulse random, slow ->... - Page 162 128 - 250 Strobe slow -> fast <1Hz - 20Hz Strobe functions 251 - 255 Strobe open 000 - 005 No function 006 - 063 Linear dimmer curve Dimmer curve 064 - 127 Exponential dimmer curve 128 - 191 Logarithmic dimmer curve 192 - 255 S-Curve dimmer curve 000 - 005 No function 006 - 127 Dimmer response LED (hold 5s)
- Page 164 CAMEOLIGHT.COM Adam Hall GmbH Adam-Hall-Str. 1 | 61267 Neu-Anspach | Germany Phone: +49 6081 9419-0 | adamhall.com Adam Hall Ltd. | The Seedbed Business Centre | SS3 9QY Essex | United Kingdom REV: 01...
Need help?
Do you have a question about the P2 T and is the answer not in the manual?
Questions and answers