
Related Manuals for Cameo TS 200 FC


Summary of Contents for Cameo TS 200 FC
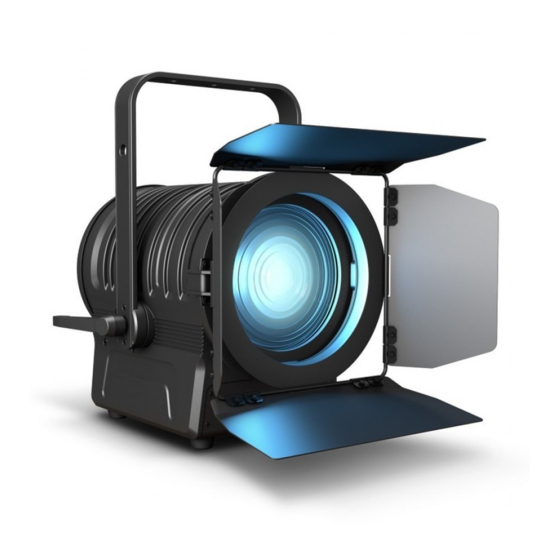
- Page 1 USER´S MANUAL BEDIENUNGSANLEITUNG MANUEL D´UTILISATION MANUAL DE USUARIO INSTRUKCJA OBSŁUGI MANUALE D´USO TS 200 FC THEATER SPOT WITH FRESNEL LENS AND 200W 6-IN-1 LED IN BLACK HOUSING CLTS200FC...
-
Page 2: Table Of Contents
CONTENTS / INHALTSVERZEICHNIS / CONTENU / CONTENIDO / TREŚĆ / CONTENUTO ENGLISH ESPAÑOL PREVENTIVE MEASURES MEDIDAS DE SEGURIDAD INTRODUCTION INTRODUCCIÓN CONNECTIONS, OPERATING AND DISPLAY ELEMENTS CONEXIONES, ELEMENTOS DE MANEJO Y ELEMENTOS OPERATION DE VISUALIZACIÓN SETUP AND INSTALLATION FUNCIONAMIENTO DMX TECHNOLOGY INSTALACIÓN Y MONTAJE TECHNICAL SPECIFICATIONS TECNOLOGÍA DMX... -
Page 3: Preventive Measures
We have designed this product to operate reliably over many years. Please read this User‘s Manual carefully, so that you can begin making optimum use of your Cameo Light product quickly. Learn more about Cameo Light on our website WWW.CAMEOLIGHT.COM. - Page 4 36. The appliance is not to be used by persons (including children) with reduced physical, sensory or mental capabilities, or lack of experience and knowledge. 37. Children must be instructed not to play with the device. 38. If the power cord of the device is damaged, do not use the device. The power cord must be replaced by an adequate cable or assembly from an authorized service center.
-
Page 5: Introduction
Blue Power Twist power socket. Operating voltage: 100–240 V AC / 50–60 Hz. POWER OUT White Power Twist power socket for the power supply of additional CAMEO spotlights. Ensure that the total power consumption of all devic- es connected to the device does not exceed the given ampere (A) value. -
Page 6: Operation
As soon as the spotlight is correctly connected to the power, various pieces of information will appear on the display during startup: “Update Wait...” (only for servicing purposes), “WELCOME TO Cameo”, the model number, and the software version. The spotlight is ready after this process, and the mode that was previously selected will activate. - Page 7 CONFIGURING DMX MODE You can access the options menu by pressing MENU. Using the UP and DOWN buttons, now select the “DMX Addr” menu item (bottom row) and confirm via ENTER. You can now set the DMX start address as desired using UP and DOWN (hold down to quickly change values, highest value depends on the activated DMX mode).
- Page 8 STAND-ALONE MODE COLOR MACROS (Macro) Stand-alone mode for selecting a color preset (Color), for setting the brightness (Dimmer), and the stroboscope (Speed). You can access the options menu by pressing MENU. Using the UP and DOWN buttons, now select the “Mode” menu item (bottom row) and confirm via ENTER. Afterwards, select the “Macro”...
- Page 9 STAND-ALONE MODE DIRECT (Direct) Stand-alone for setting the overall brightness (Dimmer), the stroboscope (Strobe), and the color mixing of R, G, B, A, L, and C (Red, Green, Blue, Amber, Lime, Cyan). You can access the options menu by pressing MENU. Using the UP and DOWN buttons, now select the “Mode” menu item (bottom row) and confirm via ENTER.
- Page 10 DimResp Dimmer response The LED spotlight responds abruptly to changes in the DMX value Halogen The spotlight behaves like a halogen spotlight with soft changes in brightness LED PWM frequency 650 Hz Sets the LED PWM frequency 1530 Hz 3600 Hz 12 kHz 25 kHz FacReset...
-
Page 11: Setup And Installation
SETUP AND INSTALLATION Thanks to its four rubber feet, the spotlight can be placed in a suitable location on a flat surface. Install on a crossbeam using the prein- stalled mounting bracket (A) and a suitable crossbeam clamp (available as an accessory). Make sure that the spotlight is firmly attached and secure it using a suitable safety cable on the provided safety eyebolt (B). -
Page 12: Technical Specifications
The Adam Hall 3 STAR, 4 STAR, and 5 STAR product ranges include an extensive selection of suitable cables. DMX CABLES When fabricating your own cables, always observe the illustrations on this page. Never connect the shielding of the cable to the ground contact of the plug, and always make certain that the shielding does not come into contact with the housing of the XLR plug. -
Page 13: Manufacturer's Declarations
Controller: DMX512, RDM-enabled Standalone functions: Direct, HSI, CCT, color macros, master/slave Control elements: Menu, enter, up, down, zoom Display elements: Illuminated 2-line LC display Operating voltage: 100 – 240 V AC / 50 – 60 Hz Power consumption: 200 W Illumination intensity (@ 1 m): 34000 lx @ 13 °... -
Page 14: Deutsch
Dieses Gerät wurde unter hohen Qualitätsanforderungen entwickelt und gefertigt, um viele Jahre einen reibungslosen Betrieb zu gewähr- leisten. Bitte lesen Sie diese Bedienungsanleitung sorgfältig, damit Sie Ihr neues Produkt von Cameo Light schnell und optimal einsetzen können. Weitere Informationen über Cameo Light erhalten Sie auf unserer Website WWW.CAMEOLIGHT.COM. - Page 15 (Staub, Nikotin, Nebel etc.) regelmäßig von qualifiziertem Fachpersonal gewartet bzw. gesäubert werden (keine Garantieleistung), um Überhitzung und Fehlfunktionen zu vermeiden. 34. Der Abstand zu brennbaren Materialien muss mindestens 0,5 m betragen. 35. Netzleitungen zur Spannungsversorgung mehrerer Geräte müssen mindestens 1,5 mm² Aderquerschnitt aufweisen. In der EU müssen die Leitungen H05VV-F, oder gleichartig, entsprechen.
-
Page 16: Einführung
Blaue Power Twist Netzbuchse. Betriebsspannung 100 - 240 V AC / 50 - 60 Hz. POWER OUT Weiße Power Twist Netzbuchse für die Netzversorgung weiterer CAMEO Scheinwerfer. Achten Sie darauf, dass die gesamte Stromaufnahme aller angeschlossenen Geräte den auf dem Gerät in Ampere (A) angegebenen Wert nicht überschreitet. -
Page 17: Bedienung
Sobald der Scheinwerfer korrekt am Stromnetz angeschlossen ist, werden während des Startvorgangs nacheinander verschiedene Informa- tionen im Display angezeigt: „Update Wait...“ (nur für Servicezwecke), „WELCOME TO Cameo“, die Modellnummer und die Software-Version. Nach diesem Vorgang ist der Scheinwerfer betriebsbereit und die Betriebsart, die zuvor angewählt war, wird aktiviert. - Page 18 DMX-STARTADRESSE EINSTELLEN Durch Drücken auf MENU gelangen Sie in das Auswahlmenü. Mit Hilfe der Taster UP und DOWN wählen Sie nun den Menüpunkt „DMX Addr“ aus (untere Zeile) und bestätigen mit ENTER. Nun können Sie die DMX-Startadresse wunschgemäß mit Hilfe von UP und DOWN einstellen (gedrückt halten für schnelle Wertänderung, höchster Wert abhängig vom aktivierten DMX-Modus).
- Page 19 Sechs verschiedene Auto-Programme stehen Ihnen zur Verfügung: Auto Program 7ColJum 7 Color Jumping 7ColFad 7 Color Fading 15ColJum 15 Color Jumping 15ColFad 15 Color Fading RandJump Random Jumping RandFade Random Fading STAND-ALONE BETRIEBSART FARBMAKROS (Macro) Stand-Alone Betriebsart zum Auswählen eines Farb-Presets (Color), zum Einstellen der Helligkeit (Dimmer) und des Stroboskops (Strobe). Durch Drücken auf MENU gelangen Sie in das Auswahlmenü.
- Page 20 STAND-ALONE BETRIEBSART CCT (Correlated Color Temperature) Stand-Alone Betriebsart zum Einstellen von Farbtemperatur (Temperature), Farbton (Tint), Helligkeit (Dimmer) und Stroboskop (Strobe). Durch Drücken auf MENU gelangen Sie in das Auswahlmenü. Mit Hilfe der Taster UP und DOWN wählen Sie nun den Menüpunkt „Mode“ aus (untere Zeile), bestätigen mit ENTER und wählen abermals mit Hilfe der Taster UP und DOWN den Menüpunkt „HSI“...
- Page 21 Lüftersteuerung anpassen Auto automatische Regelung der Lüfterleistung Silent extra leiser Lüfter (bei reduzierter Helligkeit, falls erforderlich) RedShift Imitiert die Farbdrift beim Dimmen eines Farbdrift aktiviert Halogenscheinwerfers. Beim Herunterdim- Farbdrift deaktiviert men des Scheinwerfers verändert sich die Farbtemperatur automatisch zunehmend zu Warmweiß...
-
Page 22: Aufstellung Und Montage
AUFSTELLUNG UND MONTAGE Dank seiner vier Gummifüße kann der Scheinwerfer an einer geeigneten Stelle auf eine ebene Fläche gestellt werden. Die Montage an einer Traverse erfolgt mit Hilfe des vormontierten Montagebügels (A) und einer geeigneten Traversenklemme (optional erhältlich). Sorgen Sie für feste Verbindungen und sichern Sie den Scheinwerfer mit einem geeigneten Sicherungsseil an der dafür vorgesehenen Sicherungsöse (B). -
Page 23: Technische Daten
Eine umfangreiche Auswahl geeigneter DMX-Kabel finden Sie in den Adam Hall Produktlinien 3 STAR, 4 STAR und 5 STAR. DMX-KABEL: Beachten Sie bei der Anfertigung eigener Kabel unbedingt die Abbildungen auf dieser Seite. Verbinden Sie auf keinen Fall die Abschirmung des Kabels mit dem Massekontakt des Steckers, und achten Sie darauf, dass die Abschirmung nicht mit dem XLR-Steckergehäuse in Kontakt kommt. -
Page 24: Herstellererklärungen
Steuerung: DMX512, RDM enabled Standalone Funktionen: Direkt, HSI, CCT, Farbmakros, Master/Slave Bedienelemente: Menu, Enter, Up, Down, Zoom Anzeigeelemente: beleuchtetes 2-Zeilen LC-Display Betriebsspannung: 100 - 240 V AC / 50 - 60 Hz Leistungsaufnahme: 200 W Beleuchtungsstärke (@ 1m): 34000 lx @ 13 ° Lichtstrom: 5300 lm Stromversorgungsanschluss:... -
Page 25: Francais
Cet appareil a été développé et fabriqué en appliquant des exigences de qualité très élevées: il garantit des années de fonctionnement sans problème.Veuillez lire attentivement ce Manuel Utilisateur : vous apprendrez rapidement à utiliser votre appareil Cameo Light de façon optimale. - Page 26 35. Si vous désirez alimenter plusieurs projecteurs simultanément, les conducteurs du câble secteur doivent posséder une section minimale de 1,5 mm². Dans l’Union Européenne, les câbles électriques doivent être de type H05VV-F ou équivalent. Adam Hall propose des câbles secteur adaptés. De tels câbles permettent d’alimenter plusieurs appareils par renvoi secteur de l’un à l’autre, Power Out vers Power In. As- surez-vous que la consommation totale de tous les appareils connectés ne dépasse pas la valeur correspondante en ampères (A) indiquée sur l’appareil.
-
Page 27: Introduction
Embase secteur bleue Power Twist. Tension de fonctionnement : 100 – 240 V CA / 50 – 60 Hz. POWER OUT (SORTIE D’ALIMENTATION) Embase secteur blanche Power Twist pour l’alimentation d’autres projecteurs CAMEO. Veiller à ce que la consommation totale de tous les appareils raccordés ne dépasse pas la valeur en ampères (A) indiquée sur l’appareil. - Page 28 Dès que le projecteur est correctement raccordé à l’alimentation secteur, diverses informations s’affichent successivement à l’écran durant la phase de démarrage : « Update Wait... » (uniquement à des fins de maintenance), « WELCOME TO Cameo », la référence du modèle et la version du logiciel. À l’issue de cette phase, le projecteur est opérationnel et le mode de fonctionnement précédemment sélectionné est activé.
- Page 29 ÉCRAN PRINCIPAL DU MODE STANDALONE La ligne inférieure de l’écran indique le mode Standalone actuellement activé (Slave, Auto, Macro, HSI, CCT, Direct). Si aucune saisie n’est effectuée dans les 30 secondes environ, l’affichage retourne à l’écran principal. RÉGLAGE DE L’ADRESSE DE DÉPART DMX Appuyez sur MENU pour accéder au menu de sélection.
- Page 30 Six programmes automatiques différents sont disponibles : Auto Program 7ColJum 7 Color Jumping 7ColFad 7 Color Fading 15ColJum 15 Color Jumping 15ColFad 15 Color Fading RandJump Random Jumping RandFade Random Fading MODE STANDALONE MACROS DE COULEUR (Macro) Mode Standalone permettant de sélectionner un preset de couleur (Color) et de régler la luminosité (Dimmer) et le stroboscope (Strobe). Appuyez sur MENU pour accéder au menu de sélection.
- Page 31 MODE STANDALONE CCT (Correlated Color Temperature) Mode Standalone permettant de régler la température de couleur (Temperature), la teinte (Tint), la luminosité (Dimmer) et le stroboscope (Strobe). Appuyez sur MENU pour accéder au menu de sélection. Sélectionnez à présent l’option de menu « Mode » (ligne inférieure) à l’aide des touches UP et DOWN, appuyez sur ENTER pour confirmer, puis sélectionnez l’option de menu « HSI »...
- Page 32 Settings (en gras = réglages d’usine) DispBack Éclairage de l’écran Backlight ON Allumé en permanence Backlight Off Désactivation au bout d’env. 30 secondes d’inactivité Hold DMX Fail État de fonctionnement en cas d’interruption Maintien de la dernière commande DMX du signal DMX Blackout Active la fonction Blackout Adapter le pilotage du ventilateur...
-
Page 33: Installation Et Montage
INFORMATIONS SUR L’APPAREIL Appuyez sur MENU pour accéder au menu de sélection. Utilisez ensuite les touches UP et DOWN pour sélectionner l’option de menu « Sys Info » et appuyez sur ENTER pour confirmer. Vous accédez alors au sous-menu affichant les informations sur l’appareil. Utilisez de nouveau les touches UP et DOWN pour sélectionner l’option de sous-menu souhaitée et appuyez sur ENTER pour afficher les informations (cf. -
Page 34: Technologie Dmx
TECHNIQUE DMX DMX-512 Le terme DMX (Digital Multiplex) désigne un protocole de transport universel permettant la communication entre des appareils et des contrôleurs à ce format. Un contrôleur DMX envoie des données DMX aux appareils DMX qui lui sont connectés. Les données DMX sont transportées sous forme d'un flux série, renvoyé... -
Page 35: Caractéristiques Techniques
CARACTÉRISTIQUES TECHNIQUES Référence du modèle : CLTS200FC Catégorie de produit : Projecteur à LED Type : Projecteur de théâtre à lentille Fresnel avec fonction zoom Spectre de couleurs : RBGALC IRC (mode CCT) > 90 Nombre de LED : Type de LED : 200 W Fréquence du signal PWM de la LED : 650 Hz, 1530 Hz, 3600 Hz, 12 kHz, 25 kHz (réglable) Angle de dispersion (largeur angulaire de 13°... -
Page 36: Déclarations Du Fabricant
DÉCLARATIONS DU FABRICANT GARANTIE FABRICANT & LIMITATION DE RESPONSABILITÉ Nos conditions actuelles de garantie et de limitation de responsabilité sont disponibles à l‘adresse suivante : https://cdn-shop.adamhall.com/ media/pdf/MANUFACTURERS-DECLARATIONS_CAMEO.pdf. Pour les réparations, veuillez contacter Adam Hall GmbH, Adam-Hall-Str. 1, 61267 Neu Anspach / E-Mail Info@adamhall.com / +49 (0)6081 / 9419-0. TRI ET MISE AUX DÉCHETS CORRECTE DE CE PRODUIT (Valid in the European Union and other European countries with waste separation) (Applicable dans l‘Union Européenne et les autres pays européens pratiquant le tri des déchets) La présence de ce symbole sur le... -
Page 37: Español
Este equipo está diseñado y fabricado con los estándares de calidad más exigentes, para garantizar un correcto funcionamiento durante muchos años.Lea atentamente este manual de usuario para poder aprovechar rápidamente toda la funcionalidad de su nuevo producto de Cameo Light. Más información sobre Cameo Light en la web WWW.CAMEOLIGHT.COM. MEDIDAS DE SEGURIDAD 1. - Page 38 34. Asimismo, deberá dejarse una distancia mínima de 0,5 metros con cualquier material inflamable. 35. Los cables eléctricos que sirven para alimentar a varios equipos deben tener una sección mínima de 1,5 mm². En la Unión Europa debe emplearse un cable de tipo H05VV-F, o similar. Adam Hall dispone de cables adecuados. Con estos cables podrá alimentar eléctricamente varios equipos conectando el enchufe de salida POWER OUT de un equipo al de entrada POWER IN de otro equipo.
-
Page 39: Introducción
POWER OUT Toma eléctrica Power Twist de color blanco para la alimentación eléctrica de otros focos CAMEO. Asegúrese de que el consumo de corriente total de todos los equipos conectados no supere el valor en amperios (A) indicado en el equipo. -
Page 40: Funcionamiento
«Update Wait...» («Actualización, espere por favor», solo con fines de servicio técnico), «WELCOME TO Cameo» (Bienvenidos a Cameo), así como el número de modelo y la versión del software. Tras este procedimiento, el foco estará listo para funcionar y se activará... - Page 41 CONFIGURACIÓN DE LA DIRECCIÓN INICIAL DMX Pulsando MENU accederá al menú de selección. Ahora, utilice los botones UP y DOWN para seleccionar la opción «DMX Addr» del menú (fila inferior) y confirme la selección con ENTER. Ahora puede ajustar la dirección inicial DMX con los botones UP y DOWN según lo desee (manténgalos pulsados para cambiar los valores con rapidez;...
- Page 42 Tiene a su disposición seis programas automáticos: Programa automático 7ColJum 7 Color Jumping 7ColFad 7 Color Fading 15ColJum 15 Color Jumping 15ColFad 15 Color Fading RandJump Random Jumping RandFade Random Fading MODO AUTÓNOMO DE MACROS DE COLOR (Macro) Modo autónomo para seleccionar un preset de color (Color) y para ajustar el brillo (Dimmer) y el estrobo (Strobe). Pulsando MENU accederá al menú...
- Page 43 MODO AUTÓNOMO DE CCT (Correlated Color Temperature) Modo autónomo para ajustar la temperatura de color (Temperature), el tono de color (Tint), el brillo (Dimmer) y el estrobo (Strobe). Pulsando MENU accederá al menú de selección. Mediante los botones UP y DOWN, seleccione ahora la opción «Mode» (fila inferior) del menú, confirme con ENTER y, de nuevo con los botones UP y DOWN, seleccione la opción «HSI»...
- Page 44 Adaptar el control de ventiladores Auto Regulación automática de la potencia de los ventiladores Silent Ventilador especialmente silencioso (con brillo reducido, en caso necesario) Redshift Emula la transición de color que ocurre al Transición de color activada atenuar un foco halógeno. Al atenuar el foco, Transición de color desactivada la temperatura de color cambia de forma automática y gradual a blanco cálido y ámbar...
-
Page 45: Instalación Y Montaje
INSTALACIÓN Y MONTAJE Gracias a las cuatro patas de goma, el foco puede instalarse en un lugar adecuado sobre una superficie nivelada. El montaje en un travesa- ño se realiza con el soporte de montaje premontado (A) y una abrazadera adecuada para travesaños (disponible opcionalmente). Asegúrese de acoplar bien el equipo y de fijar el foco con un cable de seguridad adecuado en la anilla de seguridad prevista a tal efecto (B). -
Page 46: Datos Técnicos
CABLE DMX: Si fabrica sus propios cables, tenga en cuenta las figuras de esta página. No conecte la malla del cable al contacto de masa del conector ni permita que la malla entre en contacto con la carcasa del conector XLR. Si se produce un contacto de la malla con la masa, puede producir un funcionamiento inestable del equipo. -
Page 47: Declaración Del Fabricante
Control: DMX 512, habilitado para RDM Funciones autónomas: Direct, HSI, CCT, macros de color, maestro/esclavo Elementos de manejo: Menu, Enter, Up, Down, Zoom Elementos de visualización: Pantalla LCD iluminada de dos líneas Tensión operativa: 100 – 240 V CA / 50 – 60 Hz Consumo de potencia: 200 W Intensidad de iluminación (a 1 m):... -
Page 48: Polski
To urządzenie zostało zaprojektowane i wyprodukowane przy zastosowaniu najwyższych kryteriów jakościowych w celu zapewnienia wieloletniej bezawaryjnej eksploatacji. Proszę starannie przeczytać niniejszą instrukcję obsługi, aby móc jak najszybciej zacząć użytkować ten produkt marki Cameo Light. Więcej informacji na temat Cameo Light znajdą Państwo na naszej stronie internetowej pod adresem WWW.CAMEOLIGHT.COM. - Page 49 32. Instalacja urządzenia powinna odbywać się, gdy urządzenie nie jest podłączone do źródła zasilania (należy wyjąć wtyczkę z gniazda). 33. Kurz i inne osady wewnątrz urządzenia mogą je uszkodzić. W zależności od warunków otoczenia (kurz, nikotyna, opary itp.) urządzenie powinno być konserwowane lub czyszczone przez wykwalifikowanego specjalistę (usługa nieobjęta gwarancją), aby zapobiec przegrzaniu i nieprawidłowemu działaniu.
-
Page 50: Wprowadzenie
Niebieskie gniazdo sieciowe Power Twist. Napięcie robocze 100 – 240 V AC / 50 – 60 Hz. POWER OUT Białe gniazdo sieciowe Power Twist do zasilania sieciowego kolejnych reflektorów CAMEO. Całkowity pobór prądu wszystkich podłączonych urządzeń nie może przekroczyć wartości w amperach (A) podanej na urządzeniu. -
Page 51: Obsługa
WSKAZÓWKA: Po prawidłowym podłączeniu reflektora do sieci zasilającej, podczas procesu uruchamiania wyświetlacz pokazuje kolejno różne komunikaty: „Update Wait...” (tylko do celów serwisowych), „WELCOME TO Cameo”, numer modelu i wersja oprogramowania. Następnie reflektor jest gotowy do pracy w ostatnio wybranym trybie. WIDOK GŁÓWNY: TRYB PRACY DMX W górnym wierszu wyświetlacza pojawi się... - Page 52 USTAWIANIE ADRESU STARTOWEGO DMX Aby przejść do menu wyboru, nacisnąć MENU. Przyciskami UP i DOWN wybrać punkt menu „DMX Mode” (dolny wiersz) i potwierdzić przyciskiem ENTER. Teraz przyciskami UP i DOWN można ustawić żądany adres startowy DMX (przytrzymać, aby przyspieszyć zmianę wartości, najwyższa wartość...
- Page 53 Do dyspozycji jest sześć różnych automatycznych programów: Auto Program 7ColJum 7 Color Jumping 7ColFad 7 Color Fading 15ColJum 15 Color Jumping 15ColFad 15 Color Fading RandJump Random Jumping RandFade Random Fading TRYB PRACY STANDALONE: MAKRA KOLORÓW (Macro) Tryb pracy standalone do wyboru ustawień wstępnych kolorów (Color), regulacji jasności (Dimmer) i stroboskopu (Strobe). Aby przejść do menu wyboru, nacisnąć...
- Page 54 TRYB PRACY STANDALONE: CCT (Correlated Colour Temperature) Tryb pracy standalone do ustawiania temperatury barwowej (Temperature), tonu barwnego (Tint), jasności (Dimmer) i stroboskopu (Strobe). Aby przejść do menu wyboru, nacisnąć MENU. Przyciskami UP i DOWN wybrać punkt menu „Mode” (dolny wiersz), potwierdzić przyciskiem ENTER i ponownie przyciskami UP i DOWN wybrać...
- Page 55 dopasowanie sterowania wentylatorem Auto automatyczna regulacja mocy wentylatora Silent bardzo cichy wentylator (przy zredukowanej jasności, jeśli jest taka konieczność) RedShift imituje przesunięcie kolorów przy ściemnianiu aktywuje przesunięcie kolorów reflektora halogenowego. Przy ściemnianiu przesunięcie kolorów wyłączone reflektora temperatura barwowa automatycz- nie zmienia się stopniowo na coraz cieplejszą biel i bursztyn (i odwrotnie).
-
Page 56: Ustawianie I Montaż
USTAWIANIE I MONTAŻ Do ustawienia reflektora w odpowiednim miejscu na płaskiej powierzchni służą cztery gumowe nóżki. Do montażu urządzenia na trawersie służy wstępnie przymocowany pałąk montażowy (A) i odpowiedni zacisk do trawersy (dostępny opcjonalnie). Należy zadbać o solidne połą- czenia i zabezpieczyć reflektor przeznaczoną do tego liną, przeciągając ją przez ucho zabezpieczające (B). Ustawić kierunek promieniowania na płaszczyźnie pionowej za pomocą... -
Page 57: Dane Techniczne
KABEL DMX: W przypadku stosowania własnych kabli należy bezwzględnie przestrzegać informacji podanych na ilustracjach na tej stronie. W żadnym wypadku nie wolno łączyć osłony kabla z końcówką uziemiającą wtyczki. Należy także pamiętać, aby osłona nie miała kontaktu z obudową wtyczki XLR. Jeśli osłona ma kontakt z uziemieniem, może dojść do awarii systemu. Przyporządkowanie wtyczek: Kabel DMX z 3-stykowymi wtyczkami XLR: Kabel DMX z 5-stykowymi wtyczkami XLR (pin 4 i 5 są... -
Page 58: Deklaracje Producenta
Sterowanie: DMX512, możliwość pracy w standardzie RDM Funkcje standalone: Direct, HSI, CCT, makra kolorów, master/slave Elementy obsługowe: Menu, Enter, Up, Down, Zoom Wskaźniki: Podświetlany dwuwierszowy wyświetlacz LCD Napięcie robocze: 100 – 240 V AC / 50 – 60 Hz Pobór mocy: 200 W Natężenie światła (w odległości 1 m): 34 000 lx przy 13°... -
Page 59: Italiano
Questo dispositivo è stato sviluppato e prodotto in conformità con elevati standard qualitativi che ne garantiscono il regolare funzionamento per molti anni. Leggete attentamente questo manuale d‘uso per utilizzare al meglio il vostro nuovo prodotto Cameo Light. Per maggiori informazioni su Cameo Light consultare la nostra pagina Web WWW.CAMEOLIGHT.COM. - Page 60 34. La distanza dai materiali infiammabili deve essere di almeno 0,5 m 35. I cavi di rete utilizzati per l’alimentazione elettrica di più dispositivi devono avere una sezione di almeno 1,5 mm². I cavi impiegati nell’Unione Europea devono essere di tipo H05VV-F o simile. Adam Hall offre cavi idonei. Tali cavi consentono di collegare più dispositivi dalla presa di uscita POWER OUT di un apparecchio alla presa POWER IN di un altro dispositivo.
-
Page 61: Introduzione
Presa di rete Power Twist blu. Tensione di esercizio 100 - 240 V AC / 50 - 60 Hz. POWER OUT Presa di rete Power Twist bianca per l'alimentazione elettrica di altri proiettori CAMEO. Assicurarsi che il totale della potenza assorbita di tutti i dispositivi collegati all'apparecchio non superi il valore indicato in ampere (A). - Page 62 Non appena il faro viene correttamente collegato alla rete elettrica, durante la procedura di accesso sul display si susseguono i seguenti messaggi: “Update Wait...” (solo per manutenzione), “WELCOME TO CAMEO”, l’indicazione del modello e la versione software. Al termine della procedura il proiettore è pronto per l’uso e la modalità di funzionamento selezionata in precedenza si attiva.
- Page 63 IMPOSTAZIONE DELL’INDIRIZZO DI AVVIO DMX Premendo MENU si accede al menu di selezione. Con i tasti UP e DOWN selezionare la voce di menu “DMX Addr” (riga inferiore) e confer- mare con ENTER. Impostare l’indirizzo di avvio DMX desiderato con i tasti UP e DOWN (tenerli premuti per modificare i valori rapidamente, il valore massimo dipende dalla modalità...
- Page 64 Sono disponibili sei programmi automatici: Auto Program 7ColJum 7 Color Jumping 7ColFad 7 Color Fading 15ColJum 15 Color Jumping 15ColFad 15 Color Fading RandJump Random Jumping RandFade Random Fading MODALITÀ DI FUNZIONAMENTO STAND-ALONE MACRO COLORE (Macro) Con la modalità di funzionamento stand-alone è possibile selezionare un preset colori (Color), nonché impostare la luminosità (Dimmer) e lo stroboscopio (Strobe).
- Page 65 MODALITÀ DI FUNZIONAMENTO STAND-ALONE CCT (Correlated Color Temperature) Con la modalità di funzionamento stand-alone è possibile impostare la temperatura del colore (Temperature), la tonalità (Tint), la luminosità (Dimmer) e lo stroboscopio (Strobe). Premendo MENU si accede al menu di selezione. Selezionare la voce di menu “Mode” (riga inferiore) con i tasti UP e DOWN, confermare con ENTER e selezionare la voce di menu “HSI”...
- Page 66 Settings (grassetto = impostazione di fabbrica) DispBack illuminazione del display Backlight ON Sempre acceso Backlight Off Disattivazione dopo circa 30 secondi di inattività DMX Fail Stato operativo con interruzione del segnale Hold Mantiene l'ultimo comando DMX Blackout Blackout attivato Adeguare controllo ventola Auto Regolazione automatica della potenza della ventola...
-
Page 67: Installazione E Montaggio
INFORMAZIONI DEL DISPOSITIVO Premendo MENU si accede al menu di selezione. Con i tasti UP e DOWN selezionare la voce di menu "Sys Info" e confermare con ENTER. In seguito si accede al sottomenu per la visualizzazione delle seguenti informazioni del sistema. Utilizzare di nuovo i tasti UP e DOWN per selezionare la voce di sottomenu desiderata e richiamare le informazioni con ENTER (v. -
Page 68: Tecnologia Dmx
TECNOLOGIA DMX DMX512 DMX (Digital Multiplex) è la sigla di un protocollo di trasmissione universale per la comunicazione tra dispositivi e controller. Un controller DMX invia dati DMX ai dispositivi DMX collegati. I dati DMX vengono sempre trasmessi come flusso di dati seriale, che viene inoltrato da un dispositivo collegato al successivo attraverso le connessioni (connettori XLR) DMX IN e DMX OUT presenti per ogni dispositivo DMX compatibile, per un massimo di 32 dispositivi. -
Page 69: Dmx Control
DATI TECNICI Codice modello: CLTS200FC Tipologia di prodotto: Faro LED Tipo: Spot teatrale Fresnel con funzione zoom Spettro cromatico: RBGALC CRI (modalità CCT) > 90 Numero di LED: Tipo di LED: 200 W Frequenza LED PWM: 650 Hz, 1530 Hz, 3600 Hz, 12 kHz, 12 kHz, 25 kHz (regolabile) Angolo di proiezione (angolo di diffusione 13°... -
Page 70: Dichiarazioni Del Produttore
DICHIARAZIONI DEL PRODUTTORE MANUFACTURER’S WARRANTY & LIMITATION OF LIABILITY Le nostre attuali condizioni di garanzia e la limitazione di responsabilità sono consultabili alla pagina: https://cdn-shop.adamhall.com/media/ pdf/MANUFACTURERS-DECLARATIONS_CAMEO.pdf. In caso di assistenza, rivolgersi a Adam Hall GmbH, Adam-Hall-Str. 1, 61267 Neu Anspach / E-mail Info@adamhall.com / +49 (0)6081 / 9419-0. CORRETTO SMALTIMENTO DEL PRODOTTO (In vigore nell‘Unione Europea e in altri Paesi europei in cui si attui la raccolta differenziata) Questo simbolo apposto sul prodotto o sui relativi documenti indica che, per evitare danni all‘ambiente e alle persone causati da uno smaltimento incontrollato dei rifiuti,... - Page 71 DMX CONTROL / DMX STEUERUNG / PILOTAGE DMX / CONTROL DMX / STEROWANIE DMX / CONTROLLO DMX 1 CH Mode (select color from stand alone mode Macro, HSI, CCT or Direct) Function Values Sub-Group Dimmer 0% to 100% Dimmer 3 CH 1 Mode (select color from stand alone mode Macro, HSI, CCT or Direct) Function Values Sub-Group...
- Page 72 0° - 360° Hue fine 0° - 360° Saturation 0% - 100% Saturation Saturation fine 0% - 100% no function overrides Hue + Warm - cold / 2800K - 8000K Saturation no function Tint Tint (affects only CCT) 001 magenta <-- 128 neutral --> 255 green Color off Amber Yellow warm...
- Page 73 No function Dimmer Response LED (hold 1,5s) Dimmer Response Halogen (hold 1,5s) DTW (Redshift) on (hold 1,5s) DTW (Redshift) off (hold 1,5s) No function Silent fan (hold 3s) Auto fan (hold 3s) No function PWM 650 Hz (hold 3s) PWM 1530 Hz (hold 3s) Device settings (please read PWM 3600 Hz (hold 3s)
- Page 74 Colour off Amber Yellow warm Yellow Green Turquoise Cyan Color Macro Blue (override RGB) Lavender Color Macro & Colour Jumping Mauve & Colour Fading Magenta Pink Warm White White Cold White Colour Jumping Stop Colour Jumping Speed slow -> fast / Colour 1 -> 12 Colour Fading Speed slow ->...
- Page 75 0,1s - 10s (0,1s Steps) Transition Time Color Mode 11s - 119s (1s Steps) between Color Crossfade Modes 2m - 4m50s (10s Steps) 5m - 15m (1m Steps) No function Dimmer Response LED (hold 1,5s) Dimmer Response Halogen (hold 1,5s) DTW (Redshift) on (hold 1,5s) DTW (Redshift) off (hold 1,5s) No function...
- Page 76 CAMEOLIGHT.COM Adam Hall GmbH | Adam-Hall-Str. 1 | 61267 Neu-Anspach | Germany Phone: +49 6081 9419-0 | adamhall.com REV: 02...
Need help?
Do you have a question about the TS 200 FC and is the answer not in the manual?
Questions and answers