Advertisement
Quick Links
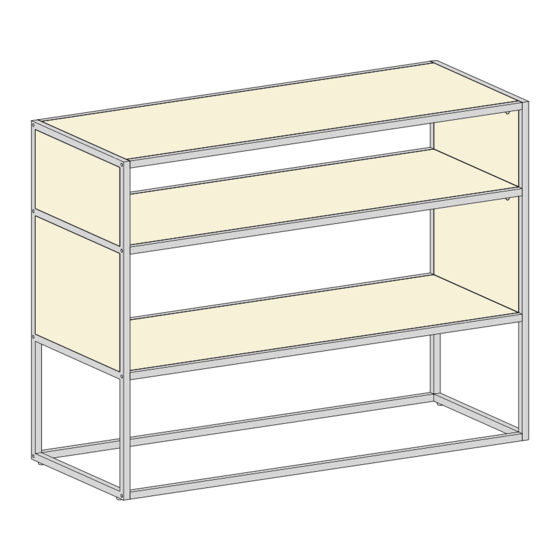
Item # : AF40JER
Assembly Instructions
Please visit our website for the most current instructions, assembly tips, report damage,
or request parts. www.walkeredison.com
Revised 02/2018
P.1
Copyright
2018, by Walker Edison Furniture Co., LLC. All rights reserved.
©
Advertisement

Related Manuals for Walker Edison AF40JER


Summary of Contents for Walker Edison AF40JER
- Page 1 Item # : AF40JER Assembly Instructions Please visit our website for the most current instructions, assembly tips, report damage, or request parts. www.walkeredison.com Revised 02/2018 Copyright 2018, by Walker Edison Furniture Co., LLC. All rights reserved. ©...
-
Page 2: General Assembly Guidelines
The two main types of hardware used to assemble this product are : screws and bolts. A Phillips head screwdriver is required for the assembly of this product . Power tools should not be used to assemble this product . Copyright 2018, by Walker Edison Furniture Co., LLC. All rights reserved. ©... -
Page 3: Parts List
Parts List Copyright 2018, by Walker Edison Furniture Co., LLC. All rights reserved. ©... - Page 5 Attach part (5) to part (1) using bolt (B) with hex key (E). Repeat this step three times. Step 2 Attach part (5) to part (1) using bolt (B) with hex key (E). Repeat this step three times. Copyright 2018, by Walker Edison Furniture Co., LLC. All rights reserved. ©...
- Page 6 Attach adjuster (D) to part (4). Repeat this step twice. Step 4 Attach part (4) to part (2) using bolt (B) with hex key (E). Repeat this step twice. Copyright 2018, by Walker Edison Furniture Co., LLC. All rights reserved. ©...
- Page 7 Attach part (4) to part (2) using screw (C) with screwdriver. Repeat this step twice. Step 6 Attach part (4) to part (3) using bolt (B) with hex key (E). Repeat this step twice. Copyright 2018, by Walker Edison Furniture Co., LLC. All rights reserved. ©...
- Page 8 Attach part (4) to part (3) using screw (C) with screwdriver. Repeat this step twice. Attach part (4) to part (5,6) using bolt (A) with hex key (E).
- Page 9 Attach part (4) to part (5,6) using bolt (A) with hex key (E).
Need help?
Do you have a question about the AF40JER and is the answer not in the manual?
Questions and answers