Advertisement
Quick Links
2020 + Jeep
Gladiator
For proper installation and best possible fit, please read all instructions BEFORE you begin.
For technical assistance or to obtain missing parts, please call Customer Relations at 1-800-328-2409.
Important Safety Information
• Periodically check all components for tightness.
• Be sure to wear safety goggles while installing.
• When using power tools, read and understand all operating
instructions.
Contents
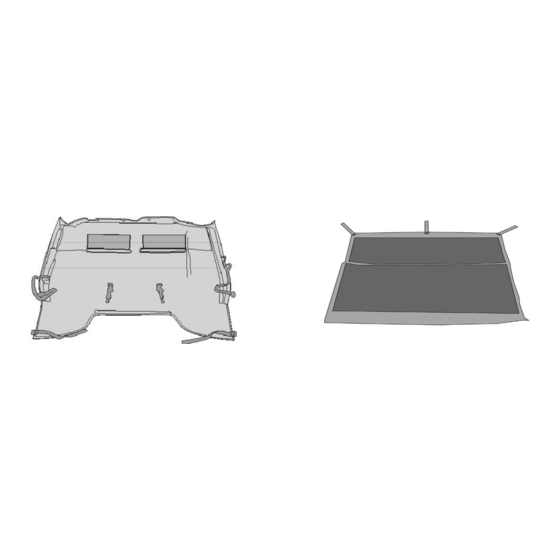
NOTE: Actual product may vary from illustration.
Trailview Main Deck x1
LH Door Surround
Mounting Plate x1
Anti-Puddle Pole
x2
LH Upright x1
Trailview Soft Top
RH Door Surround
Mounting Plate x1
Flip Top Header
Assembly x1
RH Upright x1
Page 1 of 9
®
™
Rear Window x1
Right Side
Panel x1
LH Upright Lower
Plastic x1
LH Upper Corner
Plastic x1
I-TRV-03
Left Side Panel
x1
RH Upright
Lower Plastic
x1
RH Upper Corner
Plastic x1
Advertisement

Related Manuals for Rampage Products Trailview Soft Top

Summary of Contents for Rampage Products Trailview Soft Top
- Page 1 I-TRV-03 ® Gladiator ™ Trailview Soft Top For proper installation and best possible fit, please read all instructions BEFORE you begin. For technical assistance or to obtain missing parts, please call Customer Relations at 1-800-328-2409. Important Safety Information • Periodically check all components for tightness.
-
Page 2: Tools Required
Contents cont. NOTE: Actual product may vary from illustration. Door Surround Door Surround Door Surround LH Front Door RH Front Door Front Bracket (Middle) Front Bracket x2 Rear Bracket Bar x1 Bar x1 Front Latch x2 LH Front RH Front RH Middle LH Middle Plastic Plastic Adaptor... -
Page 3: Installation Steps
Installation Steps NOTE: Actual product may vary from illustration. Important: For a smooth fit and ease of installation, this top should be installed at temperatures above 72 degrees. Below this temperature, the fabric may contract an inch or more making it difficult to install. We highly recommend taking your new Top out of the package and letting it sit inside a warm place or in direct sun light for 1-2 hours before you install the top. - Page 4 Installation Steps NOTE: Actual product may vary from illustration. Install LH Middle Plastic Adaptor onto front door bar & Slide Front Rear Bracket onto LH Rear Door Bar secure all pieces with 1 self-tap screws. as shown below. Install LH Rear Door Bar onto the adaptor & Slide Rear Bracket onto LH Rear Door Bar secure all pieces with 6 self-tap screws.
- Page 5 Installation Steps NOTE: Actual product may vary from illustration. Install LH Upright Lower Plastic onto LH Upright and Repeat this section (steps 1-11) to assemble passenger’s secure with 1 self-tap screw. side door surround. Position completed door surround onto the vehicle and fit Fit LH Door Surround Mounting Plate on top of door the bracket over the roll bar.
- Page 6 Installation Steps NOTE: Actual product may vary from illustration. Using a Torx T40 bit to remove the latch bracket screws Tighten all door surround knobs into door surround from the windshield on the bottom of the driver’s and assembly at this time. Repeat steps 13 through 16 on passenger’s side.
- Page 7 Installation Steps NOTE: Actual product may vary from illustration. Roll up the Soft Top Deck to make installation to the Flip TIP: It may be helpful to have a second person for this Top Plates more manageable. step. Place the top face down and re-fold, beginning with the rear portion.
- Page 8 Installation Steps NOTE: Actual product may vary from illustration. Close both latches and make sure both are snug, With both latches open as shown below, turn each hook until it grabs onto the soft top hoop with slight tension. but not overly tight. Locate the rear bow and insert into sleeve at rear of Wrap the 2 straps attached to the main section of fabric main skin, secure with hook and loop tab.
- Page 9 Installation Steps NOTE: Actual product may vary from illustration. Locate the sewn-in plastic strip along the front edge of Tuck the plastic strip along the bottom edge of the Left the Left Side Window. Side Window under the Jeep belt rail, by rolling it up underneath the belt rail, beginning at the door, and Tuck the plastic strip into the vertical channel along the working your way backward.
Need help?
Do you have a question about the Trailview Soft Top and is the answer not in the manual?
Questions and answers