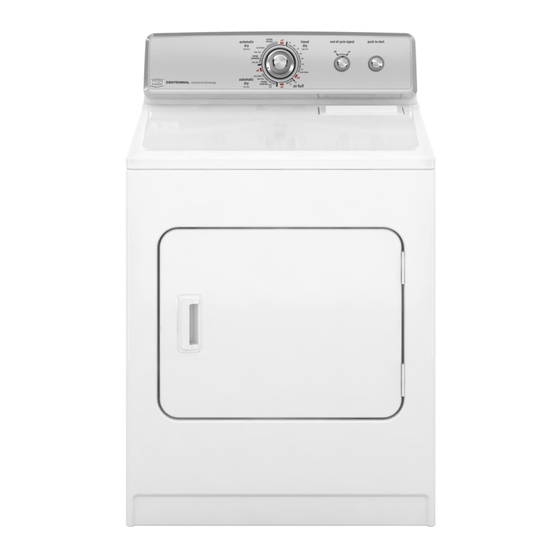
Maytag Centennial MEDC500 Install Manual
Electric dryer 29" wide models usa only
Hide thumbs
Also See for Centennial MEDC500:
- User instructions (24 pages) ,
- User instructions (20 pages)
Table of Contents
Advertisement
Quick Links
ElECTRIC DRYER InSTAllATIon InSTRuCTIonS
Para obtener acceso al manual de uso y cuidado en español, o para obtener información adicional acerca de su producto, visite:
Tenga listo su número de modelo completo. Puede encontrar el número de modelo y de serie dentro de la cavidad superior de la puerta.
W10300459A
W10296137A-SP
29" WIDE moDElS - u.S.A. onlY
Table of Contents
DRYER SAFETY ......................................................................... 2
InSTAllATIon REquIREmEnTS ............................................. 3
Tools and Parts ...................................................................... 3
location Requirements ......................................................... 3
Electrical Requirements ........................................................ 4
Install leveling legs .............................................................. 5
Electrical Connection ............................................................ 6
Venting Requirements ......................................................... 11
Plan Vent System ................................................................. 12
Install Vent System .............................................................. 13
level Dryer ........................................................................... 14
Connect Vent ........................................................................ 14
Complete Installation .......................................................... 14
Reverse Door Swing (optional) .......................................... 14
www.whirlpool.com
1
Advertisement
Table of Contents

Summary of Contents for Maytag Centennial MEDC500
-
Page 1: Table Of Contents
ElECTRIC DRYER InSTAllATIon InSTRuCTIonS 29" WIDE moDElS - u.S.A. onlY Para obtener acceso al manual de uso y cuidado en español, o para obtener información adicional acerca de su producto, visite: Tenga listo su número de modelo completo. Puede encontrar el número de modelo y de serie dentro de la cavidad superior de la puerta. -
Page 2: Dryer Safety
All safety messages will tell you what the potential hazard is, tell you how to reduce the chance of injury, and tell you what can happen if the instructions are not followed. DRYER SAFETY You can be killed or seriously injured if you don't immediately follow instructions. -
Page 3: Installation Requirements
Drying times can be extended. The dryer must not be installed or stored in an area where it will be exposed to water and/or weather. -
Page 4: Electrical Requirements
Additional clearances might be required for wall, door, and ■ floor moldings. Additional spacing of 1" (25 mm) on all sides of the dryer is ■ recommended to reduce noise transfer. For closet installation, with a door, minimum ventilation ■... -
Page 5: Install Leveling Legs
A UL listed 30-amp power supply cord, rated 120/240 volt ■ minimum. The cord should be type SRD or SRDT and be at least 4 ft. (1.22 m) long. The wires that connect to the dryer must end in ring terminals or spade terminals with upturned ends. -
Page 6: Electrical Connection
If your home has: And you will be connecting to: 4-wire receptacle (NEMA A UL listed, Type 14-30R) 120/240-volt minimum, 30-amp, dryer power supply cord* 3-wire receptacle (NEMA A UL listed, type 10-30R) 120/240-volt minimum, 30-amp, dryer power supply cord*... - Page 7 (C). Put direct wire cable through the strain relief. The strain ■ relief should have a tight fit with the dryer cabinet and be in a horizontal position. Tighten strain relief screw against the direct wire cable.
- Page 8 5. Connect the other power supply cord wires to outer terminal block screws. 6. Tighten screws. Tighten strain relief screws. 7. Insert tab of terminal block cover into slot of dryer rear panel. Secure cover with hold-down screw. 8. You have completed your electrical connection. Now go to “Venting Requirements.”...
- Page 9 3-wire connections. Direct wire cable must have 5 ft. (1.52 m) of extra length so dryer can be moved if needed. Strip 5" (127 mm) of outer covering from end of cable, leaving bare ground wire at 5"...
- Page 10 Direct wire cable must have 5 ft. (1.52 m) of extra length so dryer can be moved if needed. Strip 3½" (89 mm) of outer covering from end of cable. Strip insulation back 1"...
-
Page 11: Venting Requirements
4. Connect the other wires to outer terminal block screws. Tighten screws. 5. Tighten strain relief screws. 6. Insert tab of terminal block cover into slot of dryer rear panel. Secure cover with hold-down screw. 7. Connect a separate copper wire (G) from the external ground conductor screw (A) to an adequate ground, as determined by a qualified electrician. -
Page 12: Plan Vent System
Housecleaning problems and health problems. Plan Vent System Choose your exhaust installation type Recommended exhaust installations Typical installations vent the dryer from the rear of the dryer. Other installations are possible. A. Dryer E. Clamps B. Elbow F. Rigid metal or flexible metal vent C. -
Page 13: Install Vent System
Check the levelness of the dryer. Check levelness first side to side, then front to back. If the dryer is not level, prop up the dryer using a wood block. Use a wrench to adjust the legs up or down and check again for levelness. -
Page 14: Reverse Door Swing (Optional)
11. When the dryer has been running for 5 minutes, open the dryer door and feel for heat. If you feel heat, cancel cycle and close the door. If you do not feel heat, turn off dryer, and check the... - Page 15 Reattach outer door panel to inner door panel so handle is on the side where hinges were just removed. 7. Attach door hinges to dryer door so that the larger hole is at the bottom of the hinge. 8. Remove door strike (E) from cabinet. Use a small, flat-blade screwdriver to gently remove 4 hinge hole plugs (F) on left side of cabinet.
- Page 16 W10300459A W10296137A-SP © 2009 12/09 All rights reserved Printed in U.S.A.


Need help?
Do you have a question about the Centennial MEDC500 and is the answer not in the manual?
Questions and answers