
Related Manuals for Monitech LL Series


Summary of Contents for Monitech LL Series
- Page 1 USER MANUAL LL SERIES 12.1-INCH LCD One touch and you are ready to go M20B09-ML121LL00...
- Page 2 IMPORTANT WARRANTY Before using any MONITECH product please carefully review this Manual as well as any additional documentation provided with your shipment. Attempting any of the following will void product warranty: • unauthorized repairs or parts replacement • inappropriate use or placement: exposing product to liquids, harmful gases, electrical shock, physical shock, temperatures beyond the range of -20°C to...
-
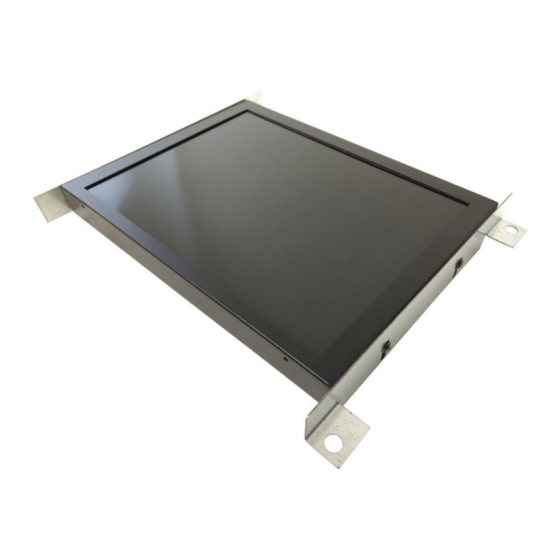
Page 3: Mounting Brackets
1.Mounting Brackets This line of Monitech Product has Mounting brackets that you will attach onto the side of our monitor by unscrewing the screws on the side and placing the brackets on by screwing in the screws that you just removed. These brackets help you mount the monitor to the old CRT frame of your application. - Page 4 2. Just press AUTO. Once you have mounted your new Monitech LCD into your control panel with the video cable attached, the indicator light on the back of the monitor may turn green. This means the video power is on. If the green light is off, press the I/O button to power it up.
- Page 5 center the image and automatically adjust the image size, color, brightness and contrast. That’s all there is to it! Your LCD is ready to go. 3. Adjust brightness, contrast & color temp. Use this menu to adjust the brightness, contrast, and color.
- Page 6 M20B09-ML121LL00...
-
Page 7: Adjust Picture
Now press the up or down buttons to select what feature you would like to change. Press MENU to enter. Then use the up or down to adjust the value of your selection. To exit, press AUTO until it goes away. 4. - Page 8 M20B09-ML121LL00...
-
Page 9: Video Connector
5.Video connector This picture shows the value for six pins on the video connector at the back of the monitor. (The other pins have no application.) M20B09-ML121LL00... -
Page 10: Troubleshooting
Troubleshooting My screen is black. Ensure the DC power cable is fully inserted into the monitor receptacle. Use only 12V 4.16a power supply (+ on center pin). Ensure the power supply is securely connected to a 120-240V AC power source and that the green light indicates it is ON. - Page 11 For Technical Support, Call 1-877-493-6105 M20B09-ML121LL00...
- Page 12 20 Howard Place Kitchener, Ontario N2K 2Z4 Canada 519-725-2222 www.monitech.com sales@monitech.com M20B09-ML121LL00...
Need help?
Do you have a question about the LL Series and is the answer not in the manual?
Questions and answers