Table of Contents
Advertisement
Quick Links
Name
Product
Version
Drawn up by:
Instruction Handbook
Translated from original
Name
CoWelder™
Model/type
79115030 UR10E/Sigma Select 400C Synergic
79115031 UR10E/Sigma Select 400C W Synergic
79115032 UR10E/Sigma Select 400C Pulse
79115033 UR10E/Sigma Select 400C W Pulse
79115034 UR10E/Sigma Select IAC 400 Synergic
79115035 UR10E/Sigma Select IAC 400 W Synergic
Function
Collaborative welding robot
Keep this operating manual at the
CoWelder™
UR10E Sigma Select
A – 9.7.2021
CTM
operator's workstation!
Side 1
Advertisement
Table of Contents

Related Manuals for Migatronic Automation CoWelder Sigma Select 400C Synergic


Summary of Contents for Migatronic Automation CoWelder Sigma Select 400C Synergic
- Page 1 Name CoWelder™ Product UR10E Sigma Select Version A – 9.7.2021 Drawn up by: Instruction Handbook Translated from original Name CoWelder™ Model/type 79115030 UR10E/Sigma Select 400C Synergic 79115031 UR10E/Sigma Select 400C W Synergic 79115032 UR10E/Sigma Select 400C Pulse 79115033 UR10E/Sigma Select 400C W Pulse 79115034 UR10E/Sigma Select IAC 400 Synergic 79115035 UR10E/Sigma Select IAC 400 W Synergic Function...
-
Page 2: Table Of Contents
MigaWeld program features ..................32 3.3.3 MigaWeld installation page ..................41 Miga Weave (Option) ......................42 Miga Offset (Option) ......................43 Miga Tack (Option) ......................44 Miga Smart Tool ........................ 45 Delete/Update Migatronic software on the CoWelder ............48 Side 2... - Page 3 Drawn up by: Update Robot software ..................... 48 3.9.1 Update Robot software ....................50 3.9.2 Delete Migatronic Software on the CoWelder ............51 3.9.3 New MigaWeld software .................... 53 3.9.4 Reinstalling MigaWeld software on a CoWelder ............54 Description of Functions ......................57 Machine Structure ......................
-
Page 4: Machine Data
Operators are required to read any user guides and data sheets for additional or integral equipment supplied with the machine, such as robot and welding machine. General Information 1.2.1 Manufacturer Company details: Migatronic Automation A/S Knøsgårdvej 112 DK-9440 Aabybro 1.2.2 Machine Machine Name: CoWelder™... -
Page 5: Technical Data
Name CoWelder™ Product UR10E Sigma Select Version A – 9.7.2021 Drawn up by: 1.2.4 Technical Data Mechanical Data UR10E Robot incl. mount and suspension Measurement 750 x 600 x 2500 mm Welding machine Measurement 700 x 260 x 735 mm Cooling Unit Mål 207 x 260 x 680 mm... -
Page 6: Safety Instructions
Name CoWelder™ Product UR10E Sigma Select Version A – 9.7.2021 Drawn up by: Safety Instructions Illustration of Safety Notes A pictogram and a describing signal word illustrate the safety notes. Pictogram Signal Word Description Immediate hazard that may cause serious physical HAZARD injury or death. -
Page 7: Intended Use
Drawn up by: Intended Use The machine, consisting of a Universal Robots robot arm, a Migatronic power source and a welding torch, are designed for welding simple workpieces, irrespective of quantity and frequency. The CoWelder, a collaborative robot interacting with one operator, is designed for manual feeding only. -
Page 8: Reasonably Foreseeable Misuse
If you intend to mount the robot on a smaller welding table, the virtual fencings must be adjusted to the actual size of the welding table. Please contact your Migatronic contact person for more information. Keep warning signs and signals visible. Replace at once any damaged or removed signs or signals. -
Page 9: Restructure Or Modification Of The Machine
Name CoWelder™ Product UR10E Sigma Select Version A – 9.7.2021 Drawn up by: Restructure or Modification of the Machine Arbitrary modifications or alterations voids the manufacturer's warranty and responsibility for damages resulting thereof. The manufacturer of the change takes over all responsibilities and obligations regarding compliance with Council Directive 2006/42 / EC - Machinery Directive. -
Page 10: Employer's Responsibilities
Name CoWelder™ Product UR10E Sigma Select Version A – 9.7.2021 Drawn up by: Employer’s Responsibilities The employer must make sure that the operators of the machine: • have knowledge of basic regulations for safety at work and accident prevention • have received training in operating the machine •... -
Page 11: Operators' Areas Of Operation
Name CoWelder™ Product UR10E Sigma Select Version A – 9.7.2021 Drawn up by: Warning: UV radiation UV radiation may cause eye injuries or eye irritation. Use of welding helmet/protective goggles is mandatory. Surroundings (other operators, visitors etc.) must be shielded, using e.g. welding curtain according to EN 1598 (owner/operator’s responsibility). -
Page 12: Personal Safety
Name CoWelder™ Product UR10E Sigma Select Version A – 9.7.2021 Drawn up by: 2.15 Personal Safety 2.15.1 Protective Equipment Operators must wear the following protective equipment: SAFETY FOOTWEAR Wear safety footwear PROTECTIVE GLOVES Avoid burns. Use protective gloves for handling welding torch and welded workpieces! SAFETY GLASSES Use of safety glasses required... -
Page 13: Safety And Protective Equipment
Name CoWelder™ Product UR10E Sigma Select Version A – 9.7.2021 Drawn up by: 2.17 Safety and Protective Equipment Defective safety and protective equipment may cause hazardous situations, in which case • the power supply to the machine must be switched off immediately •... -
Page 14: Transport, Handling And Storage
Name CoWelder™ Product UR10E Sigma Select Version A – 9.7.2021 Drawn up by: 2.20 Transport, Handling and Storage Make the machine ready for transport and secure all parts to ensure safe transport. Take precautionary measures. During lifting operations, attachment points must ensure balancing of the machine/machine parts. -
Page 15: Means Of Transport
Name CoWelder™ Product UR10E Sigma Select Version A – 9.7.2021 Drawn up by: 2.20.1 Means of Transport Travelling crane crab, lifting hooks and forklift truck are suitable for transporting the machine. 2.20.2 Prior to Transport Preparation: • Identify the attachment points for lifting •... -
Page 16: Operating Instructions
Do not mount the UR10E robot on a welding table smaller than 3000x1700mm. If you intend to mount the robot on a smaller welding table, the virtual fencings must be adjusted to the actual size of the welding table. Please contact your Migatronic contact person for more information. Side 16... -
Page 17: Tcp Position
Name CoWelder™ Product UR10E Sigma Select Version A – 9.7.2021 Drawn up by: 3.1.1 TCP Position Press Installation Press TCP under general Select TCP_1 and press Set as default Press Wizard Press Set point 1 Use the Freedrive button, arrows or Teach button point the tip of the wire precisely on a selected fixed point. - Page 18 Name CoWelder™ Product UR10E Sigma Select Version A – 9.7.2021 Drawn up by: Press Set point 2 Use the Freedrive button, arrows or Teach button to point the tip of the wire precisely on a selected fixed point. See picture When the robot is pointed at the fixed point, then press OK Press Set point 3 Side 18...
- Page 19 Name CoWelder™ Product UR10E Sigma Select Version A – 9.7.2021 Drawn up by: Use the Freedrive button, arrows or Teach button to point the tip of the wire precisely on a selected fixed point. See picture When the robot is pointed at the fixed point, then press OK Press Set point 4 Use the Freedrive button, arrows or Teach button to point the tip of the wire precisely on a selected fixed point.
- Page 20 Name CoWelder™ Product UR10E Sigma Select Version A – 9.7.2021 Drawn up by: Press Set Information: If you can´t find the text, use the scroll bar to scroll down to the bottom Press Save, followed by Save All and then press Save Side 20...
-
Page 21: Tcp Orientation
Name CoWelder™ Product UR10E Sigma Select Version A – 9.7.2021 Drawn up by: 3.1.2 TCP Orientation Press Wizard under Orientation Select Base in the menu Press Set point Robot connector Move the robot approximately to the same position as shown on the picture The following is important: The torch mount should be parallel with the X-axis, this is illustrated on the... - Page 22 Name CoWelder™ Product UR10E Sigma Select Version A – 9.7.2021 Drawn up by: Check the alignment of the torch vertically. See pictures below ( use a spirit level) Move the robot’s axis until you have the same results as in the pictures. When the robot is placed correctly then press OK Side 22...
-
Page 23: Test Tcp Settings
Name CoWelder™ Product UR10E Sigma Select Version A – 9.7.2021 Drawn up by: Press Set Information: If you can´t find the text, use the scroll bar to scroll down to the bottom. Press Save and then press Save all 3.1.3 Test TCP settings Restart the robot Press Move Select Tool under Feature... - Page 24 Name CoWelder™ Product UR10E Sigma Select Version A – 9.7.2021 Drawn up by: Place the robot and teach pendant as shown on the picture above If the orientation in chapter 3.1.2 Is done correctly, and TOOL is selected ...
-
Page 25: Programming The Robot
Programming the robot IMPORTANT We strongly recommend you to back up all programmes of robot and welding machine. Migatronic Automation cannot be held responsible for any loss of data that may occur whatever the cause! Press Program Select CoWelder SIGMA TemplateUK…... - Page 26 Name CoWelder™ Product UR10E Sigma Select Version A – 9.7.2021 Drawn up by: The template contains all necessary elements to finalise a welding program. Fill in the yellow Selected waypoints. The green Selected waypoints remain green. Side 26...
- Page 27 Name CoWelder™ Product UR10E Sigma Select Version A – 9.7.2021 Drawn up by: Mark the first unfinished waypoint. Mark Command Press Set Waypoint. Side 27...
- Page 28 Name CoWelder™ Product UR10E Sigma Select Version A – 9.7.2021 Drawn up by: Manually set the robot. Use the arrows on the screen to fine-adjust position and angle. Press OK after manual adjustment. The waypoint will change from yellow to grey. Repeat the procedure until all yellow waypoints have turned green.
- Page 29 Name CoWelder™ Product UR10E Sigma Select Version A – 9.7.2021 Drawn up by: Press the play button. Press [Play from beginning] Press and hold [Move robot to] to move the robot into its start position. Note! Keep an eye on the robot; there is a risk of collision.
- Page 30 Name CoWelder™ Product UR10E Sigma Select Version A – 9.7.2021 Drawn up by: … the robot welds. Don’t forget your protective equipment! WELDING HELMET The arc emits radiation, which is harmful to the human eye. Even short-term radiation may cause permanent injury. Use safety glasses in the welding helmet to protect the eyes against radiation from infrared, visible and ultra-violet light.
-
Page 31: Migaweld (Basis Software)
Name CoWelder™ Product UR10E Sigma Select Version A – 9.7.2021 Drawn up by: MigaWeld (Basis Software) Press the program tab, press URCaps. When you press MigaWeld an entire application tree is generated on the screen. 3.3.1 MigaWeld Program tree When the URCap is inserted into the program tree, several program nodes are included. These are reviewed in the following section. -
Page 32: Migaweld Program Features
Name CoWelder™ Product UR10E Sigma Select Version A – 9.7.2021 Drawn up by: 3.3.2 MigaWeld program features Press ”Command” Function Description Enable counter The counter records each program run Wait for start-button Awaiting start from physical start button Start from Allows you to start the program from a desired welding workpiece Ad new Weld item By pressing, a new weld item is added at the bottom of the program tree... - Page 33 100%. If the speedslider is not set to 100%, the desired speeds for the robot movements cannot be observed. Migatronic's welding machine is fully integrated in MigaWeld and can be operated from the robot's teach pendant. Regardless of which MIG your CoWelder is equipped with, you will be able to control all parameters of your welding machine directly from the teach pendant.
- Page 34 Name CoWelder™ Product UR10E Sigma Select Version A – 9.7.2021 Drawn up by: Select WeldParameters Function Description Job/sequence: Job / Sequence call, the parameters are stored in the welding machine Job number Set job index number in the welding machine Sequence number Set sequence number in the welding machine Process/Sequence:...
- Page 35 Name CoWelder™ Product UR10E Sigma Select Version A – 9.7.2021 Drawn up by: Select WeldItem Function Description Weld seam Inserts a welding seam into the program, welding seams consists of air points before and after welding, switching on the arc, switching off the arc and welding movements Tack [Option) Inserts a tack welding function in the program...
- Page 36 Name CoWelder™ Product UR10E Sigma Select Version A – 9.7.2021 Drawn up by: Select the first AirPoint in a Weld Item Function Description Move Type Movement type, choose between joints or linear movement Joint speed Joint speed Joint acc. Joint acc. Blend Transition radius Enable jump point...
- Page 37 Name CoWelder™ Product UR10E Sigma Select Version A – 9.7.2021 Drawn up by: Select another AirPoint Function Description Move Type Movement type, choose between joints or linear movement Joint speed Joint speed Joint acc. Joint acceleration Blend Transition radius Move to Airpoint Move the robot to this point Add new Airpoint Add new Airpoint...
- Page 38 Name CoWelder™ Product UR10E Sigma Select Version A – 9.7.2021 Drawn up by: Select Arc On Function Description Arc wait time Waiting time between arc detected until the robot begins its movement Select Paths Function Description Add new linear path Add new linear welding movement Add new circular path Add new circular welding movement...
- Page 39 Name CoWelder™ Product UR10E Sigma Select Version A – 9.7.2021 Drawn up by: Select Linear Function Description Set End Point Set the end point of the linear movement Move to End Point Move the robot to the end point Add new linear path Add new linear welding path Add new circular path Add new circular welding path...
- Page 40 Name CoWelder™ Product UR10E Sigma Select Version A – 9.7.2021 Drawn up by: Select Linear or Circular; select Parameters Function Description Use shared parameters If the box is checked, the default parameters for the weld item is used. If the field is not checked, you can manually set the desired parameters for each path.
-
Page 41: Migaweld Installation Page
Try to take the key out and insert it again and press reload license. If the icon does not change, contact your nearest Migatronic dealer. This icon means that the USB key is inserted in the robot controller. The module is installed and is active on your robot. -
Page 42: Miga Weave (Option)
Name CoWelder™ Product UR10E Sigma Select Version A – 9.7.2021 Drawn up by: Miga Weave (Option) Select linear Function Description Use shared parameters If the box is checked, you use the default parameters for the weld. If the field is not checked, you can manually set the desired parameters for each path. -
Page 43: Miga Offset (Option)
Name CoWelder™ Product UR10E Sigma Select Version A – 9.7.2021 Drawn up by: Miga Offset (Option) Once all the points in a welditem are set, it is possible to offset the entire welditem. At the same time, it is possible to copy the entire item and subsequently offset the copied item. Highlight the welditem To copy the welditem, use the program tree toolbar, press copy. -
Page 44: Miga Tack (Option)
Name CoWelder™ Product UR10E Sigma Select Version A – 9.7.2021 Drawn up by: Miga Tack (Option) Function Description Travel speed Air speed Air speed in the required direction [° / s] Retraction The retraction of TCP from the workpiece [mm] Weld length Welding length [mm] Number of welds... -
Page 45: Miga Smart Tool
Name CoWelder™ Product UR10E Sigma Select Version A – 9.7.2021 Drawn up by: Miga Smart Tool Home position and WeldParameters Function Description Home position Programmed as usual, see the description under MigaWeld for more information WeldParameters Programmed as usual, see the description under MigaWeld for more information WeldItem menu Function... - Page 46 Name CoWelder™ Product UR10E Sigma Select Version A – 9.7.2021 Drawn up by: Path menu Function Description Paths In this screen only linear and circular welding points can be programmed Weave pattern None or weave Side 46...
- Page 47 Name CoWelder™ Product UR10E Sigma Select Version A – 9.7.2021 Drawn up by: Freedrive Status LED-light Air point Circular Linear welding point welding point Run wire back Run wire forward Function Description Freedrive The robot can be pulled / moved by pushing it with your hands Air point (function 1) Long press: Generates a new welding seam and inserts the first air point of this weld seam.
-
Page 48: Delete/Update Migatronic Software On The Cowelder
UR10E Sigma Select Version A – 9.7.2021 Drawn up by: Delete/Update Migatronic software on the CoWelder Important URCaps can only be used from version 5.4 (e-series) Update Robot software Turn on the robot; wait until the boot sequence has finished Press “Hamburger menu”... - Page 49 Name CoWelder™ Product UR10E Sigma Select Version A – 9.7.2021 Drawn up by: Press “version” To download the update, use the following link: https://www.universal-robots.com/download/ Select e-series controller generation Select software, software update Select the software version Follow the update guideline on the webpage and on the robot screen Software updates before V 5.5.1 must be done in steps for minor releases i.e.
-
Page 50: Update Robot Software
Name CoWelder™ Product UR10E Sigma Select Version A – 9.7.2021 Drawn up by: 3.9.1 Update Robot software Download or find the 3 magic files on the supplied usb: urmagic_backup_programs, urmagic_configuration_files and urmagic_log_files, copy them to the same USB that contains the robot software. -
Page 51: Delete Migatronic Software On The Cowelder
UR10E Sigma Select Version A – 9.7.2021 Drawn up by: 3.9.2 Delete Migatronic Software on the CoWelder Turn on the robot; wait until the boot sequence has finished Open the controller cabinet. Remove the green USB licence key from the cabinet. - Page 52 Name CoWelder™ Product UR10E Sigma Select Version A – 9.7.2021 Drawn up by: Press “Hamburger menu” Select System, press URCaps Mark each line in this box and press the “MINUS” button. Continue until the box is empty. Press Restart Side 52...
-
Page 53: New Migaweld Software
3.9.3 New MigaWeld software Contact Migatronic service, they can send an e-mail with new software When you have received a mail from Migatronic with a zip file attached Unzip this file Insert your green license USB drive in the pc ... -
Page 54: Reinstalling Migaweld Software On A Cowelder
Name CoWelder™ Product UR10E Sigma Select Version A – 9.7.2021 Drawn up by: 3.9.4 Reinstalling MigaWeld software on a CoWelder Wait until the robot boot sequence has finished Insert the green license key in a free USB slot in the controller cabinet. Press “Hamburger menu”... - Page 55 Name CoWelder™ Product UR10E Sigma Select Version A – 9.7.2021 Drawn up by: Select System, press URCaps Press the “PLUS” button. Select usbdisk directory Highlight the first file Press Open Repeat the steps on this page until all files are installed. Later versions of URCaps may have fewer files to install.
- Page 56 Name CoWelder™ Product UR10E Sigma Select Version A – 9.7.2021 Drawn up by: When all files are installed correctly, the contents of the window look like this Select System, press URCaps Press Restart Wait until the robot boot sequence has finished, go to the settings page again The software is now updated.
-
Page 57: Description Of Functions
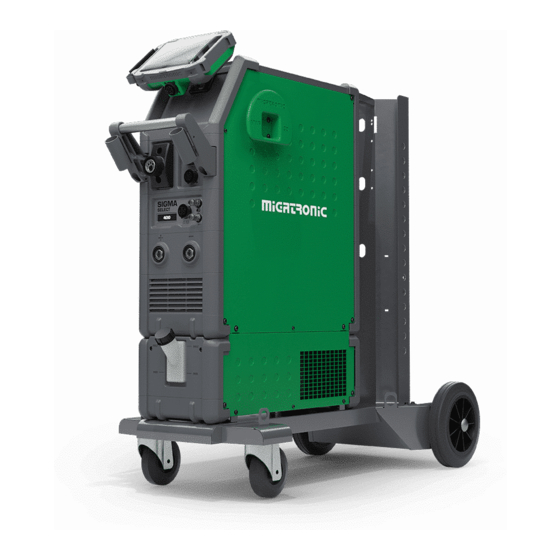
Name CoWelder™ Product UR10E Sigma Select Version A – 9.7.2021 Drawn up by: Description of Functions This chapter provides operators with a complete overview of the structure and functions of the machine. Machine Structure UR10E robot Sigma Select 400 Welding machine Teach pendant Robot controller Gallows with balance suspension... -
Page 58: Process Description
Name CoWelder™ Product UR10E Sigma Select Version A – 9.7.2021 Drawn up by: Process Description The operator places a workpiece on the welding table, programs the robot and welds the workpiece. After the welding process, the operator removes the workpiece. The operator can repeat the process, save welding programs and recall them as required. - Page 59 Name CoWelder™ Product UR10E Sigma Select Version A – 9.7.2021 Drawn up by: Place the torch suspension in the desired position and fasten the bolts. Connect the robot to the power supply. Side 59...
- Page 60 Name CoWelder™ Product UR10E Sigma Select Version A – 9.7.2021 Drawn up by: Switch on the robot on the teach pendant. Connect the torch to the welding machine. Connect the welding machine to the power supply. Connect the gas hose to a gas supply according to the welding machine manual.
- Page 61 Name CoWelder™ Product UR10E Sigma Select Version A – 9.7.2021 Drawn up by: Switch on the welding machine, lead the wire through the liner and select welding program. Once the robot is ready, press [Load Program]. Press [ON] - wait Then press [START].
- Page 62 Name CoWelder™ Product UR10E Sigma Select Version A – 9.7.2021 Drawn up by: All Check arrows are showed as green. Now the robot can move Press the freedrive button to move the robot manually. Remove the protective bubble wrap. Lift and push the robot to start position. Side 62...
- Page 63 Name CoWelder™ Product UR10E Sigma Select Version A – 9.7.2021 Drawn up by: Fasten the balance fixture to the welding hose. The balancer must be adjusted only just enough to lift the hose and not pull on the torch. Place the start box safely outside the working range of the robot.
-
Page 64: Disassembly Instructions
Name CoWelder™ Product UR10E Sigma Select Version A – 9.7.2021 Drawn up by: Place the earth cable close to the workpiece. Mount the welding wire and select welding program according to the welding machine manual. Note: lack of or insufficient earth connection may impair the welding process and increase the risk of electric shock. -
Page 65: Cleaning And Maintenance
Name CoWelder™ Product UR10E Sigma Select Version A – 9.7.2021 Drawn up by: Cleaning and Maintenance Important Disconnect gas and power supplies prior to cleaning and service. Cleaning Note: Never use compressed air to clean the Robot Arm as it can damage components 7.1.1 Teach Pendant It may become necessary to clean the Teach Pendant screen. -
Page 66: Machine Parts
Name CoWelder™ Product UR10E Sigma Select Version A – 9.7.2021 Drawn up by: 7.1.3 Machine Parts Use a soft cloth moistened with water, isopropyl alcohol, 10% ethanol alcohol or 10% naphtha to clean machine parts. 7.1.4 Painted Surfaces Use a cloth moistened with spirit (alcohol) to clean painted surfaces. 7.1.5 Aluminium Surfaces Use a cloth moistened with spirit (alcohol) to clean aluminium surfaces. - Page 67 Name CoWelder™ Product UR10E Sigma Select Version A – 9.7.2021 Drawn up by: 7.2.3.1 Robot arm inspection plan Check Monthly Bi-annually Blue lids* Blue lid screws Flat rings Robot cable Robot cable connection Robot arm mounting bolts* Tool mounting bolts* Screws/bolt on joints* V=Visual inspection F=Functional inspection *=Must be checked after heavy collision 1.
- Page 68 Name CoWelder™ Product UR10E Sigma Select Version A – 9.7.2021 Drawn up by: 7.2.3.2 Control Box and Teach Pendant inspection plan Check Monthly Bi-annually Annually Emergency stop on Teach Pendant Backdrive mode Freedrive mode Safety inputs and outputs (if connected) Teach Pendant cable and connector Clean air filters on Control Box Terminals in control Box...
-
Page 69: Function Tests
Name CoWelder™ Product UR10E Sigma Select Version A – 9.7.2021 Drawn up by: Function Tests 7.3.1 Test Safety Function Interval: Monthly 1. Press the emergency stop 2. Observe the robot stops and shuts off power to the joints 3. Power on robot again Important Check emergency stops separately. -
Page 70: Test Backdrive Mode
Name CoWelder™ Product UR10E Sigma Select Version A – 9.7.2021 Drawn up by: 7.3.3 Test Backdrive Mode Interval: Yearly If the robot is close to colliding with something, you can use the Backdrive function to move the Robot Arm to a safe position before initializing. 1. -
Page 71: Verify Safety Settings
Name CoWelder™ Product UR10E Sigma Select Version A – 9.7.2021 Drawn up by: 7.3.4 Verify Safety Settings Interval: Yearly and in case of system breakdown 1. Open program (see illustration) 2. Verify that safety settings do not exceed permissible maximum values: Force: Max110N and 140N/cm²... -
Page 72: Spare Parts
Name CoWelder™ Product UR10E Sigma Select Version A – 9.7.2021 Drawn up by: Spare parts 79115030 UR10E/Sigma Select 400C Synergic 79115032 UR10E/Sigma Select 400C Pulse Spare parts CoWelder 79115034 UR10E/Sigma Select IAC 400 Synergic The example shown is with UR10 - CB series Pos Description Article No Pos. - Page 73 Name CoWelder™ Product UR10E Sigma Select Version A – 9.7.2021 Drawn up by: 79115031 UR10E/Sigma Select 400C W Synergic 79115033 UR10E/Sigma Select 400C W Pulse 79115035 UR10E/Sigma Select IAC 400 W Synergic Pos Description Article No Description Article No...
-
Page 74: Spare Parts Ur10E Robot
Name CoWelder™ Product UR10E Sigma Select Version A – 9.7.2021 Drawn up by: Spare parts UR10E Robot Description Article No Sealing ring set UR10E for Lids and joints 36073982 Lid set complete UR10+10E 36072246 Contact for Freedrive Description Article No Freedrive Button 36072483 Side 74... -
Page 75: Fan Housing And Filter For Control Box
Name CoWelder™ Product UR10E Sigma Select Version A – 9.7.2021 Drawn up by: Fan housing and filter for Control Box Description Article No Housing for control box 36073840 5 pcs. Filter sheets 36073838 Side 75... -
Page 76: Miga Smart Tool
Name CoWelder™ Product UR10E Sigma Select Version A – 9.7.2021 Drawn up by: Miga Smart Tool 9 Nm Connector mounting The LED-lights are mounted in resp. Keyboard and Flange Pos Description Article No Flange for UR robot 36073975 PCB Holder 36073976 Tool PRG PCB 36073969... -
Page 77: Abirob A Eco 360 Kit With Hose
UR10E Sigma Select Version A – 9.7.2021 Drawn up by: Abirob A ECO 360 kit with hose See also Migatronic's spare parts list 50119427 on USB key - AB ROB A ECO 360 Description Article No Torch neck A360 22° 36072500... -
Page 78: Start Box
Name CoWelder™ Product UR10E Sigma Select Version A – 9.7.2021 Drawn up by: Start box Pos. Description Article No Emergency stop 36072178 Green flush illuminated pushbutton 36072179 Black selector switch head 36072909 ... -
Page 79: Version Control
Amendment Version 9.7.2021 Released Migatronic ServiceTeam Our ServiceTeam, a central part of our service concept, provides the best possible service throughout the service life of the equipment. Our ServiceTeam takes your orders for spare parts and services such as maintenance agreements including periodic check-ups, operators and technicians training courses as well as consulting services in the field of automated welding. - Page 80 MIGATRONIC EQUIPEMENT DE SOUDURE S.A.R.L. Parc Avenir II, 313 Rue Marcel Merieux Ericssonstraat 2, NL-5121 ML Rijen, Holland FR-69530 Brignais, France Tel. +31 (0)161-747840, www.migatronic.com Tel. +33 04 78 50 65 11, www.migatronic.com Sweden Italy MIGATRONIC SVETSMASKINER AB MIGATRONIC s.r.l. IMPIANTI PER SALDATURA Nääs Fabriker, Box 5015,S-448 50 Tollered, Sweden...
Need help?
Do you have a question about the Automation CoWelder Sigma Select 400C Synergic and is the answer not in the manual?
Questions and answers