Table of Contents
Advertisement
Quick Links
Series 49
Installation, Operating and Service Instructions for
Models:
• 49-200S
• 49-075S
• 49-250S
• 49-100S
• 49-125S
• 49-299S
• 49-150S
• 49-350S
• 49-399S
• 49-175S
NOTICE: Knock-Down Boilers: These instructions
address installation and controls. Assembly is
addressed in separate instructions shipped with
knock-down boilers.
Manual Contents
Read Before Proceeding . . . . . . . . . . . . . . . . . . . . . .3
2. User/Homeowner Read Before Proceeding . . . . . . .4
3. Specifications . . . . . . . . . . . . . . . . . . . . . . . . . . . . . . .5
4. Locating Boiler . . . . . . . . . . . . . . . . . . . . . . . . . . . . .10
5. Preparing Boiler . . . . . . . . . . . . . . . . . . . . . . . . . . . . .14
6. Venting . . . . . . . . . . . . . . . . . . . . . . . . . . . . . . . . . . . .15
7.
Steam Piping . . . . . . . . . . . . . . . . . . . . . . . . . . . . . . .18
8. Gas Piping . . . . . . . . . . . . . . . . . . . . . . . . . . . . . . . . .22
9. Electrical . . . . . . . . . . . . . . . . . . . . . . . . . . . . . . . . . .24
10. System Start-Up and Checkout . . . . . . . . . . . . . . . .31
11. Operation . . . . . . . . . . . . . . . . . . . . . . . . . . . . . . . . . .39
12. Before Leaving Jobsite . . . . . . . . . . . . . . . . . . . . . . .40
13. Service and Maintenance . . . . . . . . . . . . . . . . . . . . .41
14. How it Works . . . . . . . . . . . . . . . . . . . . . . . . . . . . . . .45
15. Troubleshooting . . . . . . . . . . . . . . . . . . . . . . . . . . . .49
16. Service Parts . . . . . . . . . . . . . . . . . . . . . . . . . . . . . . .56
Appendix A Steam Boiler Skimming . . . . . . . . . . . . . . .71
Appendix B Indirect Water Heater . . . . . . . . . . . . . . . . .72
LWCO/Pump Control . . . . . . . . . . . . . . . . . . . . . . . . . . . .74
This boiler must only be installed, serviced, and repaired by a qualified installer, service agency or gas
supplier. Improper installation, adjustment, alteration, service or maintenance can cause severe personal
injury, death, or substantial property damage. For assistance or additional information, consult a qualified
installer, service agency or gas supplier. Read these instruction carefully before installing.
111368-04 - 1/22
• 49-450S
• 49-500S
• 49-550S
Page
!
WARNING
• Steam Boiler
• Cast Iron
• Chimney Vent
• Gas Fired
!
WARNING
Attention Installer - Affix these instructions
adjacent to boiler. Provide model number and
serial number when seeking information and
support.
Attention Building Owner - Retain these
instructions for future reference. Contact a
qualified installer, service agency or gas
supplier for all issues and support.
Advertisement
Table of Contents

Related Manuals for Velocity 49 Series


Summary of Contents for Velocity 49 Series
-
Page 1: Table Of Contents
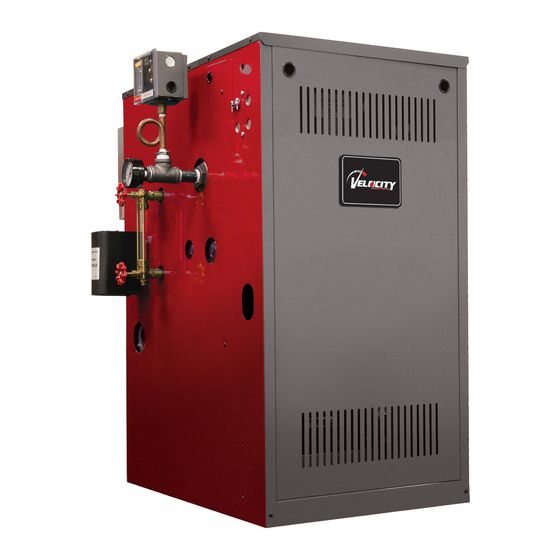
Series 49 Installation, Operating and Service Instructions for • Steam Boiler • Cast Iron • Chimney Vent • Gas Fired Models: • 49-200S • 49-450S • 49-075S • 49-250S • 49-500S • 49-100S • 49-125S • 49-299S • 49-550S • 49-150S •... - Page 2 Installation, Operating & Service Instructions Series 49 Important Definitions of Warnings Massachusetts Board of Plumbers and Gas Fitters has listed Series 49 Boilers. See Massachusetts Board of Plumbers and Gas Fitters website for latest Approval Code or ask your local Sales Representative. Commonwealth of Massachusetts requires this product to be installed by a licensed Plumber or Gas fitter.
-
Page 3: Qualified Installer, Service Agency Or Gas Supplier
Series 49 Installation, Operating & Service Instructions Qualified Installer, Service Agency or Gas Supplier Read Before Proceeding NOTICE: WARNING 1. Size boiler properly. A grossly oversized boiler Asphyxiation Hazard, Burn Hazard, Electrical will cycle excessively leading to premature Shock Hazard. failure of boiler and its components. -
Page 4: User/Homeowner Read Before Proceeding
Installation, Operating & Service Instructions Series 49 User/Homeowner Read Before Proceeding WARNING CAUTION Asphyxiation Hazard. Fire Hazard. Burn Hazard. • A qualified installer, service agency or gas Keep children and pets away from hot surfaces supplier should annually inspect boiler. of the boiler including boiler piping, vent piping, and vent terminals. -
Page 5: Specifications
Series 49 Installation, Operating & Service Instructions Specifications Series 49 Gas Table 3-1: Ratings Net AHRI Rating Thermal Model Input Output AFUE Combustion Efficiency Steam Steam Number (MBH) (MBH) Efficiency (%) (square foot) (MBH) 49-075S 82.0 49-100S 82.0 49-125S 82.0 49-150S 82.0 49-175S... - Page 6 Installation, Operating & Service Instructions Series 49 Specifications (continued) Table 3-2: Dimensions and Connections Min. Relief Boiler Relief No. of Depth Supply Return Vent Valve Model Height Width (in) Valve Sections (in) (NPT) (NPT) (in) (NPT) Capacity Number (in) (NPT) (lb./hr.) 49-075S 16 5/16...
- Page 7 Series 49 Installation, Operating & Service Instructions Specifications (continued) 111368-04 - 1/22...
- Page 8 Installation, Operating & Service Instructions Series 49 Specifications (continued) 111368-04 - 1/22...
- Page 9 Series 49 Installation, Operating & Service Instructions Specifications (continued) Intermediate Section Left End Section Right End Section Figure 3-6: Section Tappings Table 3-7: Trim and Control Installation in Section Tappings Size Tapping Function (NPT) Supply Return and/or Bushed Down for Drain Skimming Connection or Bushed Down for Auto Reset Pressure Limit, Manual Reset Pressure Limit and Pressure Gauge...
-
Page 10: Locating Boiler
Installation, Operating & Service Instructions Series 49 Locating Boiler Code Requirements Table 4-1: Corrosive Combustion Contaminants and Sources 1. Installations must conform to requirements of authority having jurisdiction or, in the Contaminants to avoid: absence of such requirements, to National Fuel Spray cans containing chloro/fluorocarbons (CFC’s) Gas Code, ANSI Z223.1/NFPA 54. - Page 11 Series 49 Installation, Operating & Service Instructions Locating Boiler (continued) Boiler 49-075S 16 5/16 NOTICE: 24 in. service clearance recommended 49-100S 16 5/16 from left side, right side, and front. 49-125S 21 3/8 49-150S 21 3/8 49-175S 26 7/16 49-200S 26 7/16 49-250S 31 1/2...
- Page 12 Installation, Operating & Service Instructions Series 49 Locating Boiler (continued) NOTICE: 24 in. service clearance recommended Boiler from left side, right side, and front. 49-350S 41 5/8 49-399S 46 11/16 49-450S 51 3/4 49-500S 56 13/16 49-550S 61 7/8 6.00 4 "...
- Page 13 Series 49 Installation, Operating & Service Instructions Locating Boiler (continued) Before Removing Existing Boiler 4. Place in operation appliance being inspected. Follow Operating Instructions. See Figure 10- Take pictures and measure and/or mark existing 1. Adjust thermo stat so appliance will operate steam and condensate return piping to ensure continuously.
-
Page 14: Preparing Boiler
Installation, Operating & Service Instructions Series 49 Preparing Boiler Unpack Boiler Remove boiler and miscellaneous parts carton from outer shipping carton. DANGER Use precautions and appropriate rigging apparatus when moving heavy objects. Boiler Pressure Gauge Misc. Parts Carton Relief Valve Vent Damper Drain Valve Rear Air Dam... -
Page 15: Venting
Series 49 Installation, Operating & Service Instructions Venting General Do not use single wall pipe for vent connections in attics. WARNING Asphyxiation Hazard. C. Size chimney and vent connector in accordance with National Fuel Gas Code, • Failure to vent this boiler in accordance with ANSI Z223.1/NFPA 54. - Page 16 Installation, Operating & Service Instructions Series 49 Venting (continued) Single Draft Hood System 2. Install rear air dam. Hang air dam on screws located at back of (49-075S - 49-299S) boiler. See Figure 6-1 for location. 1. Install vent damper. OPEN VENT DAMPER CARTON and remove WARNING Installation Instructions.
- Page 17 Series 49 Installation, Operating & Service Instructions Venting (continued) Dual Draft Hood System (49-350S - 49-550S) 1. Install rear air dams. Hang air dams on screws located at back of boiler. See Figure 6-5 for reference. WARNING Weld Stud This installation is not complete until rear air dams are installed.
-
Page 18: Steam Piping
Installation, Operating & Service Instructions Series 49 Steam Piping WARNING • Do not use softened water in steam boilers. Accelerated boiler corrosion will result. Tie in fresh water supply to boiler upstream of a water softener. • Oxygen contamination of boiler water will cause corrosion of iron and steel boiler components, and can lead to boiler failure. - Page 19 Series 49 Installation, Operating & Service Instructions Steam Piping (continued) WRONG Take-off bullheaded into two mains. WRONG WRONG Take-off Header bullheaded between risers. into take-off and equalizer. Figure 7-1: Common Near Boiler Piping Mistakes 111368-04 - 1/22...
- Page 20 Installation, Operating & Service Instructions Series 49 Steam Piping (continued) Near Boiler Piping 4. Remove parts carton from boiler crate. 5. Install relief valve (spindle must be in vertical 1. Evaluate existing steam system. position) into tapping on boiler right side using Single most important factor in determining nipple and elbow supplied.
- Page 21 Series 49 Installation, Operating & Service Instructions Steam Piping (continued) 49-075S thru 49-175S thru 49-350S and 49-450S thru 49-150S 49-299S 49-399S 49-550S # Sections 3 & 4 5, 6 & 7 8 & 9 10, 11 & 12 (1) 2 (2) 2 (3) 2 (4) 2...
-
Page 22: Gas Piping
Installation, Operating & Service Instructions Series 49 Gas Piping 1. Size gas piping. Design system to provide WARNING adequate gas supply to boiler. Consider these Explosion Hazard. factors: • Failure to properly pipe gas supply to boiler A. Allowable pressure drop from point of delivery could cause improper operation or leaks of to boiler. - Page 23 Series 49 Installation, Operating & Service Instructions Gas Piping (continued) Ignitor/Sensor Manifold Assembly Pilot Burner Combination Gas Valve Pilot Tubing Observation Port Figure 8-3: 49-075S through 49-299S Gas Manifold and Control Assembly Single Combination Gas Valve Ignitor/Sensor Pilot Burner Pilot Burner Ignitor/Sensor Observation Port Manifold Assembly...
-
Page 24: Electrical
Installation, Operating & Service Instructions Series 49 Electrical WARNING DANGER Electrical Shock Hazard. Wiring errors can Electrical Shock Hazard. cause improper or dangerous operation. Verify • Disconnect electrical supply before proper operation after installation. installing or performing maintenance. • Electrical power may be supplied 1. - Page 25 Series 49 Installation, Operating & Service Instructions Electrical (continued) 111368-04 - 1/22...
- Page 26 Installation, Operating & Service Instructions Series 49 Electrical (continued) 111368-04 - 1/22...
- Page 27 Series 49 Installation, Operating & Service Instructions Electrical (continued) 111368-04 - 1/22...
- Page 28 Installation, Operating & Service Instructions Series 49 Electrical (continued) 111368-04 - 1/22...
- Page 29 Series 49 Installation, Operating & Service Instructions Electrical (continued) 111368-04 - 1/22...
- Page 30 Installation, Operating & Service Instructions Series 49 Electrical (continued) 111368-04 - 1/22...
-
Page 31: System Start-Up And Checkout
Series 49 Installation, Operating & Service Instructions System Start-Up and Checkout DANGER Explosion Hazard. Do not use matches, candles, open flames or other ignition source to check for leaks. Failure to comply could result in severe personal injury, death or substantial property damage. WARNING •... - Page 32 Installation, Operating & Service Instructions Series 49 System Start-Up and Checkout (continued) Figure 10-1: Operating Instructions 111368-04 - 1/22...
- Page 33 Series 49 Installation, Operating & Service Instructions System Start-Up and Checkout (continued) Top Panels Step 1 'Up' Front Removable Door Rear Panel Step 2 Step 3 'Forward' 'Down' Lower Front Tie Bar Figure 10-2: Front Door Removal Pilot Burner Pilot Tubing Ignitor/Sensor Pilot Ground Ignition Cable...
- Page 34 Installation, Operating & Service Instructions Series 49 System Start-Up and Checkout (continued) Table 10-4: Green LED Status Codes Green LED Flash Indicates Next System Action Recommended Service Action Code No “Call for Heat” None Flash Fast Power up - internal check None Normal startup - ignition sequence Heartbeat...
- Page 35 Series 49 Installation, Operating & Service Instructions System Start-Up and Checkout (continued) Incandescent Outer Mantle Blue with occasional orange flashing Outer Cone Darker transparent blue Inner Cone Sharply outlined with bright light blue Flame Retention Inner Cone Partially lifted from burner Figure 10-5: Main Burner Flame 111368-04 - 1/22...
- Page 36 Installation, Operating & Service Instructions Series 49 System Start-Up and Checkout (continued) WARNING Failure to follow the following procedure exactly could result in over firing of boiler and a carbon monoxide hazard. 23. Verify auto reset LWCO operation while boiler is 18.
- Page 37 Series 49 Installation, Operating & Service Instructions System Start-Up and Checkout (continued) Figure 10-6: Combination Gas Valve Detail 111368-04 - 1/22...
- Page 38 Installation, Operating & Service Instructions Series 49 System Start-Up and Checkout (continued) CSD-1 Configuration Combination Gas Valve Leak Test (49-450S - 49-550S CSD-1) Boilers over 400 MBH must have a means to leak check each valve seat independently per ANSI 1.
-
Page 39: Operation
Series 49 Installation, Operating & Service Instructions Operation Ignition Sequence of Operation Control Operation 1. 24 volts is immediately applied to auto reset LWCO – Interrupts burner operation when water in LWCO when boiler is energized. Vent damper boiler drops below cut-off level. Power is restored will close as long as auto reset LWCO is once water in boiler is above cut-off level. -
Page 40: Before Leaving Jobsite
Installation, Operating & Service Instructions Series 49 Before Leaving Jobsite Before Leaving Jobsite: Boiler filled with water to normal water line Performed gas leak test Checked pilot burner flame Checked main burner flames Checked gas input rate ... -
Page 41: Service And Maintenance
Series 49 Installation, Operating & Service Instructions Service and Maintenance Important Product Safety Information: Refractory Ceramic Fiber Product WARNING Some boiler components use materials that contain refractory ceramic fibers (RCF). RCF has been classified as a possible human carcinogen. When exposed to elevated temperatures, RCF may change into crystalline silica, a known carcinogen. - Page 42 Installation, Operating & Service Instructions Series 49 Service and Maintenance (continued) WARNING This boiler should be serviced by a qualified installer, service agency or gas supplier. Inspections should be performed at intervals specified in this manual. Maintain manual in a legible condition. •...
- Page 43 Series 49 Installation, Operating & Service Instructions Service and Maintenance (continued) 4. Clean Main Burners and Combustion Chamber. B. Replace gauge if needed. A. To remove manifold/burner assembly for 7. Operate relief valve cleaning or repairs: A. When manually operating relief valve, water i.
- Page 44 Installation, Operating & Service Instructions Series 49 Service and Maintenance (continued) CAUTION IF, DURING NORMAL OPERATION, IT IS NECESSARY TO ADD MORE WATER THAN INDICATED BELOW. CONSULT A QUALIFIED INSTALLER OR SERVICE AGENCY TO CHECK YOUR SYSTEM FOR LEAKS. Gallons Boiler Model Number Gallons per Year Month...
-
Page 45: How It Works
Series 49 Installation, Operating & Service Instructions How It Works See Figures 14-1, 14-2 and 14-3 When vent damper is opened completely, control module opens pilot valve and activates ignition spark. Ignition Module Control module will sense pilot flame. Once pilot flame is established, control module opens gas valve and main burners will ignite. - Page 46 Installation, Operating & Service Instructions Series 49 How It Works (continued) Figure 14-1: Controls Location 49-075S through 49-299S 111368-04 - 1/22...
- Page 47 Series 49 Installation, Operating & Service Instructions How It Works (continued) Figure 14-2: Controls Location 49-350S through 49-550S, Non CSD-1 111368-04 - 1/22...
- Page 48 Installation, Operating & Service Instructions Series 49 How It Works (continued) Figure 14-3: Controls Location 49-450S through 49-550S, CSD-1 111368-04 - 1/22...
-
Page 49: Troubleshooting
Series 49 Installation, Operating & Service Instructions Troubleshooting 1. Troubleshooting should be completed by a qualified installer, service agency or gas supplier. 2. Before seeking technical assistance, the qualified installer, service agency or gas supplier should have an electrical meter and gas pressure gauge available for use. - Page 50 Installation, Operating & Service Instructions Series 49 Troubleshooting (continued) Figure 15-1: Troubleshooting Flow Diagram 49-075S through 49-299S 111368-04 - 1/22...
- Page 51 Series 49 Installation, Operating & Service Instructions Troubleshooting (continued) Figure 15-1: Troubleshooting Flow Diagram 49-075S through 49-299S (continued from previous page) 111368-04 - 1/22...
- Page 52 Installation, Operating & Service Instructions Series 49 Troubleshooting (continued) Figure 15-2: Troubleshooting Flow Diagram 49-350S through 49-550S, Non CSD-1 111368-04 - 1/22...
- Page 53 Series 49 Installation, Operating & Service Instructions Troubleshooting (continued) Figure 15-2: Troubleshooting Flow Diagram 49-350S through 49-550S, Non CSD-1 (continued from previous page) 111368-04 - 1/22...
- Page 54 Installation, Operating & Service Instructions Series 49 Troubleshooting (continued) Figure 15-3: Troubleshooting Flow Diagram 49-450S through 49-550S, CSD-1 111368-04 - 1/22...
- Page 55 Series 49 Installation, Operating & Service Instructions Troubleshooting (continued) Figure 15-3: Troubleshooting Flow Diagram 49-450S through 49-550S, CSD-1 (continued from previous page) 111368-04 - 1/22...
-
Page 56: Service Parts
All service parts may be obtained through your local Velocity Boiler Works wholesale distributor. Should you require assistance in locating a Velocity Boiler Works distributor in your area, or you have questions regarding the availability of products or service parts, please contact us at (215) 535-8900 or Fax (215) 535-9736 or at www. - Page 57 Series 49 Installation, Operating & Service Instructions Service Parts (continued) Part Number [Quantity] Description 49-075S 49-100S 49-125S 49-150S 49-175S 49-200S 49-250S 49-299S Section Assembly 111268-03 111268-03 111268-04 111268-04 111268-05 111268-05 111268-06 111268-07 (includes both canopy and base gaskets) Baffles 111263-01 [1] 111263-01 [2] (set of 3) Canopy Gasket...
- Page 58 Installation, Operating & Service Instructions Series 49 Service Parts (continued) 111368-04 - 1/22...
- Page 59 Series 49 Installation, Operating & Service Instructions Service Parts (continued) Part Number [Quantity] Key No. Description 49-350S 49-399S 49-450S 49-500S 49-550S Left Half Section 111285-04 111285-04 111285-05 111285-06 111285-06 Assembly Right Half Section 111287-04 111287-05 111287-05 111287-05 111287-06 Assembly Baffles 111263-01 [3] 111263-01 [4] (set of 3)
- Page 60 Installation, Operating & Service Instructions Series 49 Service Parts (continued) Part Number [Quantity] Description 49-075S 49-100S 49-125S 49-150S 49-175S 49-200S 49-250S 49-299S Complete Base Assembly Consult 110901-03 110902-04 110901-04 110902-05 110901-05 110901-06 110901-07 (Base Gasket Factory included) Base Gasket 6206002 [1] 111368-04 - 1/22...
- Page 61 Series 49 Installation, Operating & Service Instructions Service Parts (continued) Part Number [Quantity] Key No. Description 49-350S 49-399S 49-450S 49-500S 49-550S Complete Left Half 110908-04 110908-04 111236-05 111236-06 111236-06 Base Assembly Complete Right Half 110909-04 110909-05 111237-05 111237-05 111237-06 Base Assembly Source Locally Section Assembly to High Temperature Silicone RTV Meeting ASTM C920 Type S, Grade NS,...
- Page 62 Installation, Operating & Service Instructions Series 49 Service Parts (continued) Part Number [Quantity] Description 49-075S 49-100S 49-125S 49-150S 49-175S 49-200S 49-250S 49-299S Manifold, Burners, Pilot, Consult 111277-03 111269-04 111277-04 111269-05 111277-05 111277-06 111277-07 Insulation Factory Assembly Gas Valve 111261-01 [1] 109622-01 [1] Pilot 111279-01 [1]...
- Page 63 Series 49 Installation, Operating & Service Instructions Service Parts (continued) Part Number [Quantity] Description 49-075S 49-100S 49-125S 49-150S 49-175S 49-200S 49-250S 49-299S 111365-03 111365-03 111365-04 111365-04 111365-05 111365-05 111365-06 111365-07 Jacket Set 111368-04 - 1/22...
- Page 64 Installation, Operating & Service Instructions Series 49 Service Parts (continued) Part Number [Quantity] Key No. Description 49-350S 49-399S 49-450S 49-500S 49-550S 111370-04 111370-04 111370-05 111370-06 111370-06 Left Side Jacket Set 111371-04 111371-05 111371-05 111371-05 111371-06 Right Side Jacket Set 111368-04 - 1/22...
- Page 65 Series 49 Installation, Operating & Service Instructions Service Parts (continued) Part Number [Quantity] Key No. Description 49-075S 49-100S 49-125S 49-150S 49-175S 49-200S 49-250S 49-299S Ignition Module, (Non 109633-01 [1] Honeywell CSD-1) Transformer 106034-01 [1] Relay 111282-01 [1] Part Number [Quantity] Key No.
- Page 66 Installation, Operating & Service Instructions Series 49 Service Parts (continued) Part Number [Quantity] Key No. Description 49-075S 49-100S 49-125S 49-150S 49-175S 49-200S 49-250S 49-299S 109634-02 109634-02 109634-03 109634-03 109634-04 109634-04 109634-05 109634-05 Vent Damper Pressure Gauge 109707-01 [1] Gauge Glass 111271-01 [1] Relief Valve 111267-01 [1]...
- Page 67 Series 49 Installation, Operating & Service Instructions Service Parts (continued) Part Number [Quantity] Key No. Description 49-350S 49-399S 49-450S 49-500S 49-550S Vent Damper Pressure Gauge 109707-01 [1] Gauge Glass 111271-01 [1] Relief Valve 111267-01 [1] 111304-01 [1] Pressure Limit Auto Reset, Honeywell 111280-01 [1] Pressure Limit Manual Reset, Honeywell 111281-01 [1]...
- Page 68 Installation, Operating & Service Instructions Series 49 Service Parts (continued) 111368-04 - 1/22...
- Page 69 Series 49 Installation, Operating & Service Instructions Service Parts (continued) Wiring Part Number [Quantity] Key No. Description 49-075S 49-100S 49-125S 49-150S 49-175S 49-200S 49-250S 49-299S Main Harness, 111264-01 [1] Power Harness Pilot Ground 111278-01 [1] Wire Ignition Cable 111274-01 [1] Part Number [Quantity] Key No.
- Page 70 Installation, Operating & Service Instructions Series 49 Service Parts (continued) Conversion Kit 111251-01: Input conversion kit 49-075S (49-100S to 75 MBH) Accessories Part Number [Quantity] Key No. Description 49-075S 49-100S 49-125S 49-150S 49-175S 49-200S 49-250S 49-299S Near Boiler 111295-01 [1] 111296-01 [1] Shown Piping...
-
Page 71: Appendix A Steam Boiler Skimming
Series 49 Installation, Operating & Service Instructions Appendix A Steam Boiler Skimming Steam Boiler Skimming ALL STEAM BOILERS REQUIRE PROPER SKIMMING. THIS NOTICE WILL HELP CONTRACTORS COMPLETE STEAM BOILER INSTALLATIONS AND AVOID CUSTOMER CALL-BACKS Background Skimming removes oil from the boiler water volume. If not removed properly oil can reduce steam generation and make the boiler surge. -
Page 72: Appendix B Indirect Water Heater
Installation, Operating & Service Instructions Series 49 Appendix B Indirect Water Heater In this type of system, hot water is drawn from 4. Boiler Limit Control - Use a SPST break-on-rise below boiler's NWL and passed through IWH's heat temperature limit control such as the Honeywell exchanger. - Page 73 Series 49 Installation, Operating & Service Instructions Appendix B Indirect Water Heater (continued) 6. Figure B-2 shows field wiring for an indirect If there is a call for space heat, heating water heater. A Honeywell R8845U or thermostat will make boiler “T”-“T” circuit equivalent DPST relay and transformer is and boiler will fire without regard to status required.
-
Page 74: Appendix C Mcdonnell & Miller 150S-Md Auto Reset Lwco/Pump Control
Installation, Operating & Service Instructions Series 49 Appendix C McDonnell & Miller 150S-MD Auto Reset LWCO/Pump Control NOTICE: Follow Instruction Manual warnings provided with the 150S-MD. • 150S-MD must be water column mounted on same side as Manual Reset LWCO. See Figure C-1. •... - Page 75 Series 49 Installation, Operating & Service Instructions SERVICE RECORD DATE SERVICE PERFORMED 111368-04 - 1/22...
- Page 76 Installation, Operating & Service Instructions Series 49 Velocity Boiler Works, LLC P.O. Box 14818 3633 I Street Philadelphia, PA 19134 111368-04 - 1/22...
Need help?
Do you have a question about the 49 Series and is the answer not in the manual?
Questions and answers