Velocity Phantom-X Series Installation, Operating And Service Instructions
Hide thumbs
Also See for Phantom-X Series:
- Installation, operating and service instructions (144 pages)
Table of Contents
Advertisement
Quick Links
Installation, Operating and Service Instructions for
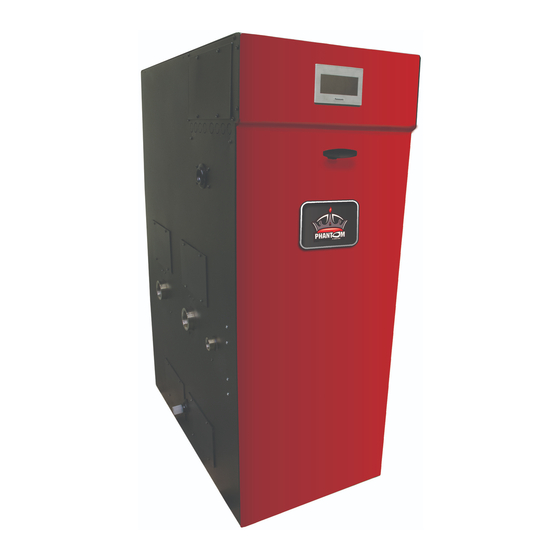
Phantom-X
Models:
• PHNTM399C
• PHNTM500C
• PHNTM600C
• PHNTM700C
• PHNTM800C
This manual is for use with
boilers having a part number
ending in "C" (example:
PHNTM399HNL2HUC.
TO THE INSTALLER:
Affix these instructions adjacent to boiler.
TO THE CONSUMER:
Retain these instructions for future reference.
WARNING
Improper installation, adjustment, alteration, service or maintenance can cause property
damage, injury, or loss of life. For assistance or additional information, consult a qualified installer,
service agency or the gas supplier. This boiler requires a special venting system. Read these instructions
carefully before installing.
106309-03 - 4/19
9700609
Series
Condensing
High Efficiency
Direct Vent
Gas-Fired
Water Boiler
Manufacturer of Hydronic Heating Products
P.O. Box 14818 3633 I. Street
Philadelphia, PA 19134
www.velocityboilerworks.com
VELOCITY LOGO CMYK CO
VELOCITY LOGO CMYK COLORS
1
Advertisement
Table of Contents

Related Manuals for Velocity Phantom-X Series


Summary of Contents for Velocity Phantom-X Series
- Page 1 • PHNTM700C Gas-Fired • PHNTM800C 9700609 Water Boiler VELOCITY LOGO CMYK CO This manual is for use with boilers having a part number ending in “C” (example: PHNTM399HNL2HUC. TO THE INSTALLER: Manufacturer of Hydronic Heating Products Affix these instructions adjacent to boiler.
- Page 2 IMPORTANT INFORMATION - READ CAREFULLY NOTE: The equipment shall be installed in accordance with those installation regulations enforced in the area where the installation is to be made. These regulations shall be carefully followed in all cases. Authorities having jurisdiction shall be consulted before installations are made.
- Page 3 DANGER Explosion Hazard. DO NOT store or use gasoline or other flammable vapors or liquids in the vicinity of this or any other appliance. If you smell gas vapors, DO NOT try to operate any appliance - DO NOT touch any electrical switch or use any phone in the building.
- Page 4 Special Installation Requirements for Massachusetts A. For all sidewall horizontally vented gas fueled equipment installed in every dwelling, building or structure used in whole or in part for residential purposes and where the sidewall exhaust vent termination is less than seven (7) feet above grade, the following requirements shall be satisfied: 1.
-
Page 5: Table Of Contents
TABLE OF CONTENTS Product Description, Specifications and Dimensional Data...... Unpacking Boiler..................10 Pre-Installation and Boiler Mounting............11 III. Venting...................... A. General Guidelines................16 B. CPVC/PVC Venting................23 C. Polypropylene Venting................. 28 D. Stainless Steel Venting................ 34 E. Optional Room Air for Combustion............36 F. -
Page 6: Product Description, Specifications And Dimensional Data
I. Product Description, Specifications and Dimensional Data Phantom X Series boilers are condensing high efficiency maximum heat transfer and simultaneous protection against flue gas product corrosion. These boilers are not designed gas-fired direct vent hot water boilers designed for use in forced hot water space or space heating with indirect for use in gravity hot water space heating systems or systems containing significant amount of dissolved oxygen... - Page 7 106309-03 - 4/19...
- Page 8 106309-03 - 4/19...
- Page 9 106309-03 - 4/19...
-
Page 10: Unpacking Boiler
I. Product Description, Specifications and Dimensional Data (continued) Table 3: Ratings Phantom X Series Gas-Fired Boilers Input (MBH) Combustion Model Gross Output Net Ratings Water Thermal Efficiency (%) Efficiency (%) Number (MBH) (MBH) Min. Max. PHNTM399C 94.1 94.5 PHNTM500C 97.0 96.0 PHNTM600C 95.0... -
Page 11: Pre-Installation And Boiler Mounting
CAN/CSA-B149.1, Venting Systems and Air Supply for cycling and accelerated component failure. Appliances. Velocity Boiler Works, LLC DOES NOT warrant Table 4: Corrosive Combustion Air Contaminants failures caused by mis-sized boiler applications. and Sources DO NOT oversize the boiler to the system. - Page 12 III. Pre-Installation and Boiler Mounting G. General (continued) weight of boiler, water and all additional system components. WARNING b. Boiler must be level to prevent condensate from Asphyxiation Hazard. Adequate combustion and backing up inside the boiler. c. Provide adequate space for condensate piping or ventilation air must be provided to assure proper combustion.
- Page 13 III. Pre-Installation and Boiler Mounting G. General (continued) Figure 4: Clearances To Combustible and Non-combustible Material H. Boiler Stacking bottom boiler. b. Each Phantom X boiler is factory packaged 1. For installations with unusually high space heating with 2 stacking boiler attachment brackets (P/N and/or domestic hot water heating loads, where employing multiple boilers will offer the benefits of 101679-01) and the bracket mounting hardware...
- Page 14 III. Pre-Installation and Boiler Mounting H. Boiler Stacking • The remaining lower bracket hole must align vertically from each other in order to prevent with a matching bottom boiler left side panel combustion air contamination. For vertical top positioning dimple. through the roof venting, individual vertical vent terminals, if level with each other, must •...
- Page 15 III. Pre-Installation and Boiler Mounting H. Boiler Stacking (continued) Figure 5: Boiler Stacking 106309-03 - 4/19...
-
Page 16: Venting
IV. Venting WARNING Asphyxiation Hazard. Failure to vent this boiler in accordance with these instructions could cause products of combustion to enter the building resulting in severe property damage, personal injury or death. Do not use a barometric damper, draft hood or vent damper with this boiler. Do not locate vent termination under a deck. - Page 17 IV. Venting A. General Guidelines (continued) Table 7: Vent/Combustion Air Intake System Options Penetration Vent & Intake Component Reference Option Through Termination Figures Materials Table Section Structure Intake Horizontal Sidewall 90° Elbow w/ Screen 7, 8 11, 12 Horizontal Sidewall Coupling w/ Screen Vent Intake...
- Page 18 IV. Venting A. General Guidelines (continued) Table 8: Vent and Combustion Air Pipe Sizes and Equivalent Lengths (Applies to All Listed Vent/Combustion Air System Options) Combustion Air Length Vent Length Approx. Derate at Boiler Model Option Max. Length Pipe Dia., in. Min., ft.
- Page 19 106309-03 - 4/19...
- Page 20 IV. Venting A. General Guidelines (continued) intervalles de support doivent être spécifiés. b. Maintain minimum clearance to combustible materials. See Table 5 for details. Les instructions divent aussi indiquer les renseignements suivants: c. Enclose vent passing through occupied or unoccupied spaces above boiler with material les chaudières de catégories II et IV doivent être having a fire resistance rating at least equal to the installées de façon à...
- Page 21 IV. Venting A. General Guidelines (continued) Figure 8: Direct Vent - Sidewall Snorkel Terminations Figure 9: Direct Vent - Sidewall Low Profile Termination ii. Vertical Roof Venting: Use coupling on vent sidewall combustion air terminal. and two 90° elbows turned downwards for iii.
- Page 22 IV. Venting A. General Guidelines (continued) j. Do not locate the vent terminal under decks or f. Locate bottom of vent terminal at least 3 ft. (900 mm)above any forced air inlet located within 10 similar structures. ft. (3.0 m). k.
-
Page 23: Cpvc/Pvc Venting
IV. Venting B. CPVC/PVC Venting (continued) spacing is recommended to avoid frost damage to d. See Table 14 for CPVC/PVC installer provided building surfaces where vent terminations are vent and combustion air components required for placed. optional vertical roof terminals shown in Figure q. - Page 24 IV. Venting B. CPVC/PVC Venting (continued) WARNING Asphyxiation Hazard. Apply supplied dielectric grease to gasket inside vent section of vent connector. Failure to apply the grease could result in flue gas leaks from gasket rupture during vent pipe installation or gasket deterioration due to condensate exposure.
- Page 25 IV. Venting B. CPVC/PVC Venting (continued) Figure 12: Field Installation CPVC/PP/SS Vent Connector Figure 13: Near-Boiler Vent/Combustion Air Piping 5. Horizontal Sidewall Termination a. Plan venting system to avoid possible contact with plumbing or electrical wires. Start at a. Standard Two-Pipe Termination vent connector at boiler and work towards vent See Figure 7.
- Page 26 IV. Venting B. CPVC/PVC Venting (continued) Table 15: Expansion Loop Lengths Length of Loop Length Nominal Straight Run “L” Pipe Dia. (In.) 1350 1650 1900 2130 2340 1520 1880 Figure 14: CPVC/PVC Expansion Loop and Offset 2159 2413 2642 1850 2290 2620 2950...
- Page 27 IV. Venting B. CPVC/PVC Venting (continued) • Install screen and vent terminal (supplied with boiler), see Figure 16 for appropriate configuration. • Brace exterior piping if required. ii. Combustion Air Piping • After penetrating wall, install a Schedule 40 PVC 90° elbow so that elbow leg is in the up direction.
-
Page 28: Polypropylene Venting
IV. Venting B. CPVC/PVC Venting - C. Polypropylene Venting (continued) • Install screen and vent terminal (supplied with boiler). See Figure 16 for WARNING appropriate configuration. • Brace exterior piping if required. Asphyxiation Hazard. Follow these instructions and the installation instructions included by ii. - Page 29 IV. Venting C. Polypropylene Venting (continued) ii. Install CPVC/PP/SS vent connector. Follow NOTICE instructions in “2. Field Installation of CPVC/PP/SS Vent Connector” under “B. The venting system must be free to expand CPVC/PVC Venting.” and contract and supported in accordance iii.
- Page 30 106309-03 - 4/19...
- Page 31 106309-03 - 4/19...
- Page 32 IV. Venting C. Polypropylene Venting (continued) NOTICE Pressure drop for flexible polypropylene liner is 20% greater than from rigid pipe. Multiply measured flexible polypropylene liner length by 1.2 to obtain equivalent length. Maximum equivalent length of flexible polypropylene liner is 48 ft. (14.6 m). a.
- Page 33 IV. Venting C. Polypropylene Venting Figure 19: Locking Band Clamp Installation, Figure 20: Alternate Locking Band Clamp M&G DuraVent or Centrotherm InnoFlue Installation, M&G DuraVent Venting of Other Appliances (or Fireplace) into Chase or Adjacent Flues Prohibited! Figure 21: Flexible Vent in Masonry Chimney with Separate Combustion Air Intake 106309-03 - 4/19...
-
Page 34: Stainless Steel Venting
See Table 19, 20, or 21 for adapters for reduced Examine all components for possible vent diameter. shipping damage prior to installation. Table 19: Velocity Boiler Works (Heat Fab) All condensate that forms in the vent must be Vent System Components able to drain back to the boiler. - Page 35 IV. Venting D. Stainless Steel Venting (continued) Table 21: Z-Flex, Z-Vent (SVE Series III, Z-Vent III) Stainless Steel Vent System Components, Single Wall Sidewall * or Roof Termination: Boiler Model Nominal Pipe Diameter Boiler Adapter Wall Thimble Straight Termination w/Screen PHNTM399C (reduced dia.) 3 in.
-
Page 36: Optional Room Air For Combustion
IV. Venting D. Stainless Steel Venting - E. Optional Room Air for Combustion (continued) 4. Horizontal Sidewall Vent Termination ii. Combustion Air Termination a. Standard Two-Pipe Termination • After penetrating wall, install a 90° elbow so that the elbow leg is in the up See Figure 7. -
Page 37: Removing The Existing Boiler
IV. Venting E. Optional Room Air for Combustion - F. Removing the Existing Boiler (continued) 3. Terminations a. For standard horizontal sidewall terminations, WARNING see Figures 7 and 8. When using room air for Sources of combustion air contaminants, combustion, use 90° elbow or tee for sidewall including chlorines, chlorofluorocarbons vent termination. -
Page 38: Multiple Boiler Installation Venting
IV. Venting F. Removing the Existing Boiler - G. Multiple Boiler Installation Venting (continued) 7. Any improper operation of the common venting 7. Tout mauvais fonctionnement du système system should be corrected so the installation d’évacuation commun devrat être corrigé de façon conforms with the National Fuel Gas Code, ANSI que l’installation soit conforme au National Fuel Z223.1/NFPA 54 and/or the Natural Gas and... - Page 39 IV. Venting G. Multiple Boiler Installation Venting (continued) f. Multiple individual boiler vertical vent pipes b. Each individual boiler must have own may be piped through a common conduit or combustion air pipe and terminal. Refer to chase so that one roof penetration may be made. Paragraphs A through F (as applicable) for individual boiler combustion air guidelines and g.
- Page 40 106309-03 - 4/19...
-
Page 41: Condensate Disposal
V. Condensate Disposal A. Condensate Trap and Drain Line 1. All condensate which forms in the boiler or vent WARNING system collects in the sump under heat exchanger Asphyxiation Hazard. Failure to fill the and leaves the boiler through factory installed condensate trap with water prior to boiler start- condensate trap. - Page 42 V. Condensate Disposal (continued) Figure 24: Condensate Trap and Drain Line B. Condensate Neutralizer Installation 2. Limestone chips will get coated by neutral salts (product of chemical reaction between limestone 1. Some jurisdictions may require that the condensate and acidic condensate) and lose neutralizing be neutralized before being disposed of.
-
Page 43: Water Piping And Trim
Oxygen contamination of boiler water will cause corrosion of iron and steel boiler components, and can lead to boiler failure. Velocity Boiler Works, LLC Standard Warranty does not cover problems caused by oxygen contamination of boiler water or scale (lime) build-up caused by frequent addition of water. - Page 44 VI. Water Piping and Trim (continued) Space heating only - refer to Tables 25 and Table 23: Flow Switch Paddle Application 26 and Figure 28 “Near Boiler Piping - Boiler Flow Switch Heating Only” as applicable. Paddle Marking ii. Space heating plus indirect water heater(s) PHNTM399C –...
- Page 45 106309-03 - 4/19...
- Page 46 VI. Water Piping and Trim (continued) Figure 26: Factory Supplied Piping and Trim Installation - PHNTM500C, PHNTM600C, PHNTM700C, PHNTM800C C. Standard Installation Requirements. The end of the discharge pipe must terminate in an unthreaded pipe. If the safety relief valve is not Observe the following guidelines when making the piped to a drain, it must terminate at least 6 in.
- Page 47 - Phantom X boilers have factory provided UL353 listed boiler control and UL1434 listed manual reset high limit. An optional manual reset external high limit is available from Velocity Boiler Works, LLC to meet local code requirements. 106309-03 - 4/19...
- Page 48 VI. Water Piping and Trim (continued) Table 27: Fitting and Valve Equivalent Length Table 27: Fitting and Valve Equivalent Length (cont’d) Threaded Fitting and Valve Equivalent Length (Ft) Copper Fitting and Sweat Valve Equivalent Length (Ft) Black Threaded Pipe or Copper Pipe or Valve Size Fitting or Valve Fitting or Valve...
- Page 49 106309-03 - 4/19...
- Page 50 106309-03 - 4/19...
- Page 51 VI. Water Piping and Trim (continued) D. Special Situation Piping Installation 2. Piping with a Chiller - If the boiler is used in Requirements conjunction with a chiller, pipe the boiler and chiller in parallel. Use isolation valves to prevent chilled Observe the following guidelines when making the water from entering the boiler.
- Page 52 VI. Water Piping and Trim (continued) Figure 31: Isolation of the Boiler From Oxygenated Water with A Plate Heat Exchanger (IWH Piped Off System Header) E. Multiple Boiler Water Piping 3. For installations where indirect domestic hot water heater is combined with space heating, 1.
- Page 53 106309-03 - 4/19...
- Page 54 106309-03 - 4/19...
-
Page 55: Gas Piping
VII. Gas Piping 1. Allowable pressure drop from point of delivery to boiler. Maximum allowable system pressure is ½ psig (3.4 kPa). Actual point of delivery WARNING pressure may be less; contact gas supplier for Explosion Hazard. Failure to properly pipe gas additional information. - Page 56 VII. Gas Piping (continued) B. Connect boiler gas valve to gas supply For materials or conditions other than those listed above, refer to National Fuel Gas Code, ANSI Z223.1/ system. NFPA 54 or Natural Gas and Propane Installation Code, CAN/CSA B149.1, or size system using standard engineering methods acceptable to authority having jurisdiction.
- Page 57 VII. Gas Piping (continued) Table 32: Specific Gravity Correction Factors Specific Specific Correction Correction Gravity Factor Gravity Factor 0.60 1.00 0.90 0.82 0.65 0.96 1.00 0.78 0.70 0.93 1.10 0.74 0.75 0.90 1.20 0.71 0.80 0.87 1.30 0.68 0.85 0.81 1.40 0.66 WARNING...
- Page 58 VII. Gas Piping (continued) C. Pressure test. instructions. The switches are preset for natural gas. See Table 33 for Phantom X Min./ For LP gas, the low gas pressure switch setting must Max. Pressure Ratings. The boiler and its gas be adjusted.
- Page 59 VII. Gas Piping (continued) E. Gas Piping for Multiple Boiler Installation 1. Individual module (boiler) gas pipe sizing CAUTION specific details - see Paragraph A. If gas pressure in the building is above ½ psig 2. Individual module (boiler) recommended gas (3.4 kPa), an additional gas pressure regulator is required.
-
Page 60: Electrical
VIII. Electrical DANGER Electrical Shock Hazard. Positively assure all electrical connections are unpowered before attempting installation or service of electrical components or connections of the boiler or building. Lock out all electrical boxes with padlock once power is turned off. WARNING Electrical Shock Hazard. - Page 61 VIII. Electrical (continued) Figure 37: PCB Locations for Field Wiring Figure 38: 120 VAC Field Wiring 106309-03 - 4/19...
- Page 62 VIII. Electrical (continued) 3. 24VAC low voltage connections shielded cable. Connect one end of the shielding on are located on left side of right PCB and are shown in Figure 39. this cable to ground. One 24V fuse and spare are provided. PHNTM399C NOTICE and PHNTM500C use 1.6A slow-blow fuse.
- Page 63 VIII. Electrical (continued) Figure 40: Ladder Diagram 106309-03 - 4/19...
- Page 64 VIII. Electrical (continued) Figure 41: Wiring Connections Diagram 106309-03 - 4/19...
- Page 65 VIII. Electrical (continued) Figure 42a: Modified Wiring For DHW Priority When Using Low Flow Circulator Piped Off System Header - Heating (with Central Heating Circulators) Plus Alternately Piped Indirect Water Heater 106309-03 - 4/19...
- Page 66 BT LT 106309-03 - 4/19...
- Page 67 106309-03 - 4/19...
- Page 68 106309-03 - 4/19...
- Page 69 106309-03 - 4/19...
- Page 70 106309-03 - 4/19...
-
Page 71: System Start-Up
VIII. Electrical (continued) F. Multiple Boiler Wiring b. Ethernet Cables Ethernet cables are used to connect the boiler 1. Install over-current protection in accordance network together. These are standard “straight with authority having jurisdiction or, in the absence through” cables that can be purchased at of such requirements, follow the National Electric electrical distributors. - Page 72 IX. System Start-up E. Confirm that the boiler and system have no water leaks. WARNING Explosion Hazard. Asphyxiation Hazard. NOTICE Electrical Shock Hazard. Start-up of this boiler If it is required to perform a long term pressure should be undertaken only by trained and skilled personnel from a qualified service agency. test of the hydronic system, the boiler should first be isolated to avoid a pressure loss due to Follow these instructions exactly.
- Page 73 IX. System Start-up (continued) Figure 47: Operating Instructions 106309-03 - 4/19...
- Page 74 IX. System Start-up (continued) L. Upon initial start-up, the gas train will be filled with air Even if the gas line has been WARNING completely purged of air, it may take several tries for ignition before a flame is established. If more than Any gas valve adjustments (throttle and/ or offset) specified herein and subsequent 2 tries for ignition are needed, it will be necessary to...
- Page 75 IX. System Start-up (continued) Figure 48: Burner Flame e. If low fire O is too low (CO is too high), WARNING increase O (decrease CO ) by turning offset screw counterclockwise in less than 1/8 turn Make sure that all adjustments at high fire are increments and checking the O (or CO made with the throttle, not offset screw (see...
- Page 76 IX. System Start-up (continued) 2. Test the flow switch by disabling the primary loop circulator. The boiler must not start if flow is WARNING not present. Explosion Hazard. Asphyxiation Hazard. 3. Test any other external limits or other controls This conversion should be performed by a in accordance with the manufacturer’s instructions.
- Page 77 IX. System Start-up (continued) U. Correcting Throttle Screw Mis-Adjustment (if required) WARNING Phantom X boilers are fire tested at factory and gas Asphyxiation Hazard. The throttle adjustments valve throttle screws are preset. However, if boiler shown in Table 37 are approximate. The does not start when first turned on, and, the problem final throttle setting must be found using a cannot be remedied following “Help”...
- Page 78 IX. System Start-up (continued) WARNING Asphyxiation Hazard. If the throttle is very far out of adjustment on the “rich” (counter-clockwise) side, the boiler burner may be running at 0% excess air or even with air deficiency. Operating the boiler in this condition may cause property damage, personal injury or loss of life.
- Page 79 IX. System Start-up (continued) Table 41: Control Parameter Checklist Parameter Step Parameter Description Location Select appropriate source: Not Installed, Wired or Wireless. Outdoor Sensor Source Adjust >> Warm Weather Shutdown Selecting Enable will restrict boiler start during warm weather, but System Setup Enable/Disable only if an outdoor sensor is installed.
-
Page 80: Operation
4. HeatMatch Software for easy field connection. Simple parameter selections When the boiler is installed with a Velocity PN allow all three pumps to respond properly to various 3501505 Zone Control Panel (Zone Control) into a hydronic piping arrangements including either a boiler multiple zone home the Control uses a patent pending or primary piped indirect water heater. -
Page 81: Supply Water Temperature Regulation
X. Operation B. Supply Water Temperature Regulation (continued) The peer-peer network is truly “plug and play”. 2. Setpoint Purpose Communication is activated by simply connecting The Control starts and stops the boiler and modulates a RJ45 ethernet cable between boilers. The Control the boiler input from minimum (MBH) to maximum provides precise boiler coordination by sequencing (MBH) in order to heat water up to the active setpoint. -
Page 82: Boiler Protection Features
X. Operation C. Boiler Protection Features (continued) 7. Domestic Hot Water (DHW) Setpoint • Differential exceeds 63°F (35°C) – shutdown; automatic restart after temperature difference has This is the boiler supply water setpoint upon a DHW call decreased and minimum off time has expired for heat. -
Page 83: Multiple Boiler Control Sequencer
X. Operation D. Multiple Boiler Control Sequencer (continued) 8. Manual Reset Limit Devices 3. Lead/Slave Sequencing & Equalized Run Time If any below listed limit opens, the boiler will restart One boiler is a “Lead” boiler and the remaining networked only after the limit closes and the boiler control boilers are “Slaves”. - Page 84 X. Operation D. Multiple Boiler Control Sequencer (continued) 8. DHW Two boiler Start 11. Advanced Boiler Sequencing When the Indirect Water Heater (IWH) parameter is After there is a Call For Heat input, both header water temperature and boiler firing rate percent are used to start set to “Primary Piped”...
-
Page 85: Boiler Sequence Of Operation
X. Operation E. Boiler Sequence Of Operation (continued) E. Boiler Sequence of Operation 1. Normal Operation Table 44: Boiler Sequence of Operation Status Screen Display Description Priority: (burner Off, circulator(s) Off) Standby Boiler is not firing and there is no call for heat, priority equals standby. The boiler Status: is ready to respond to a call for heat. -
Page 86: Using The Display
X. Operation E. Boiler Sequence Of Operation (continued) 2. Using The Display The Control includes a touch screen LCD display. The user monitors and adjusts boiler operation by selecting screen navigation “buttons” and symbols. The “Home Screen” and menu selections are shown below. When no selection is made, while viewing any screen, the display reverts to the “Home Screen”... -
Page 87: Status Screens
“arrow” symbol. These screens are accessed by selected the “Status” button from the “Home” screen. NOTE Only visible if Velocity Boiler Works, LLC 3501505 Zone Panel is connected. Zone Panel 1 and 2 shown typical for 1 through 4. Figure 52: Status Screen Overview... - Page 88 X. Operation E. Boiler Sequence Of Operation (continued) 3. Status Screens (continued) Bargraph Screen Bargraph Screen The bargraph screen presents measured values for easy comparison. Included on this screen is firing rate and when the Zone Panel is connected the measure Heat Loss. Measured heat loss is the heat rate kbtu/hr sum of all active (call for heat) zones.
-
Page 89: Detail Screens
Screen provides status and a page links NOTE for up to four zone panels. Individual Only visible if Velocity Boiler zone “on” status is shown by a bold zone Works, LLC 3501505 Zone Panel number with a solid underscore. “Press”... -
Page 90: Multiple Boiler Sequencer Screens
X. Operation E. Boiler Sequence Of Operation (continued) 5. Multiple Boiler Sequencer Screens available: When the Sequence Master is enabled the following screens are The Sequencer Status screen is selected by “pressing” “Status” button from the “Home” screen when Sequence Master is enabled. -
Page 91: Changing Adjustable Parameters
X. Operation (continued) F. Changing Adjustable Parameters 1. Entering Adjust Mode The Control is factory programmed to include basic modulating boiler functionality. These settings are password protected to discourage unauthorized or accidental changes to settings. User login is required to view or adjust these settings: - Press the “Adjust”... - Page 92 The result will be the Control’s measurement matching the reference reading. Velocity Boiler Works, LLC 3501505 Zone Control Status Connected Connected, When the Zone Control is connected adjustable settings are automatically shown under the Adjust Not Connected “Modulation”, “Auxiliary Heat”...
- Page 93 X. Operation F. Changing Adjustable Parameters (continued) WARNING Asphyxiation Hazard. Boiler type is factory set and must match the boiler model. Only change the boiler type setting if you are installing a new or replacement Control. The boiler type setting determines minimum and maximum blower speeds.
- Page 94 X. Operation F. Changing Adjustable Parameters (continued) Expected Heat Rate Adjustment Screens (Zone Panels with HeatMatch Software Only) The Control is shipped with defaults that will provide improved operation. Adjustment is only required to optimize setup. The expected heat rate adjustment is used to better match boiler output to the home heating needs. After receiving a "call for heat"...
- Page 95 X. Operation F. Changing Adjustable Parameters (continued) Modulation Setup “Press” button to access the following parameters: Factory Range / Parameter and Description Setting Choices Central Heat Maximum Expected Heat Rate Minimum to This parameter defines the highest modulation rate the Control will go to during a central heat 100% Maximum call for heat.
- Page 96 X. Operation F. Changing Adjustable Parameters (continued) Pump Setup “Press” button to access the following parameters: Factory Setting Range / Choices Parameter and Description System Pump run pump for: Activates the system pump output according to selected function. Never: Pump is disabled and not shown on status screen. Never, Any Demand, Any Demand:...
- Page 97 X. Operation F. Changing Adjustable Parameters (continued) Example Pump Parameter selections (continued): Single boiler Primary Piped Indirect Water Heater, Optional DHW Priority. Parameter Selections: System Pump= “Central Heat , Optional Priority” Boiler Pump = “any demand” DHW Pump = “Primary Loop Piped IWH” DHW Priority Enable is optional Explanation: This piping arrangement permits the...
- Page 98 X. Operation F. Changing Adjustable Parameters (continued) Example Pump Parameter selections (continued): Multiple Boilers with Boiler Piped Indirect Water Heater Sequencer Master Boiler 2 (Boiler 1) Wiring locations: Enable/Disable DHW Demand System pump DHW pump Boiler Pump Sequencer Master Parameter Selections: Sequencer Master Enabled Indirect Water...
- Page 99 X. Operation F. Changing Adjustable Parameters (continued) Example Pump Parameter selections (continued): Multiple Boilers, Primary Piped Indirect Water Heater, Optional DHW Priority Sequencer Master Boiler 2 (Boiler 1) Wiring locations: Enable/Disable DHW Demand System Pump DHW Pump Boiler Pump Sequencer Master Parameter Selections: Sequencer Master Enabled Indirect Water...
- Page 100 X. Operation F. Changing Adjustable Parameters (continued) Contractor Setup “Press” button to access the following parameters: Contractor Name For Service Contact: Press box to input contractor information. Bill Smith Bill Smith > < 12 Victory Lane Plainview, New York Save 516 123-4567 Press SAVE button to store revisions.
- Page 101 X. Operation F. Changing Adjustable Parameters (continued) Central Heat “Press” button to access the following parameters: Factory Range / Choices Parameter and Description Setting 180°F 50°F to 190°F Central Heat Setpoint (82.2°C) (10°C to 87.8°C) Target temperature for the central heat priority. Value also used by the outdoor air reset function. Central Heat Thermostat “Sleep”...
- Page 102 X. Operation F. Changing Adjustable Parameters (continued) “Press” button to access the following parameters: Factory Range / Choices Parameter and Description Setting Auxiliary Heat Setpoint 180°F 60°F to 190°F Target temperature for the Auxiliary Heat priority. Value also used by the outdoor air reset (82.2°C) (15.6°C to 87.8°C) function.
- Page 103 X. Operation F. Changing Adjustable Parameters (continued) Domestic Hot Water “Press” button to access the following parameters: Factory Range / Choices Parameter and Description Setting Domestic Hot Water Setpoint The Domestic Hot Water (DHW) Setpoint parameter is used to create a minimum boiler water 170°F 50°F to 190°F temperature setpoint that is used when DHW heat demand is “on”.
- Page 104 X. Operation F. Changing Adjustable Parameters (continued) “Press” button to access the following parameters: Factory Range / Choices Parameter and Description Setting Central Heat Outdoor Reset Enable If an outdoor sensor is installed and Outdoor Reset is Enabled, the boiler will automatically adjust the heating zone set point temperature based on the outdoor reset curve in Figure 58.
- Page 105 X. Operation F. Changing Adjustable Parameters (continued) “Press” button to access the following parameters: Factory Range / Choices Parameter and Description Setting Auxiliary Heat Outdoor Reset Enable If an outdoor sensor is installed and Outdoor Reset is Enabled, the boiler will automatically adjust the heating zone set point temperature based on the outdoor reset curve in Figure 58.
- Page 106 X. Operation F. Changing Adjustable Parameters (continued) Figure 58: Outdoor Reset Curve - Typical for Central Heat and Auxiliary Heat Central Heat Central Heat Heating Element Type Heating Element Type Setpoint Setpoint 180°F to 190°F 100°F to 140°F In Slab Radiant High Fan Coil (82.2°C to 87.8°C) (37.8°C to 60°C)
- Page 107 X. Operation F. Changing Adjustable Parameters (continued) “Press” button to access the following parameters: Factory Range / Choices Parameter and Description Setting Master Enable/Disable Enable, Disable The Sequencer Master Enable/Disable is used to “turn on” the Multiple Boiler Controller. Warning! Disable enable ONLY one Sequence Master.
- Page 108 X. Operation F. Changing Adjustable Parameters (continued) “Press” button to access the following parameters: Factory Range / Parameter and Description Setting Choices Central Heat Modulation Source This parameter enables the 4-20mA input to control firing rate and the thermostat input to control Local, boiler on/off demand directly without using the internal setpoint.
- Page 109 X. Operation F. Changing Adjustable Parameters (continued) “Press” button to access the following parameters: NOTE Zone Control Description Setup shown for 2 panels, typical for up to 4. Use Up and DOWN Arrows for More Exit Screen without Saving Clear Entire Field Backspace Save Field and Exit Factory Setting...
-
Page 110: Service And Maintenance
XI. Service and Maintenance Important Product Safety Information Refractory Ceramic Fiber Product Warning: The Repair Parts list designates parts that contain refractory ceramic fibers (RCF). RCF has been classified as a possible human carcinogen. When exposed to temperatures above 1805°F, such as during direct flame contact, RCF changes into crystalline silica, a known carcinogen. - Page 111 XI. Service and Maintenance (continued) WARNING Asphyxiation Hazard. This boiler requires regular maintenance and service to operate safely. Follow the instructions contained in this manual. Improper installation, adjustment, alteration, service or maintenance can cause property damage, personal injury or loss of life. Read and understand the entire manual before attempting installation, start-up operation, or service.
- Page 112 XI. Service and Maintenance (continued) DANGER Explosion Hazard. Electrical Shock Hazard. Burn Hazard. This boiler uses flammable gas, high voltage electricity, moving parts, and very hot water under high pressure. Assure that all gas and electric power supplies are off and that the water temperature is cool before attempting any disassembly or service.
- Page 113 XI. Service and Maintenance (continued) prohibited. Do not use any cleaning agents or solvents. If insulation disc has signs of damage, it must be replaced. CAUTION / ATTENTION Inspect the condensate trap to verify it is open and free Electrical Shock Hazard. Label all wires prior to from debris.
- Page 114 Insure that system fluid contains proper glycol 547-6002 and/or selected HVAC distributors. concentration and inhibitor level. The system should Contact Velocity Boiler Works, LLC for specific details. be tested at least once a year and as recommended by the manufacturer of the glycol solution. Allowance iii.
- Page 115 XI. Service and Maintenance (continued) i. If the original condensate overflow switch is to g. Restore power supply to boiler. Fill up the trap (see Section V “Condensate Disposal”) and verify be re-used, follow the appropriate switch removal steps from Condensate Overflow Switch Removal the switch operation.
-
Page 116: Troubleshooting
XII. Troubleshooting WARNING Electrical Shock Hazard. Turn off power to boiler before working on wiring. A. Troubleshooting problems where no error code is displayed. Condition Possible Cause Boiler not responding to call for heat, “Status” and Boiler is not seeing call for heat. Check thermostat or zone wiring for loose connection, “Priority”... - Page 117 XII. Troubleshooting (continued) C. Help Screen Faults Indication Condition Possible Cause Zone Panel 1 communication lost, typical for Panel 1 through 4: The zone panel’s communication was established and then lost. Check the following to correct the Zone Panel 1 issue: •...
- Page 118 XII. Troubleshooting (continued) E. Active Fault Screen Faults Indication Condition Possible Cause The Limit String Status screen shows the faulty safety limit. A contact icon, either “open” or “closed”, graphically represents each safety limit. The “closed” contact icon Limit String Status is steady;...
- Page 119 XII. Troubleshooting (continued) F. Troubleshooting problems where a Soft Lockout Code is displayed. When a soft lockout occurs, the boiler will shut down, the display will turn red and the “Help” button will “blink”. Select the “blinking” “Help” button to determine the cause of the soft lockout.
- Page 120 XII. Troubleshooting (continued) G. Troubleshooting problems where a Hard Lockout Code is displayed. When a hard lockout occurs, the boiler will shut down, the display will turn red and the “Help” button will “blink”. Select the “blinking” “Help” button to determine the cause of the Hard Lockout.
- Page 121 XII. Troubleshooting (continued) Hard Lockout Codes Displayed (continued) Lockout Number Condition Possible Cause • Loose or defective gas valve harness. Check electrical Power detected at fuel valve output when connections. Fuel Valve Error fuel valve should be off. • Defective gas valve (check for 24 Vac at harness during trial for ignition before replacing valve).
-
Page 122: Service Parts
XIII. Service Parts The following parts may be obtained from any Velocity Boiler Works, LLC distributor. To find the closest Velocity distributor, consult the area Velocity representative or the factory at: Velocity Boiler Works, LLC Customer Service, P.O. Box 14818, Philadelphia, PA 19134. www.velocityboilerworks.com... - Page 123 XIII. Service Parts (continued) Heat Exchanger Components Part Number Description PHNTM399C PHNTM500C PHNTM600C PHNTM700C PHNTM800C Replacement Heat Exchanger Assembly (includes bare heat exchanger, supply and 106464-01 106278-01 106465-01 106279-01 return water temperature sensors, air vent valve and header gaskets) 1A Air Vent Valve 101586-01 Supply Water Temperature Sensor / High 106014-01...
- Page 124 XIII. Service Parts (continued) 106309-03 - 4/19...
- Page 125 XIII. Service Parts (continued) Blower / Gas Train Components Part Number Description PHNTM399C PHNTM500C Replacement Blower Kit (includes blower, blower outlet gasket and hardware) 104999-01 104999-02 Blower Outlet Gasket 101345-01 105995-01 Blower Inlet Assembly (includes gas orifice, injector flange, inlet shroud (425C 101704-04 101704-05 only), swirl plate, blower adapter plate, and mounting hardware)
- Page 126 106309-03 - 4/19...
- Page 127 XIII. Service Parts (continued) Blower / Gas Train Components Part Number Description PHNTM600C PHNTM700C PHNTM800C Replacement Blower Kit (includes blower, blower outlet gasket 104999-03 and hardware) Blower Outlet Gasket 103263-01 Natural Gas: Natural Gas: Blower Inlet Assembly (includes gas orifice, injector flange, inlet 105001-01 105001-02 shroud (425 only), swirl plate, blower adapter plate, and mounting...
- Page 128 XIII. Service Parts (continued) Condensate Trap and Related Components Part Number Description PHNTM399C PHNTM500C PHNTM600C PHNTM700C PHNTM800C Replacement Condensate Trap Kit (includes trap, float switch, grommet, 104704-01 105006-01 coupling, and clamps) Replacement Condensate Float Switch 105005-01 (includes float switch and clamp) Spring Hose Clamp, 15/16 in.
- Page 129 XIII. Service Parts (continued) Control Components Part Number Description PHNTM399C PHNTM500C PHNTM600C PHNTM700C PHNTM800C Replacement Control Kit (pro- 106500-01 106500-02 grammed) Replacement Display Kit (programmed, includes mounting 106508-01 hardware) Transformer 102516-01 103193-01 Replacement 120V PCB Kit (includes 106512-01 PCB, fuses, and hardware) Replacement Low Voltage PCB Kit 106513-01 (includes PCB, fuses, and hardware)
- Page 130 106309-03 - 4/19...
- Page 131 XIII. Service Parts (continued) Jacket and Trim Components Part Number Description PHNTM399C PHNTM500C PHNTM600C PHNTM700C PHNTM800C Left Side Panel 106249-01 106249-02 106249-03 106249-04 Right Side Panel (includes 106517-01 106517-02 106517-03 106517-04 rating label instructions) Top Panel (includes gaskets) 106254-01 106254-02 106254-03 106254-04 Top Control Access Panel...
- Page 132 XIII. Service Parts (continued) Additional Components Part Number Description PHNTM399C PHNTM500C PHNTM600C PHNTM700C PHNTM800C CSD-1 Kit (not shown, 106056-01 includes manual reset high limit and 106056-01 107421-01 immersion well; 107421-01 kit includes gas pressure switches) Gas Pressure Switch Assembly 106356-01 Low Gas Pressure Switch 107654-01 High Gas Pressure Switch...
- Page 133 XIII. Service Parts (continued) 106309-03 - 4/19...
- Page 134 XIII. Service Parts (continued) Wiring Harnesses Part Number Description PHNTM399C PHNTM500C PHNTM600C PHNTM700C PHNTM800C 10A 120V Harness 106003-01 10B Low Voltage Harness 106008-01 10C Fan Power Harness 103012-01 10D Ignition Harness 107211-01 10G GT02 Display Communication Harness 106005-01 10H Flow Switch Harness 106385-01 10J LWCO Jumper 105111-01...
-
Page 135: Appendix A - Instructions For High Altitude Installations Above 2000 Ft And Lp Conversions
Appendix A - Instructions for High Altitude Installations Above 2000 ft. and LP Conversions WARNING If installing PHNTM500C: Do not convert PHNTM500C to LP (propane gas) at altitudes above 6000 ft. If installing PHNTM800C: Do not install PHNTM800C-NG (natural gas) at altitudes above 6000 ft. If installing PHNTM700C: Do not install PHNTM700C-LP (propane gas) at altitudes above 7800 ft. - Page 136 Appendix A - Instructions for High Altitude Installations Above 2000 ft. and LP Conversions (continued) 6. Lock boiler in low fire (see Section IX. System 10. Press “Adjust” button on Boiler Type screen. 11. Use the ↓ ↑ arrows to select the correct size Start-up).
- Page 137 Appendix A - Instructions for High Altitude Installations Above 2000 ft. and LP Conversions (continued) Table S1: Approximate Clockwise Throttle Screw Turns for LP Gas (Propane) Conversion Boiler Model Approximate Throttle Screw Turns PHNTM399C 2¾ PHNTM500C PHTNM600C PHNTM700C N/A - Fatory LP Builds PHNTM800C Figure 49: Gas Valve Detail 106309-03 - 4/19...
- Page 138 Appendix A - Instructions for High Altitude Installations Above 2000 ft. and LP Conversions (continued) Table S2: Phantom X Altitude Adjustments Percentage Derate Altitude Model Fuel Recommended CO Range (approx. per 1000 ft) 8.6-9.2 PHNTM399C 2.3% 9.4-10.2 8.7-9.2 PHNTM500C 4.1% 9.8-10.1 2,001 ft 8.6-9.2...
- Page 139 106309-03 - 4/19...
- Page 140 Velocity Boiler Works, LLC P.O. Box 14818 3633 I Street Philadelphia, PA 19134 www.velocityboilerworks.com 106309-03 - 4/19...
Need help?
Do you have a question about the Phantom-X Series and is the answer not in the manual?
Questions and answers