Advertisement
Quick Links
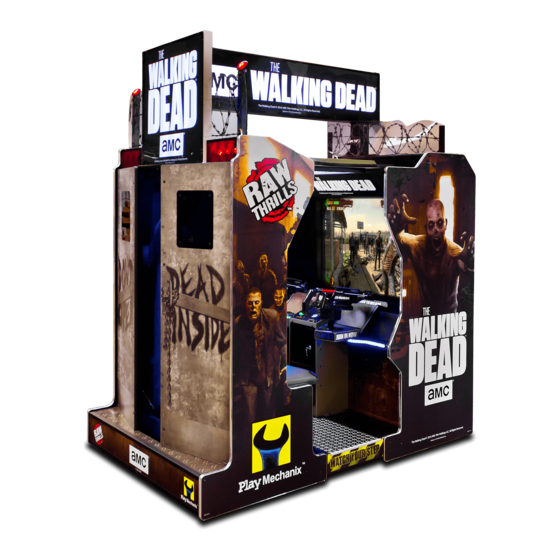
Setup and Operation
Service Manual
Revision TWD-1.1-7.11-1
The Walking Dead © 2016 AMC Film Holdings LLC. All Rights Reserved.
Game Software Copyright 2016 Play Mechanix™ Inc.
The Walking
Dead©
This software is based in part on the work of the Independent JPEG Group.
This product includes software developed by the OpenSSL Project for use in the OpenSSL Toolkit. (http://www.openssl.org/)
This product includes cryptographic software written by Eric Young (eay@cryptsoft.com)
Advertisement

Related Manuals for Play Mechanix amc The Walking Dead


Summary of Contents for Play Mechanix amc The Walking Dead
- Page 1 Service Manual Revision TWD-1.1-7.11-1 The Walking Dead © 2016 AMC Film Holdings LLC. All Rights Reserved. Game Software Copyright 2016 Play Mechanix™ Inc. The Walking Dead© This software is based in part on the work of the Independent JPEG Group.
-
Page 2: Table Of Contents
Safety ................................3 Product Specifications........................... 5 Setup ................................6 Game Software Setup ..........................22 Maintenance ............................... 23 Troubleshooting ............................25 Parts ................................27 Electrical Wiring ............................46 Contact Information ............................ 49 Copyright © 2016 Play Mechanix™ Inc. All rights reserved. Page 2... - Page 3 PERATION Before operating game, read this manual. Failure to properly install and operate this game could result in malfunction or accident. Operate the game in accordance with the manual. RANSPORTING Cabinet is very heavy and contains fragile components. Use appropriate care when moving or transporting cabinet. Avoid rough handling.
-
Page 4: Safety
For reasons such as performance, this product’s specifications may change without notice. Federal patent, copyright and other intellectual property laws protect the content, devices and design of the game and its equipment. Copyright © 2016 Play Mechanix™ Inc. All rights reserved. Page 4... - Page 5 Electrical Power Domestic 120 VAC @ 60 Hz, 5 amps International 240 VAC @ 50 Hz, 2.5 amps Japan 100 VAC @ 50 Hz, 5 amps ELECTICAL SAFETY NOTICE REPLACE FUSE WITH SPECIFIED FUSE RATING ONLY. DO NOT REPLACE FUSE WITH HIGHER THAN SPECIFIED RATING. RIO PCB Fuse Guide +5 VDC ‐...
-
Page 6: Setup
4. Check for shipping damage to the following: Cabinet Marquee, Cabinet back door, Cabinet coin door, Cabinet decals, Monitor Install Floor Assembly 1. Locate the mounting brackets and parts bag inside the floor assembly. Copyright © 2016 Play Mechanix™ Inc. All rights reserved. Page 6... - Page 7 ¼ -20 x 2” T-27 Torx screws 2. Attach brackets to Monitor Assembly with three (do not fully tighten screws) 3. Connect cables from Monitor Assembly to Floor Assembly. Be careful not to pinch the cables when sliding Floor Assembly into Monitor Assembly . ¼...
- Page 8 (do not fully tighten screws) 6. Connect cables from Seat Assembly to Floor Assembly Be careful not to pinch the cables when sliding Floor Assembly into Seat Assembly . Copyright © 2016 Play Mechanix™ Inc. All rights reserved. Page 8...
- Page 9 ¼ -20 x 2” T-27 Torx screws 7. Attach Floor Assembly to Seat Assembly with three (do not fully tighten screws) ¼ -20 x 2” T-27 Torx screws; there are 8. Fully tighten all 12 screws per side. Walking Dead© Game Software copyright 2016 PlayMechanix™ Inc. All rights reserved. Page 9...
- Page 10 Setup ¼ -20 x 2” T-27 Torx screws with washers. 9. Secure floor assembly with four Copyright © 2016 Play Mechanix™ Inc. All rights reserved. Page 10...
- Page 11 Install Cabinet Roof Assembly 1. Locate Cabinet Roof Assembly and six roof assembly bolts with washers. 2. Lift and position Cabinet Roof Assembly on top of Main Cabinet Assembly Be sure cable connection is directed toward the Monitor Assembly Walking Dead© Game Software copyright 2016 PlayMechanix™ Inc. All rights reserved. Page 11...
- Page 12 3. Connect cable from Monitor Assembly to Roof Assembly ¼ -20 x 2” T-27 security 4. Secure Roof Assembly to Seat Assembly and Monitor Assembly with six and washers. Torx screws Copyright © 2016 Play Mechanix™ Inc. All rights reserved. Page 12...
- Page 13 Assemble Marquee Topper 1. Locate marquee and monitor assembly mounting bracket parts. 2. Assemble monitor assembly mounting bracket, using four ¼-20 x .5” Phillips head screws. Walking Dead© Game Software copyright 2016 PlayMechanix™ Inc. All rights reserved. Page 13...
- Page 14 Two of these screws are located on the interior of the mounting bracket. Be careful not to pinch the power cable. Secure seat assembly mounting bracket to marquee using 4 ¼-20 x .5” Phillips head screws. Copyright © 2016 Play Mechanix™ Inc. All rights reserved. Page 14...
- Page 15 Install Marquee Topper 1. Locate Main Marquee Assembly, Rear Marquee Assembly, and associated parts bag. 2. With an assistant, position the Main Marquee Assembly on top of the cabinet. 3. Connect and route the power cable from the Monitor Assembly to the Main Marquee Assembly. Be careful not to pinch the cable between the topper and cabinet.
- Page 16 4. Attach Main Marquee Assembly to Monitor Assembly using six ¼-20 x 1.5” hexhead screws. (do not fully tighten screws) 5. Attach Main Marquee Assembly to Seat Assembly using two ¼-20 x 1.5” hexhead screws. (do not fully tighten screws) Copyright © 2016 Play Mechanix™ Inc. All rights reserved. Page 16...
- Page 17 6. Connect and route the power cable from the Seat Assembly to the Rear Marquee Assembly. Be careful not to pinch the cable between the topper and cabinet. 7. Hook Rear Marquee Assembly to Main Marquee Assembly Walking Dead© Game Software copyright 2016 PlayMechanix™ Inc. All rights reserved. Page 17...
- Page 18 Setup 8. Secure Rear Marquee Assembly to Main Marquee Assembly using four screws. 9. Fully tighten all Marquee Topper screws. Copyright © 2016 Play Mechanix™ Inc. All rights reserved. Page 18...
- Page 19 Install Razor Wire 1. Locate the left and right Rear Razor Wire assemblies. 2. Connect cables from Rear Razor assemblies to the Seat Assembly. Be careful not to pinch the cables between the assembly and the cabinet. Walking Dead© Game Software copyright 2016 PlayMechanix™ Inc. All rights reserved. Page 19...
- Page 20 Setup 3. Secure each Razor Wire Assembly to Seat Assembly and Rear Marquee Assembly with six screws and washers. Be sure to fully tighten all screws. Copyright © 2016 Play Mechanix™ Inc. All rights reserved. Page 20...
- Page 21 4. Secure left and right Front Razor Wire assemblies to the Monitor Assembly with five screws and washers. Be sure to fully tighten all screws. Verify Cabinet Functionality 1. Verify the voltage in the nearest AC outlet. 2. Verify the AC outlet ground connection is present and working. 3.
-
Page 22: Game Software Setup
7. Enter the WATCHDOG TEST menu, which re-boots the game. 8. Upon a successful re-boot, you are ready to make adjustments to pricing, volume and other functions found in the Diagnostic menu. Copyright © 2016 Play Mechanix™ Inc. All rights reserved. Page 22... - Page 23 Hard Drive Recovery Symptoms requiring hard drive recovery include: File Test reports bad or missing files Game fails to finish loading during startup After resetting the AC power, an error is reported You are prompted to insert a boot DVD ...
-
Page 24: Maintenance
AC power and reboot, after the crossbows are connected again. Failure to do so may result in incorrect functionality. Following these procedures is critical to maintaining crossbows and maximizing revenue. Perform regular maintenance to keep your game in top working order. Copyright © 2016 Play Mechanix™ Inc. All rights reserved. Page 24... - Page 25 Warning: Review safety chapter before making any adjustments to game. General Troubleshooting Problem Possible Cause Solution Game will not power up Game not plugged in. Plug game into outlet. Game not turned on. Turn on main power switch. Game fuse is blown. Check and replace fuse.
-
Page 26: Troubleshooting
Verify 5V and 12V fuses are not blown No power to RIO board Check for proper voltage (+5V, +12V) at RIO P2 connector Bad RIO Board Replace RIO board with known functional board Copyright © 2016 Play Mechanix™ Inc. All rights reserved. Page 26... - Page 27 Seat Cabinet Assembly Walking Dead© Game Software copyright 2016 PlayMechanix™ Inc. All rights reserved. Page 27...
-
Page 28: Parts
600-01934-01 GRILL-PORT-WD 603-00794-01 PETG-DOOR-OPENING-WD 603-00795-01 WINDOW-DOOR-WD 603-00796-01 WINDOW-INSIDE-WD 600-01859-01 BRACKET-SEAT-CUSHION-WD SPEAKER WOOFER-6.5” 4 OHM 2-1-11-00-00-000 600-01870-01 SEAT-BASE-PAD-ASSY-WD 600-01871-01 SEAT-BACKREST-PAD-PANEL-WD 601-00775-01 WD-BACKRES-PANEL 603-00809-01 PLATE-LEFT-HAND-WD 606-01269-01 DECAL-ZOMBIE-LEFT-HAND-WD 603-00808-01 PLATE-RIGHT-HAND-WD 606-01268-01 DECAL-ZOMBIE-RIGHT-HAND-WD Copyright © 2016 Play Mechanix™ Inc. All rights reserved. Page 28... - Page 29 Main Cab Assembly Main Cab Assembly Part Numbers Item Part No. Description 601-00758-01 ASSY-WOOD-MAINCAB-WD CASTER 2’5 2-1/2” CASTER LEG LEVELER – ½”-13 X 4.00LG LEG LEVELER – ½”-13 X 4.00LG LEG LEVELER PLATE 2.50 X 2.50 X ½-13 CTR-LEVELER PLATE 606-01176-01 DECAL-LEFT-SIDE-MAINCAB-WD 606-01177-01...
- Page 30 820-00001-00 FAN,120VAC,19/15W 800-00001-00 120mm Wire Fan Guard 600-01458-01 JP-55-CTR-CONNECT-BRACKET 600-01464-01 JP-55-SPEAKER-GRILL 600-01849-01 BRACKET-SUPPORT-CP-WD 600-01850-01 ANGLE-SUPPORT-CP-WD 600-01851-01 WD-CP-DECAL-BRACKET 600-01853-01 GRILL-CP-SPEAKER-WD 600-01899-01 CLIP-LED-WD 606-01193-01 DECAL-CP-CENTER-WD 606-01194-01 DECAL-CP-HEADER-WD LEFT-CONTROL-PANEL-ASSY LEFT-CONTROL-PANEL-ASSY RIGHT-CONTROL-PANEL-ASSY RIGHT-CONTROL-PANEL-ASSY Copyright © 2016 Play Mechanix™ Inc. All rights reserved. Page 30...
- Page 31 Final Cabinet Assembly Item Description WD-55-MAIN-CAB-ASSY WD-55-SEAT-CAB-ASSY WD-55-FLOOR-BOX-ASSY WD-ROOF-ASSY WD-LIGHTBOX-ASSY WD-SQ-LIGHTBOX-ASSY WD-55-MAINCAB-BARBEDWIRE-ASSY WD-55-SEATCAB-POST-ASSY Walking Dead© Game Software copyright 2016 PlayMechanix™ Inc. All rights reserved. Page 31...
- Page 32 Parts Floor Box Assembly Floor Box Assembly Part Numbers Item Part No. Description 600-01847-01 WD-WOOD-FLOOR-BOX 600-01457-01 JP-55-CONNECT-BRACKET 600-01863-01 DIAMOND-PLATE-WD 600-01864-01 TRIM-FLOOR-WD 606-01191-01 DECAL-FLOORBOX-SIDE-WD CASTER – 2-1/2” CASTER – 2-1/2” Copyright © 2016 Play Mechanix™ Inc. All rights reserved. Page 32...
- Page 33 Roof Assembly Roof Assembly Part Numbers Item Part No. Description 601-00761-01 ASSY-WOOD-ROOF-WD 600-01865-01 WD-55-ROOF-BRACKET 600-01802-01 RETAINER-CROSS-ROOF-WD 600-01801-01 RETAINER-END-ROOF-WD 603-00785-01 PANEL-DIFFUSION-ROOF-WD 500-00184-100 100CM-RGB-LED-STRIP-LIGHT-60LEDS Walking Dead© Game Software copyright 2016 PlayMechanix™ Inc. All rights reserved. Page 33...
- Page 34 603-00793-01 COVER-BOTTOM-CP-WD 603-00792-01 ACRYLIC-GREEN-CP-WD (LEFT) 603-00791-01 ACRYLIC-BLUE-CP-WD (RIGHT) 606-01215-01 DECAL-JOIN-IN-WD 606-01197-01 DECAL-PLAYER-1-WD 606-01198-01 DECAL-PLAYER-2-WD 606-01195-01 DECAL-CROSSBOW-FRONT-WD 606-01196-01 DECAL-CROSSBOW-SIDE-WD 820-00024-01 ASSY-BOW-MECH-WD 820-00024-01 Crossbow Main Assembly 500-00205-01 White LED Superpuck PCB-36LEDS Copyright © 2016 Play Mechanix™ Inc. All rights reserved. Page 34...
- Page 35 Crossbow Main Assembly Walking Dead© Game Software copyright 2016 PlayMechanix™ Inc. All rights reserved. Page 35...
- Page 36 8-32 black locknut MMC 96765A120 8-32 black washer 8-32 x 1.5” black tamperproof screw MMC 96075A155 MMC 97416A115 10-32 black washer 10-32 x ¾” black tamperproof screw MMC 96075A191 Copyright © 2016 Play Mechanix™ Inc. All rights reserved. Page 36...
- Page 37 Crossbow Top Assembly Walking Dead© Game Software copyright 2016 PlayMechanix™ Inc. All rights reserved. Page 37...
- Page 38 MMC 91355A077 8-32 x 3/8” low profile cap screw MMC 92220A152 8-32 x 5/8” cap screw MMC 91251A196 8-32 x 5/16” cap screw MMC 91251A191 MMC 90652A029 1/4-20 thin locknut Copyright © 2016 Play Mechanix™ Inc. All rights reserved. Page 38...
- Page 39 Crossbow Upper Assembly Walking Dead© Game Software copyright 2016 PlayMechanix™ Inc. All rights reserved. Page 39...
- Page 40 Pot – 5k HAPP 50-2670-01 8-32 x 5/16” cap screw MMC 91251A191 MMC 90631A005 4-40 locknut 8-32 x ¼” Phillips screw MMC 90272A190 10-32 x 3/8” flathead Phillips screw MMC 90273A827 Copyright © 2016 Play Mechanix™ Inc. All rights reserved. Page 40...
- Page 41 Crossbow Lower Assembly Crossbow Lower Assembly Part Numbers Item Part No. Description 600-01426-01 Lower tube weldment 600-01425-01 Rocker bracket 600-01424-01 Side pin 600-01496-01 Lower mounting bracket 600-01738-01 Lower cover-left Lower cover – right 600-01739-01 600-01419-01 Pinch cover Tube stop bumper – 5/8” OD 600-01418-01 HAPP 96-4907-00 Segment gear...
- Page 42 600-01413-01 Coil rod 680-00214-01 Blue damper pad 608-00210-01 Coil spring HAPP FL11629 Coil HAPP #95-0637-00 Coil sleeve ¼-20 x 3/8” set screw MMC 91375A535 MMC 93298A109 10-32 flanged locknut Copyright © 2016 Play Mechanix™ Inc. All rights reserved. Page 42...
- Page 43 Crossbow Grip Assembly Crossbow Grip Assembly Part Numbers Item Part No. Description 608-00204-01 Red trigger 608-00206-01 Torsion spring 608-00205-01 Trigger shaft 608-00225-01 Switch assy wms da3 type Grip – right hand 608-00222-01 Grip – left hand 608-00223-01 Walking Dead© Game Software copyright 2016 PlayMechanix™ Inc. All rights reserved. Page 43...
- Page 44 600-01860-01 POST-WELDMENT-WIRE-WD 603-00540-01 LED Spotlight Lens-RED-TINT 606-01203-01 DECAL-RIGHT-FRONT-BARBED-WIRE-WD 500-00065-02 RED LED PUCK LIGHT PCB Square Lightbox Assembly Item Part No. Description 600-01803-01 LIGHTBOX-SQUARE-WD 603-00786-01 PETG-SQUARE-LIGHTBOX-WD 606-01199-01 WD-SQ-LIGHTBOX-TRANSLITE 500-00162-65 65CM-WHITE-LED-STRIP-39LEDS Copyright © 2016 Play Mechanix™ Inc. All rights reserved. Page 44...
- Page 45 Lightbox Assembly Item Part No. Description 600-01804-01 FRAME-HORIZ-LIGHTBOX-WD 600-01805-01 FRAME-VERT-LIGHTBOX-WD 600-01806-01 BRACKET-FRONT-LIGHTBOX-WD 600-01807-01 BRACKET-TOP-LIGHTBOX-WD 600-01808-01 BRACKET-SUPPORT-LIGHTBOX-WD 600-01809-01 COVER-SUPPORT-LIGHTBOX-WD 600-01810-01 GUSSET-LIGHTBOX-WD 603-00787-01 PETG-LIGHTBOX-WD 606-01200-01 WD-LIGHTBOX-TRANSLITE 603-00788-01 STYRENE-REFLECTOR-LIGHTBOX-WD 500-00162-150 150CM-WHITE-LED-STRIP-90LEDS Walking Dead© Game Software copyright 2016 PlayMechanix™ Inc. All rights reserved. Page 45...
-
Page 46: Electrical Wiring
Electrical Wiring Barbed Wire Assembly Item Part No. Description 600-01861-01 BRACKET-CORNER-WIRE-WD 600-01862-01 BRACKET-EDGE-WIRE-WD 606-01204-01 DECAL-LEFT-REAR-BARBED-WIRE-WD 606-01205-01 DECAL-RIGHT-REAR-BARBED-WIRE-WD Copyright © 2016 Play Mechanix™ Inc. All rights reserved. Page 46... - Page 47 Walking Dead© Game Software copyright 2016 PlayMechanix™ Inc. All rights Page 47 reserved.
- Page 48 Electrical Wiring Copyright © 2016 Play Mechanix™ Inc. All rights reserved. Page 48...
- Page 49 For an authorized distributor near you, visit Raw Thrills at http://www.rawthrills.com/sales-service For service, contact your local distributor or your local Betson office for sales, technical information, warranty or repair. Betson can be reached at (800) 524-2343 Fax (201) 438-4837 www.betson.com Betson Enterprises Headquarters 303 Paterson Plank Rd.
Need help?
Do you have a question about the amc The Walking Dead and is the answer not in the manual?
Questions and answers