Table of Contents
Advertisement
Quick Links
CDE30
Commercial Display
User Guide
IMPORTANT: Please read this User Guide to obtain important information on installing and using your product in
a safe manner, as well as registering your product for future service. Warranty information contained in this User
Guide will describe your limited coverage from ViewSonic® Corporation, which is also found on our web site at
http://www.viewsonic.com in English, or in specific languages using the Regional selection box in the upper right
Model No. VS19112 | VS19113 | VS19114 | VS19115 | VS19116 | VS19117
P/N: CDE4330 | CDE5530 | CDE6530 | CDE7530 | CDE8630 | CDE9830
corner of our website.
Advertisement
Table of Contents

Subscribe to Our Youtube Channel
Related Manuals for ViewSonic VS19112


Summary of Contents for ViewSonic VS19112
- Page 1 Warranty information contained in this User Guide will describe your limited coverage from ViewSonic® Corporation, which is also found on our web site at http://www.viewsonic.com in English, or in specific languages using the Regional selection box in the upper right corner of our website.
- Page 2 At ViewSonic®, we believe that our products have the potential to make a positive impact in the world, and we are confident that the ViewSonic® product you have chosen will serve you well.
-
Page 3: Safety Precautions
Do not place any heavy objects on the device or connection cables. • If smoke, an abnormal noise, or a strange odor is present, immediately turn the device off and call your dealer or ViewSonic®. It is dangerous to continue using the device. •... - Page 4 • When a cart is used, use with caution when moving the cart/equipment combination to avoid injury from tipping over. • Disconnect the power plug from the AC outlet if the device is not being used for a long period of time. •...
- Page 5 CAUTION: Immediately unplug your device from the wall outlet and refer servicing to a qualified service personnel under the following conditions: • When the power supply cord or plug is damaged. • If liquid has been spilled onto or objects have fallen into the unit. •...
-
Page 6: Table Of Contents
Contents Safety Precautions ............3 Contents ..............6 Introduction ..............9 Package Contents ....................9 Wall Mounting Specifications (VESA) ..............10 CDE4330 ........................ 10 CDE5530 ........................ 11 CDE6530 ........................ 11 CDE7530 ........................ 12 CDE8630 ........................ 12 CDE9830 ........................ 13 Product Overview ....................14 CDE4330 ........................ - Page 7 Using Your Display ............. 32 Powering On/Off Your Display ................32 Initial Launch Setup ....................33 Home Screen ......................36 General Settings ....................37 Network ......................... 38 Device ........................41 System ........................48 General Settings Menu Tree ................. 50 On-Screen Display (OSD) Menu ................52 Navigating the OSD Menu using the Remote Control ...........
- Page 8 Appendix ..............78 Specifications ......................78 USB Media Support Format ..................80 Photo ........................80 Video ........................80 Audio ........................84 Subtitle ........................90 Timing Table ......................91 HDMI PC ........................ 91 HDMI ........................91 Type-C ........................92 Troubleshooting ....................94 Maintenance......................96 General Precautions ....................96 Cleaning the Screen ....................
-
Page 9: Introduction
CDE4330/CDE5530/CDE6530/CDE7530/CDE8630/CDE9830 Commercial Display CDE4330/CDE5530/CDE6530/CDE7530/CDE8630/CDE9830 Quick Start Guide Commercial Display Quick Start Guide Introduction CDE4330/CDE5530/CDE6530/CDE7530/CDE8630/CDE9830 Commercial Display Quick Start Guide FRAGILE (For CDE6520/CDE7520) FRAGILE (For CDE6520/CDE7520) Package Contents USB1 FRAGILE USB3.0 USB2 (For CDE6520/CDE7520) USB1 USB3.0 USB2 USB1 USB3.0 USB2 CDE4330/CDE5530/CDE6530/CDE7530/CDE8630/CDE9830 Commercial Display Quick Start Guide CDE4330/CDE5530/CDE6530/CDE7530/CDE8630/CDE9830... -
Page 10: Wall Mounting Specifications (Vesa)
Wall Mounting Specifications (VESA) NOTE: Please follow the instructions in the wall mount installation guide to install your wall mount or mobile mount bracket. If attaching to other building materials, please contact your nearest dealer. CDE4330 Model VESA Spec. (A x B) Standard Screw (C x D) Quantity CDE4330... -
Page 11: Cde5530
CDE5530 Model VESA Spec. (A x B) Standard Screw (C x D) Quantity CDE5530 400 x 200 mm M6 x 12 mm NOTE: Do not use screws that are longer than the standard dimension, as they may cause damage to the inside of the display. CDE6530 Model VESA Spec. -
Page 12: Cde7530
CDE7530 Model VESA Spec. (A x B) Standard Screw (C x D) Quantity CDE7530 800 x 600 mm M8 x 25 mm NOTE: Do not use screws that are longer than the standard dimension, as they may cause damage to the inside of the display. CDE8630 Model VESA Spec. -
Page 13: Cde9830
CDE9830 Model VESA Spec. (A x B) Standard Screw (C x D) Quantity CDE9830 800 x 600 mm M8 x 25 mm NOTE: Do not use screws that are longer than the standard dimension, as they may cause damage to the inside of the display. -
Page 14: Product Overview
Product Overview CDE4330 Front Panel Rear Panel Control Panel I/O Panel... -
Page 15: Cde5530
CDE5530 Front Panel Rear Panel Control Panel I/O Panel... -
Page 16: Cde6530
CDE6530 Front Panel Rear Panel I/O Panel Control Panel... -
Page 17: Cde7530
CDE7530 Front Panel Rear Panel I/O Panel Control Panel... -
Page 18: Cde8630
CDE8630 Front Panel Rear Panel I/O Panel Control Panel... -
Page 19: Cde9830
CDE9830 Front Panel Rear Panel I/O Panel Control Panel... -
Page 20: Control Panel
Control Panel INPUT MENU Number Button Description • Increase the volume level. Left / Volume • In the OSD Menu, press to adjust the value of the selected Increase item. • Decrease the volume level. Right / Volume • In the OSD Menu, press to adjust the value of the selected Decrease item. -
Page 21: I/O Panels - Cde4330 | Cde5530
I/O Panels - CDE4330 | CDE5530 SPDIF USB 2.0 USB 3.0 RS-232 HDMI OUT 1 (ARC) Number Port Description Power Switch Turn the device ON/OFF. AC IN AC power input. SPDIF Multichannel sound via optical signals. Standard RJ45 (10M/100M/1G) Internet connection interface. -
Page 22: I/O Panels - Cde6530 | Cde7530 | Cde8630 | Cde9830
I/O Panels - CDE6530 | CDE7530 | CDE8630 | CDE9830 SPDIF Number Port Description Connect USB devices such as hard disks, keyboard, USB 2.0 mouse, etc. (Output rating: 5Vdc/500mA) Serial interface; used for mutual transfer of data RS-232 between devices. Connect USB devices such as hard disks, keyboard, USB 3.0 mouse, etc. -
Page 23: Remote Control
Remote Control Number Description Power on/off Screen capture Back to the Launcher screen Back/Return to the previous page Increase/Decrease the Volume Number Keypad Information Input source selection Media control buttons: • Red: Play/Pause • Green: Stop • Yellow: Forwards • Blue: Backwards Settings menu Up/Down/Right/Left/OK Freeze screen... -
Page 24: Inserting Remote Control Batteries
Inserting Remote Control Batteries To insert batteries into the remote control: 1. Remove the cover on the rear of the remote control. 2. Insert two “AAA” batteries, ensuring the “+” symbol on the battery matches the “+” on the battery post. 3. -
Page 25: Remote Control Receiver Range
Remote Control Receiver Range The working range of the remote control is shown here. It has an effective range of ° 6 meters, 30 degrees left and right. Ensure there is nothing obstructing the remote control’s signal to the receiver. 30°... -
Page 26: Making Connections
Making Connections Connecting External Devices Type-C Cable Type-C HDMI Cable Computer HDMI Your external device(s) can be connected in any of the following configurations: USB Type-C Connection To connect via USB Type-C: Connect a USB Type-C cable from your external device to the Type-C port on the display. -
Page 27: Rs-232 Connection
RS-232 Connection Serial Port Cable RS-232 Computer When you use a RS-232 serial port cable to connect your display to an external computer certain functions can be controlled remotely by the PC, including Power On/Off, Volume adjustment, Input select, Brightness, and more. -
Page 28: Usb And Network Connections
USB and Network Connections Just like any PC, it is easy to connect various USB devices and other peripherals to your display. USB Peripherals Plug the USB device cable into the USB port. USB Cable USB Device Networking and Modem cables Plug the network cable into the LAN port. -
Page 29: Media Player Connection
Media Player Connection HDMI Media Player HDMI Cable To connect to a media player via HDMI: 1. Connect an HDMI cable to the HDMI ports on your display and peripheral device. Plug in the power cord of your display, and turn on the power supply switch. Press the Power button on the display to turn the screen on. - Page 30 SPDIF Connection Optical Cable SPDIF To connect to an external sound system: Power amplifier / Stereo equipment 1. Connect an optical cable from the SPDIF port on the display to your sound system’s optical connector. Plug in the power cord of your display, and turn on the power supply switch. Audio Cable Press the Power button on the display to turn the screen on.
- Page 31 Video Output Connection To output video via an external display device, connect an HDMI cable to the HDMI IN port of your external display device, and the other end to the HDMI OUT port of the display. HDMI OUT HDMI Cable Projector...
-
Page 32: Using Your Display
Using Your Display Powering On/Off Your Display 1. Ensure the power cord is connected, plugged into a power outlet, and the power switch is in the “On” position. NOTE: The AC IN socket is located at the rear, and the Power Switch is located underneath the display. -
Page 33: Initial Launch Setup
Initial Launch Setup When you first turn on your display, an initial setup wizard will launch. 1. Select your Language. 2. Select your Network. - Page 34 3. Select your Time Zone. 4. Select your Boot Mode. 5. Select your Power Saving Mode.
- Page 35 6. Accept or Decline Privacy and Copyright Protection.
-
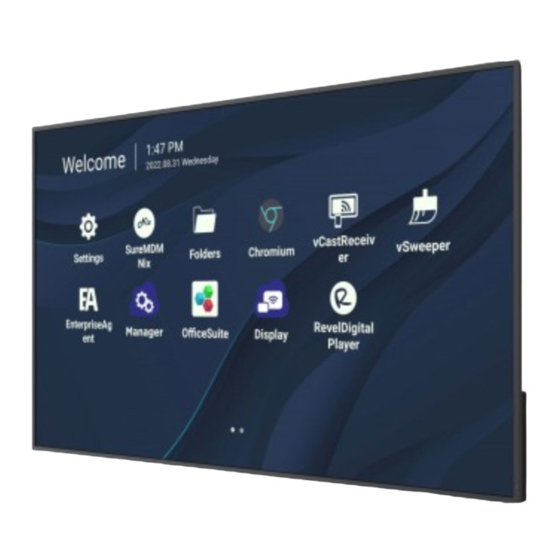
Page 36: Home Screen
Home Screen From the Home Screen all the installed applications can be accessed. NOTE: Press the Home button on the remote control at any time to return to the Home Screen. -
Page 37: General Settings
General Settings Configure basic Network, Device, and System settings. -
Page 38: Network
Network Configure Ethernet, Wi-Fi, Wireless Hotspot, and Bluetooth settings. Ethernet • Enable/Disable Ethernet. NOTE: After Ethernet is Enabled, the Connection Type and MAC Address will be available. • Adjust the Connection Type. Connection Type Description DHCP Cannot modify IP Address, Netmask, DNS Address and Gateway. Static IP Can input IP Address, Netmask, DNS Address and Gateway. - Page 39 Wi-Fi • Enable/Disable Wi-Fi. • Add a Wi-Fi network or choose from the available listed. NOTE: After Wi-Fi is Enabled, available networks will be listed. Wireless Hotspot • Enable/Disable Wireless Hotspot. • Share an internet connection with your devices once enabled.
- Page 40 Bluetooth • Enable/Disable Bluetooth. Miracast • Enable/Disable Miracast.
-
Page 41: Device
Device Configure Signage Display, System Tools, Display, Apps, and Physical Keyboard settings. - Page 42 Signage Display Item Description Signage Display Name Setup the display’s name. Maximum of 36 characters. Boot Logo • Enable/Disable the boot logo. General Settings • Select a custom boot logo or animation file. NOTE: Ensure “Boot on logo” in the Advanced settings of the OSD Menu is set to “User”...
- Page 43 Item Description Custom App Setup a custom .apk application for Custom input source. If a Custom App is setup, the display will open the App when the input source is changed to “Custom”. Source Setting External Storage Enable/Disable USB storage. NOTE: ...
- Page 44 System Tools Item Description Clear all folder data. Internal Storage Clear Storage Only clear internal storage folder data. USB Storage Only clear USB storage folder data. Factory Reset Return to factory default settings. Reset...
- Page 45 NOTE: • The saved file name will be: vs8386SettingFile.txt Import & Export • File will be saved in a folder titled “ViewSonic”. If one does not exist, it will be created. Import Signage Display Settings Import display settings from a USB.
- Page 46 Display Item Description Font Size Adjust the display’s font size. Backlight Adjust the brightness of the display. Orientation Select landscape or portrait mode. Wallpaper Choose a background image for the display.
- Page 47 Apps • View any running or installed applications. Select them for more detailed information and options. • By selecting a running application, more information will be displayed, and the application can be stopped or reported.
-
Page 48: System
System Date & Time Set the time zone and Auto Time settings. - Page 49 About Item Description When the display is off, the system will automatically check Online System for a new version. If a new version is found, the system will Updates automatically update. After the update is complete, the system will turn off. Android Version Current Android version information.
-
Page 50: General Settings Menu Tree
General Settings Menu Tree Main Menu Sub-menu Menu Option Enable/ Disable Ethernet Connection Type Ethernet Configuration MAC Address Enable/ Disable Wi-Fi Add Wi-Fi Network Enable/ Disable Wireless Hotspot Hotspot Configuration Enable/Disable Bluetooth Available Devices Enable/Disable Miracast Name... - Page 51 Main Menu Sub-menu Menu Option Signage Display Name General Settings Boot Logo Source Setting Custom App Trusted Credentials User Credentials Credentials Settings Signage Display Install from Storage Clear Credentials External Storage Unknown Sources Security Privacy and Copyright Protection App Authority Device Clear Storage Internal Storage...
-
Page 52: On-Screen Display (Osd) Menu
On-Screen Display (OSD) Menu Access Picture, Screen, Audio, Time, Advanced, and About settings. Navigating the OSD Menu using the Remote Control 1. On the remote control, press the Settings button ( ) to display the OSD Menu. 2. Use the directional buttons, q/p/t/u , to select menu items and adjust values. 3. -
Page 53: On-Screen Display (Osd) Menu Tree
On-Screen Display (OSD) Menu Tree Main Menu Sub-menu Brightness Contrast Sharpness Tint Color Noise Reduction Picture Color Temperature Picture Mode Overscan RGB Range Blue Light Filter Picture Reset Zoom Mode Screen Screen Reset Sub Mode PIP Size PIP Position PIP Source PIP Audio PIP Reset Enable... - Page 54 Main Menu Sub-menu Off Time Date and Time Schedule Time Slide Show Interval OSD Turn Off OSD Information Time Reset Panel Saving Power Save Power LED Light Boot on Source Boot on Logo Auto Signal Detection No Signal Standby HDMI with One Wire Advanced HDMI EDID USB Cloning...
-
Page 55: Picture
Picture Item Description Brightness Adjust the background black levels of the screen image. Adjust the degree of difference between the lightest and Contrast darkest parts of the picture and change the amount of black and white in the image. Sharpness Adjust the picture quality. -
Page 56: Low Blue Light Filter And Eye Health
Low Blue Light Filter and Eye Health The Blue Light Filter blocks high-energy blue light for a more comfortable viewing experience. Calculating Breaks When viewing screens for extended periods, it is recommended to take periodic breaks from viewing. Short breaks of at least 10 minutes are recommended after one (1) hour of continuous viewing. - Page 57 Eye and Neck Exercises Eye Exercises Eye exercises can help minimize eye strain. Slowly roll your eyes to the left, right, up, and down. Repeat as many times as needed. Exercises for the eyes (1) Keep the body and the (2) Move the eyes le and (3) Move the eyes to look head upright.
-
Page 58: Screen
Screen Item Description Dynamically stretch and scale the image output to a different aspect than that of the image input signal. Full Restores the correct proportions of pictures transmitted in 16:9 using the full screen display. Zoom Mode Normal The picture is reproduced in 4:3 format and a black band is displayed on either side of the picture. - Page 59 Item Description Sub Mode Select the PIP (Picture-in-Picture) mode. Choose from: Off, PIP, PBP. PIP Size Select the size of the sub picture in the PIP (Picture-in-Picture) mode. Choose from: Small, Medium, Large. PIP Position Select the position of the sub picture in the PIP (Picture-in- Picture) mode.
-
Page 60: Audio
Audio Item Description Balance Adjust the left/right speaker balance. Treble Increase/decrease the treble level (higher-pitched sounds). Bass Increase/decrease the bass level (lower-pitched sounds). Volume Increase/decrease the display’s volume level. Mute Mute the volume. Volume Control Select audio source from internal speaker or Audio Out port. SPDIF Sync Sync Audio Out volume with the display’s speakers. -
Page 61: Time
Time Item Description Off Time Set the auto power off time. Date and Time Adjust the date and time of the display. Set up to seven (7) different time intervals for the display to be Schedule active. Slide Show Interval Set the photo slide show interval for USB auto play. -
Page 62: Advanced
Turn On/Off the Power LED indicator. Boot on Source Select the input source after boot up. Enable/Disable a logo when the display is turned on. Neither the ViewSonic nor animation logo will show. Boot on Logo The ViewSonic logo and animation will show. User If a custom logo option is set in General Settings, then the custom logo will show. - Page 63 Item Description Let the display detect and display available input sources Auto Signal Detection automatically. Set the time period to enter Standby Mode when there is no No Signal Standby signal. Enable/Disable CEC (Consumer Electronics Control). CEC synchronizes power on/off operation via HDMI connection. That is, if a device that also supports CEC is connected to the HDMI with One Wire HDMI input of the display, when the display’s power is turned...
-
Page 64: About
About Item Description Heat Status Check the temperature of the display. See information about the display: Model Name, Serial No., Display Information Operation Hours, and Software Version. -
Page 65: Embedded Applications And Settings
Ports: • CP: 56789, 25123, 8121, and 8000 • UDP: 48689 and 25123 Port and DNS activation: • Port: 443 • DNS: https://vcastactivate.viewsonic.com OTA Service: • Server Port: TCP443 • Server FQDN Name: https://vcastupdate.viewsonic.com... -
Page 66: Cast Sender From Windows-Based, Macbook, And Chrome Devices
Cast Sender from Windows-based, Macbook, and Chrome devices. Mac, Windows, Chrome Devices: 1. Make sure your device is connected to the same network as the display. 2. Visit the address that is shown on the display to download the application. 3. -
Page 67: Cast Sender From Mobile Devices: Ios-Based (Iphone, Ipad) And Android Os Based Phone/Tablet
Cast Sender from Mobile Devices: iOS-based (iPhone, iPad) and Android OS based phone/tablet. Android/iOS: 1. Make sure your device is connected to the same network as the display. 2. Scan the QR Code that is shown on the display to download directly from the server, or download from the Google Play Store or the Apple Store. -
Page 68: Other Default Applications
Other Default Applications vSweeper Clear unnecessary data and unwanted files. Advanced Settings can also be customized to the user’s needs. -
Page 69: Folders
Folders 1. Storage Device Display Select the appropriate storage device. 2. Icons Item Description Exit Exit Folders Sort Sort the files Thumbnail Display files by thumbnail view List Display files by list view Select Select a file Add folder Add a folder Copy Copy a file Paste... - Page 70 3. File Type Menu Item Description All types Office files Images stored by myViewBoard, Side Tool Note Bar, and remote control Screen Capture button. Picture Image files Media Audio and Video files 4. File Information Preview the file, show the file’s name, size, resolution, and creation date. 5.
-
Page 71: Rs-232 Protocol
RS-232 Protocol This document describes the hardware interface spec and software protocols of the RS-232 interface communication between ViewSonic LFD and a PC or other control units with RS-232 protocol. The protocol contains three command sections: • Set-Function • Get-Function •... -
Page 72: Lan Hardware Specification
LAN Hardware Specification ViewSonic LFD communication port on the rear side: 1. Connector type: 8P8C RJ45 2. Pin Assignment: Pin # Signal Remark Output from Display Output from Display Input to Display BI_D3+ For 1G case BI_D3- For 1G case... -
Page 73: Protocol
Protocol Set-Function Listing The PC can control the Display for specific actions. The Set-Function command allows you to control the Display behavior at a remote site through the RS-232 port. The Set-Function packet format consists of 9 bytes. Set-Function Description: Length: Total Byte of Message excluding “CR”... - Page 74 Example 1: Set Brightness as 76 for Display (#02) and this command is valid Send (Hex Format) Name Length Command Type Command Value1 Value2 Value3 0x30 0x38 0x73 0x24 0x30 0x37 0x36 0x0D 0x32 Reply (Hex Format) Name Length Command Type 0x30 0x34 0x2B...
- Page 75 Set-Function Table A. Basic Function Set Function Length ID Command Command Value Range Comments Code Code (Three ASCII Type (ASCII) (ASCII) (Hex) bytes) 1. The Power-on via LAN control may works only under specific mode. To Power on / off 000: STBY *3.2.1 see display UG for...
- Page 76 Set Function Length ID Command Command Value Range Comments Number 000~009 *3.1.1 000: UP 001: DOWN 002: LEFT 003: RIGHT Key Pad *3.1.1 004: ENTER 005: INPUT 006: MENU/(EXIT) 007: EXIT Disable: RCU will be no function Enabled: RCU controls normally 000: Disable Pass through: Remote...
- Page 77 B. Optional Function Set Function Length ID Command Command Value Range Comments Code Type (ASCII) Code (Hex) (Three ASCII bytes) (ASCII) Contrast 000 ~ 100 Sharpness 000 ~ 100 Color & 000 ~ 100 Tint ‘ 000 ~ 100 000: Off Backlight On_Off 001: On *3.2.3...
-
Page 78: Appendix
Appendix Specifications Specifications Item Category CDE4330 CDE5530 CDE6530 CDE7530 CDE8630 CED9830 P/N. CDE4330 CDE5530 CDE6530 CDE7530 CDE8630 CDE9830 Model VS19112 VS19113 VS19114 VS19115 VS19116 VS19117 Screen Size 43” 55” 65” 75” 86” 98” 2 x HDMI (v. 2.1, 3 x HDMI (v. 2.1, HDCP 2.2) HDCP 2.2) - Page 79 Specifications Item Category CDE4330 CDE5530 CDE6530 CDE7530 CDE8630 CED9830 Physical 964.6 x 1233 x 1463.3 x 1685.6 x 1930.8 x 2212.9 x (W x H x D) 552.5 x 703.5 x 838.3 x 963.7 x 1101.8 x 1268.4 x 71.4 71.5 81.6 81.6...
-
Page 80: Usb Media Support Format
USB Media Support Format Photo Image Photo Resolution Base-line 1920 x 1080 JPEG Progressive 1024 x 768 non-interlace 1920 x 1080 Interlace 1920 x 1080 15360 x 8640 Video Container Codec Resolution Bit Rate MKV(.mkv) 4096 x 2176 @60fps 100Mbps WebM(.webm) MP4(.mp4, .mov) 3GPP(.3gpp, .3gp) - Page 81 Container Codec Resolution Bit Rate MP4(.mp4, .mov) 3GPP(.3gpp, .3gp) MEPG transport stream (.ts, .trp, .tp) MPEG program stream (.DAT, .VOB, .MPG, 1920 x 1080 MPEG4 40Mbps .MPEG) @120fps MKV(.mkv) WebM(.webm) FLV(.flv) AVI(lavi) ASF(.asf) WMV(.wmv) OGM(.ogm) ASF(.asf) AVI(.avi) DivX(.divx) DivX 3.11 MKV(.mkv) Divx 4.12 1920 x 1080...
- Page 82 Container Codec Resolution Bit Rate 3GPP(.3gpp, .3gp) ASF(.asf) AVI(lavi) FLV(.flv) H.264(.264) MKV(.mkv) MP4(.mp4, .mov) MEPG transport stream H.264 4096 x 2160 @60fps 135Mbps (.ts, .trp, .tp) MPEG program stream (.DAT, .VOB, .MPG, .MPEG) OGM(.ogm) WebM(.webm) WMV(.wmv) AVS(.avs) MEPG transport 1920 x 1080 @60fps 50Mbps stream (.ts, .trp, .tp)
- Page 83 Container Codec Resolution Bit Rate 3GPP(.3gpp, .3gp) ASF(.asf) AVI(.avi) MKV(.mkv) MP4(.mp4, .mov) 2048 x 1024 40Mbps MEPG transport @120fps stream (.ts, .trp, .tp) WebM(.webm) WMV(.wmv) VC1(.vc1) 3GPP(.3gpp, 3gp) AVI(.avi) FLV(.flv) MKV(.mkv) Motion JPEG 1920 x 1080 @30fps 40Mbps MP4(.mp4, .mov) OGM(.gom) WebM(.webm) 3GPP(.3gpp, .3gp)
-
Page 84: Audio
Audio Container Codec Sample Rate Channel Bit Rate 3GPP(.3gpp, .3gp) MPEG1/2 32Kbps ~ ASF(.asf) 16KHz ~ 48KHz Up to 2 Layer1 448Kbps AVI(.avi) DivX(.divx) FLV(.flv) MKV(.mkv, .mka) MPEG1/2 8Kbps ~ 16KHz ~ 48KHz Up to 2 MP3(.mp3) Layer2 384Kbps MP4(.mp4) MEPG transport stream (.ts, .trp,... - Page 85 Container Codec Sample Rate Channel Bit Rate 3GPP(.3gpp, .3gp) ASF(.asf) AVI(.avi) DivX(.divx) EAC3(.ec3) MKV(.mkv, .mka) 32KHz, 32Kbps ~ MP4(.mp4) EAC3(DDP) 44.1KHz, Up to 5.1 6Mbps MEPG 48KHz transport stream (.ts, .trp, .tp) MPEG program stream (.DAT, .VOB, .MPG, .MPEG) OGM(.ogm) 32KHz, 32Kbps ~ WebM(.webm)
- Page 86 Container Codec Sample Rate Channel Bit Rate 3GPP(.3gpp, .3gp) ASF(.asf) AVI(.avi) MKV(.mkv, 128Kbps ~ .mka) 8KHz ~ 48KHz Up to 2 320kbps MP4(.mp4, .mov) WebM(.webm) WMV(.wma, .wmv) WMA 10 Pro 3GPP(.3gpp, 8KHz ~ 48KHz Up to 2 < 192kbps .3gp) WMA 10 Pro ASF(.asf) 8KHz ~ 48KHz...
- Page 87 Container Codec Sample Rate Channel Bit Rate 3GPP(.3gpp, .3gp) AVI(.avi) DTS(.dts) MKV(.mkv, .mka) MP4(.mp4, .mov) MEPG < 1.5Mbps transport Up to 48KHz Up to 5.1 (Pure DTS core) stream (.ts, .trp, .tp) MPEG program stream (.DAT, .VOB, .MPG, .MPEG) OGM(.ogm) WAV(.wav) WebM(.webm) 3GPP(.3gpp,...
- Page 88 Container Codec Sample Rate Channel Bit Rate 3GPP(.3gpp, .3gp) ASF(.asf) AVI(.avi) FLV(.flv) MKV(.mkv, .mka) MP4(.mp4, .mov, .m4a) MEPG Mono, Stereo 64Kbps ~ transport LPCM 8Khz ~ 48Khz 1.5Mbps stream (.ts, .trp, .tp) MPEG program stream (.DAT, .VOB, .MPG, .MPEG) OGM(.ogm) WAV(.wav) WebM(.webm) WMV(.wmv)
- Page 89 Container Codec Sample Rate Channel Bit Rate 3GPP(.3gpp, 3gp) Up to 5.1 AC4(.ac4) (MS12 Up to MP4(.mp4, 44.1KHz, v1.x) 1521kbps per .mov, .m4a) 48KHz Up to 7.1 presentation MEPG transport (MS12 v2.x) stream (.ts, .trp, .tp) Up to 16 core 3GPP(.3gpp, Fraunhofer 32KHz,...
-
Page 90: Subtitle
Subtitle Internal File Extension Container Codec dat, mpg, mpeg, vob MPG, MPEG DVD Subtitle ts, trp, tp DVB Subtitle DVD Subtitle UTF-8 Plain Text UTF-8 Plain Text VobSub DVD Subtitle AVI(1.0, 2.0) XSUB divx, avi DMF0, 1, 2 XSUB+ External File Extension Container Codec... -
Page 91: Timing Table
Timing Table HDMI PC Resolution Refresh Rate 60Hz 640 x 480 72Hz 75Hz 800 x 600 72Hz 75Hz 60Hz 1024 x 768 70Hz 75Hz 1280 x 1024 60Hz 1360 x 768 60Hz 1920 x 1080 60Hz HDMI Video Resolution Refresh Rate 480i 720 x 480 60Hz... -
Page 92: Type-C
Video Resolution Refresh Rate 3840 x 2160 29.97Hz/R444 3840 x 2160 30Hz/R444 3840 x 2160 25Hz/R444 3840 x 2160 23.98Hz/R444 3840 x 2160 24Hz/R444 4096 x 2160 24Hz/R444 3840 x 2160 50Hz/R444 3840 x 2160 59Hz/R444 3840 x 2160 60Hz/R444 4096 x 2160 50Hz/R444 4096 x 2160... - Page 93 Video Resolution Refresh Rate 1920 x 1080 24Hz 1920 x 1080 24Hz 1920 x 1080 25Hz 1920 x 1080 30Hz 1080p (16:9) 1920 x 1080 30Hz 1920 x 1080 50Hz 1920 x 1080 60Hz 1920 x 1080 60Hz 3840 x 2160 24Hz 3840 x 2160 25Hz...
-
Page 94: Troubleshooting
Troubleshooting This section describes some common problems that you may experience when using the display. Problem or Issue Possible Solutions 1. Check whether something is obstructing the display’s remote control receiver. Remote Control is not 2. Check whether the batteries in the remote control working are installed correctly. - Page 95 Video Not Working Properly Problem or Issue Possible Solutions 1. Check the Power status. No picture/ No sound 2. Check the signal cable. 3. Check that the internal PC is installed correctly. 1. Check the signal cable. Picture is unclear or cuts in and out 2.
-
Page 96: Maintenance
Some chemical cleaners have been reported to damage the screen and/or case of the device. • ViewSonic® will not be liable for damage resulting from use of any ammonia or alcohol-based cleaners. NOTE: If condensation appears between the glass and the panel, keep the... -
Page 97: Regulatory And Service Information
Regulatory and Service Information Compliance Information This section addresses all connected requirements and statements regarding regulations. Confirmed corresponding applications shall refer to nameplate labels and relevant markings on the unit. FCC Compliance Statement This device complies with part 15 of FCC Rules. Operation is subject to the following two conditions: (1) this device may not cause harmful interference, and (2) this device must accept any interference received, including interference that may cause undesired operation. -
Page 98: Ce Conformity For European Countries
CE Conformity for European Countries The device complies with the EMC Directive 2014/30/EU and Low Voltage Directive 2014/35/EU. The following information is only for EU-member states: The mark shown to the right is in compliance with the Waste Electrical and Electronic Equipment Directive 2012/19/EU (WEEE). The mark indicates the requirement NOT to dispose of the equipment as unsorted municipal waste, but use the return and collection systems according to local law. -
Page 99: Declaration Of Rohs2 Compliance
Declaration of RoHS2 Compliance This product has been designed and manufactured in compliance with Directive 2011/65/EU of the European Parliament and the Council on restriction of the use of certain hazardous substances in electrical and electronic equipment (RoHS2 Directive) and is deemed to comply with the maximum concentration values issued by the European Technical Adaptation Committee (TAC) as shown below: Proposed Maximum Substance... -
Page 100: Energy Star Statement
U.S. Environmental Protection Agency. As an ENERGY STAR Partner, ViewSonic is determined to meet the Energy star Guidelines and mark all certified models with the ENERGY STAR logo. -
Page 101: Indian Restriction Of Hazardous Substances
Schedule 2 of the Rule. Product Disposal at End of Product Life ViewSonic® respects the environment and is committed to working and living green. Thank you for being part of Smarter, Greener Computing. Please visit the ViewSonic®... -
Page 102: Copyright Information
VESA is a registered trademark of the Video Electronics Standards Association. DPMS, DisplayPort, and DDC are trademarks of VESA. Disclaimer: ViewSonic® Corporation shall not be liable for technical or editorial errors or omissions contained herein; nor for incidental or consequential damages resulting from furnishing this material, or the performance or use of this product. -
Page 103: Customer Service
For technical support or product service, see the table below or contact your reseller. NOTE: You will need the product’s serial number. Country/Region Website Country/Region Website Asia Pacific & Africa Australia www.viewsonic.com/au/ Bangladesh www.viewsonic.com/bd/ 中国 (China) www.viewsonic.com.cn 香港 (繁體中文) www.viewsonic.com/hk/ Hong Kong (English) www.viewsonic.com/hk-en/ India www.viewsonic.com/in/... -
Page 104: Limited Warranty
How long the warranty is effective: ViewSonic® displays are warranted for between 1 and 3 years, depending on your country of purchase, for all parts including the light source and for all labor from the date of the first consumer purchase. - Page 105 (e) the serial number of the product. • Take or ship the product, freight prepaid, in the original container to an authorized ViewSonic® service center or ViewSonic®. • For additional information or the name of the nearest ViewSonic® service center, contact ViewSonic®. Limitation of implied warranties:...
- Page 106 Exclusion of damages: ViewSonic’s liability is limited to the cost of repair or replacement of the product. ViewSonic® shall not be liable for: • Damage to other property caused by any defects in the product, damages based upon inconvenience, loss of use of the product, loss of time, loss of...
-
Page 107: Mexico Limited Warranty
If a product proves to be defective in material or workmanship during the warranty period, ViewSonic® will, at its sole option, repair or replace the product with a like product. Replacement product or parts may include remanufactured or refurbished parts or components &... - Page 108 Exclusion of damages: ViewSonic®’s liability is limited to the cost of repair or replacement of the product. ViewSonic® shall not be liable for: • Damage to other property caused by any defects in the product, damages...
- Page 109 Name, address, of manufacturer and importers: México, Av. de la Palma #8 Piso 2 Despacho 203, Corporativo Interpalmas, Col. San Fernando Huixquilucan, Estado de México Tel: (55) 3605-1099 http://www.viewsonic.com/la/soporte/index.htm NÚMERO GRATIS DE ASISTENCIA TÉCNICA PARA TODO MÉXICO: 001.866.823.2004 Hermosillo: Villahermosa: Distribuciones y Servicios Computacionales SA de CV.
Need help?
Do you have a question about the VS19112 and is the answer not in the manual?
Questions and answers