Table of Contents
Advertisement
Quick Links
. . . . . . . . . . . . . . . . . . . . . . . . . . . . . . .
. .
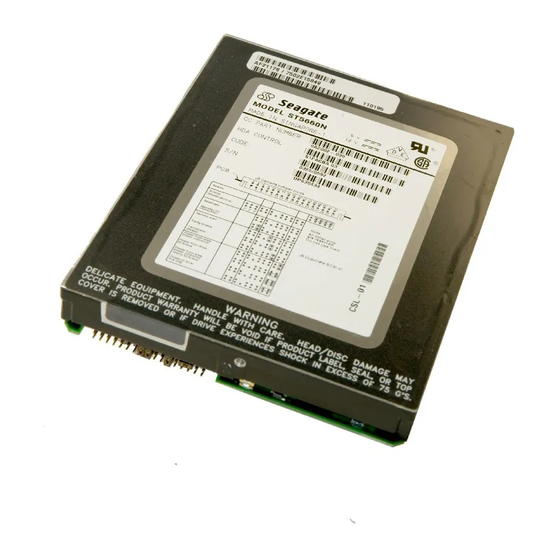
ST5660N
. . . . . . . . . . . . . . . . . . . . . . . . . . . . . . .
. . . . .
SCSI Interface Drive
. . . . . . . . . . . . . . . . . . . . . . . . . . . . . . .
. .
. . . . . . . . . . . . . . . . . . . . . . . . . . . . . . .
. .
. . . . . . . . . . . . . . . . . . . . . . . . . . . . . . .
Installation Guide
. . . . . . . . . . . . . . . . . . . . . . . . . . . . . . .
. .
Advertisement
Table of Contents
Troubleshooting

Related Manuals for Seagate ST5660N


Summary of Contents for Seagate ST5660N
- Page 1 ....... ST5660N .......
-
Page 2: Table Of Contents
Seagate , Seagate Technology and the Seagate logo are registered trademarks of Seagate Technology, Inc. SeaFAX ™ , SeaFONE ™ , SeaBOARD ™ and SeaTDD ™ are trademarks of Seagate Technology, Inc. Other product names are registered trademarks or trademarks of their owners. -
Page 3: Read Before You Begin
Maintenance and repair. Seagate drives do not require mainte- nance. The head/disc assembly is sealed; if you break the seal, you void the warranty. Seagate customer service centers are the only facilities authorized to repair Seagate drives. Seagate does not sanction any third-party repair facilities. - Page 4 ST5660N Installation Guide, Rev A Shipping. Keep your original box and packing materials for transporting or shipping your drive. The box has a Seagate Approved Package label. Shipping a drive in a nonapproved container voids the warranty. Call your authorized Seagate dis- tributor to purchase additional boxes.
-
Page 5: Configuring The Drive
J5 to set the SCSI ID (see Figure 3 on page 6); in these cases, leave the SCSI ID pins of J8 open. For details, refer to the Seagate ST5660N Product Manual , publication number 36245-00x .) 2. - Page 6 ST5660N Installation Guide, Rev A Options jumper block pin 1 J1. Interface connector pin 1 Auxiliary selection J3. Standard power connector SCSI ID Circuit board +5V return +12V return +12V Figure 1. Connector and jumper block locations...
- Page 7 ST5660N Installation Guide, Rev A J8. Options jumper block Circuit board Spares Notes: SCSI ID 0 1. All other pins are reserved. Do SCSI ID 1 not use them. SCSI ID 2 2. Jumpers on pins 28–30 and SCSI ID 3 32–34 are...
- Page 8 ST5660N Installation Guide, Rev A pin 1 SCSI ID Circuit board bottom view SCSI ID 0 SCSI ID 1 SCSI ID 2 SCSI ID 3 SCSI ID 4 SCSI ID 5 SCSI ID 6 SCSI ID 7 Figure 3. J5. Auxiliary block for SCSI ID...
-
Page 9: Attaching Cables
ST5660N Installation Guide, Rev A 3. Installing jumpers on the terminator power source jumper block. To select the termination power source, install jumpers for the appropriate case as follows: • To provide terminator power to the SCSI connector and the drive terminator packs, install jumpers on pins 21 and 23 and on pins 22 and 24 of J8. -
Page 10: Mounting The Drive
ST5660N Installation Guide, Rev A board or the host adapter. If you are installing multiple drives, use a daisy-chain cable. Verify that pin 1 of the connector on each end of the interface cable aligns with pin 1 of its matching connector on the drive and on the host. - Page 11 ST5660N Installation Guide, Rev A Figure 4. Mounting hole locations...
-
Page 12: Physical Geometry For Non-Dos Operating Systems
ST5660N Installation Guide, Rev A Physical geometry for non-DOS operating systems When installing the drive in systems not using MS-DOS or PC-DOS, use the following information to configure your host system: Data cylinders 3,002 Spare cylinders Read/write heads Total sectors... -
Page 13: Low-Level Formatting
Caution. Performing either a low-level format or a high-level format on a drive erases all data on it. Save all files to a different storage device before formatting a disc drive. Seagate assumes no liability if you destroy your data. Partitioning If you are using a version of DOS earlier than Version 4.0, the... -
Page 14: High-Level Formatting
Caution Partitioning a drive erases all data on it. Before parti- tioning a disc drive, first save all files to a different storage device. Seagate assumes no liability if you destroy your data. Many Unix-based operating systems allow you to partition the drive for DOS applications. -
Page 15: Basic Troubleshooting
ST5660N Installation Guide, Rev A Basic troubleshooting Before you begin troubleshooting, read all the suggestions dis- cussed in the following list; they resolve the majority of installation problems. Warning. Always turn off the system before changing jumpers or unplugging cables and cards. - Page 16 ST5660N Installation Guide, Rev A Caution. Do not randomly reverse-plug the cables. This may damage some systems. When connecting the diskette drive, make sure you use a control cable for a diskette drive and not a hard drive. Unlike the hard drive cable, the diskette drive control cable has seven lines split and twisted.
-
Page 17: Advanced Troubleshooting
ST5660N Installation Guide, Rev A Advanced troubleshooting If you have performed the preceding basic checks but the prob- lem has not been solved, follow these guidelines for analyzing specific cases: The system does not recognize the presence of the drive or system error message, “No Drives Found,”... - Page 18 ST5660N Installation Guide, Rev A System error message, “Drive not Ready,” appears. • Check all cables. For each ribbon cable, verify that pin 1 of the cable is aligned with pin 1 of the connector. Pin 1 is usually denoted by a stripe on the side of the ribbon cable.
- Page 19 ST5660N Installation Guide, Rev A The FDISK error message, “No Fixed Disk Present,” appears. • Check all cables. • Check the power supply specifications. • Make sure the drive spins up when you turn on the system. • Check the drive type. In AT systems, the drive type must be set to zero.
-
Page 20: Technical Support Services
Dealers are generally knowledgeable about unique system con- figurations. Technical support is available for all Seagate products by calling the SeaFAX ™ , Seagate Technical Support FAX, SeaFONE ™ , SeaBOARD ™ and SeaTDD ™ services. SeaFAX. 408/438-2620 You can use a touch-tone telephone to access Seagate’s automated FAX system to receive technical support informa- tion by return FAX. - Page 21 ST5660N Installation Guide, Rev A access the recordings 24 hours daily. Before calling, note your system configuration and drive model number (ST xxxx ). SeaBOARD Using a modem, you can: • Access documentation, drive specifications and jumper set- tings for Seagate’s entire product line.
-
Page 22: Storing And Shipping Your Drive
Storing and shipping your drive Keep your original box and packing materials for storing or shipping your drive. The box has a Seagate Approved Package label. Shipping a drive in an unapproved container voids the warranty. Call your authorized Seagate distributor to purchase additional boxes. - Page 23 ST5660N Installation Guide, Rev A Foam Foam Antistatic bag Antistatic bag Drive Drive Foam Foam Figure 5. A drive in an approved package...
- Page 24 Seagate Technology, Inc. 920 Disc Drive, Scotts Valley, CA 95066, USA Publication Number: 36269-001, Rev. A, Printed in USA...
Need help?
Do you have a question about the ST5660N and is the answer not in the manual?
Questions and answers