Table of Contents
Advertisement
Quick Links
Advertisement
Table of Contents

Subscribe to Our Youtube Channel
Related Manuals for BANWOOD CLASSIC


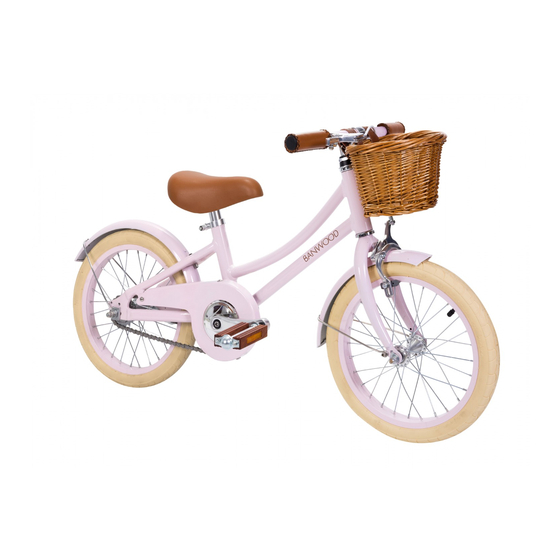
Summary of Contents for BANWOOD CLASSIC
- Page 1 CLASSIC w w w . b a n w o o d . c o m...
- Page 2 WHAT’S IN The box A. Assembled alloy frame G. Bell & rear wheel H. Saddle with seat post B. Handlebar set I. Front wheel C. Tools J. Training wheels D. Front mudguard E. Front wicker basket F. Pedal Tools Allen key (x2) Spanner (x2) ·...
- Page 3 Before assembled...
- Page 4 After assembled...
- Page 5 Helmet Warning Information Warning and Safety Information Meanings of Warnings: WARNING: This symbols is important. See the word “CAUTION” or “WARNING” which follows it. ALWAYS WEAR YOUR The word “CAUTION” is before mechanical instructions. If you do not obey these instruc- HELMET WHEN RIDING tions, mechanical damage or failure of a part of the bicycle can occur.
- Page 6 The Owner’s Responsibility General Warning WARNING: WARNING: Not intented for use on public roads. This bicycle is made to be ridden by one rider at a time for general transportation and recreational use. It is not made to withstand the abuse of stunting and jumping. •...
-
Page 7: Stem Installation
Step Stem Installation Loosen the bolt on the top of the stem to allow movement of the stem end. Insert the stem into the headset and make sure the headset is over the safety line of the stem. Using the provided Allen key, fasten the bolt on the top of the stem. WARNING: WARNING: To prevent steering system damage... - Page 8 Testing Stem and Handlebar Tightness Testing Stem and Handlebar Tightness To test the tightness of the stem: • Straddle the front the wheel between your legs. • Try to turn the front wheel by turning the handlebar. • If the handlebar and stem turn without turning the front wheel, realign the stem with the wheel and tighten the stem bolt(s) tighter than before (about 1/2 revolution only at a time).
- Page 9 Step Front mudguard Installation...
- Page 10 How to assemble the front mudguard? • Taking out the screw by spanner • Take out the screws on fork 10mm. dropouts by screw driver. • Install the mudguard,then put • Place mudguard supports on fork back the screw and fix it. dropouts.
- Page 11 Step Installing the Front Wheel...
- Page 12 How to fit the front wheel? • Put the wheel in the center of the fork • Removing the Axle Nuts and wheel and tighten Axle Nuts securely by retainers that already attached to the spanner 15mm. front wheel axle. •...
-
Page 13: Saddle Installation
Step Saddle Installation Loosen the hex head bolt on the seat post clamp to allow movement of the saddle. Adjust the height so that your child’s feet rest comfortably on the ground, flat and slightly bending the knee. Tighten bolt securely so it supports the rider without moving. WARNING: To prevent the seat coming loose and possible loss of control, the “min.in”... -
Page 14: Basket Installation
Step Basket Installation Attach the straps on the basket to the handlebar and adjust it to a perfect position. -
Page 15: Pedal Installation
Step Pedal Installation · Please note that there is a letter at the end of the axle. “L” stands for left, “R” stands for right. · Using the spanner 15mm to fix the “L” pedal on the left side and “R” pedal on the right side Right pedal - fasten to the right Left pedal - fasten to the left... - Page 16 Step Training Wheel Installation...
-
Page 17: Operation
How to assemble the training wheel? • Remove outside Alex Nuts mudguard supports from both sides of Alex by Spanner 15mm. • Put the Alignment Tab ,a Training Wheel Leg , mudguard support, spacer and an Axle Nut on each end of the rear wheel Alex. -
Page 18: Bell Installation
Step Bell Installation Using the screw driver to install the bell on the handlebar. - Page 19 Step Rim Brake System Setup WARNING: Coaster Brakes - various models You must adjust the front the brakes before you ride the bicycle. These models are equipped with a NOTE: FRONT AND REAR BRAKE SETUP IS THE SAME. rear ‘coaster’ brake that is operated by rotating the crank backwards.
-
Page 20: Safety Notice
· After riding, remove any water children during assembly. or mud with a clean cloth. · Keep your Classic in a dry place when not in use. · When unpacking the Classic, properly dispose of all plastic wrappings. · Check your tyre pressure regularly. -
Page 21: Self-Locking Fasteners
Maintenance, Repair and Service Tires WARNING: Maintenance: • The maximum inflation pressure is shown This product should be checked periodically for any loose, broken, or worn parts. Tighten • Frequently check the tire inflation on the tire sidewall. any parts that are loose, and replace any worn or broken parts immediately with original pressure because all tires lose air slowly •... -
Page 22: Maintenance
Inspection of the Bearing Lubrication MAINTENANCE WARNING: Frequently check the bearings of the bicycle. Lubricate the bearings once a year or any time they do not pass the following tests: • Do not over lubricate. If oil gets on the wheel rims or the brake shoes, it will reduce brake HEAD TUBE BEARINGS perfomance and a longer distance to stop the bicycle will be necessary. - Page 24 w w w . b a n w o o d . c o m i n f o @ b a n w o o d . c o m...
Need help?
Do you have a question about the CLASSIC and is the answer not in the manual?
Questions and answers