Table of Contents
Advertisement
Quick Links
WASHING MACHINE
SERVICE MANUAL
CAUTION
READ THIS MANUAL CAREFULLY TO DIAGNOSE PROBLEMS
CORRECTLY BEFORE OFFERING SERVICE.
BEFORE SERVICING THE WASHING MACHINE, UNPLUG THE POWER
CORD TO AVOID THE RISK OF AN ELECTRIC SHOCK.
WHEN SERVICING INTERNAL PARTS, USE ONLY SERVICE PARTS
SUPPLIED FROM LG.
AFTER SERVICING THE ELECTRIC WIRE, INSURE THAT INSULATION
TAPE IS APPLIED TO PREVENT AN ELECTRICAL SHORT.
MODEL : F14A8TDHP(1~9)N
website : http://biz.lgservice.com
e-mail : http://LGEservice.com/techsup.html
Advertisement
Table of Contents
Troubleshooting

Related Manuals for LG F14A8TDHP1N


Summary of Contents for LG F14A8TDHP1N
- Page 1 BEFORE SERVICING THE WASHING MACHINE, UNPLUG THE POWER CORD TO AVOID THE RISK OF AN ELECTRIC SHOCK. WHEN SERVICING INTERNAL PARTS, USE ONLY SERVICE PARTS SUPPLIED FROM LG. AFTER SERVICING THE ELECTRIC WIRE, INSURE THAT INSULATION TAPE IS APPLIED TO PREVENT AN ELECTRICAL SHORT.
-
Page 2: Table Of Contents
CONTENTS 1. SPECIFICATIONS ..........................3 2. FEATURES & TECHNICAL EXPLANATION ..................4 3. PARTS IDENTIFICATION ......................... 6 4. INSTALLATION ..........................7 5. OPERATION ........................... 12 6. WIRING DIAGRAM / PCB LAYOUT ....................19 7. TROUBLESHOOTING ........................23 7-1.CHECK BEFORE SERVICE ....................23 7-2.LOAD TEST MODE ........................ -
Page 3: Specifications
1. SPECIFICATION F14A8TDHP(0~9)N POWER SUPPLY 220 V - 240 V ~, 50 Hz PRODUCT WEIGHT 68 kg WASHING 170 W SPIN 550 W ELECTRICITY DRAIN MOTOR 38 W CONSUMPTION 1250 W STEAM HEATER WASH HEATER 2100 W 1250 W DRY HEATER 50 rpm WASH REVOLUTION... -
Page 4: Features & Technical Explanation
2. FEATURES & TECHNICAL EXPLANATION 2-1. FEATURES Inverter Direct Drive system The advance Brushless DC motor directly drives the drum without belt and pulley. 6 motion Washer is able to perform various drum actions or a combination of different actions depending on the wash program selected. - Page 5 2-2. DETERMINE WASHING TIME BY FUZZY LOGIC To get the best washing performance optimal time is determined by sensing the water temperature, selected washing temperature and laundry amount. water temperature washing time the best selected FUZZY washing rinse time washing LOGIC temperature performance...
-
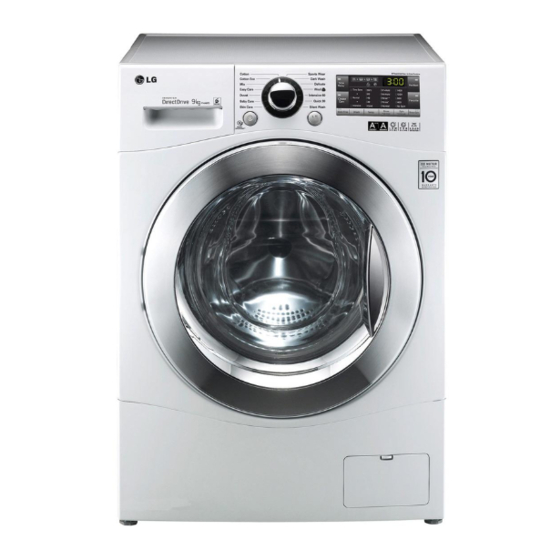
Page 6: Parts Identification
3. PARTS IDENTIFICATION Power Plug Transit Bolts If the supply cord is damaged, it must be replaced by the Drawer manufacturer or its authorized service technician in order to avoid a hazard. Control Panel Drain Hose Drum Drain Pump Filter Door Drain Plug Lower Cover Cap... -
Page 7: Installation
4. INSTALLATION INSTALLATION The appliance should be installed as follows. Check the conditions of installation area. 1. Check level ground. horizontal On raised foundations or upper level homes, the vibrations can be caused by the type of flooring. It may be necessary to move the machine to a different area in the home or have the floor reinforced to properly support the operation of the unit. - Page 9 onnect Drain Hose. If the drain hose is not installed properly, the unit will not drain properly. This allows water to back flow into the unit which can cause odors. Refer to Owner Manual for proper drain hose installation. The odor could also be coming from the home’s drain to which the drain hose is attached. Laundry tub about 100 cm Hose...
- Page 10 Check the horizontality with a level (Gage). Step 1 If washing machine legs are loose or not Screwed in, then tighten with the spanner wrench. Using the level, level the washing machine from front to back and side to side. A level Higher Tighten...
- Page 11 Test operation Preparation Press the power button. Press the START/PAUSE button. washing. · Connect the power plug to the · In case of Coloreds program. outlet. · Connect the inlet hose. Check the water heating. Check automatic reverse turn. Check the water supply. ·...
-
Page 12: Operation
5. OPERATION Cycle Selector Additional programs Power Start/ Pause Option Button... - Page 13 EST. T ime remaining Tub Clean Beep on/off Child Lock...
- Page 14 How to use washer Options Pre Wash ( Steam (Wash and Softener) f the laundry is heavily soiled, “Pre Wash” Steam Wash features enhance washing course is effective. performance with low energy consumption. Steam Softener sprays the steam after Touch the Power button. spinning cycle to reduce creases and make Select a cycle.
- Page 15 • • ℃ ℃ ℃ ℃...
- Page 16 ow to use washer Child Lock Select this function to lock the buttons on the control assembly to prevent tampering "Child Lock" can be set only during the washing cycle Locking the control panel Touch and hold the Child Lock button for 3 seconds A beeper will sound, and ' ' will appear on...
- Page 17 ow to use washer Tub Clean ub Clean is a special cycle to clean the inside of the washing machine. A higher water level is used in this cycle at higher spin speed. Perform this cycle regularly. . Remove any clothing or items from the washer and close the door.
- Page 18 How to use washer Cold water tap must be left on during drying • cycles. 1. Drying Automatic guide Use your Automatic Cycles to dry most • loads. Electronic sensors measures the temperature of the exhaust to increase or decrease drying temperatures for faster reaction time and tighter temperature control.
- Page 19 How to use washer Fiber glass 2. Drying time guide Do not dry fiberglass articles in your dryer. • By touching the Dry button, the drying time Glass particles left in the dryer could be picked can be selected. up by your clothes the next time you use the dryer and irri tate your skin.
-
Page 20: Wiring Diagram / Pcb Layout
6. WIRING DIAGRAM / PCB LAYOUT Wiring Diagram 1/3 Full Wiring Diagram Error Message IE – INLET ERROR OE – DRAIN ERROR UE – UNBALANCE ERROR dE – DOOR ERROR tE – THERAL ERROR FE – OVERFLOW ERROR PE – PRESSURE ERROR LE –... - Page 21 Wiring Diagram 2/3...
- Page 22 Wiring Diagram 3/3 Error Message IE – INLET ERROR OE – DRAIN ERROR UE – UNBALANCE ERROR dE – DOOR ERROR tE – THERAL ERROR FE – OVERFLOW ERROR PE – PRESSURE ERROR LE – MOTOR ERROR AE – LEAKAGE ERROR dHE –...
- Page 23 PCB Layout (Main) Dry Heater Heater PCB POWER Motor Stator Control Dry Fan motor Thermistor Thermistor For W ash Thermistor For Dry LCD Display Circulation Pump Pressure Switch & Aqua Stop Circulation & Pump Measure Hz impossible (152~176 Hear Just Check cut-off Common Door S/W &...
-
Page 24: Troubleshooting
7. TROUBLESHOOTING 7-1. CHECK BEFORE SERVICE Before servicing ask the customer what the trouble is. Check the adjustments. (Power supply :220-240V~, Removal of transit bolts etc..) Check the troubles referring to the troubleshooting. Decide service steps referring to disassembly instructions. Then, service and repair. - Page 25 7-3. HOW TO CHECK THE WATER LEVEL FREQUENCY Touch the Rinse+ and Temp button simultaneously. The digits indicate the water level frequency. For example, if 255 is displayed the water level frequency is 25.5kHz (255X0.1) 7-4. HOW TO CHECK THE TEMPERATURE OF EACH THERMISTOR AT OPERATING CONDITION.
- Page 26 7-5. ERROR DISPLAY If you press the Start/Pause button in error condition, any error except will disappear and the machine will change into the pause status. In case of , if the error is not resolved within 20 sec., and in case of all other errors, if the error is not resolved within 4 min., the power will turn off automatically and the error only will blink.
- Page 27 ERROR SYMPTOM CAUSE • The connector in the LEAD WIRE ASSEMBLY is MOTOR LOCKED not connected to the connector of STATOR ERROR ASSEMBLY. Reconnect or repair the connector. • The hall sensor is out of order/defective. Replace the STATOR ASSEMBLY Page 35 POWER •...
- Page 28 7-6. TROUBLESHOOTING WITH ERROR Water Inlet Error (IE) [Note] Environmental safety check list 1. No water tap leakage or freeze 4. No entanglement of water supply hose. 2. No water shortage. 5. No water supply hose leakage 3. The inlet filter is not clogged. Is the water tap closed? Check the Water tap and open it fully.
- Page 29 Unbalanced Error (UE) The few items of clothing will clump together Does the load lean toward one and their weight will be in one place on the drum, side, or is the load a few items? throwing the weight off during spin mode. So add some laundry to overcome UE error.
- Page 30 Water Outlet Error (OE) Check drain hose for kink and straighten the Hose. Is the drain hose kinked ? Drain Hose Check & Clean Pump Filter. Is the Pump filter clogged ? This kind of accumulation on the drain filter not only prevents proper drainage, but also will promote bacteria growth and cause odors.
- Page 31 Is the Standpipe Height greater Observe Standpipe Height requirements than 1.0 m above the floor? of 1.0m maximum. - Your washer will not be able to drain out water adequately, if the standpipe exceeds 1.0 m. In this case, water may flow back into the washer. When there is no water in the Check the Air Chamber and the Tube (clogged).
- Page 32 Overflow Error (FE) Power off for 10sec. Then power on. Is the water level over reference line and is the water level frequency under 21.3kHz? * Water level frequency - Touch and Hold 'Rinse + ' & 'Temp.' simultaneously. Drain out the water and then Is water continuously check the Air Chamber and the Tube (clogged).
-
Page 33: Pe (Pressure Sensor S/W Error)
Pressure Sensor S/W Error (PE) Is the Connector connected correctly to Reconnect or repair the Connector. the Main PCB and the Pressure Switch ? Or replace the Harness. Is the Harness alright ? Is the resistance of the Pressure Switch Replace the Pressure Switch. -
Page 34: De (Door Open Error)
Door Open Error (dE) Close the door fully. Is the door closed? Is the Door assembly in line with door switch ? Scratch by Latch Hook Touching Lift up & Close the door. If the dE is displayed, Replace the Door Bracket. Does the Spring of Latch Hook actuate? Replace the Spring Is the Connector connected correctly to... -
Page 35: Te (Thermistor (Heating) Error)
Thermistor (Heating) Error (tE) Is the Connector connected correctly to Reconnect or repair the Connector. the Main PCB and the Thermistor and the Heater? Or replace the Harness. Is the Harness alright ? Heater for Washing Heater for Steam Replace the Thermistor. Is the resistance of the Thermistor out of range 44 ~ 53 KΩ... - Page 36 Motor Locked Error (LE) [Pre Check] • Gentle wash cycles, such as Perm Press, Delicates, Hand Wash, and Wool/Silk should only be used for smaller loads. Because these cycles are more gentle in tumbling and spinning, putting too much in the drum can register an issue with the motor.
-
Page 37: Ae (Steam Model Only)
Water leakage (AE) (Steam Model Only) Which part have broken.(ex. heck if there is some water on the base ? heck if there is some water on the base ? Tub, dispenser, inlet hose, circulation hose, steam generator, pump, drain hose) Replace the broken part. - Page 38 Dry Heater Error (dHE) Is the Connector connected correctly to Reconnect or repair the Connector. the Main PCB and the Dry Heater or Fan Motor? Or replace the Harness. Or is the Harness alright? Is the resistance of t.he Thermistor out of range Replace the Thermistor.
-
Page 39: Dry Heater Trouble
Dry Heater Trouble Replace the Dry Heater. After power off, is the resistance of Dry Heater out of range 33 ~ 37Ω? Is Thermostat closed ? Replace the Thermostat. When checking voltage between connectors(1,2) on drying, is the voltage AC 220-240V as the figure ? Replace the PWB assembly (main). -
Page 40: Dry Fan Motor Trouble
Dry Fan Motor Trouble Is the Connector connected correctly to Reconnect or repair the Connector. the Main PCB and the Dry Heater or Fan Motor ? Or replace the Harness. Or is the Harness alright? Replace the Dry Fan Motor. Are the resistance same between terminal points? V~U / U~W / W~V : 2~5Ω... -
Page 41: Troubleshooting Without Error Codes
8. TROUBLESHOOTING WITHOUT ERROR CODES PE (Power Failure or no power) Is the Power Plug connected Reconnect Power Plug firmly. firmly to the power outlet? Check the fuse or And is the supply voltage reset the circuit breaker. 220~240V AC? Is Multi-plug socket used ? Don’t use Multi-plug socket. -
Page 42: No Power
No Power Is the Power Plug connected Reconnect Power Plug firmly. firmly to the power outlet? Check the fuse or And is the supply voltage reset the circuit breaker. 220~240V AC? Is Multi-plug socket used ? Don’t use Multi-plug socket. Use Single Plug socket for washing machine. -
Page 43: Vibration & Noise During Spin
Vibration & Noise During Spin Have all the Transit Bolts and the Base Packing Remove the Transit Bolts and been removed? the Base Packing. Washer Base Packing Packing Support Refer to INSTALLATION. (Page 8) -
Page 44: Detergent & Softener Does Not Flow In
Detergent & Softener does not flow in Refer to [Water Inlet Error (IE)] Is water supplied? (page 26) Is detergent & softener put in the correct compartment of the drawer? Only softener Put it in the Correct Position. Main Wash Pre Wash (Powder) (Powder) -
Page 45: Water Leak
Water Leak 1. Water Leak from Dispenser Is the Dispenser Tray Damaged or warped? Replace the Dispenser Tray. Is detergent & softener put in Put it in the Correct Position. the correct compartment of the drawer? Only softener ※ Reference (Amount of Detergent & Softener) Main Wash Pre Wash Detergent... - Page 46 2. Water Leak from Dispenser Are the gasket (seal) Clean the periphery of Gasket and Door regularly. and door cleaned regularly? Is the door or gasket damaged? Replace the damaged parts. 3. Unknown – Water on Floor Are the inlet hoses loose or cracked/split? Replace the Inlet Hoses.
-
Page 47: Before Using The Tag On Function
Tag On function The Tag On function allows you to conveniently use the LG Sma rtDiagnosis™ and Cycle Download features to communicate with your appliance right from your own smart phone. To use the Tag On function: . - Page 48 NFC-equipped phones may be unable to transmit successfully. Press in the LG Smart Laundry & DW app for a more detailed guide on how to use the Tag On function. NFC reading performance of your smart phone must be higher than a certain level for...
-
Page 49: Part Inspection
9. PART INSPECTION ARNING When Resistance (Ohm) checking the Component, be sure to turn the power off, and do voltage discharge sufficiently. -1. FILTER ASSEMBLY (LINE FILTER) iring Circuit in the MAIN P B / iring Diagram diagram Test points Result Test Points Result... -
Page 50: 9-2.Door Lock Switch Assembly
-2. DOOR LOCK SWITCH ASSEMBLY iring Circuit in the MAIN P B / iring Diagram diagram MAIN P B MICOM Relay Relay Common terminal of Valve Door switch Function The Door Lock Switch Assembly consists of Heating PTC, a Bimetal, a Protection PTC, and a Solenoid. - Page 51 points " " Result...
-
Page 52: 9-3.Stator Assembly
-3. STATOR ASSEMBLY iring Circuit in the MAIN P B / iring Diagram diagram MAIN P B MICOM Function The DD motor can be driven from stopped to maximum speed in infinite steps in either direction. There are 36 poles on the stator; 12 permanent magnets spaced around the rotor. There are no brushes to wear out. - Page 53 7. To measure output signal voltage from the hall sensor, carefully move test leads to terminals to 4, blue and gray. Slowly rotate motor rotor by hand. You should read a pulsing 0 Vdc. If 0 Vdc is measured from to 4, move lead on blue wire to red wire, terminal 2.
-
Page 54: 9-4.Pump Motor Assembly
-4. PUMP MOTOR ASSEMBLY iring Circuit in the MAIN P B iring Diagram diagram MAIN P B Rg Cg 1 2 3 1 2 3 1 2 3 4 1 2 3 3 2 1 MICOM 3 2 1 CONNECTOR Pump Driving circuit DRAIN PUMP... -
Page 55: 9-5.Inlet Valve Assembly
-5. INLET VALVE ASSEMBLY iring Circuit in the MAIN P B diagram MICOM Inlet valve driving circuit CONNECTOR INLET iring Diagram VALVE MIAN P B COMMON GY VT BL (BK) 1 2 RD MAIN BLEACH VALVE INLET VALVE * All load circuits in wiring diagram are all the same. Function Depending on the cycle and water temperature, the controller will energize the hot or cold water valve solenoids to meet the selected water temperature. -
Page 56: Disassembly Instructions
10. DISASSEMBLY INSTRUCTIONS Remove the power cord from the outlet before disassembling or repairing the unit. CONTROL PANEL ASSEMBLY Screws 1 Unfasten the screws from the parts displayed in the fig. 2 Disassemble the top plate assembly by sliding it back and then lifting it up. 3 Pull the drawer panel assembly out. - Page 57 PWB ASSEMBLY(MAIN) 1 Disassembly Back cover 2 First Unscrew one or two screws and Pull the PWB assembly in direction of red arrow 3 Disassembly PWB like the picture DISPENSER ASSEMBLY 3 Two screws are unscrewed. 4 Clamp 1 The plate assembly(Top) are disassembled. 2 Pull the drawer to arrow direction.
- Page 58 INLET VALVE 1 Disconnect the wiring connector. 2 Remove the valve by two screws of the valve holder. ※ When reconnecting the connector • Rating : 220/240V 50/60Hz • Resistant : 3.5~4.5kΩ DOOR 1 Open the door completely. 2 Remove the three screws from the hinge. ※...
- Page 59 CABINET COVER Two screws are unscrewed 1 The plate assembly(Top) is disassembled. 2 Pull out the drawer and unscrew 2 screws. 3 Lift the side the Control Panel Assembly and pull it out Pull the drawer to arrow direction. 1 Two screws are unscrewed. 2 Push out PANEL ASSEMBLY, CONTROL after Push the hook( ) below.
- Page 60 4 Lift and separate the cabinet cover. ※ NOTE: When assembling the CABINET COVER, connect the Door S/W connector. SWITCH ASSY, DOOR LOCK 1 Two screws are unscrewed and disassembly cabinet cover. 2 The Door Lock S/W is disconnected form the wiring connector and the strap.
- Page 61 ROTOR ASSEMBLY, STATOR ASSEMBLY, FRICTION DAMPER 1 Remove the back cover. 2 After loosening the bolt, Rotor, pull out the rotor. 1 Remove the 6 bolts from the stator. 2 Disconnect the 2 connectors. Motor Stator • V ~ U (8~11Ω) •...
- Page 62 PUMP 1 Disassembly Top Plate, Control Panel Assembly, Drawer Panel Assembly, Cabinet Cover Assembly, Lower Cover Assembly. Remove pump outlet hose. Bellows Circulation Hose Remove tub pump bellows. Remove cap(Remaining Hose). Pump Hose Disconnect the wiring. Three screws are unscrewed from the cabinet. Remove the pump to arrow direction.
- Page 63 WHEN FOREIGN OBJECT STUCK BETWEEN DRUM AND TUB 1 Remove washing heater. 2 Remove the foreign object(wire,coin,etc) by inserting long bar in the hole. SWITCH ASSEMBLY, SAFETY (Steam Model Only) 1 Disassembly Back cover. 2 First Unscrew a screw and Pull the PWB assembly in direction of red arrow 3 Disconnect the wiring connector.
-
Page 64: Exploded View And Part List
11. EXPLODED VIEW AND PART LIST 11-1. THE PART LIST OF CABINET ASSEMBLY A154 A140 A110 A103 A102 A153 A104 A152 A151 A150 A101 A141 A131 A100 A430 A130 A440 A134 A410 A135 A455 A300 A133 A310 A450 A200 A485 A220 A276... - Page 65 11-2. THE EXPLODED VIEW OF CONTROL PANEL & DISPENSER ASSEMBLY F300 F321 F160 F462 F432 F225 F430 F220 F441 F120 F215 F110 F210...
- Page 66 11-3. THE EXPLODED VIEW OF DRUM & TUB ASSEMBLY K143 K123 K350 K360 F466 K351 K361 F140 K411 K613 K612 K410 K614 K615 K122 K571 K572 K121 K125 K111 F310 K320 K110 K141 F464 K616 K140 K105 K115 K130 K135 K610 K510 K131...
- Page 67 11-4. THE EXPLODED VIEW OF DRYER M130 M110 M120...
- Page 68 南京乐金熊猫电器有限公司 地址: 中国南京市秦淮区永丰大道28号 电话: 025-87706668 传真: 025-84872931 邮编: 210014 售后服务热线: 025-84876315 免费咨询电话: 8008288008 (全国区域免费电话) P/No.: MFL42714070...
Need help?
Do you have a question about the F14A8TDHP1N and is the answer not in the manual?
Questions and answers