
Related Manuals for Nice Linear IV200 Series


Summary of Contents for Nice Linear IV200 Series
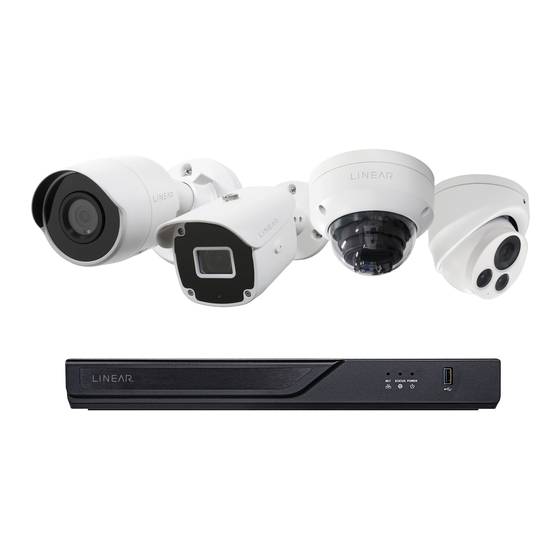
- Page 1 Fixed Lens Fixed Lens & Bullet Camera Motorized Varifocal Lens Dome Camera Fixed Lens Motorized Varifocal Turret Camera Lens Bullet Camera IV200 Smart Surveillance Cameras | 2MP SERIES User Manual...
-
Page 2: Table Of Contents
Table of Contents Overview ......................................3 Revision History ���������������������������������������������������������������������������������������������������������������������������������������������������������������������������4 Read Before Use �������������������������������������������������������������������������������������������������������������������������������������������������������������������������4 Package Contents �����������������������������������������������������������������������������������������������������������������������������������������������������������������������5 Symbols and Statements in this Document ��������������������������������������������������������������������������������������������������������������������������������5 The Cameras ....................................6 Fixed Lens Bullet Camera ������������������������������������������������������������������������������������������������������������������������������������������������������������6 Motorized Varifocal Lens �������������������������������������������������������������������������������������������������������������������������������������������������������������7 Fixed / Motorized Dome Camera ������������������������������������������������������������������������������������������������������������������������������������������������8 Turret Dome Fixed Lens Camera �������������������������������������������������������������������������������������������������������������������������������������������������9 Hardware Installation .................................. -
Page 3: Overview
Smart Surveillance Overview The IV200 family of 2MP indoor/outdoor cameras incorporate our intelligent video analytics and ® are capable of 1920 x 1080 at 30 fps� With the most updated LINEAR WDR Pro technology, the camera series is capable of capturing the highest quality images in both low light and high contrast environments�... -
Page 4: Revision History
Revision History ¾ Rev� 1�0: Initial release� Read Before Use The use of surveillance devices may be prohibited by law in your country� The Network Camera is not only a high-performance web-ready camera but can also be part of a flexible surveillance system�... -
Page 5: Package Contents
Smart Surveillance Package Contents ¾ IV200 Camera ¾ Screw pack� ¾ Alignment sticker� ¾ Quick Installation Guide� ¾ Waterproof cable gland� WARNING: IR lights emit from this product� Use appropriate shielding or eye protection� Symbols and Statements in this Document INFORMATION: provides important messages or advices that might help prevent inconvenient or problem situations�... -
Page 6: The Cameras
The Cameras Fixed Lens Bullet Camera Outer View RJ45 Ethernet connector Fastening ring Lens IR LEDs Inner View Reset button MicroSD card slot... -
Page 7: Motorized Varifocal Lens
Smart Surveillance Motorized Varifocal Lens Outer View Sunshield Lens IR LEDs Inner View MicroSD card slot Reset button... -
Page 8: Fixed / Motorized Dome Camera
Fixed / Motorized Dome Camera Outer View Dome cover RJ45 Ethernet connector Inner View IR LEDs Lens MicroSD card slot Reset button LEDs... -
Page 9: Turret Dome Fixed Lens Camera
Smart Surveillance Turret Dome Fixed Lens Camera Outer View Mount bracket (base plate) Lens Microphone IR LEDs IV200-2TFW Inner View Reset button SD card slot SD card slot Reset button... - Page 10 IMPORTANT: Many copper coated aluminum (CCA) and other non-standard conductors cabling products are masqueraded as CAT5E or CAT6 cables� Avoid using these CCA products especially when connecting PoE cameras� It is a must to use Ethernet cables compliant with the 3P/ETL standard� The camera's cable can be routed through a drilled hole or through the opening on the side of camera�...
-
Page 11: Hardware Installation
Smart Surveillance Hardware Installation For hardware installation instructions, refer to the Quick Start Guide for your particular camera� Browser IEEE 802.3af/at The camera requires IEEE 802�3af/at PoE power to function properly� Use Only UL listed I�T�E active PoE Switch or Mid-Span� When connected to a Linear Network Video Recorder (NVR) directly or over the network, the NVR will automatically find the camera regardless of IP network settings�... - Page 12 Enter the combination of alphabetic and numeric characters to fulfill the password strength requirement� The default name for the camera administrator is “admin”� It can not be changed� Some, but not all special ASCII characters are supported: !, $, %, -, �, @, ^, _, and ~� You can use them in the password�...
- Page 13 Smart Surveillance IEEE 802.3af Browser Hardware Reset The reset button is used to reset the system or restore the factory default settings� Sometimes resetting the system can return the camera to normal operation� If the system problems remain after reset, restore the factory settings and install again� Press the recessed Reset button�...
-
Page 14: Network Deployment
Network Deployment General Connection (PoE) When using a PoE-enabled switch The Network Camera is PoE-compliant, allowing transmission of power and data via a single Ethernet cable� Follow the below illustration to connect the Network Camera to a PoE-enabled switch via an Ethernet cable� 802�3af/at PoE Switch When using a non-PoE switch... -
Page 15: Network > Ip
Smart Surveillance Network > IP This section explains how to configure a wired network connection for the Network Camera� Network Type Select this option when the Network Camera is deployed on a local area network (LAN) and is intended to be accessed by local computers� The default setting for the Network Type is LAN� Remember to click on the Save button when you complete the Network setting�... - Page 16 The primary domain name server that translates host names into Primary DNS IP addresses� Secondary DNS Secondary domain name server that backups the Primary DNS� The primary WINS server that maintains the database of Primary WINS server computer names and IP addresses� The secondary WINS server that maintains the database of Secondary WINS server computer names and IP addresses�...
- Page 17 Smart Surveillance Refers to Ethernet Link-global IPv6 address/network mask Link-local IPv6 address/network mask Follow the steps below to link to an IPv6 address: 1� Open your web browser� 2� Enter the link-global or link-local IPv6 address in the address bar of your web browser� 3�...
- Page 18 Manually setup the IP address: Select this option to manually set up IPv6 settings if your network environment does not have DHCPv6 server and router advertisements-enabled routers� If you check this item, the following blanks will be displayed for you to enter the corresponding information:...
-
Page 19: Network > Streaming Protocols
Smart Surveillance Network > Streaming protocols Streaming protocols To utilize HTTP authentication, make sure that your have set a password for the Network Camera first; refer to Security > User account on page 63 for details� Authentication: Depending on your network security requirements, the Network Camera provides two types of security settings for an HTTP transaction: basic and digest�... - Page 20 URL command -- http://<ip address>:<http port>/<access name for stream 1, 2, 3> For example, when the Access name for stream 2 is set to stream2�mjpg: 1� Launch a browser� 2� Type the above URL command in the address bar� Press Enter� 3�...
- Page 21 Smart Surveillance RTSP stream names are: stream1�sdp stream2�sdp stream3�sdp If you want to use an RTSP player to access the Network Camera, you have to set the video mode to H�264 or H�265 and use the following RTSP URL command to request transmission of the streaming data�...
- Page 22 Multicast settings for streams: Click the pull-down menu for Multicast settings for and select stream 1, 2 or 3� The ports can be changed to values between 1025 and 65535� The multicast RTP port must be an even number, and the multicast RTCP port number is the multicast RTP port number plus one (always odd)� When the multicast RTP port changes, the multicast RTCP port will change accordingly�...
-
Page 23: Network > Qos (Quality Of Service)
Smart Surveillance Network > QoS (Quality of Service) Quality of Service refers to a resource reservation control mechanism, which guarantees a certain quality to different services on the network� Quality of service guarantees are important if the network capacity is insufficient, especially for real-time streaming multimedia applications� Quality can be defined as, for instance, a maintained level of bit rate, low latency, no packet dropping, etc�... -
Page 24: Network > Snmp (Simple Network Management Protocol)
QoS/DSCP (the DiffServ model) DSCP-ECN defines QoS at Layer 3 (Network Layer)� The Differentiated Services (DiffServ) model is based on packet marking and router queuing disciplines� The marking is done by adding a field to the IP header, called the DSCP (Differentiated Services Codepoint)� This is a 6-bit field that provides 64 different class IDs�... -
Page 25: Network > Ftp
Smart Surveillance SNMP Configuration Enable SNMPv1, SNMPv2c Select this option and enter the names of Read/Write community and Read Only community according to your NMS settings� Enable SNMPv3 This option contains cryptographic security, a higher security level, which allows you to set the Authentication password and the Encryption password�... -
Page 26: Accessing The Network Camera
Accessing the Network Camera This chapter explains how to access the Network Camera through web browsers, RTSP players, 3GPP- ® compatible mobile devices and LINEAR NVR� Using Web Browsers ® Launch your web browser (e�g�, Microsoft Internet Explorer or Mozilla Firefox)� Enter the IP address of the Network Camera in the address field�... - Page 27 Smart Surveillance Internet connection via a router Before setting up the Network Camera over the Internet, make sure you have a router and follow the steps below� 1� Connect your Network Camera behind a router, the Internet environment is illustrated below� IP address : 192.168.0.3 WAN (Wide Area Network ) Subnet mask : 255.255.255.0...
- Page 28 For example, your router and IP settings may look like this: IP Address: External Port (Mapped port Device IP Address: internal port on the router) Public IP of router 122�146�57�120 LAN IP of router 192�168�0�1 Camera 1 192�168�0�2:80 122�146�57�120:8000 Camera 2 192�168�0�3:80 122�146�57�120:8001 ���...
-
Page 29: Using Rtsp Players
Smart Surveillance Using RTSP Players To view the streaming media using RTSP players, use one of the following players that support RTSP streaming: Quick Time Player VLC media player Launch the RTSP player� The address format is rtsp://<ip address>:<rtsp port>/<RTSP streaming access name for stream1 or stream2>... -
Page 30: Using 3Gpp-Compatible Mobile Devices
Using 3GPP-compatible Mobile Devices To view the streaming media through 3GPP-compatible mobile devices, make sure the Network Camera can be accessed over the Internet� For more information on how to set up the Network Camera over the Internet, refer to Accessing the Network Camera on page 26� To utilize this feature, check the following settings on your Network Camera: Because most players on 3GPP mobile phones do not support RTSP authentication, make sure the authentication mode of RTSP streaming is set to disable�... -
Page 31: Main Page
Smart Surveillance Main Page This chapter explains the layout of the main page� It is composed of the following sections: LINEAR Logo, Host Name, Camera Control Area, Configuration Area, Menu and Live Video Window� Resize Buttons Host Name LINEAR Logo Configuration Area Camera... -
Page 32: Configuration Area
Configuration Area Click this button to access the configuration page of the Network Camera� It is suggested that a password be applied to the Network Camera, so only Settings the administrator can configure the Network Camera� For more information, refer to Configuration on page 35� Click this button to choose a language for the user interface�... - Page 33 Smart Surveillance Click on this item to display the Global View window� The Global View Global View window contains a full view image (the largest frame size of the captured video) and a floating frame (the viewing region of the current video stream)� The viewing region of the current video stream The largest frame size...
- Page 34 „ The following window is displayed when the video mode is set to MJPEG: Video Title Time 2018/07/25 17:08:56 Video (HTTP-V) Title and Time Video 17:08:56 2018/07/25 Video Control Buttons The video title can be configured� For more information, refer Video Title to Camera >...
-
Page 35: Settings
Smart Surveillance Settings Click Settings on the main page to enter the camera setting pages� Note that only Administrators can access the configuration page� Provided is an easy-to-use user interface that helps you set up your network camera with minimal effort�... -
Page 36: System > General Settings
System > General settings This section explains how to configure the basic settings for the Network Camera, such as the host name and system time� It is composed of the following two columns: System and System Time� When finished with the settings on this page, click Save at the bottom of the page to enable the settings� System Enter a desired name for the Network Camera�... -
Page 37: System > Home Page Layout
Smart Surveillance System > Home page layout This section explains how to set up your own customized home page layout� General settings This column shows the settings of your home page layout� You can manually select the background and font colors in Theme Options (the second tab on this page)� The settings will be displayed automatically in this Preview field�... - Page 38 Theme Options Here you can change the color of your home page layout� There are three types of preset patterns for you to choose from� The new layout will simultaneously appear in the Preview filed� Click Save to enable the settings� Font Color of the Video Title...
-
Page 39: System > Logs
Smart Surveillance The palette window will pop up as shown below� Drag the slider bar and click on the left square to select a desired color� The selected color will be displayed in the corresponding fields and in the Preview column� Click Save to enable the settings�... -
Page 40: System > Parameters
Access log Access log displays the access time and IP address of all viewers (including operators and administrators) in a chronological order� The access log is stored in the Network Camera’s buffer area and will be overwritten when reaching a certain limit� System >... -
Page 41: System > Maintenance
Smart Surveillance System > Maintenance This chapter explains how to restore the Network Camera to factory default, upgrade firmware version, etc� General settings > Upgrade firmware This feature allows you to upgrade the firmware of your Network Camera� It takes a few minutes to complete the process�... - Page 42 General settings > Restore This feature allows you to restore the Network Camera to factory default settings� Select this option to retain the Network Type settings (refer to Network Type Network on page 15)� Select this option to retain the Daylight Saving Time settings (refer to Import/ Daylight Saving Time Export files below on this page)�...
- Page 43 Smart Surveillance The following message is displayed when attempting to upload an incorrect file format� Click to export language strings� LINEAR provides nine languages: Export language file English, Deutsch, Español, Français, Italiano, 日本語, Português, 簡 体中文 and 繁體中文� Click Browse… and specify your own custom language file to upload� Update custom language file Export configuration file Click to export all parameters for the device and user-defined scripts�...
-
Page 44: Camera > Image
Camera > Image This section explains how to configure the image settings of the Network Camera� It is composed of the following columns: General settings, Illuminators, Image settings, Exposure, Focus, and Privacy mask� The Focus window is available only for models that come with motorized lens� General settings Enter a name that will be displayed on the title bar of the live video as the picture shown below�... - Page 45 Smart Surveillance Flip - vertically reflect the display of the live video; Mirror - horizontally reflect the display of the live video� Select both options if the Network Camera is installed Video orientation upside-down (e�g�, on the ceiling) to correct the image orientation� Note that if you have preset locations, those locations will be cleared after flip/mirror setting�...
- Page 46 IR cut filter With a removable IR-cut filter, this Network Camera can automatically remove the filter to let Infrared light pass into the sensor during low light conditions� „ Auto mode: (The Day/Night Exposure Profile will not be available if Auto mode is selected)� The Network Camera automatically removes the filter by judging the level of ambient light�...
- Page 47 Smart Surveillance Illuminators Turn on built-in IR illuminator in night mode Select this to turn on the camera’s onboard IR illuminator when the camera detects low light condition and enters the night mode� When enabled, the camera automatically adjusts the IR projection to adjacent Anti-overexposure objects in order to avoid over-exposure in the night mode�...
- Page 48 Tips: If there is an object in close proximity, the IR lights reflected back from it can mislead the Smart IR’s calculation of light level� To solve this problem, you can place an “Exposure Exclude” window on an unavoidable object in the Exposure setting window� See page 51�...
- Page 49 Smart Surveillance White balance: Adjust the value for the best color temperature� You may follow the steps below to adjust the white balance to the best color temperature� 1� Place a sheet of paper of white or cooler-color temperature color, such as blue, in front of the lens, then allow the Network Camera to automatically adjust the color temperature�...
- Page 50 Exposure On this page, you can set the Exposure measurement window, Exposure level, Exposure mode, Exposure time, Gain control and Day/Night mode settings� You can configure two sets of Exposure settings: one for normal situations, the other for special situations, such as the day/night/schedule mode�...
- Page 51 Smart Surveillance The inclusive window refers to the “weighted window”; the exclusive window refers to “ignored window”� It adopts the weighted averages method to calculate the value� The inclusive windows have a higher priority� You can overlap these windows, and, if you place an exclusive window within a larger inclusive window, the exclusive part of the overlapped windows will be deducted from the inclusive window�...
- Page 52 „ WDR Pro: This refers to the Wide Dynamic Range function that enables the camera to capture details in a high contrast environment� Use the checkbox to enable the function, and use the slide bar to select the strength of the WDR Pro functionality (depending on the lighting condition at the installation site)� You can select a higher effect when the contrast is high (between the shaded area and the light behind the objects)�...
-
Page 53: Camera > Video
Smart Surveillance Camera > Video Stream settings This Network Camera supports multiple streams with frame sizes ranging from 480 x 272 to 1920 x 1080 pixels The definition of multiple streams: „ Stream 1: Users can define the "Region of Interest" (viewing region) and the "Output Frame Size" (size of the live view window)�... - Page 54 Follow the steps below to set up those settings for a stream: 1� Select a stream for which you want to set up the viewing region� 2� Select a Region of Interest from the drop-down list� The floating frame, the same as the one in the Global View window on the home page, will resize accordingly�...
- Page 55 Smart Surveillance Click the stream item to display the detailed information� The maximum frame size will follow your settings in the above Viewing Window sections� This Network Camera provides real-time H�265, H�264 and MJPEG compression standards (Triple Codec) for real-time viewing� If the H.265 or H.264 mode is selected, the video is streamed via RTSP protocol�...
- Page 56 The frame rate will decrease if you select a higher resolution� „ Intra frame period Determine how often for firmware to plant an I frame� The shorter the duration, the more likely you will get better video quality, but at the cost of higher network bandwidth consumption� Select the intra frame period from the following durations: 1/4 second, 1/2 second, 1 second, 2 seconds, 3 seconds, and 4 seconds�...
- Page 57 Smart Surveillance With the H�265 codec in an optimal scenario and when Dynamic Intra frame is combined with the Smart Stream function, an 80% of bandwidth saving can be achieved compared with using H�264 without enabling these bandwidth-saving features� „ Smart FPS In a static scene, the algorithm puts old frames in queue when no motions occur in scene�...
- Page 58 Select an operation mode if Smart codec is preferred� - Auto tracking: The Auto mode configures the whole screen into the non-interested area� The video quality of part of the screen returns to normal when one or more objects move in that area� The remainder of the screen where there are no moving objects (no pixel changes) will still be transmitted in low-quality format�...
- Page 59 Smart Surveillance - Hybrid: The major difference between the “Manual” mode and the “Hybrid” mode is that: In the “Hybrid“ mode, any objects entering the non-interested area will restore the video quality of the moving objects and the area around them� The video quality of the associated non-interested area is immediately restored to normal to cover the moving objects�...
- Page 60 Select ON or OFF to enable or disable the feature� Smart Q is scene-aware� The Smart Q: Smart Q reduces frame size and bit rate consumption through the following: „ Dynamically adjusting the image quality for scenes in different luminosities in low light frames� Less noises means less of the bandwidth consumed�...
- Page 61 Smart Surveillance If the JPEG mode is selected, the Network Camera sends consecutive JPEG images to the client, producing a moving effect similar to a filmstrip� Every single JPEG image transmitted guarantees the same image quality, which in turn comes at the expense of variable bandwidth usage� Because the media contents are a combination of JPEG images, no audio data is transmitted to the client�...
-
Page 62: Security > Users
Security > Users This section explains how to enable password protection and create multiple accounts� Account management The administrator account name is “admin”, which is permanent and can not be deleted� If you want to add more accounts in the Account management window, apply the password for the “admin” account first�... -
Page 63: Security > Https (Hypertext Transfer Protocol Over Ssl)
Smart Surveillance Security > HTTPS (Hypertext Transfer Protocol over SSL) This section explains how to enable authentication and encrypted communication over SSL (Secure Socket Layer)� It helps protect streaming data transmission over the Internet on higher security level� Create and Install Certificate Method Before using HTTPS for communication with the Network Camera, a Certificate must be created first�... - Page 64 5� Click Save to preserve your configuration, and your current session with the camera will change to the encrypted connection� 6� If your web session does not automatically change to an encrypted HTTPS session, click Home to return to the main page� Change the URL address from “http://” to “https://“ in the address bar and press Enter on your keyboard�...
- Page 65 Smart Surveillance Create certificate request and install 1� Select Create certificate request and install from the Method pull-down menu� 2� Click Create certificate to proceed� 3� The following information will show up in a pop-up window after clicking Create� Then click Save to generate the certificate request�...
-
Page 66: Security > Access List
Security > Access List This section explains how to control access permission by verifying the client PC’s IP address� Filter Enable access list filtering: Check this item, and click Save if you want to enable the access list filtering function� Filter type: Select Allow or Deny as the filter type�... - Page 67 Smart Surveillance Click Add to create a new rule� There are three types of rules: Single: This rule allows the user to add a single IP address to the Allowed/Denied list� For example: Network: This rule allows the user to assign a network address and corresponding subnet mask to the Allow/Deny List�...
-
Page 68: Security > Ieee 802.1X
Security > IEEE 802.1X Enable this function if your network environment uses IEEE 802�1x, which is a port-based network access control� The network devices, intermediary switch/access point/hub, and RADIUS server must support and enable 802�1x settings� The 802�1x standard is designed to enhance the security of local area networks, which provides authentication to network devices (clients) attached to a network port (wired or wireless)�... - Page 69 Smart Surveillance When all settings are complete, move the Network Camera to the protected LAN by connecting it to an 802�1x enabled switch� The devices will then start the authentication automatically� NOTE: The authentication process for 802�1x: 1� The Certificate Authority (CA) provides the required signed certificates to the Network Camera (the supplicant) and the RADIUS Server (the authentication server)�...
-
Page 70: Events > Event Settings
Events > Event settings This section explains how to configure the Network Camera to respond to particular situations (event)� A typical application is that when a motion is detected, the Network Camera sends buffered images to an FTP server or e-mail address as notifications� Click on Help, there is an illustration shown in the pop- up window explaining that an event can be triggered by many sources, such as motion detection or external digital input devices�... - Page 71 Smart Surveillance „ Event name: Enter a name for the event setting� „ Enable this event: Select this checkbox to enable the event setting� „ Priority: Select the relative importance of this event (High, Normal, or Low)� Events with a higher priority setting will be executed first�...
- Page 72 Click Enable this profile, then select Night mode or Schedule mode� Click Save , then click Close � „ Manual Triggers: This option allows users to enable event triggers manually by clicking the on/off button on the home page� Configure 1 to 3 associated events before using this function� „...
- Page 73 Smart Surveillance 3. Action Define the actions to be performed by the Network Camera when a trigger is activated� Add server It is necessary to configure the server and media settings so that the Network Camera will know what action to take (such as which server to send the media files to) when a trigger is activated� Click server to open the server setting window�...
- Page 74 Server type - Email Select to send the media files via email when a trigger is activated� „ Server name: Enter a name for the server setting� „ Sender email address: Enter the email address of the sender� „ Recipient email address: Enter the email address of the recipient� „...
- Page 75 Smart Surveillance Server type - FTP Select to send the media files to an FTP server when a trigger is activated� „ Server name: Enter a name for the server setting� „ Server address: Enter the domain name or IP address of the FTP server� „...
- Page 76 „ Passive mode: Most firewalls do not accept new connections initiated from external requests� If the FTP server supports passive mode, select this option to enable passive mode FTP and allow data transmission to pass through the firewall� The firmware default has the Passive mode checkbox selected�...
- Page 77 Smart Surveillance Network storage: Select to send the media files to a networked storage when a trigger is activated� Refer to NAS management on page 89 for details� Note that only one NAS server can be configured� Click Save server to enable the settings� „...
- Page 78 Click 20190120 to open the directory: The format is: HH (24r) Click to open the file list for that hour 2019/01/20 2019/01/20 C l i c k t o g o b a c k t o t h e Click to delete previous level of the directory selected items...
- Page 79 Smart Surveillance Add media Add media Click to open the media setting window� You can specify the type of media that will be sent when a trigger is activated� A total of 5 media settings can be configured� There are three choices of media types available: Snapshot, Video Clip and System log�...
- Page 80 „ Add date and time suffix to the file name� Select this option to add a date/time suffix to the file name� Snapshot_20190513_100341 For example: File name prefix Date and time suffix The format is: YYYYMMDD_HHMMSS Click Save media to enable the settings� Note that after you set up the first media server, a new column for media server will automatically display on the Media list�If you wish to add more media options, click Add media�...
- Page 81 Smart Surveillance „ Maximum file size: Specify the maximum file size allowed� Some users may need to stitch the video clips together when searching and packing up forensic evidence� „ File name prefix: Enter the text that will be appended to the front of the file name� For example: Video_20190513_100341 File name prefix...
- Page 82 In the Event settings column, the Servers and Medias you configured will be listed� Make sure the Event -> Status is indicated as ON, in order to enable the event triggering action� When completed, click the Save event button to enable the settings and click Close to exit the Event Settings page�...
-
Page 83: Events > General
Smart Surveillance Events > General General settings that affect object detection can be adjusted on this page� The following parameters are available for Engine setting (tuning) from web-based User Interface within the Events/General tab� A� The higher the sensitivity threshold value the more motion / movements will be Sensitivity: detected�... - Page 84 C� Ignore area: In case user does not want to track all regions of the image, (i�e�, if there are any moving objects or reflections), unwanted regions of the image can be masked out, so that they would not be tracked� D�...
-
Page 85: Events > Motion Detector
Smart Surveillance Events > Motion Detector The following page contains Motion Detection settings� ¾ Enable: switch to enable Motion Detection� ¾ Sensitivity: regulates Motion Detection sensitivity (a trade-off between true detections and false alarms)� ¾ Brush size: User may set the brush size to 1x1 or 3X3 depending on user needs� To select an area for Motion Detector, click and drag on the image to paint the scene�... -
Page 86: Events > Intrusion Detector
Events > Intrusion Detector The following page contains Intrusion Detector settings� ¾ Enable: switch to enable the Intrusion detection� ¾ Add/Delete Zone: User can add, delete and modify intrusion zones� ¾ Enable Intrusion Entered/Exited events: user can enable this property to start getting IntrusionEntered / IntrusionExited events�... -
Page 87: Recording > Recording Settings
Smart Surveillance Recording > Recording settings This section explains how to configure the recording settings for the Network Camera� Recording Settings Insert your SD card and click here to test NOTE: Remember to format your SD card via the camera’s web console (in the Local storage� SD card management page) when using it for the first time�... - Page 88 If you enable adaptive recording on a camera, only when an event is triggered on Camera A will the server record the full frame rate streaming data; otherwise, it will only request the I frame data during normal monitoring, thus effectively saves bandwidths and storage space� NOTE: ...
- Page 89 Smart Surveillance 2� Destination You can select the SD card or network storage (NAS) for the recorded video files� If you have not configured a NAS server, see details in the following: NAS management Click Add NAS server to open the server setting window and follow the steps below to set up: 1�...
- Page 90 If successful, you will receive a test�txt file on the network storage server� 3� Enter a server name� 4� Click Save to complete the settings, and click Close to exit the page� „ Capacity: You can choose either the entire free space available or limit the reserved space� The recording size limit must be larger than the reserved amount for cyclic recording�...
-
Page 91: Local Storage > Sd Card Management
Smart Surveillance If you want to enable recording notification, click Event to configure event triggering settings� Refer to Event > Event settings on page 70 for more details� When completed, select Enable this recording� Click Save to enable the setting and click Close to exit this page�... - Page 92 Storage > Storage Management This column shows the status and reserved space of your SD card� Remember to format the SD card when using for the first time� no SD card SD card format The Linux kernel EXT4 file system format applies to SD card larger than 32GB� However, if EXT4 is applied, the computers running Windows will not be able to access the contents on the SD card unless using some 3rd-party software�...
-
Page 93: Storage > Content Management
Smart Surveillance Storage > Content management This section explains how to manage the content of recorded videos on the Network Camera� Here you can search and view the records and view the searched results� Searching and Viewing the Records This column allows the user to set up search criteria for recorded data� If you do not select any criteria and click Search button, all recorded data will be listed in the Search Results column�... - Page 94 „ Play: Click on a search result which will highlight the selected item� A Play window will appear on top for immediate review of the selected file� For example: „ Download: Click on a search result to highlight the selected item in purple as shown above� Then click the Download button and a file download window will pop up for you to save the file�...
-
Page 95: Electromagnetic Compatibility (Emc)
Smart Surveillance Electromagnetic Compatibility (EMC) FCC Statement This device compiles with FCC Rules Part 15� Operation is subject to the following two conditions� „ This device may not cause harmful interference, and „ This device must accept any interference received, including interference that may cause undesired operation�... - Page 96 USA & Canada Toll Free: 800-421-1587 or call 760-438-7000 www.linear-solutions.com ©2022 Nice North America LLC� Linear is a registered trademark of Nice North America LLC� All rights reserved� 10030343 Rev-A...
Need help?
Do you have a question about the Linear IV200 Series and is the answer not in the manual?
Questions and answers