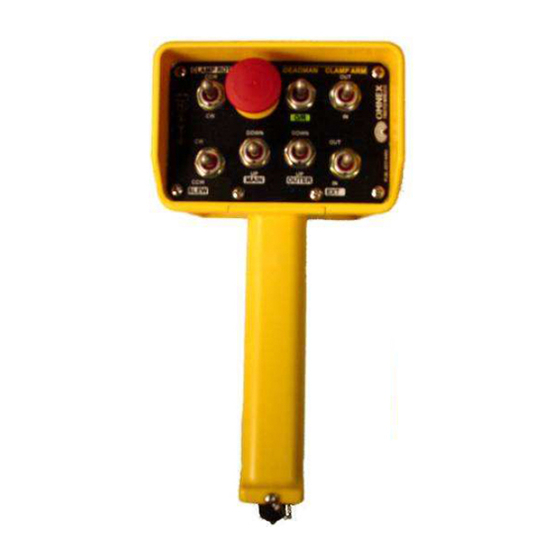
Omnex T150 User Manual
Hide thumbs
Also See for T150:
- Installation/configuration manual (16 pages) ,
- Installation and configuration manual (16 pages) ,
- Installation and configuration manual (16 pages)
Advertisement
Quick Links
www omnexcontrols com
STEP 1
Install Batteries
Remove the battery cover on the
back of the T150, and install the
four AA alkaline batteries as
shown in Figure 1.
STEP 2
Power Up T150
Activation of any switch will cause the T150 to power up. However as a
safety feature, the [EStop] switch must be pressed and released, or if
already pressed, released within 10 seconds for unit to remain powered
up.
STEP 3
Using The T150
The ACTIVE LED will flash two times per second indicating that the T150
is transmitting to the R150. When a function switch is used, the ACTIVE
LED will flash brightly upon activation of the switch and return to flashing at
a rate of two times per second when there is no switch activity.
During normal operation the LOW BATT. LED will flash to indicate a low
battery condition.
The [EStop] button is used for both an emergency shutdown as well as a
safe way of powering down the T150 after operation.
Each switch has a device specific label to identify its function.
The Trigger is a Proportional Control switch used in conjunction with a
function switch (i.e. [ROT CW]). The type of Proportional Control output is
dependent on the option of the receiver but will generally be either a
Voltage, PWM or Current Control.
This device complies with the requirements of the Federal Communication Commission (FCC) as specified in document CFR47 Part 15.247 and Industry and
Science Canada (ISC), as specified in document RSS 210. The device is permitted only on a no-interference, no-protection basis, that is, it must cease operation
when it is determined that it causes harmful interference to the services authorized by the FCC or the ISC.
Changes or modifications to the equipment not expressly approved by OMNEX will void the warranty.
DMAN-2293-01
Bldg. 74 – 1833 Coast Meridian Road, Port Coquitlam, BC, Canada V3C 6G5
T150 / R150 User Guide
Figure 1
T150
R150
Rev. 1.03
Advertisement

Summary of Contents for Omnex T150
- Page 1 Figure 1 STEP 2 Power Up T150 Activation of any switch will cause the T150 to power up. However as a safety feature, the [EStop] switch must be pressed and released, or if T150 already pressed, released within 10 seconds for unit to remain powered...
- Page 2 “Configuration Data” from the T150. Continue holding the [SETUP] button after the STATUS LED begins flashing rapidly. Momentarily toggle the [SW5] switch to the UP position; this enables the T150 to send “Configuration Data” to the R150. Release [SW5] and release the [SETUP] button.
- Page 3 Codes to match on both the Transmitter and the Receiver. [SETUP] SW1 Figure 2 EStop SW 5 SW 6 SW 1 SW 2 SW 3 SW 4 T150 / R150 Switch Function Table Switch Number Position Output Control Pin Assignment Color Code Function Output 9 Green DOWN...
- Page 4 PARTS SUBJECT TO UNAUTHORIZED REPAIR OR MODIFICATION) and labor EStop Out from the date of delivery as evidenced by a copy of the receipt. OMNEX’s entire EStop liability and your exclusive remedy shall be, at OMNEX’s option, either the (a) repair...


Need help?
Do you have a question about the T150 and is the answer not in the manual?
Questions and answers